How to Use solar charger controller lithium: Examples, Pinouts, and Specs
Introduction
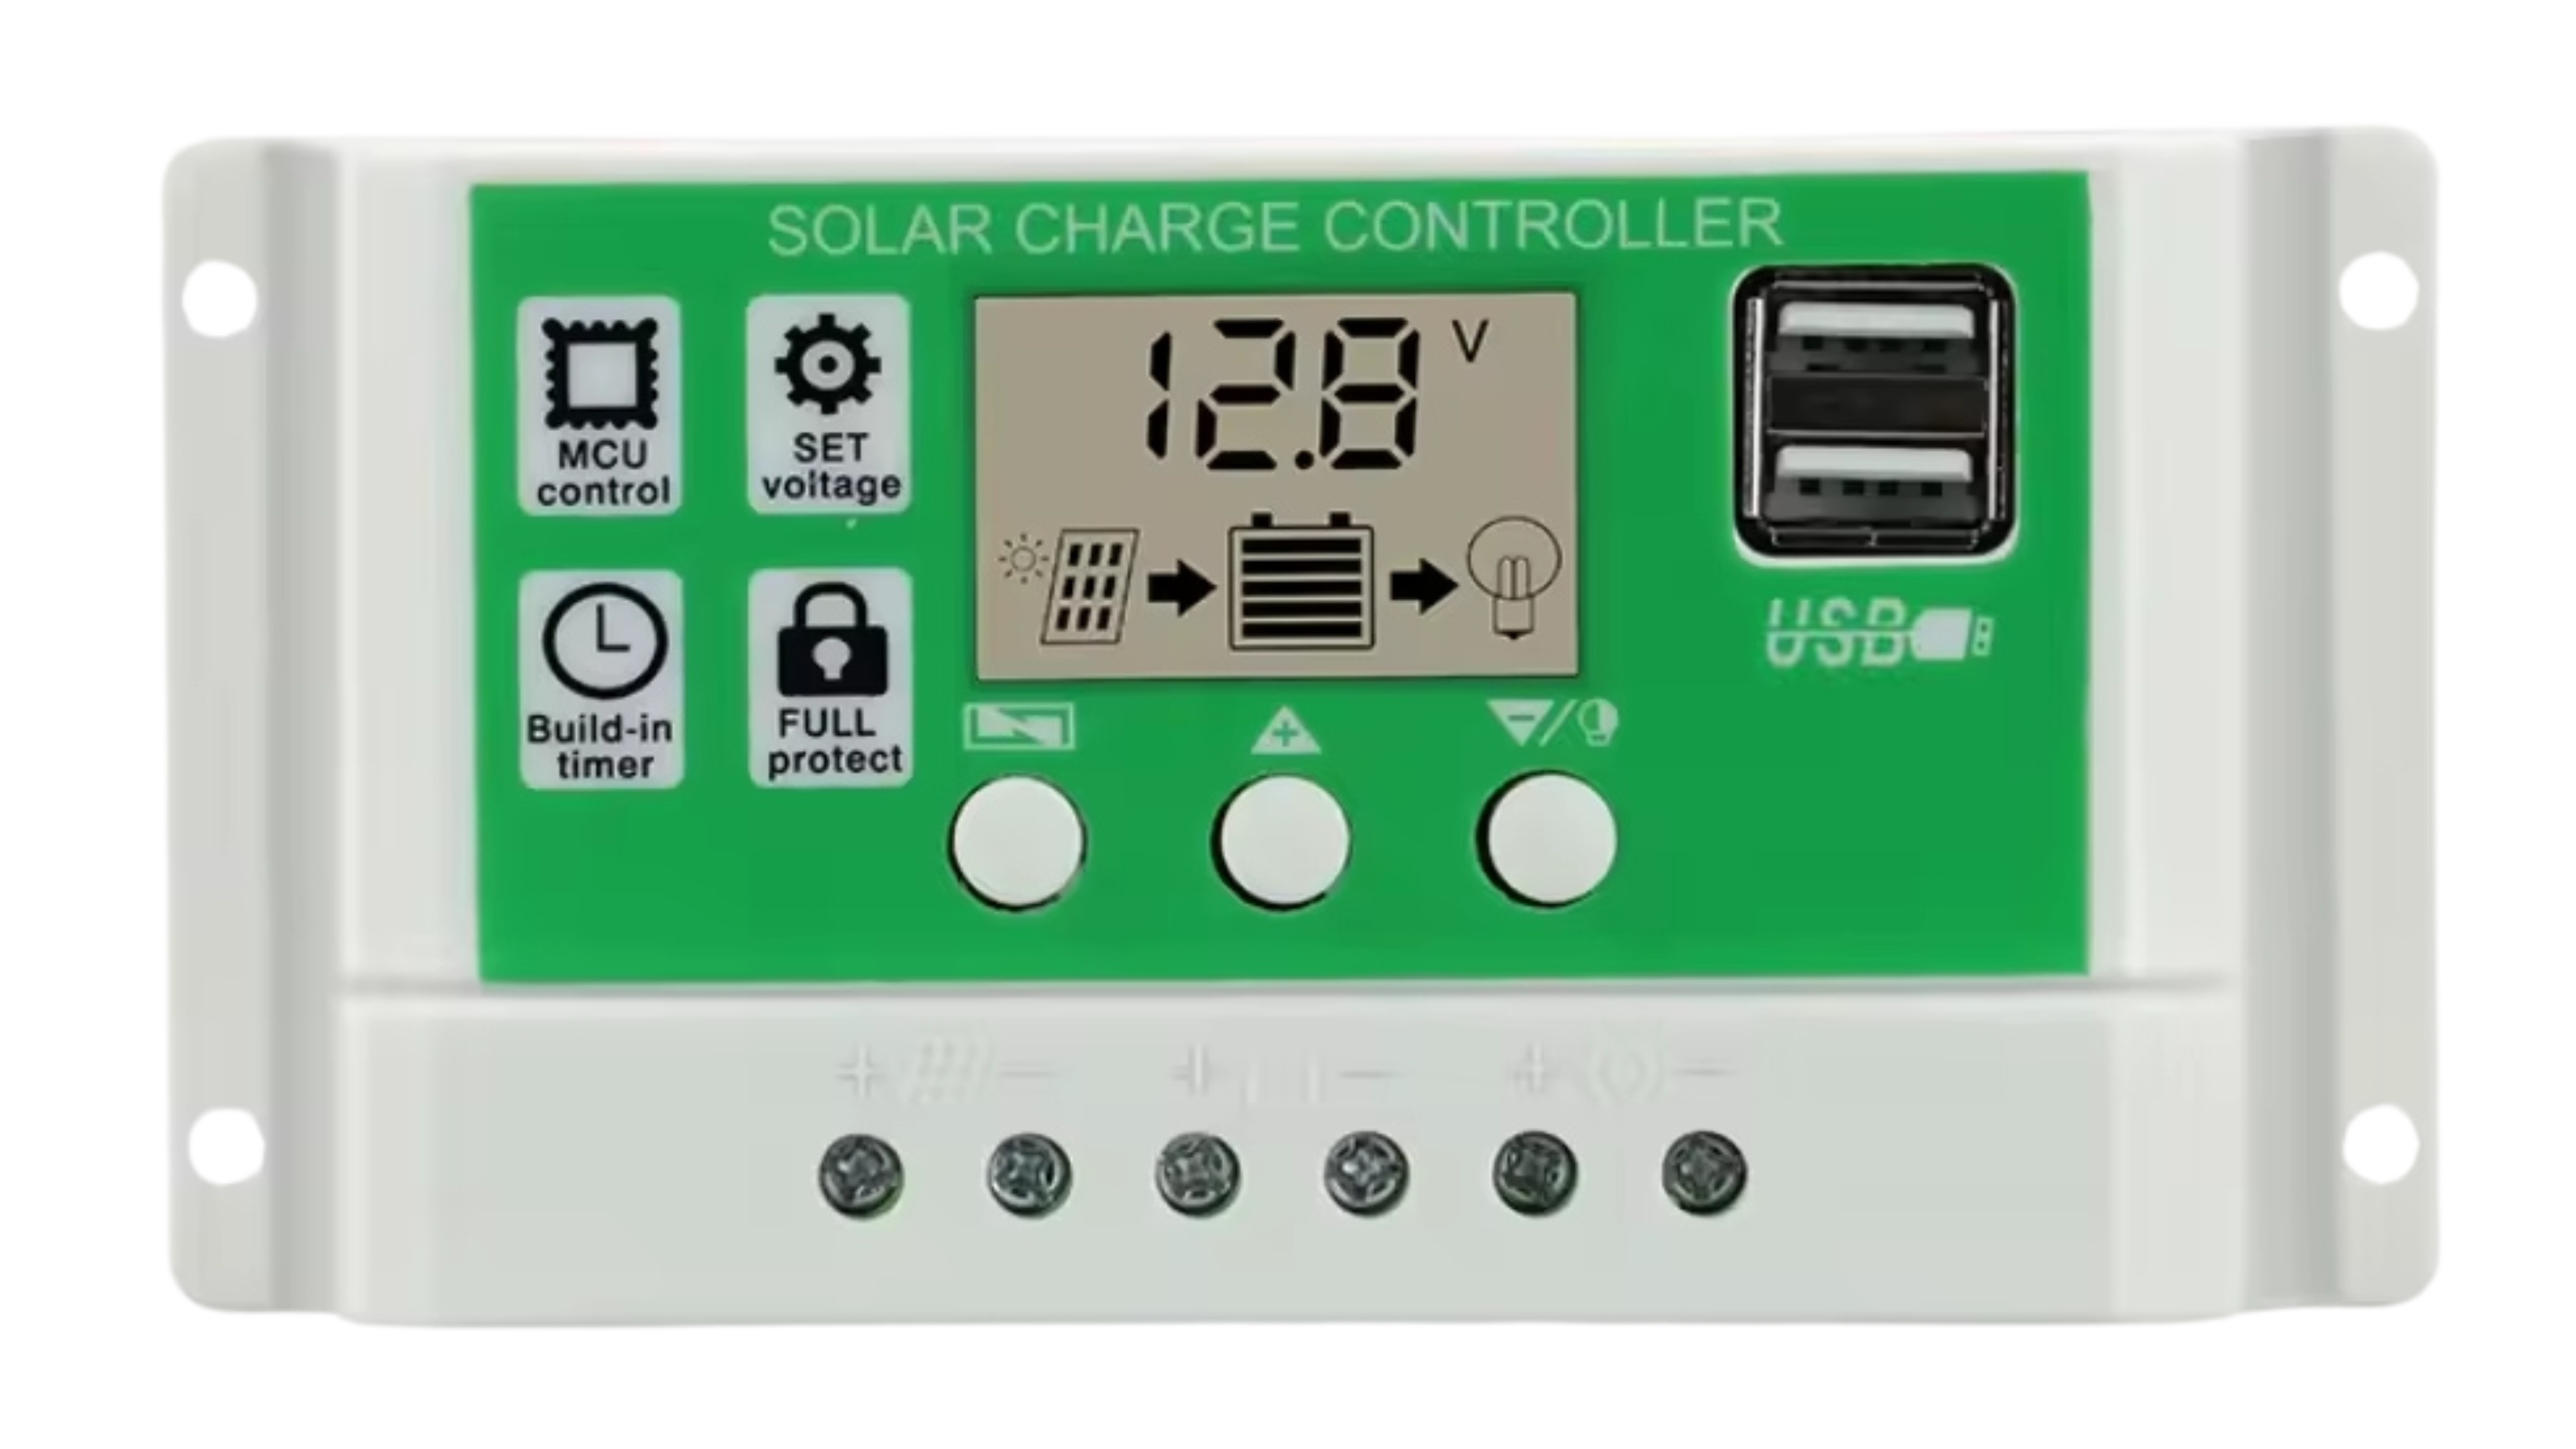
A solar charger controller lithium is a device designed to regulate the voltage and current generated by solar panels to safely and efficiently charge lithium batteries. It ensures that the batteries are not overcharged, which can lead to damage or reduced lifespan, and optimizes the charging process for maximum performance. These controllers are essential for solar-powered systems that rely on lithium-ion or lithium-polymer batteries.
Explore Projects Built with solar charger controller lithium
Explore Projects Built with solar charger controller lithium
Common Applications and Use Cases
- Off-grid solar power systems
- Solar-powered lighting systems
- Portable solar chargers for electronic devices
- Renewable energy storage systems
- Solar-powered IoT devices
Technical Specifications
Below are the typical technical specifications for a solar charger controller designed for lithium batteries. Note that actual specifications may vary depending on the model and manufacturer.
| Parameter | Value |
|---|---|
| Input Voltage Range | 12V to 24V (varies by model) |
| Maximum Input Current | 10A to 30A (varies by model) |
| Battery Type Supported | Lithium-ion, Lithium-polymer |
| Charging Voltage | 4.2V per cell (configurable for multi-cell) |
| Maximum Charging Current | 5A to 20A (varies by model) |
| Efficiency | Up to 98% |
| Operating Temperature Range | -20°C to 60°C |
| Protection Features | Overcharge, Overcurrent, Short Circuit |
Pin Configuration and Descriptions
The pin configuration for a typical solar charger controller is as follows:
| Pin Name | Description |
|---|---|
| Solar Panel (+) | Positive input terminal for the solar panel. |
| Solar Panel (-) | Negative input terminal for the solar panel. |
| Battery (+) | Positive output terminal for the lithium battery. |
| Battery (-) | Negative output terminal for the lithium battery. |
| Load (+) | Positive terminal for connecting the load (optional, for direct power usage). |
| Load (-) | Negative terminal for connecting the load (optional). |
| Temperature Sensor | Input for an external temperature sensor to monitor battery temperature. |
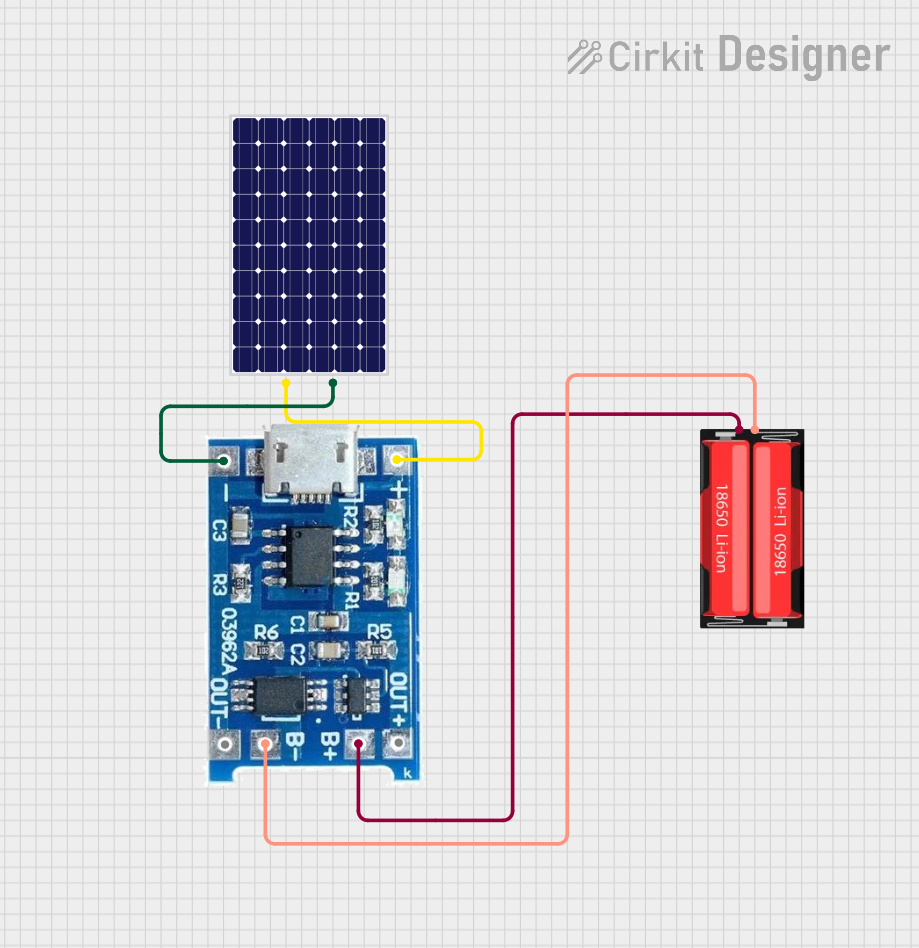
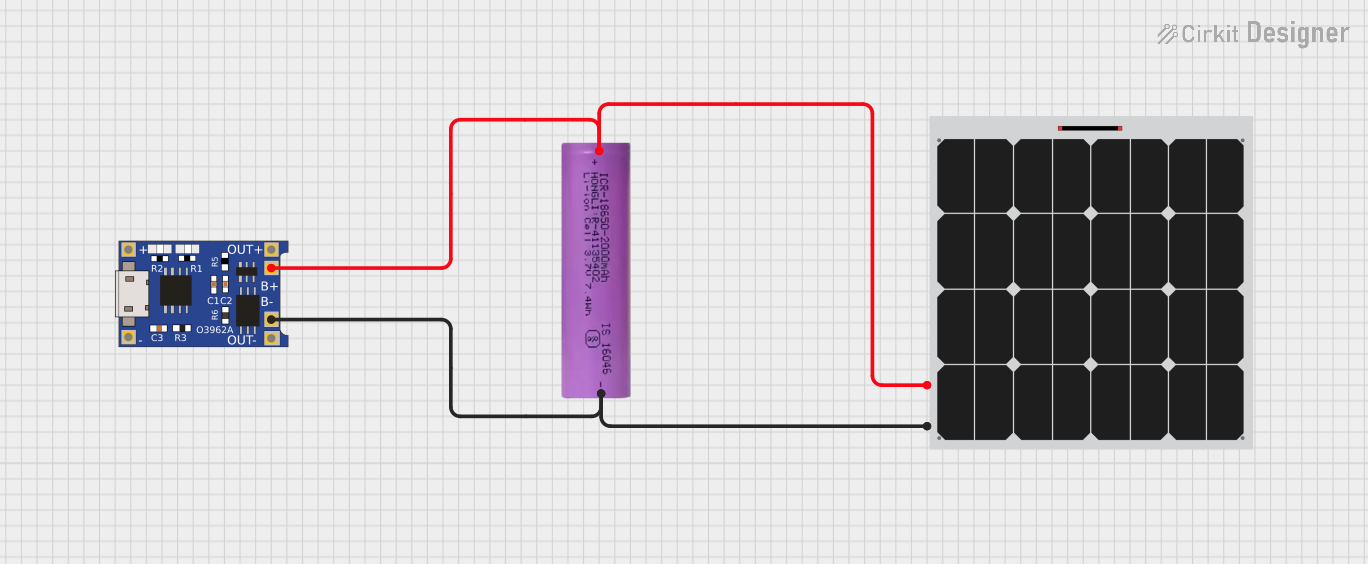
Usage Instructions
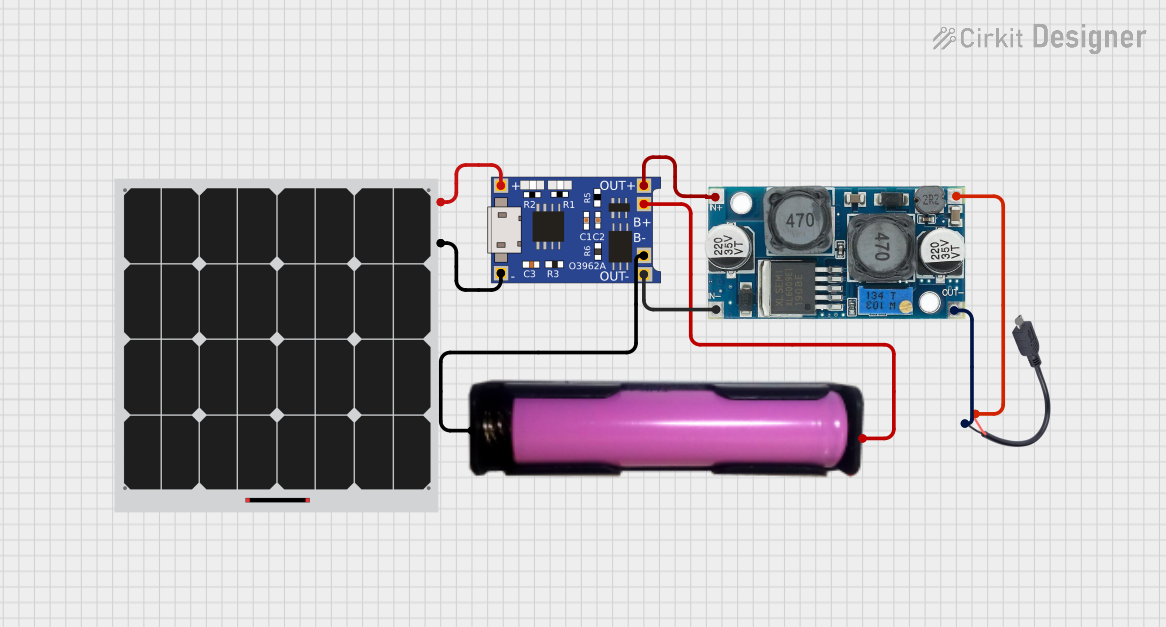
How to Use the Component in a Circuit
- Connect the Solar Panel: Attach the positive and negative terminals of the solar panel to the corresponding
Solar Panel (+)andSolar Panel (-)pins on the controller. - Connect the Battery: Connect the lithium battery's positive and negative terminals to the
Battery (+)andBattery (-)pins, respectively. - Optional Load Connection: If you want to power a load directly, connect the load's positive and negative terminals to the
Load (+)andLoad (-)pins. - Temperature Sensor (Optional): If the controller supports temperature monitoring, connect the external temperature sensor to the designated input.
- Power On: Once all connections are secure, expose the solar panel to sunlight. The controller will automatically regulate the charging process.
Important Considerations and Best Practices
- Battery Compatibility: Ensure the controller is configured for the specific type of lithium battery you are using (e.g., lithium-ion or lithium-polymer).
- Voltage Matching: Verify that the solar panel's output voltage is within the controller's input voltage range.
- Temperature Monitoring: Use a temperature sensor if available to prevent overheating of the battery during charging.
- Avoid Overloading: Do not exceed the maximum input current or charging current specified by the controller.
- Secure Connections: Ensure all connections are tight and secure to prevent voltage drops or short circuits.
Example Code for Arduino UNO Integration
If you are using the solar charger controller in a project with an Arduino UNO, you can monitor the battery voltage using an analog input pin. Below is an example code snippet:
// Define the analog pin connected to the battery voltage output
const int batteryVoltagePin = A0;

// Define the reference voltage of the Arduino (5V for most boards)
const float referenceVoltage = 5.0;

// Define the voltage divider ratio (if using a voltage divider circuit)
const float voltageDividerRatio = 2.0;

void setup() {
  // Initialize serial communication for debugging
  Serial.begin(9600);
}

void loop() {
  // Read the analog value from the battery voltage pin
  int analogValue = analogRead(batteryVoltagePin);

  // Convert the analog value to a voltage
  float batteryVoltage = (analogValue * referenceVoltage / 1023.0) * voltageDividerRatio;

  // Print the battery voltage to the Serial Monitor
  Serial.print("Battery Voltage: ");
  Serial.print(batteryVoltage);
  Serial.println(" V");

  // Wait for 1 second before the next reading
  delay(1000);
}
Note: If the battery voltage exceeds the Arduino's input voltage range, use a voltage divider circuit to scale it down.
Troubleshooting and FAQs
Common Issues and Solutions
Battery Not Charging
- Cause: Solar panel output is insufficient (e.g., low sunlight).
- Solution: Ensure the solar panel is exposed to direct sunlight and check its output voltage.
Overheating of the Controller
- Cause: Excessive current or poor ventilation.
- Solution: Reduce the load or improve airflow around the controller.
Load Not Receiving Power
- Cause: Load terminals are not connected or the load exceeds the controller's capacity.
- Solution: Verify the load connections and ensure the load is within the controller's specifications.
Controller Not Powering On
- Cause: Incorrect wiring or insufficient solar panel voltage.
- Solution: Double-check all connections and ensure the solar panel is providing adequate voltage.
FAQs
Q: Can I use this controller with other battery types?
A: No, this controller is specifically designed for lithium batteries. Using it with other battery types may cause damage.Q: What happens if the solar panel produces more current than the controller's maximum input?
A: Most controllers have built-in protection to limit the input current. However, it is recommended to use a solar panel that matches the controller's specifications.Q: Can I connect multiple solar panels to the controller?
A: Yes, but ensure the combined voltage and current of the panels do not exceed the controller's input limits.Q: How do I know if the battery is fully charged?
A: Many controllers have an LED indicator or display that shows the charging status. Refer to the user manual for details.