Cirkit Designer Logo
Cirkit Designer
Your all-in-one circuit design IDE
Home / 
Component Documentation

How to Use Battery AA 1.5V: Examples, Pinouts, and Specs

Image of Battery AA 1.5V
Cirkit Designer LogoDesign with Battery AA 1.5V in Cirkit Designer

Introduction

The AA 1.5V battery is a single-cell, cylindrical power source widely used in a variety of portable electronic devices. Its popularity stems from its convenient size, reliable output, and availability. Common applications include remote controls, wall clocks, flashlights, and small toys.

Explore Projects Built with Battery AA 1.5V

Use Cirkit Designer to design, explore, and prototype these projects online. Some projects support real-time simulation. Click "Open Project" to start designing instantly!
Simple Battery-Powered Red LED Circuit
Image of project 2: A project utilizing Battery AA 1.5V in a practical application
This circuit is a simple LED lighting circuit powered by two AA batteries. The LED's anode is connected through a 220 Ohm resistor to the positive terminal of one battery mount, and its cathode is directly connected to the negative terminal of the other battery mount. The resistor limits the current to protect the LED from excessive current that could damage it.
Cirkit Designer LogoOpen Project in Cirkit Designer
Simple Battery-Powered LED Circuit
Image of Coding and Robotics activity 2: A project utilizing Battery AA 1.5V in a practical application
This circuit is a simple LED lighting circuit powered by a 4 x AAA battery mount. The LED's anode is connected to the positive terminal of the battery through a 220 Ohm resistor, which limits the current to protect the LED. The cathode of the LED is connected directly to the negative terminal of the battery, completing the circuit and allowing the LED to light up when the battery is connected.
Cirkit Designer LogoOpen Project in Cirkit Designer
Simple Battery-Powered Red LED Circuit
Image of cirkit designer project2 : A project utilizing Battery AA 1.5V in a practical application
This circuit is a simple LED driver consisting of a red LED, a resistor, and a 4 x AAA battery mount. The resistor is in series with the LED, limiting the current to prevent damage to the LED. The battery provides the power source, with the negative terminal connected to one end of the resistor and the positive terminal connected to the anode of the LED.
Cirkit Designer LogoOpen Project in Cirkit Designer
Battery-Powered LED Circuit with Resistor
Image of Project 1: Glowing LED: A project utilizing Battery AA 1.5V in a practical application
This circuit consists of a 4 x AAA battery mount powering a red LED through a 220-ohm resistor. The resistor limits the current flowing through the LED, which is connected in series with the battery pack to ensure safe operation and prevent damage to the LED.
Cirkit Designer LogoOpen Project in Cirkit Designer

Explore Projects Built with Battery AA 1.5V

Use Cirkit Designer to design, explore, and prototype these projects online. Some projects support real-time simulation. Click "Open Project" to start designing instantly!
Image of project 2: A project utilizing Battery AA 1.5V in a practical application
Simple Battery-Powered Red LED Circuit
This circuit is a simple LED lighting circuit powered by two AA batteries. The LED's anode is connected through a 220 Ohm resistor to the positive terminal of one battery mount, and its cathode is directly connected to the negative terminal of the other battery mount. The resistor limits the current to protect the LED from excessive current that could damage it.
Cirkit Designer LogoOpen Project in Cirkit Designer
Image of Coding and Robotics activity 2: A project utilizing Battery AA 1.5V in a practical application
Simple Battery-Powered LED Circuit
This circuit is a simple LED lighting circuit powered by a 4 x AAA battery mount. The LED's anode is connected to the positive terminal of the battery through a 220 Ohm resistor, which limits the current to protect the LED. The cathode of the LED is connected directly to the negative terminal of the battery, completing the circuit and allowing the LED to light up when the battery is connected.
Cirkit Designer LogoOpen Project in Cirkit Designer
Image of cirkit designer project2 : A project utilizing Battery AA 1.5V in a practical application
Simple Battery-Powered Red LED Circuit
This circuit is a simple LED driver consisting of a red LED, a resistor, and a 4 x AAA battery mount. The resistor is in series with the LED, limiting the current to prevent damage to the LED. The battery provides the power source, with the negative terminal connected to one end of the resistor and the positive terminal connected to the anode of the LED.
Cirkit Designer LogoOpen Project in Cirkit Designer
Image of Project 1: Glowing LED: A project utilizing Battery AA 1.5V in a practical application
Battery-Powered LED Circuit with Resistor
This circuit consists of a 4 x AAA battery mount powering a red LED through a 220-ohm resistor. The resistor limits the current flowing through the LED, which is connected in series with the battery pack to ensure safe operation and prevent damage to the LED.
Cirkit Designer LogoOpen Project in Cirkit Designer

Technical Specifications

General Characteristics

  • Nominal Voltage: 1.5V
  • Chemistry: Alkaline, Lithium, NiMH rechargeable, or Zinc-Carbon
  • Diameter: 14.5 mm (0.57 inches)
  • Length: 50.5 mm (1.99 inches)
  • Weight: Approximately 23 g (0.81 oz) for Alkaline

Electrical Specifications

Specification Alkaline Lithium NiMH Zinc-Carbon
Nominal Voltage 1.5V 1.5V 1.2V 1.5V
Capacity 1800-2600 mAh 3000-3500 mAh 1200-2700 mAh 400-1500 mAh
Rechargeable No No Yes No

Pin Configuration

As a cylindrical battery, the AA 1.5V battery does not have pins but rather terminals:

  • Positive Terminal: Protruding nub at one end of the battery
  • Negative Terminal: Flat opposite end of the battery

Usage Instructions

Installing the Battery

  1. Identify the positive (+) and negative (-) terminals of the battery.
  2. Align the positive terminal of the battery with the positive contact in the device.
  3. Insert the battery into the device, ensuring a snug fit against the contacts.
  4. If multiple batteries are required, ensure they are inserted in the correct orientation according to the device's instructions.

Best Practices

  • Do not mix old and new batteries or batteries of different types.
  • Remove batteries from the device if it will not be used for an extended period.
  • Store batteries at room temperature in a dry environment.
  • Do not attempt to recharge non-rechargeable batteries.
  • Dispose of batteries properly, following local regulations.

Troubleshooting and FAQs

Common Issues

  • Device not powering on: Check that the batteries are inserted correctly with the proper orientation. Ensure that the contacts are clean and not obstructed.
  • Reduced performance: If the device is performing poorly, the batteries may be nearing the end of their life. Replace with new batteries.
  • Leakage: Battery leakage can occur if batteries are left in the device for too long, especially if the device is not used. If leakage occurs, carefully remove the battery and clean the device contacts with a mild acid like vinegar, then rinse with water and dry thoroughly.

FAQs

Q: Can I use a different type of AA battery in my device? A: Yes, but be aware of the different capacities and voltage (1.2V for NiMH) which may affect device performance.

Q: How should I dispose of AA batteries? A: Dispose of batteries according to local regulations. Many areas have specific recycling programs for batteries.

Q: Are all AA batteries 1.5V? A: Most single-use AA batteries are 1.5V. Rechargeable NiMH batteries typically have a nominal voltage of 1.2V.

Q: Can I mix batteries of different chemistries in my device? A: It is not recommended to mix batteries of different chemistries due to differences in voltage and discharge rates which can affect device performance and safety.

Q: How can I tell if a battery is dead? A: The most reliable method is to use a battery tester to check the voltage. If the voltage is significantly below 1.5V (or 1.2V for NiMH), the battery is likely dead.

Connecting to an Arduino UNO

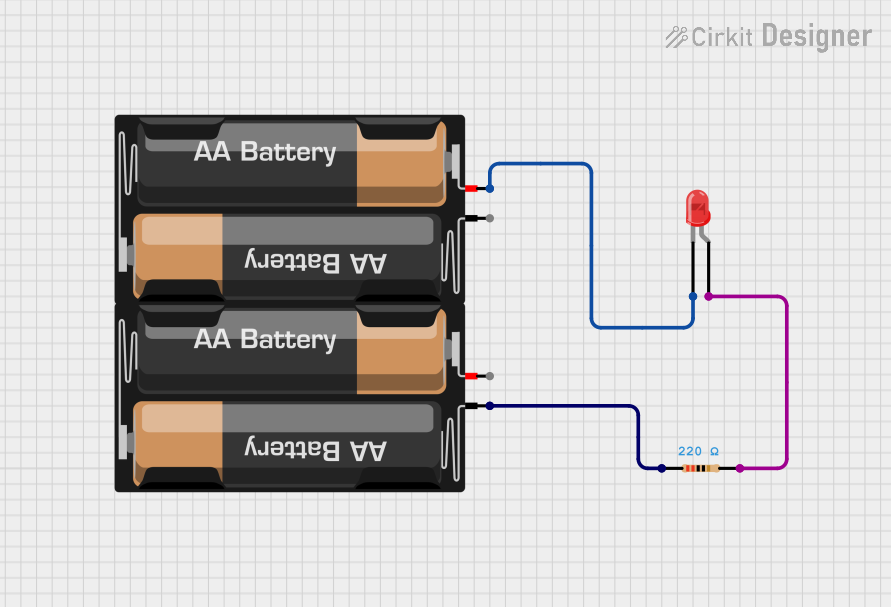
While AA batteries are not typically used to power an Arduino UNO directly, they can be used in a battery pack to provide the appropriate voltage. For example, four AA batteries in series can be used to create a 6V power supply, which can then be regulated down to 5V for the Arduino.

// No specific code is required for powering an Arduino with AA batteries.
// However, ensure that the voltage supplied to the Arduino is within its
// operating range (7-12V recommended for the VIN pin).

Remember to always check the Arduino's specifications and ensure that the power supply is within the recommended voltage range.