How to Use Haptic Motor Controller: Examples, Pinouts, and Specs
Introduction
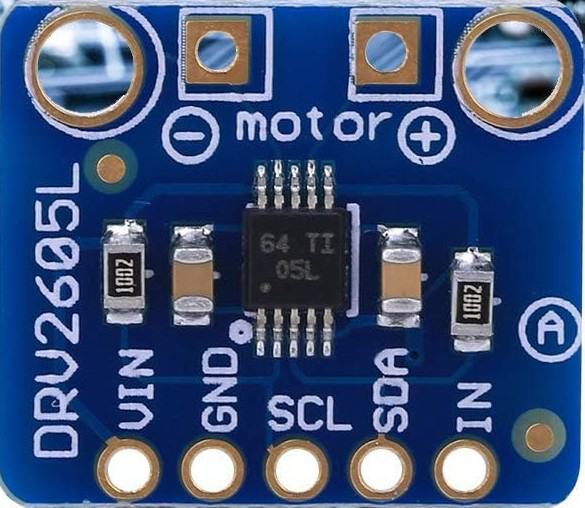
The WALFRONT DRV2605L Haptic Motor Controller is a highly versatile device designed to regulate the operation of haptic motors. It enables precise control of vibration and motion feedback, enhancing user interaction in electronic devices. This controller is widely used in applications requiring tactile feedback, such as smartphones, gaming controllers, wearables, and automotive interfaces.
The DRV2605L integrates advanced features like waveform sequencing, audio-to-haptics conversion, and support for both eccentric rotating mass (ERM) and linear resonant actuator (LRA) motors. Its compact design and I²C interface make it ideal for modern, space-constrained applications.
Explore Projects Built with Haptic Motor Controller
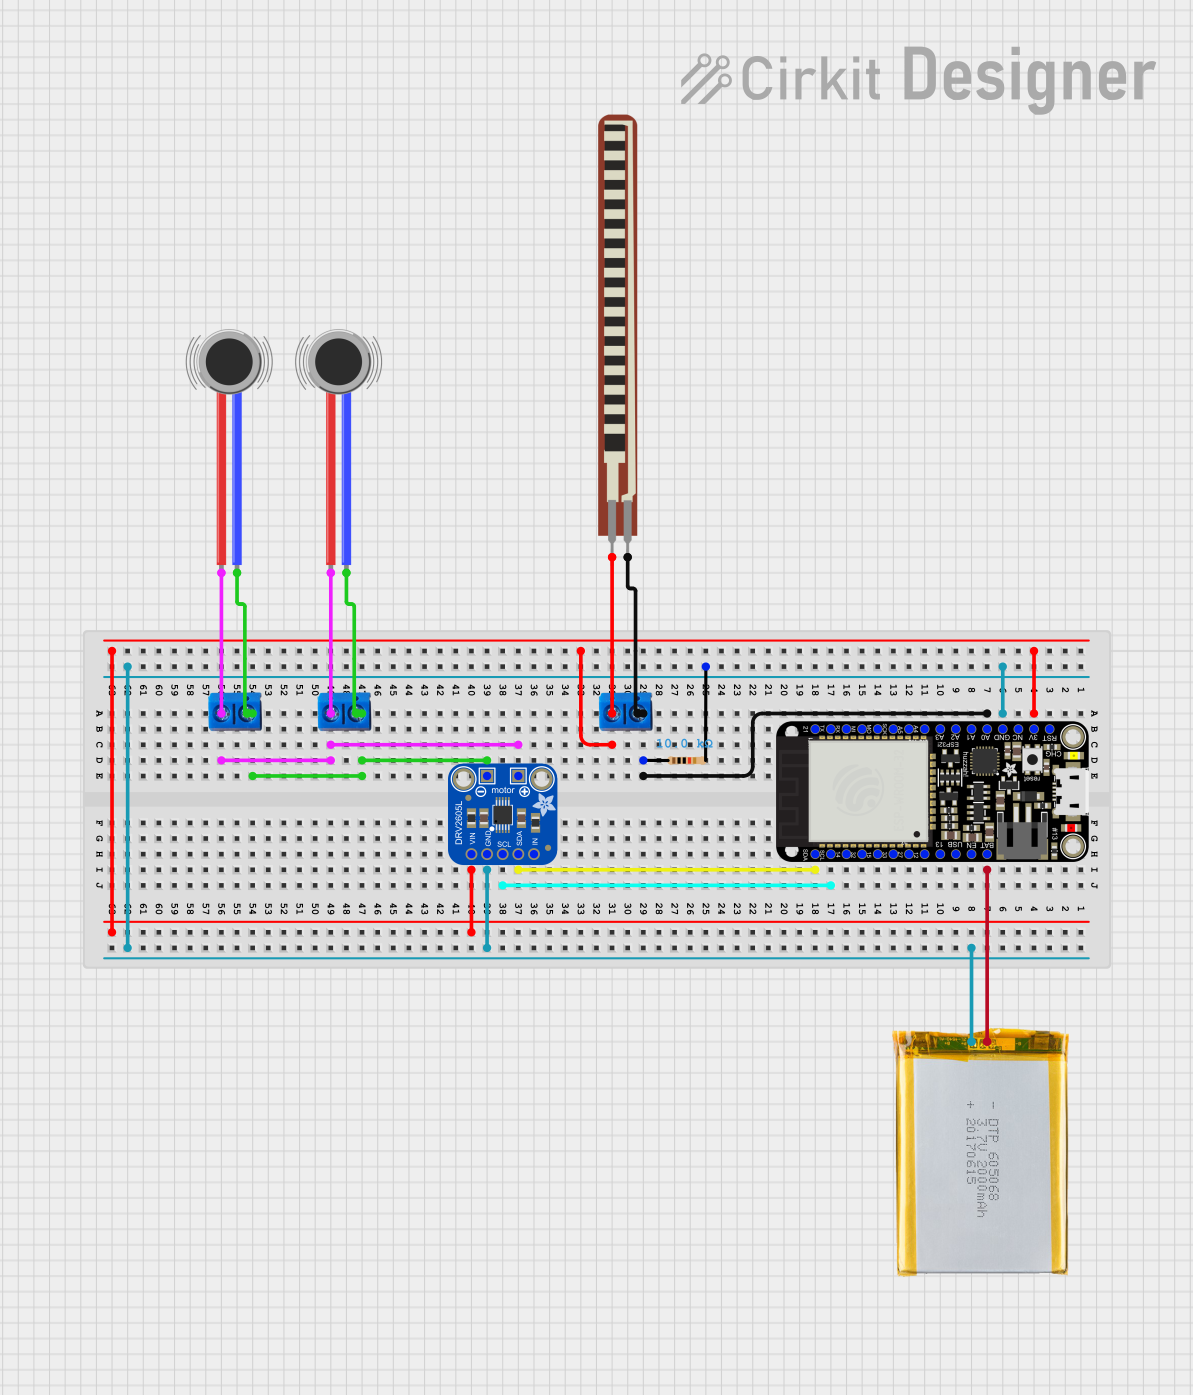
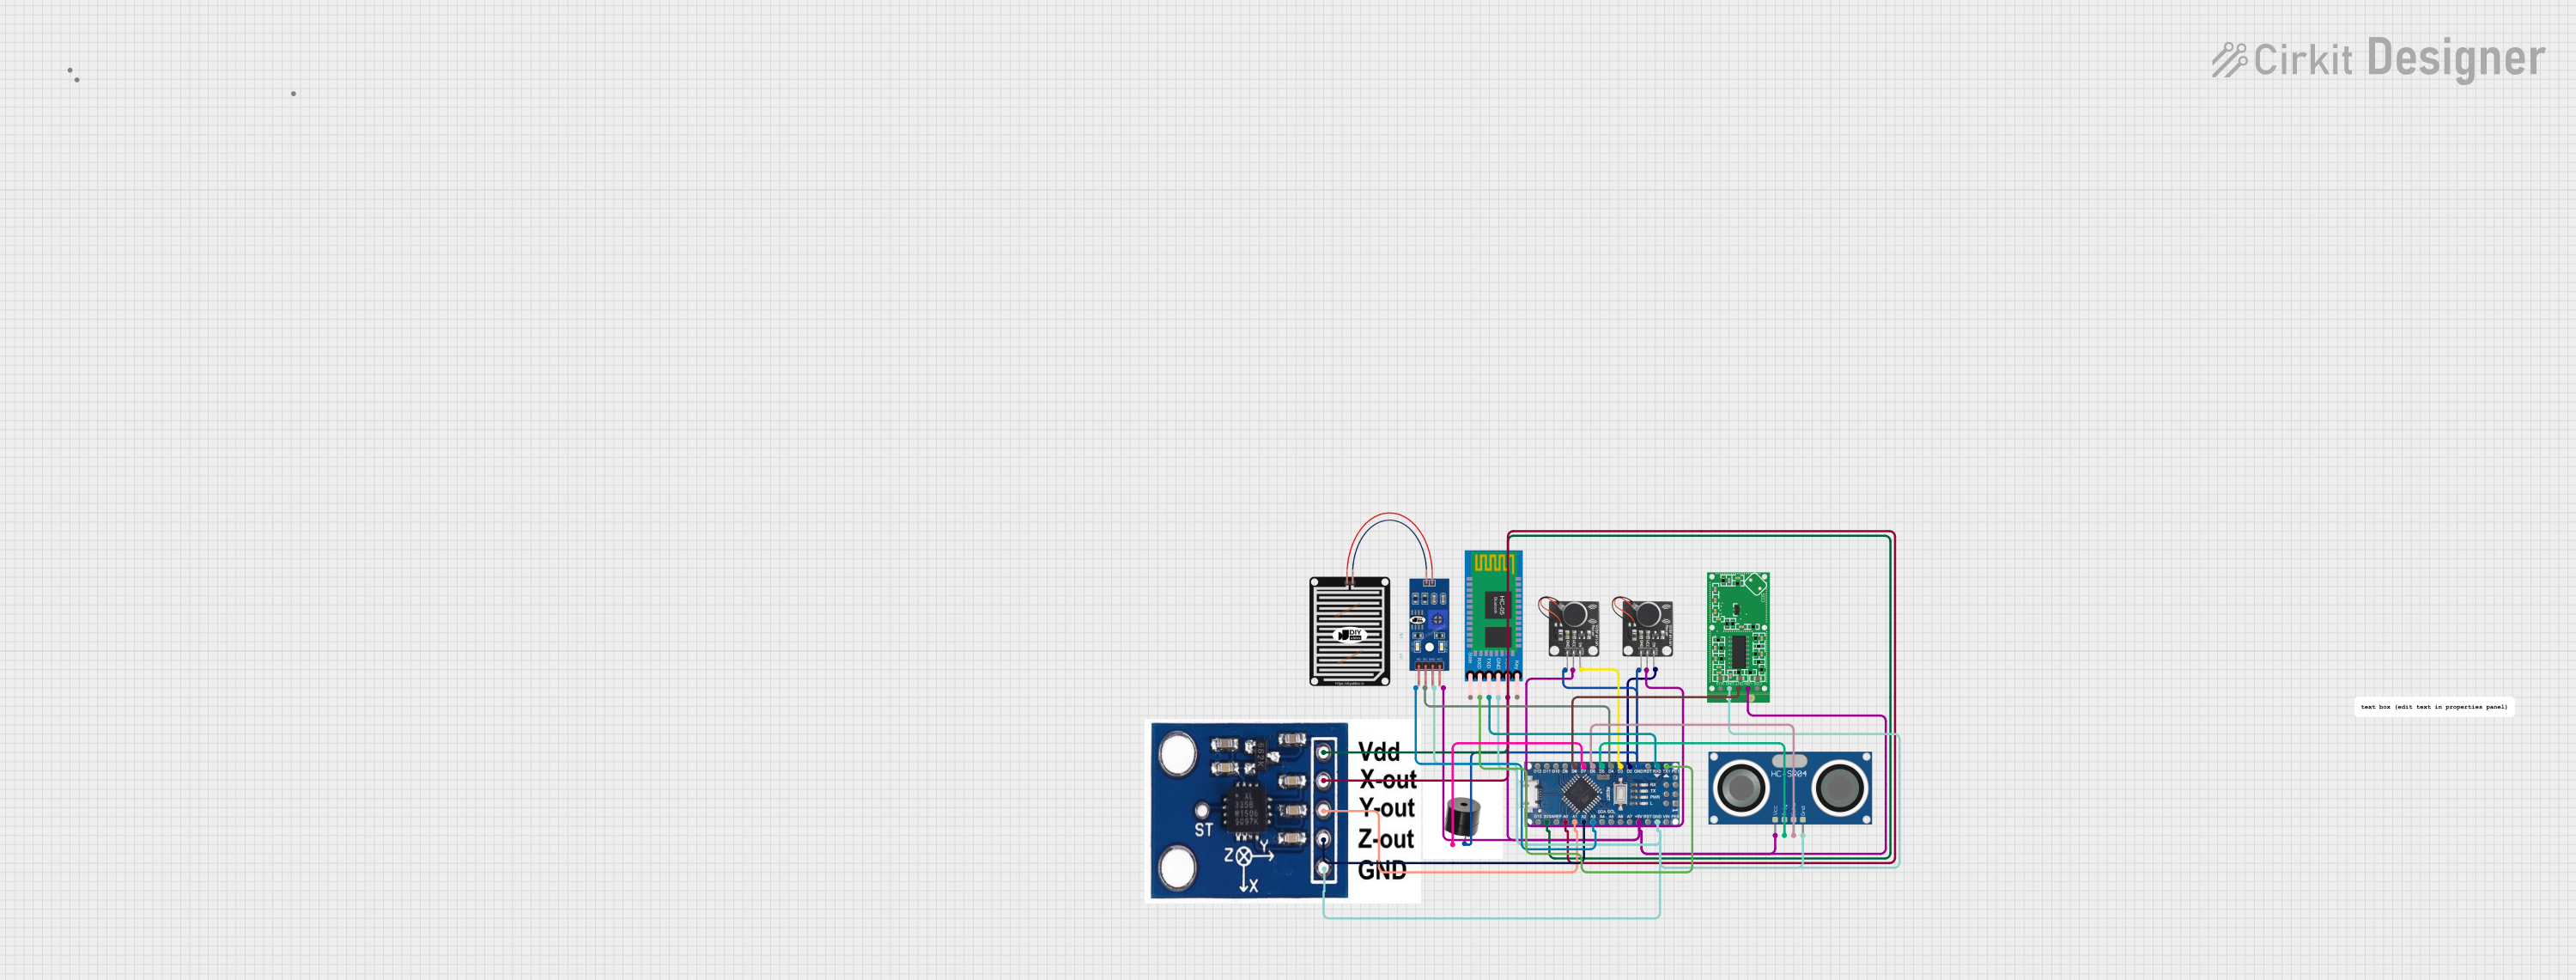

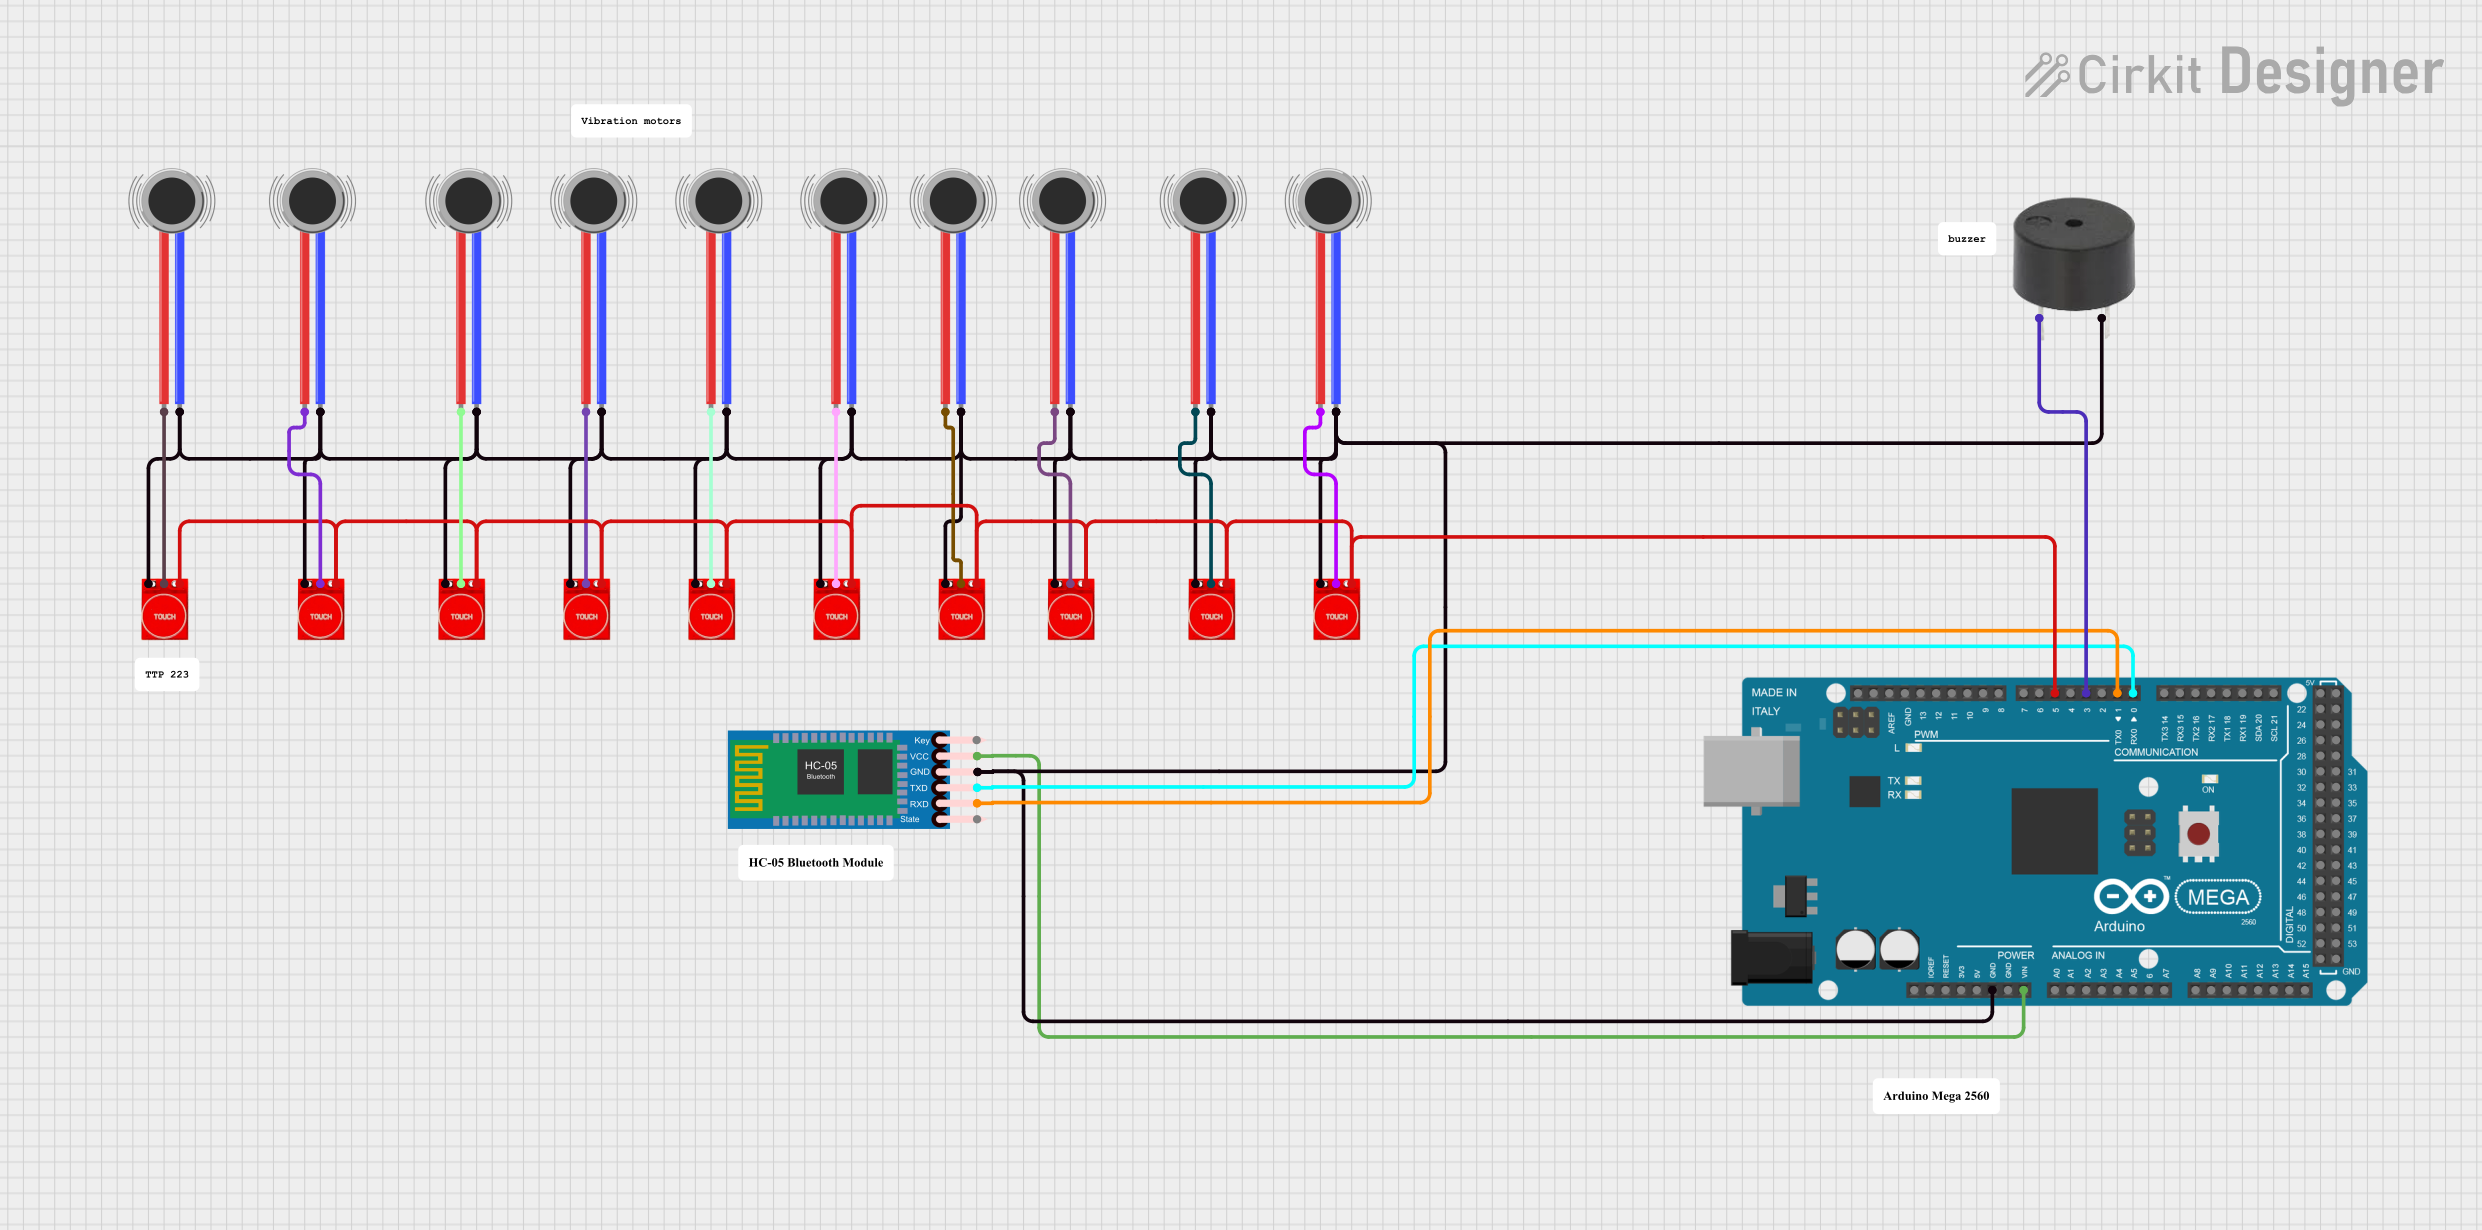
Explore Projects Built with Haptic Motor Controller
Technical Specifications
The following table outlines the key technical details of the DRV2605L Haptic Motor Controller:
| Parameter | Value |
|---|---|
| Operating Voltage | 2.0V to 5.2V |
| Operating Current | 1.5mA (typical) |
| Standby Current | 0.1µA (typical) |
| Motor Types Supported | ERM and LRA |
| Communication Interface | I²C (up to 400kHz) |
| Output Drive Voltage | Up to 5.5V |
| Package Type | 10-pin VSON (3mm x 3mm) |
| Operating Temperature | -40°C to +85°C |
Pin Configuration and Descriptions
The DRV2605L comes in a 10-pin VSON package. The pin configuration and descriptions are as follows:
| Pin Number | Pin Name | Description |
|---|---|---|
| 1 | VDD | Power supply input (2.0V to 5.2V). |
| 2 | GND | Ground connection. |
| 3 | IN/TRIG | Trigger input for external waveform playback. |
| 4 | SDA | I²C data line. |
| 5 | SCL | I²C clock line. |
| 6 | EN | Enable pin to activate the device. |
| 7 | OUT+ | Positive output to the haptic motor. |
| 8 | OUT- | Negative output to the haptic motor. |
| 9 | NC | No connection (leave unconnected). |
| 10 | ASEL | Address select for I²C communication. |
Usage Instructions
How to Use the DRV2605L in a Circuit
- Power Supply: Connect the VDD pin to a stable power source (2.0V to 5.2V) and the GND pin to ground.
- Motor Connection: Attach the haptic motor to the OUT+ and OUT- pins. Ensure the motor type (ERM or LRA) is compatible with the DRV2605L.
- I²C Communication: Connect the SDA and SCL pins to the corresponding I²C lines of your microcontroller. Use pull-up resistors (typically 4.7kΩ) on these lines.
- Enable the Device: Pull the EN pin high to activate the controller.
- Address Selection: Use the ASEL pin to configure the I²C address if multiple devices are on the same bus.
- Programming: Use the I²C interface to send commands and configure the device for specific haptic effects.
Important Considerations and Best Practices
- Motor Selection: Ensure the motor's voltage and current ratings are within the DRV2605L's output capabilities.
- Thermal Management: Operate the device within its specified temperature range to avoid overheating.
- Waveform Library: The DRV2605L includes a preloaded library of haptic waveforms. Use these to simplify development and achieve consistent results.
- Audio-to-Haptics Mode: For applications requiring real-time vibration feedback from audio signals, enable the audio-to-haptics mode.
Example Code for Arduino UNO
Below is an example of how to control the DRV2605L using an Arduino UNO:
#include <Wire.h>
#include <Adafruit_DRV2605.h>

// Create an instance of the DRV2605L library
Adafruit_DRV2605 drv;

void setup() {
  Serial.begin(9600); // Initialize serial communication
  Serial.println("Initializing DRV2605L...");

  // Initialize the DRV2605L
  if (!drv.begin()) {
    Serial.println("Failed to find DRV2605L. Check connections.");
    while (1);
  }
  Serial.println("DRV2605L initialized successfully.");

  // Select the haptic effect library
  drv.selectLibrary(1);

  // Set the device to use ERM motor mode
  drv.setMode(DRV2605_MODE_INTTRIG);
}

void loop() {
  // Play a haptic effect (effect ID 1)
  Serial.println("Playing haptic effect...");
  drv.setWaveform(0, 1); // Set effect ID 1 on slot 0
  drv.setWaveform(1, 0); // End of sequence
  drv.go();              // Start playback

  delay(1000);           // Wait for 1 second before repeating
}
Troubleshooting and FAQs
Common Issues and Solutions
Device Not Responding on I²C Bus:
- Cause: Incorrect wiring or I²C address mismatch.
- Solution: Verify the SDA and SCL connections. Check the ASEL pin configuration and ensure the correct I²C address is used in your code.
Motor Not Vibrating:
- Cause: Incorrect motor connection or unsupported motor type.
- Solution: Ensure the motor is properly connected to the OUT+ and OUT- pins. Verify that the motor is either an ERM or LRA type.
Overheating:
- Cause: Excessive current draw or operation outside the specified voltage range.
- Solution: Check the power supply voltage and ensure the motor's current requirements are within the DRV2605L's limits.
Waveform Playback Issues:
- Cause: Incorrect waveform configuration.
- Solution: Use the preloaded waveform library and ensure the correct effect IDs are used in your code.
FAQs
Can the DRV2605L drive multiple motors simultaneously? No, the DRV2605L is designed to drive a single haptic motor at a time.
What is the maximum I²C clock speed supported? The DRV2605L supports I²C communication speeds up to 400kHz.
Does the DRV2605L support custom haptic waveforms? Yes, custom waveforms can be uploaded via the I²C interface.
Can the DRV2605L operate in low-power applications? Yes, the device has a low standby current of 0.1µA, making it suitable for battery-powered devices.