How to Use Noctua 40mm NF-A4x20 5V PWM 5000RPM Fan: Examples, Pinouts, and Specs
Introduction
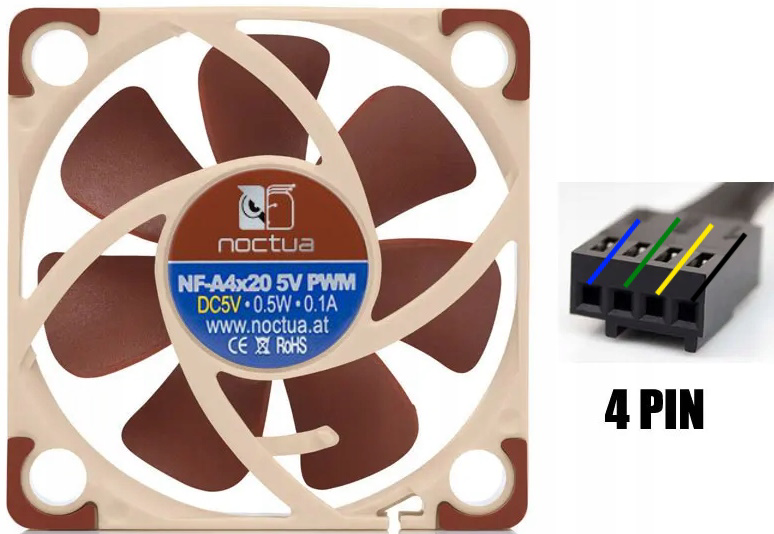
The Noctua NF-A4x20 is a high-performance cooling fan designed for compact electronic systems. With a 40mm size, 5V power requirement, and PWM control, this fan offers precise speed adjustments up to 5000 RPM. It is engineered for efficient and quiet operation, making it ideal for applications where space is limited but effective cooling is essential.
Explore Projects Built with Noctua 40mm NF-A4x20 5V PWM 5000RPM Fan
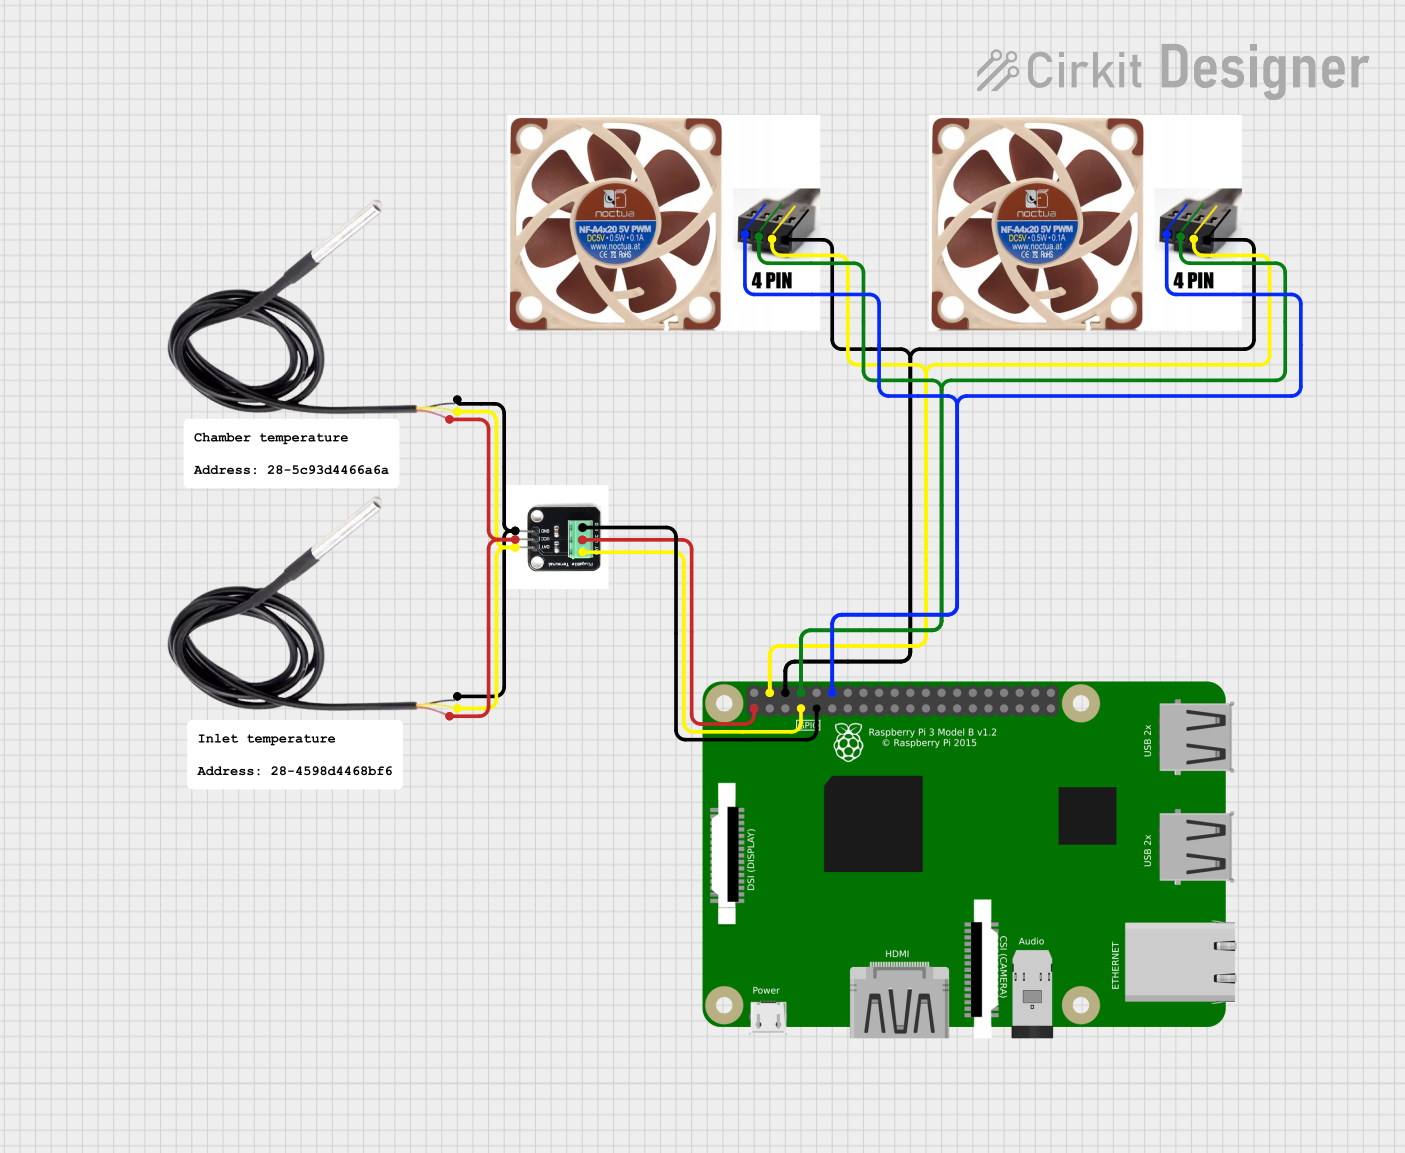

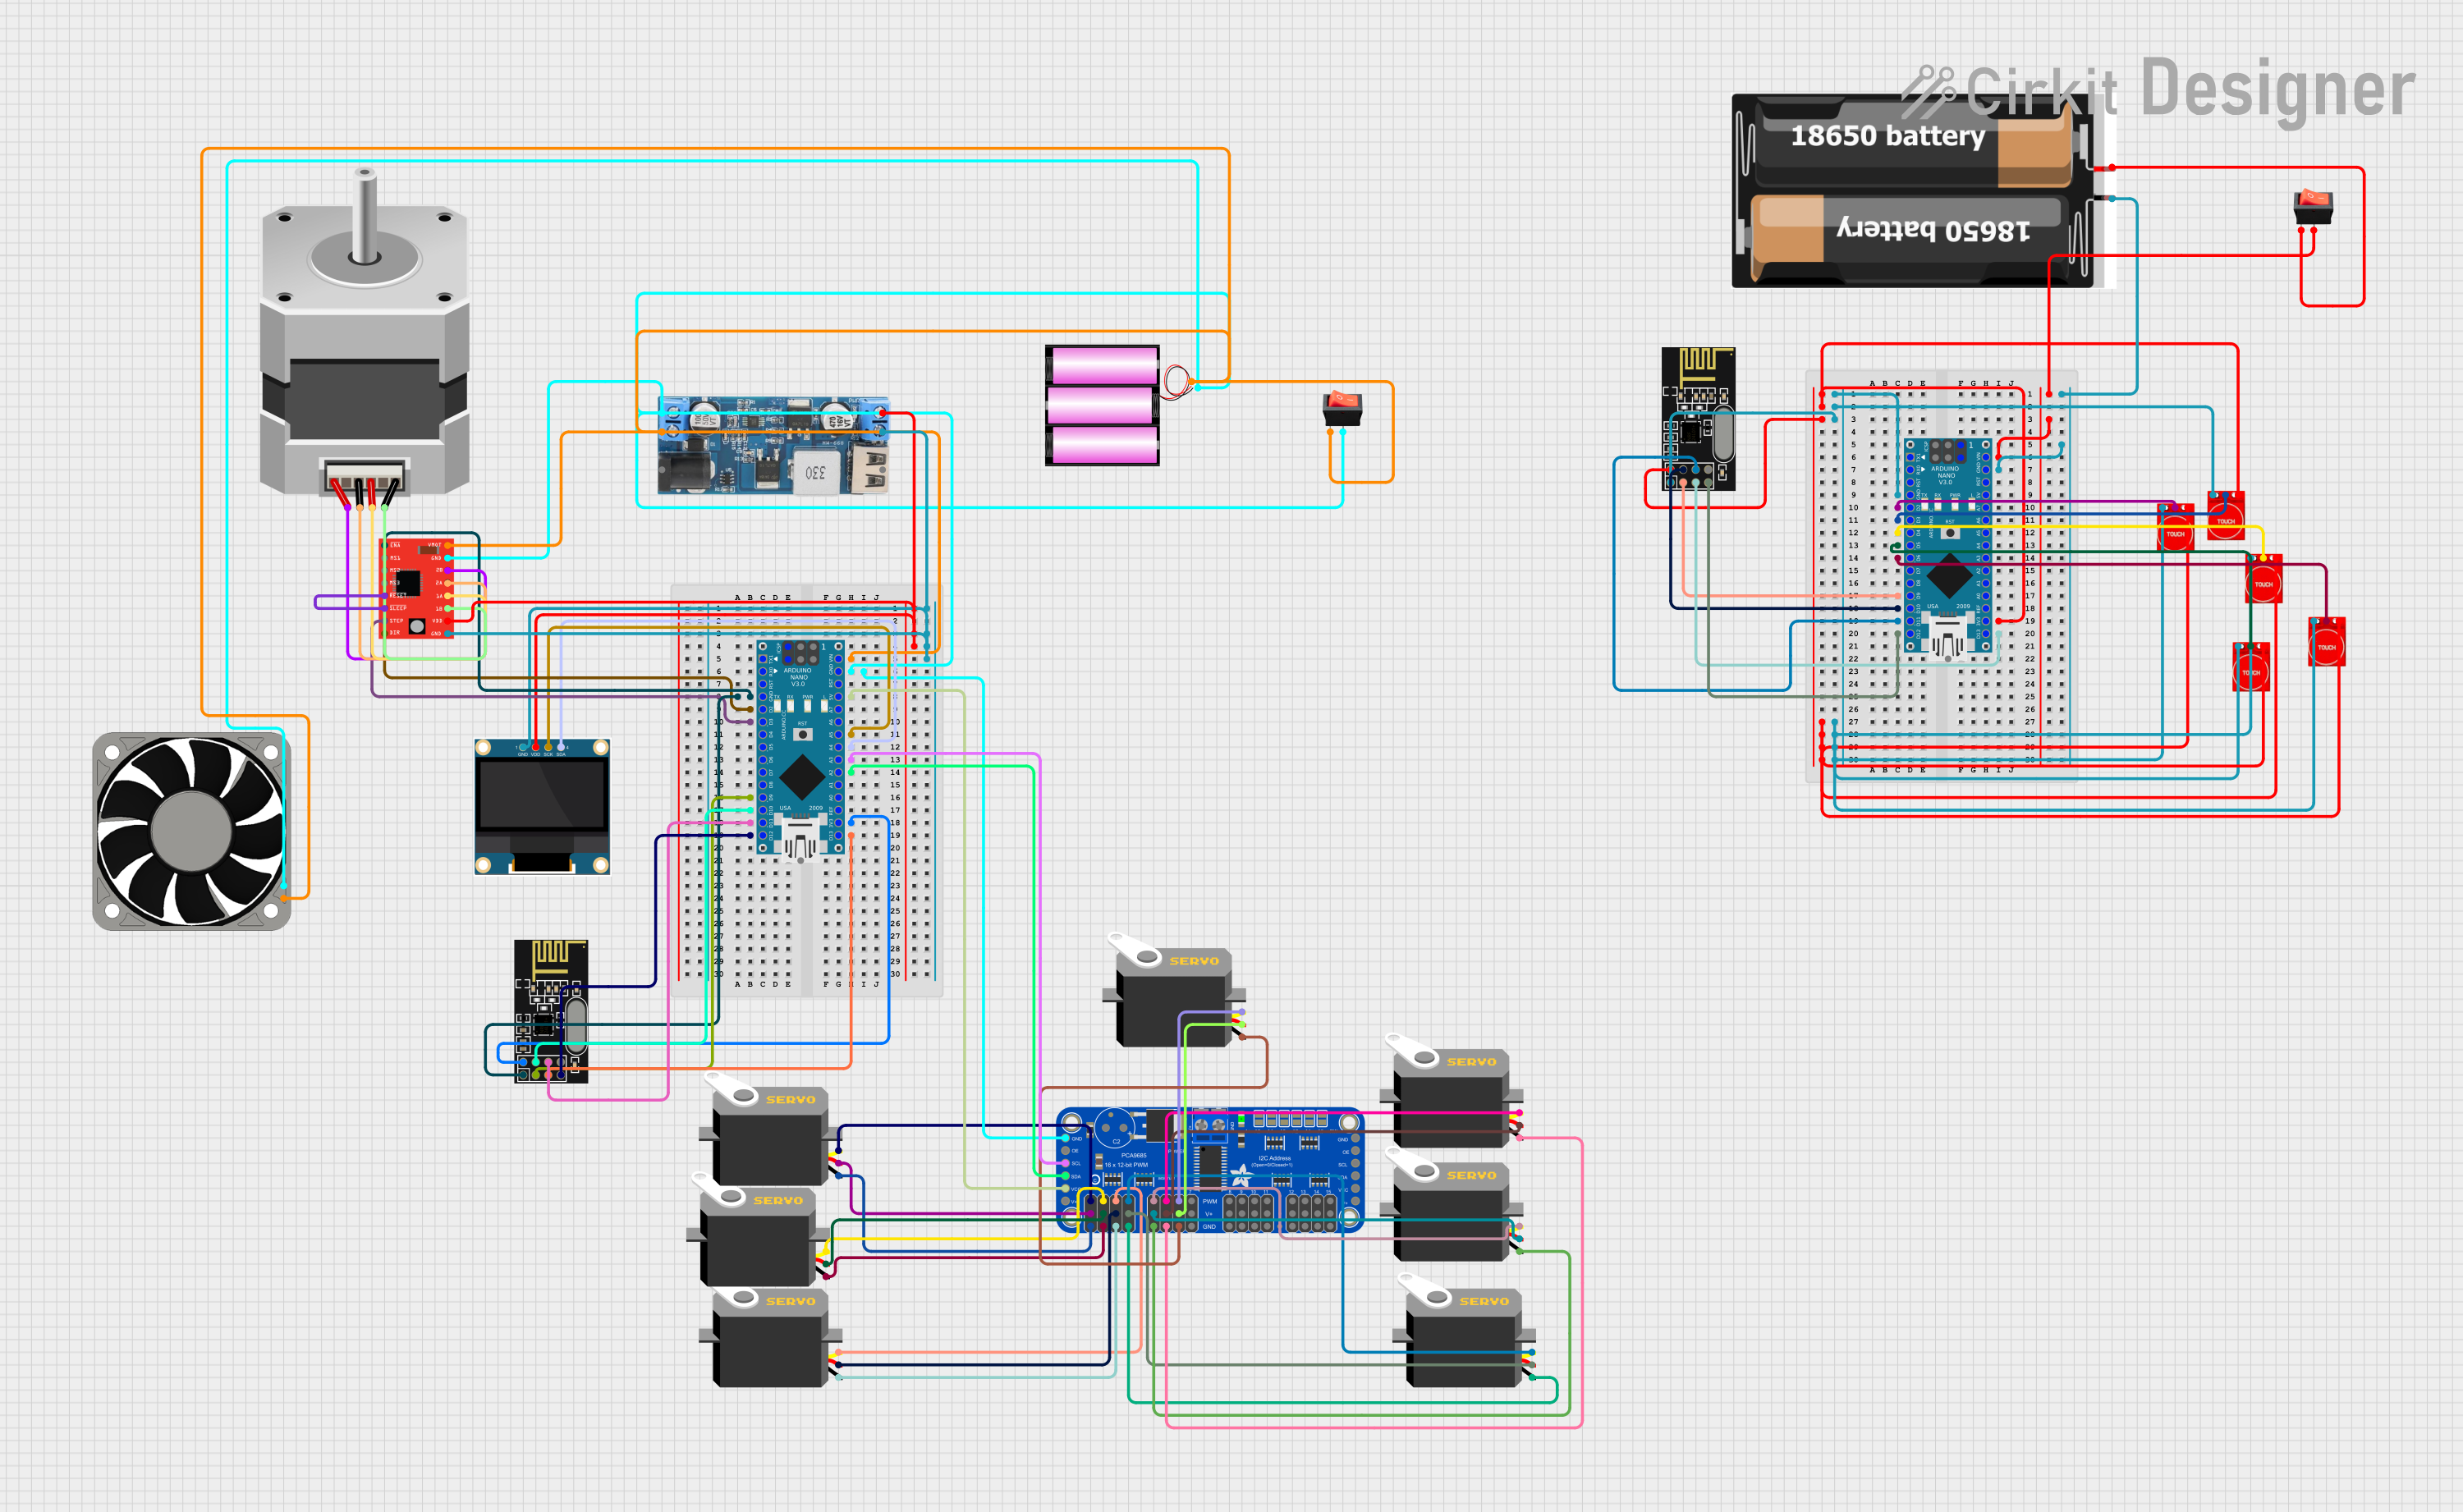
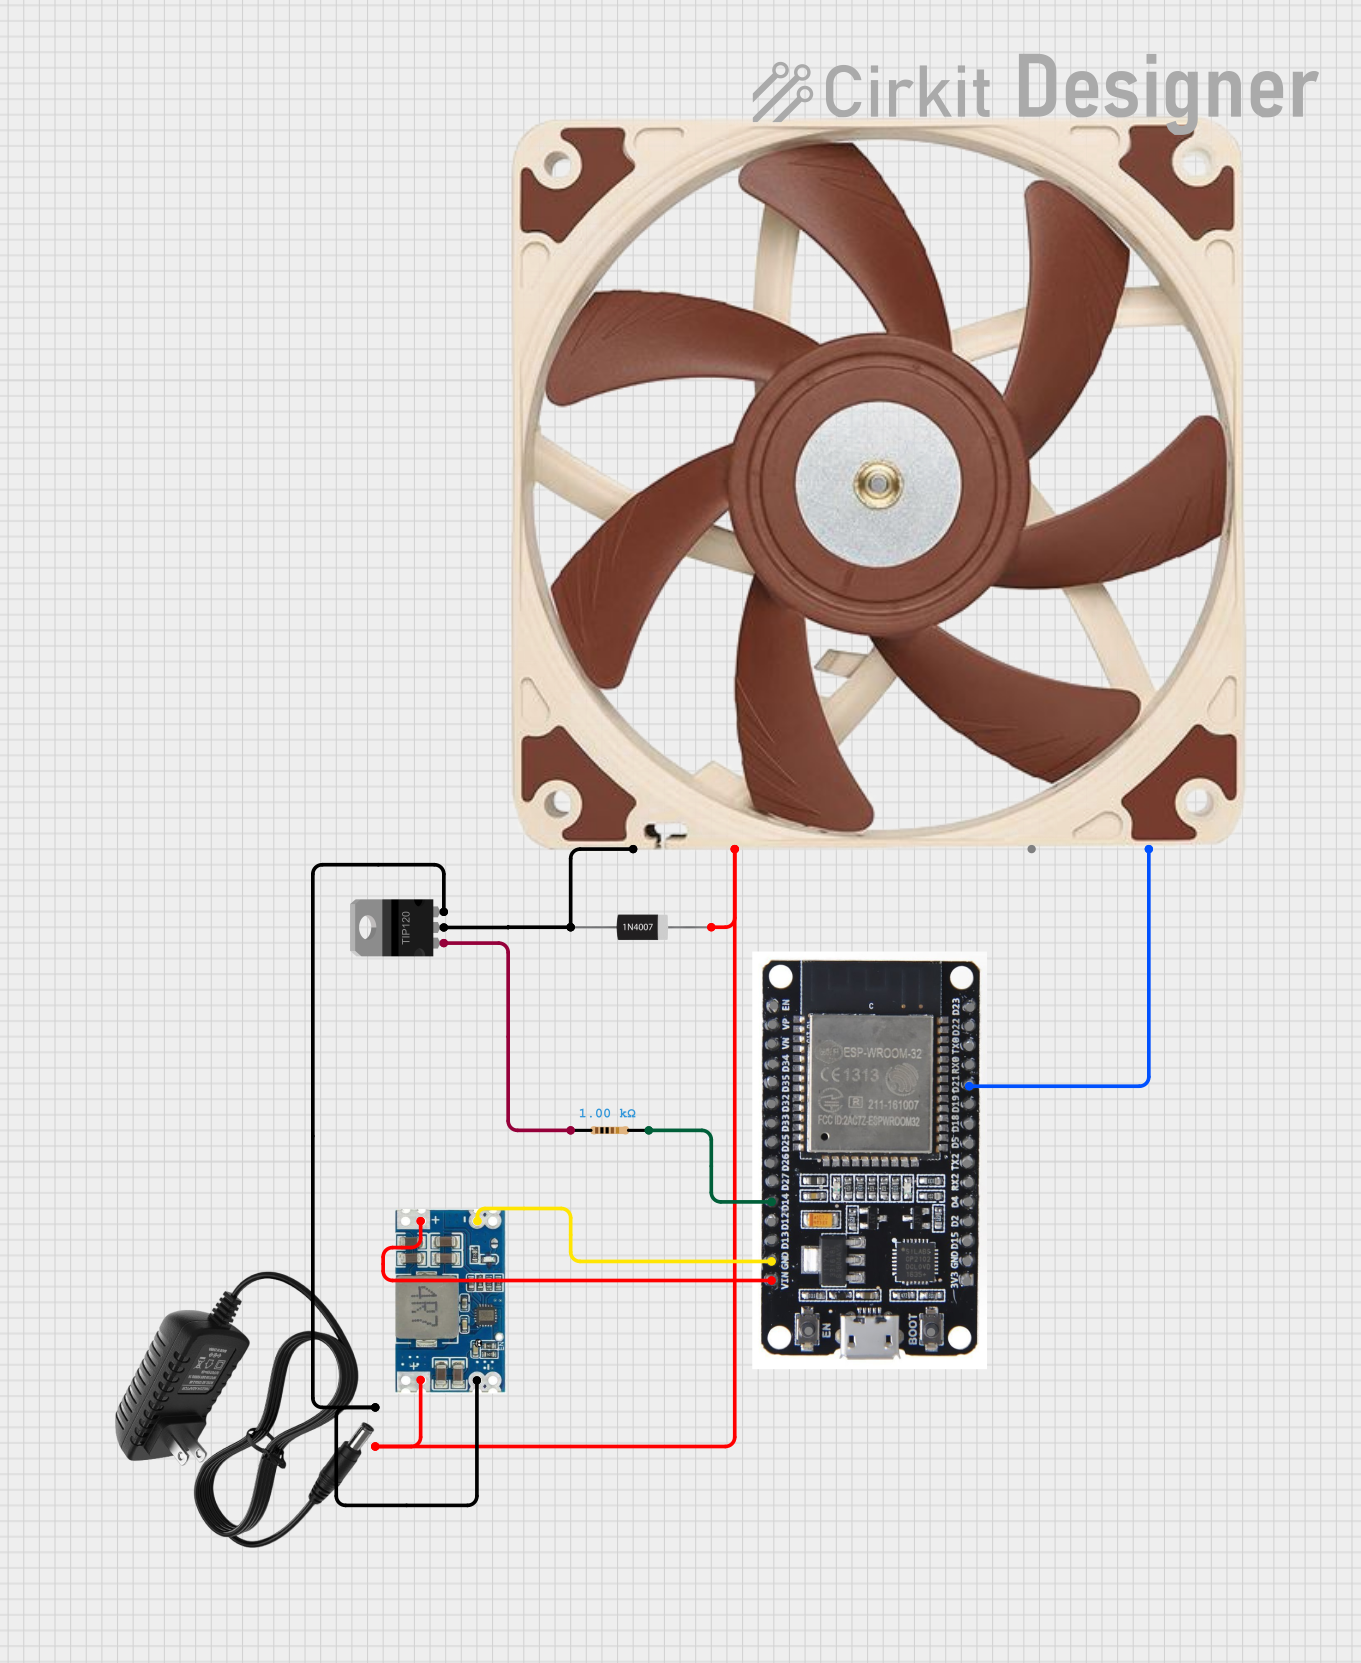
Explore Projects Built with Noctua 40mm NF-A4x20 5V PWM 5000RPM Fan
Common Applications and Use Cases
- Small Form Factor PCs: Ideal for cooling compact computer systems.
- Embedded Systems: Suitable for cooling embedded electronics and microcontrollers.
- Networking Equipment: Used in routers, switches, and other networking devices.
- 3D Printers: Provides cooling for extruders and electronics.
- DIY Projects: Perfect for custom electronics and hobbyist projects.
Technical Specifications
Key Technical Details
| Parameter | Value |
|---|---|
| Manufacturer | Noctua |
| Part ID | NF-A4x20 |
| Size | 40mm x 40mm x 20mm |
| Voltage | 5V |
| Current | 0.1A |
| Power Consumption | 0.5W |
| Speed | 5000 RPM (max) |
| Airflow | 9.4 m³/h |
| Noise Level | 14.9 dB(A) |
| Bearing Type | SSO2 Bearing |
| Connector Type | 4-pin PWM |
Pin Configuration and Descriptions
| Pin Number | Pin Name | Description |
|---|---|---|
| 1 | GND | Ground |
| 2 | +5V | Power Supply (5V) |
| 3 | RPM | Tachometer Output (Speed Feedback) |
| 4 | PWM | Pulse Width Modulation (Speed Control) |
Usage Instructions
How to Use the Component in a Circuit
To use the Noctua NF-A4x20 fan in a circuit, follow these steps:
- Power Connection: Connect the +5V pin to a 5V power supply and the GND pin to the ground.
- PWM Control: Connect the PWM pin to a PWM-capable output pin on your microcontroller (e.g., Arduino).
- RPM Feedback: Optionally, connect the RPM pin to an input pin on your microcontroller to monitor the fan speed.
Important Considerations and Best Practices
- Power Supply: Ensure that the power supply can provide a stable 5V output.
- PWM Signal: Use a PWM frequency between 20 kHz and 25 kHz for optimal performance.
- Mounting: Secure the fan properly to avoid vibrations and noise.
- Airflow Direction: Ensure the fan is oriented correctly to direct airflow where needed.
Example: Connecting to an Arduino UNO
Circuit Diagram
Arduino UNO          Noctua NF-A4x20
-----------          ----------------
GND  --------------> GND
5V   --------------> +5V
D3   --------------> PWM
A0   --------------> RPM (optional)
Arduino Code
// Noctua NF-A4x20 Fan Control with Arduino UNO

const int pwmPin = 3;  // PWM control pin
const int rpmPin = A0; // RPM feedback pin (optional)

void setup() {
  pinMode(pwmPin, OUTPUT);
  pinMode(rpmPin, INPUT);
  Serial.begin(9600);
}

void loop() {
  // Set fan speed to 50% duty cycle
  analogWrite(pwmPin, 128);

  // Read RPM feedback (optional)
  int rpmValue = analogRead(rpmPin);
  Serial.print("RPM Value: ");
  Serial.println(rpmValue);

  delay(1000); // Wait for 1 second
}
Troubleshooting and FAQs
Common Issues Users Might Face
Fan Not Spinning:
- Solution: Check the power connections and ensure the 5V supply is stable.
- Tip: Verify the PWM signal is being generated correctly.
Fan Speed Not Adjustable:
- Solution: Ensure the PWM pin is connected to a PWM-capable output.
- Tip: Use a PWM frequency between 20 kHz and 25 kHz.
Excessive Noise:
- Solution: Check for proper mounting and secure the fan to reduce vibrations.
- Tip: Ensure the fan is not obstructed and airflow is not blocked.
FAQs
Q: Can I use the fan with a 3.3V power supply?
- A: No, the fan requires a 5V power supply for proper operation.
Q: What is the optimal PWM frequency for this fan?
- A: The optimal PWM frequency is between 20 kHz and 25 kHz.
Q: How can I monitor the fan speed?
- A: Connect the RPM pin to an input pin on your microcontroller and read the tachometer output.
Q: Can I use this fan in a 3D printer?
- A: Yes, the Noctua NF-A4x20 is suitable for cooling extruders and electronics in 3D printers.
This documentation provides a comprehensive guide to using the Noctua NF-A4x20 5V PWM 5000RPM fan in various applications. Whether you are a beginner or an experienced user, this guide will help you effectively integrate this high-performance cooling fan into your projects.