How to Use Pmod MicroSD: Examples, Pinouts, and Specs
Introduction
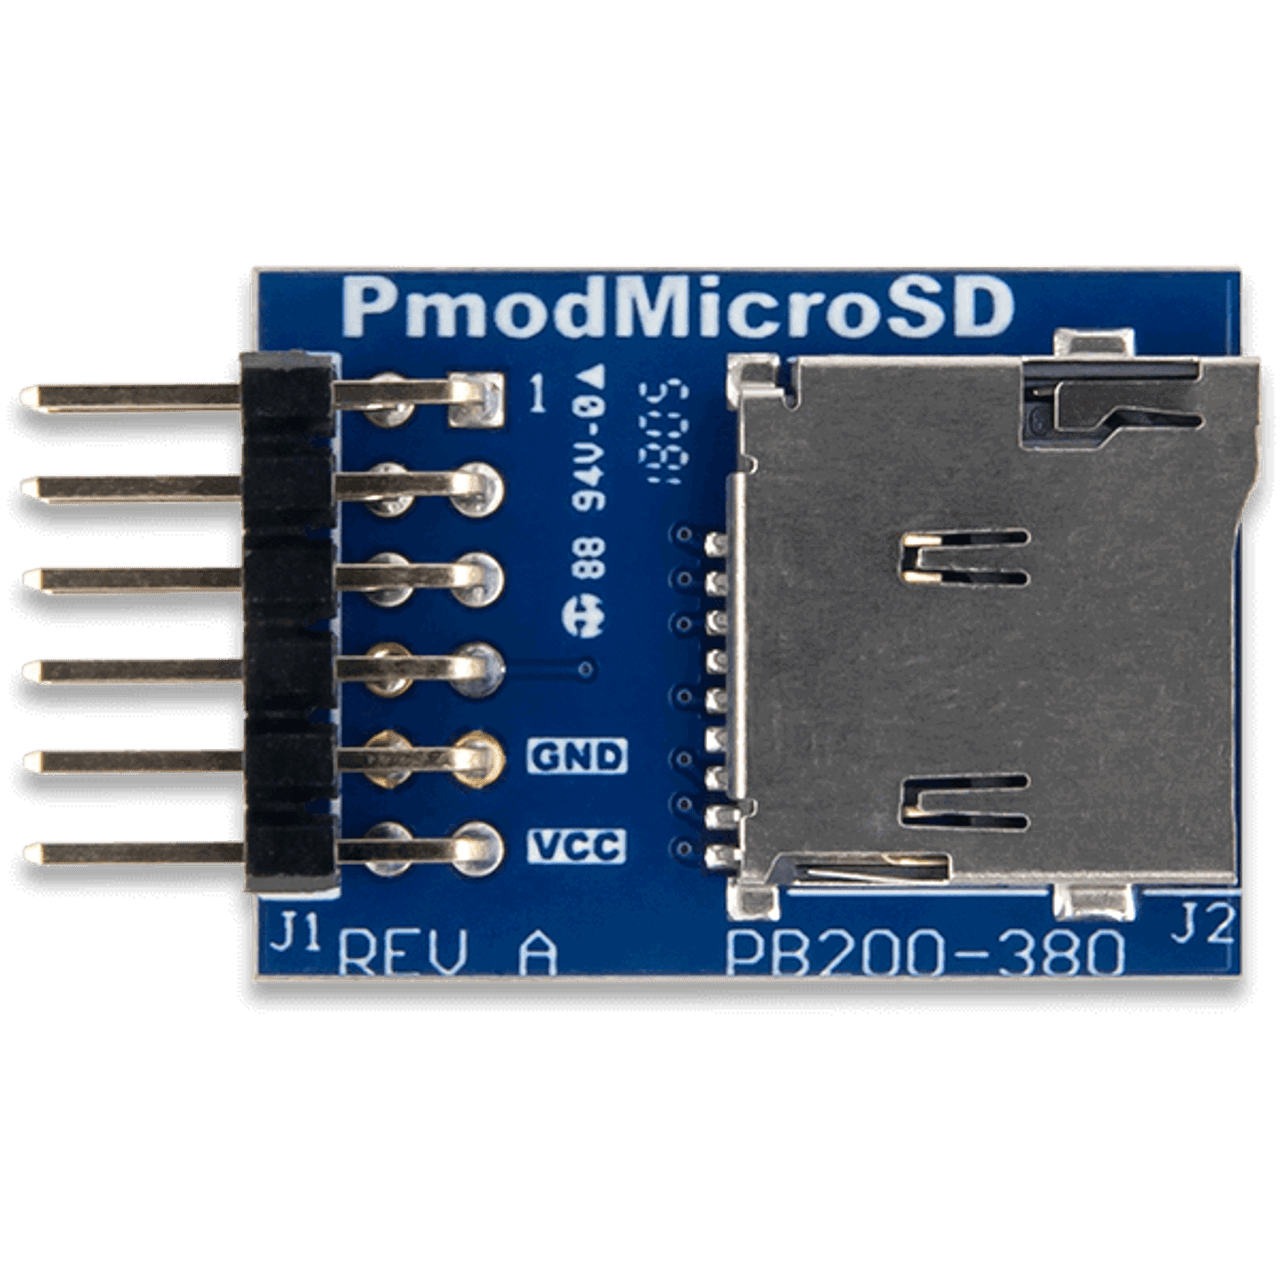
The Pmod MicroSD (Manufacturer Part ID: 1286-1200-ND) is a versatile interface module designed by Digilent. It allows for the connection of a MicroSD card to a microcontroller or FPGA, enabling efficient data storage and retrieval. This module is ideal for applications requiring large amounts of non-volatile memory, such as data logging, multimedia storage, and file management.
Explore Projects Built with Pmod MicroSD

Explore Projects Built with Pmod MicroSD
Common Applications and Use Cases
- Data logging for sensors and IoT devices
- Storing multimedia files (e.g., images, audio, video)
- File system management in embedded systems
- Bootloading firmware or configuration files
- Applications requiring portable and removable storage
Technical Specifications
The Pmod MicroSD is built to interface seamlessly with microcontrollers and FPGAs via the SPI protocol. Below are its key technical details:
Key Technical Details
- Interface Protocol: SPI (Serial Peripheral Interface)
- Operating Voltage: 3.3V
- Logic Level Compatibility: 3.3V
- MicroSD Card Support: Standard MicroSD cards (up to 32GB, FAT32 file system)
- Connector Type: MicroSD card slot
- Dimensions: 0.8" × 1.3" (20.32mm × 33.02mm)
Pin Configuration and Descriptions
The Pmod MicroSD uses a 6-pin interface for SPI communication. The pinout is as follows:
| Pin Number | Pin Name | Description |
|---|---|---|
| 1 | CS | Chip Select (Active Low) |
| 2 | MOSI | Master Out Slave In (Data Input) |
| 3 | MISO | Master In Slave Out (Data Output) |
| 4 | SCK | Serial Clock |
| 5 | GND | Ground |
| 6 | VCC | Power Supply (3.3V) |
Usage Instructions
The Pmod MicroSD is straightforward to use in embedded systems. Below are the steps and best practices for integrating it into your project.
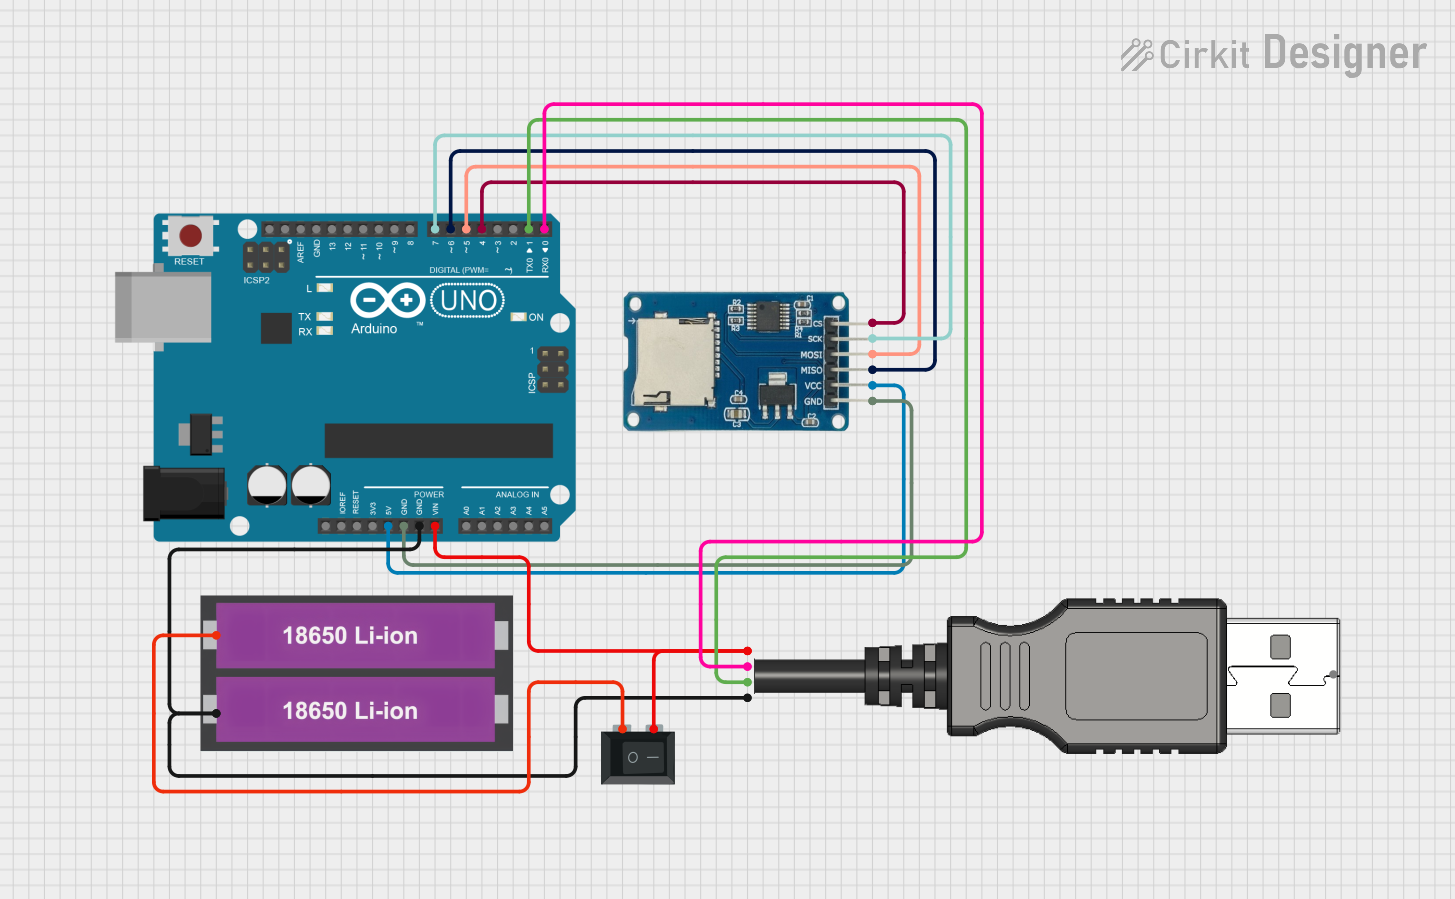
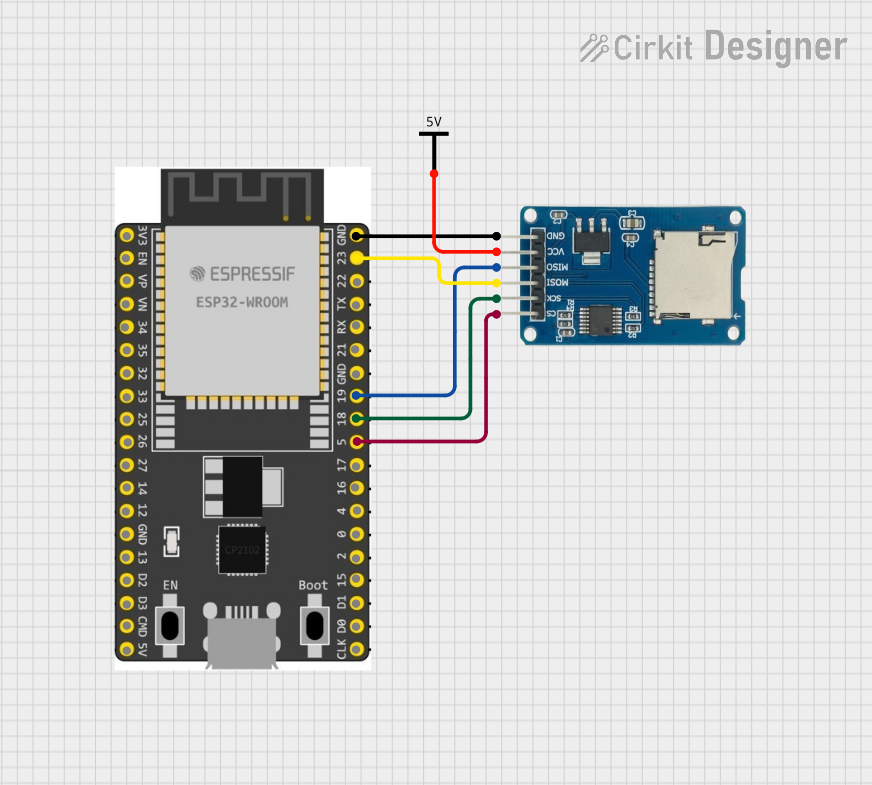
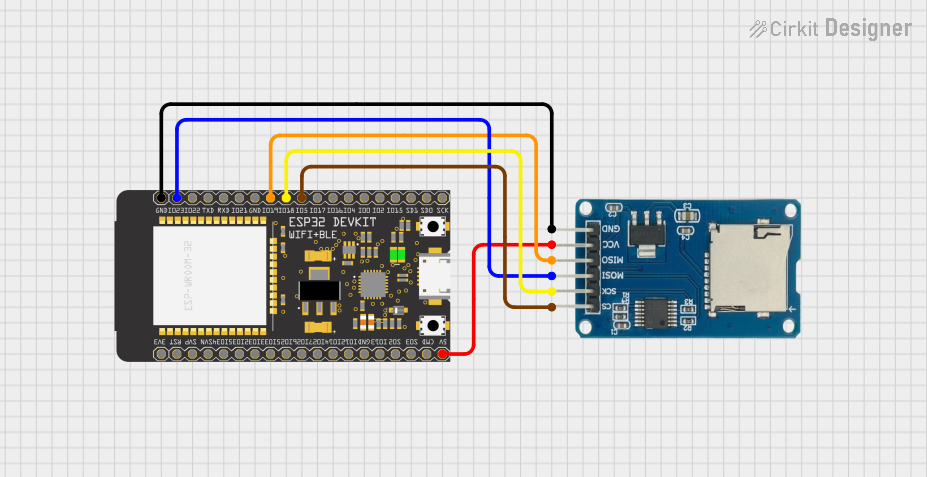
How to Use the Pmod MicroSD in a Circuit
Connect the Pmod MicroSD to Your Microcontroller or FPGA:
- Use the SPI pins (CS, MOSI, MISO, SCK) to connect the module to the corresponding SPI pins on your microcontroller or FPGA.
- Ensure the VCC pin is connected to a 3.3V power supply and the GND pin is connected to ground.
Initialize the MicroSD Card:
- Use an appropriate library (e.g., the Arduino SD library or a custom SPI driver) to initialize the MicroSD card.
- Ensure the card is formatted with the FAT32 file system for compatibility.
Read and Write Data:
- Use SPI commands or library functions to read from and write to the MicroSD card.
- For Arduino users, the
SD.open(),SD.read(), andSD.write()functions are commonly used.
Handle Errors Gracefully:
- Check for initialization errors or file system issues during setup.
- Implement error-handling routines to ensure data integrity.
Important Considerations and Best Practices
- Voltage Levels: The Pmod MicroSD operates at 3.3V. If your microcontroller uses 5V logic, use a level shifter to avoid damaging the module.
- Card Compatibility: Ensure the MicroSD card is formatted as FAT32 and does not exceed 32GB.
- SPI Speed: Configure the SPI clock speed appropriately. A typical starting point is 4MHz.
- ESD Protection: Handle the MicroSD card and module carefully to avoid electrostatic discharge damage.
Example Code for Arduino UNO
Below is an example of how to use the Pmod MicroSD with an Arduino UNO. Note that a level shifter is required for voltage compatibility.
#include <SPI.h>
#include <SD.h>

// Define the Chip Select (CS) pin for the Pmod MicroSD
const int chipSelect = 10;

void setup() {
  // Initialize serial communication for debugging
  Serial.begin(9600);
  while (!Serial) {
    ; // Wait for the serial port to connect
  }

  Serial.println("Initializing SD card...");

  // Initialize the SD card
  if (!SD.begin(chipSelect)) {
    Serial.println("SD card initialization failed!");
    return;
  }
  Serial.println("SD card initialized successfully.");

  // Create and write to a file
  File dataFile = SD.open("example.txt", FILE_WRITE);
  if (dataFile) {
    dataFile.println("Hello, Pmod MicroSD!");
    dataFile.close();
    Serial.println("Data written to example.txt.");
  } else {
    Serial.println("Error opening example.txt for writing.");
  }
}

void loop() {
  // Nothing to do in the loop
}
Troubleshooting and FAQs
Common Issues and Solutions
SD Card Initialization Fails:
- Cause: Incorrect wiring or incompatible card format.
- Solution: Double-check the connections and ensure the card is formatted as FAT32.
File Not Found or Cannot Be Opened:
- Cause: Incorrect file path or file permissions.
- Solution: Verify the file path and ensure the file exists on the card.
Data Corruption:
- Cause: Power loss during write operations.
- Solution: Use proper shutdown procedures and avoid removing the card during operation.
SPI Communication Issues:
- Cause: Incorrect SPI clock speed or misconfigured pins.
- Solution: Adjust the SPI clock speed and verify the pin connections.
FAQs
Q: Can I use a 64GB MicroSD card with the Pmod MicroSD?
A: No, the Pmod MicroSD supports cards up to 32GB formatted as FAT32.Q: Is the Pmod MicroSD compatible with 5V microcontrollers?
A: Yes, but you must use a level shifter to convert 5V logic to 3.3V.Q: How do I check if the MicroSD card is inserted?
A: Use theSD.begin()function to detect the presence of a card during initialization.Q: Can I use the Pmod MicroSD with an FPGA?
A: Yes, the module is compatible with FPGAs that support SPI communication.
By following this documentation, you can effectively integrate the Pmod MicroSD into your projects for reliable data storage and retrieval.