The DRV8825 is a high-performance stepper motor driver designed for precise control of bipolar stepper motors. It features adjustable current control, microstepping capabilities (up to 1/32 steps), and can handle up to 2.5A per phase with proper cooling. This makes it an ideal choice for applications requiring smooth and accurate motor control, such as 3D printers, CNC machines, and robotics. Its compact design and ease of integration make it a popular choice among hobbyists and professionals alike.
Explore Projects Built with DRV8825
Use Cirkit Designer to design, explore, and prototype these projects online. Some projects support real-time simulation. Click "Open Project" to start designing instantly!
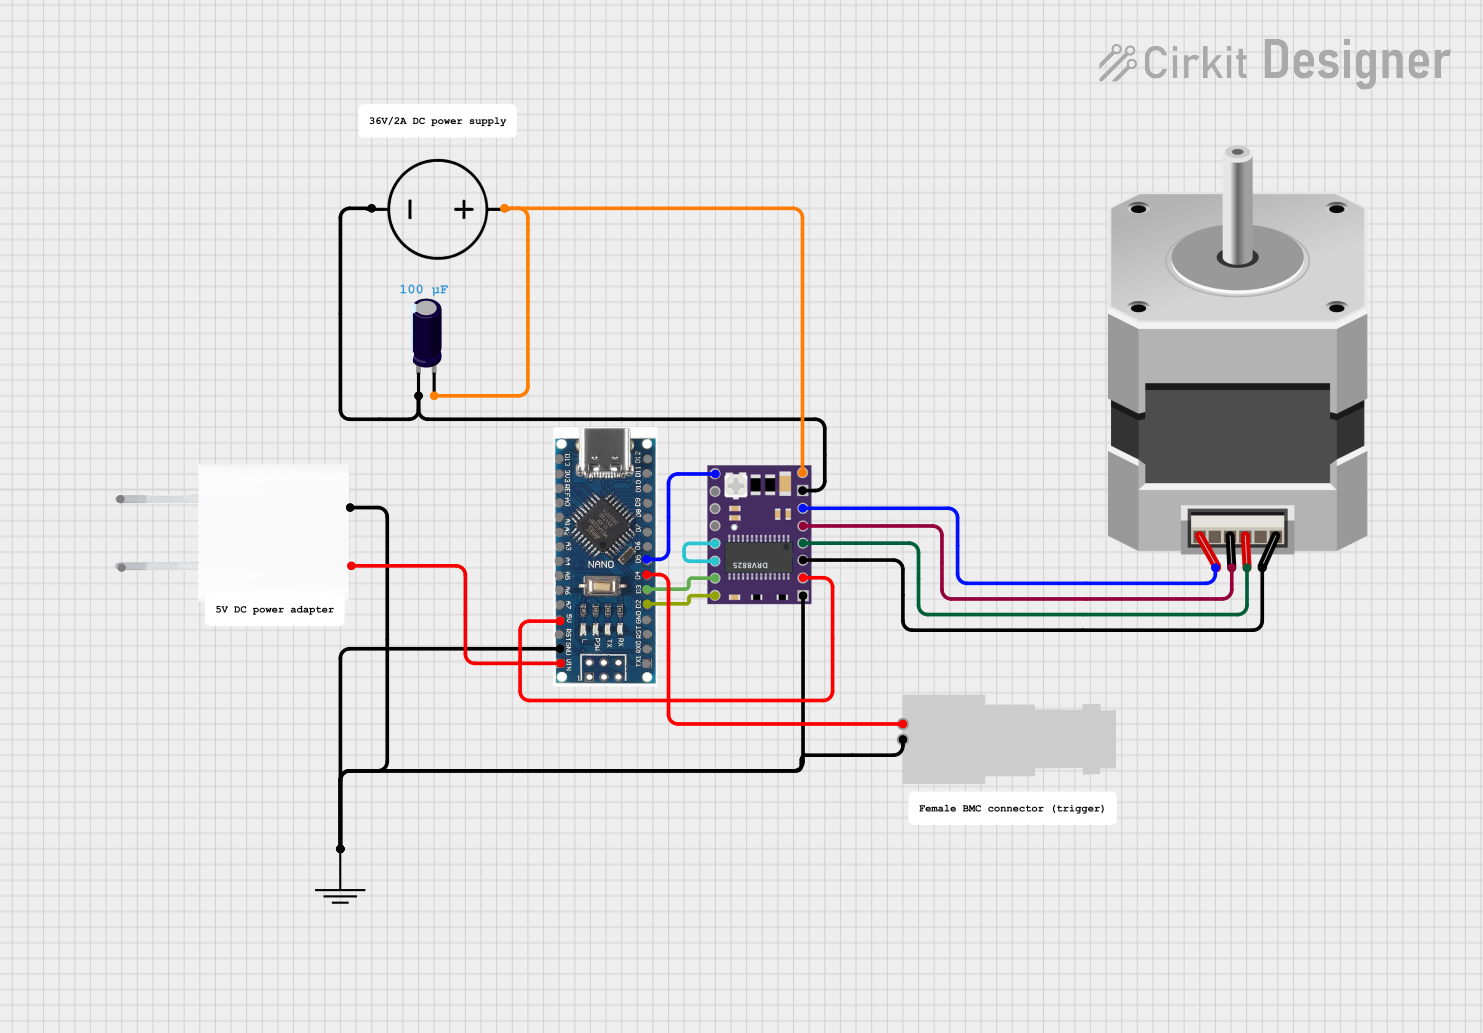
This circuit is designed to control a bipolar stepper motor using a DRV8825 stepper motor driver, which is interfaced with a Nano 3.0 ATmega328P microcontroller. The microcontroller sends step and direction signals to the DRV8825, which in turn drives the stepper motor's coils. Power is supplied to the system through a 5V adapter for the logic and a DC power source for the motor, with an electrolytic capacitor for voltage smoothing on the motor supply.
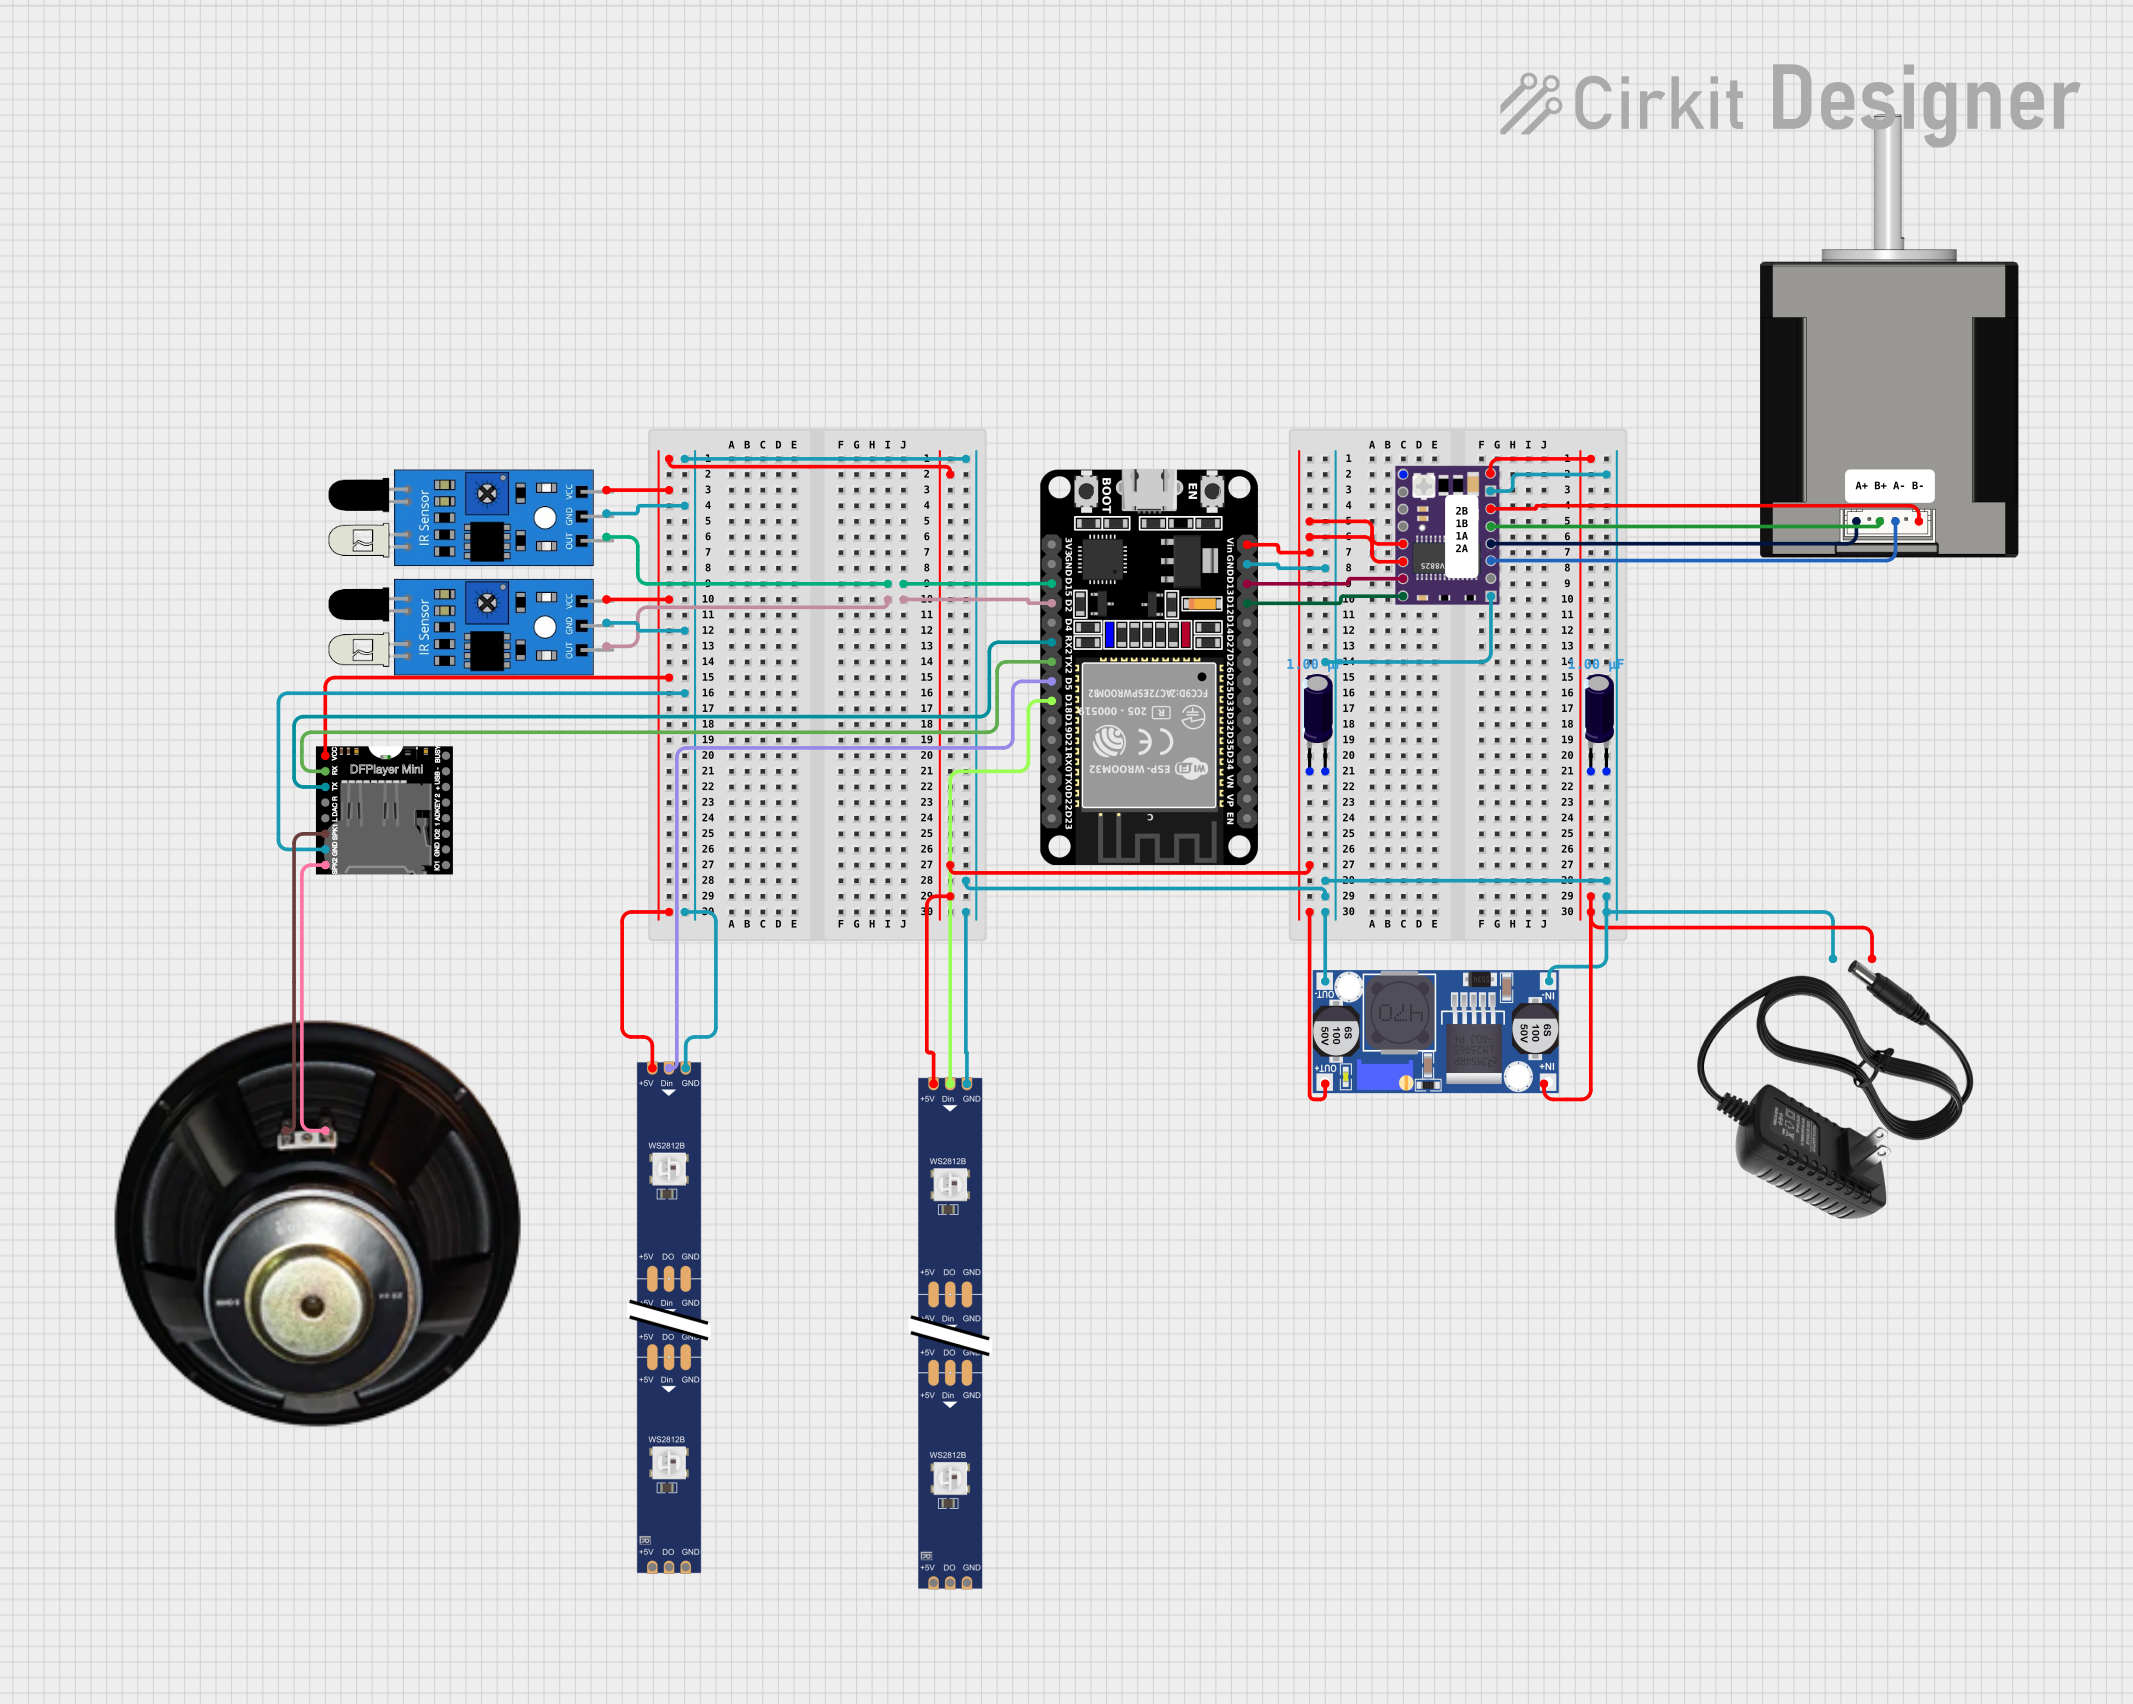
This circuit is designed for an interactive miniature golf course feature, which includes a stepper motor controlled by a DRV8825 driver for a rotating windmill obstacle, two IR sensors for detecting the presence of a golf ball, and two LED strips for visual effects. An ESP32 microcontroller is programmed to manage the sensors, control the stepper motor, drive the LED strips, and interface with a DFPlayer Mini MP3 module for sound effects. The circuit is powered by a 12V power supply with a buck converter to step down the voltage for the logic components, and electrolytic capacitors are used for voltage smoothing.
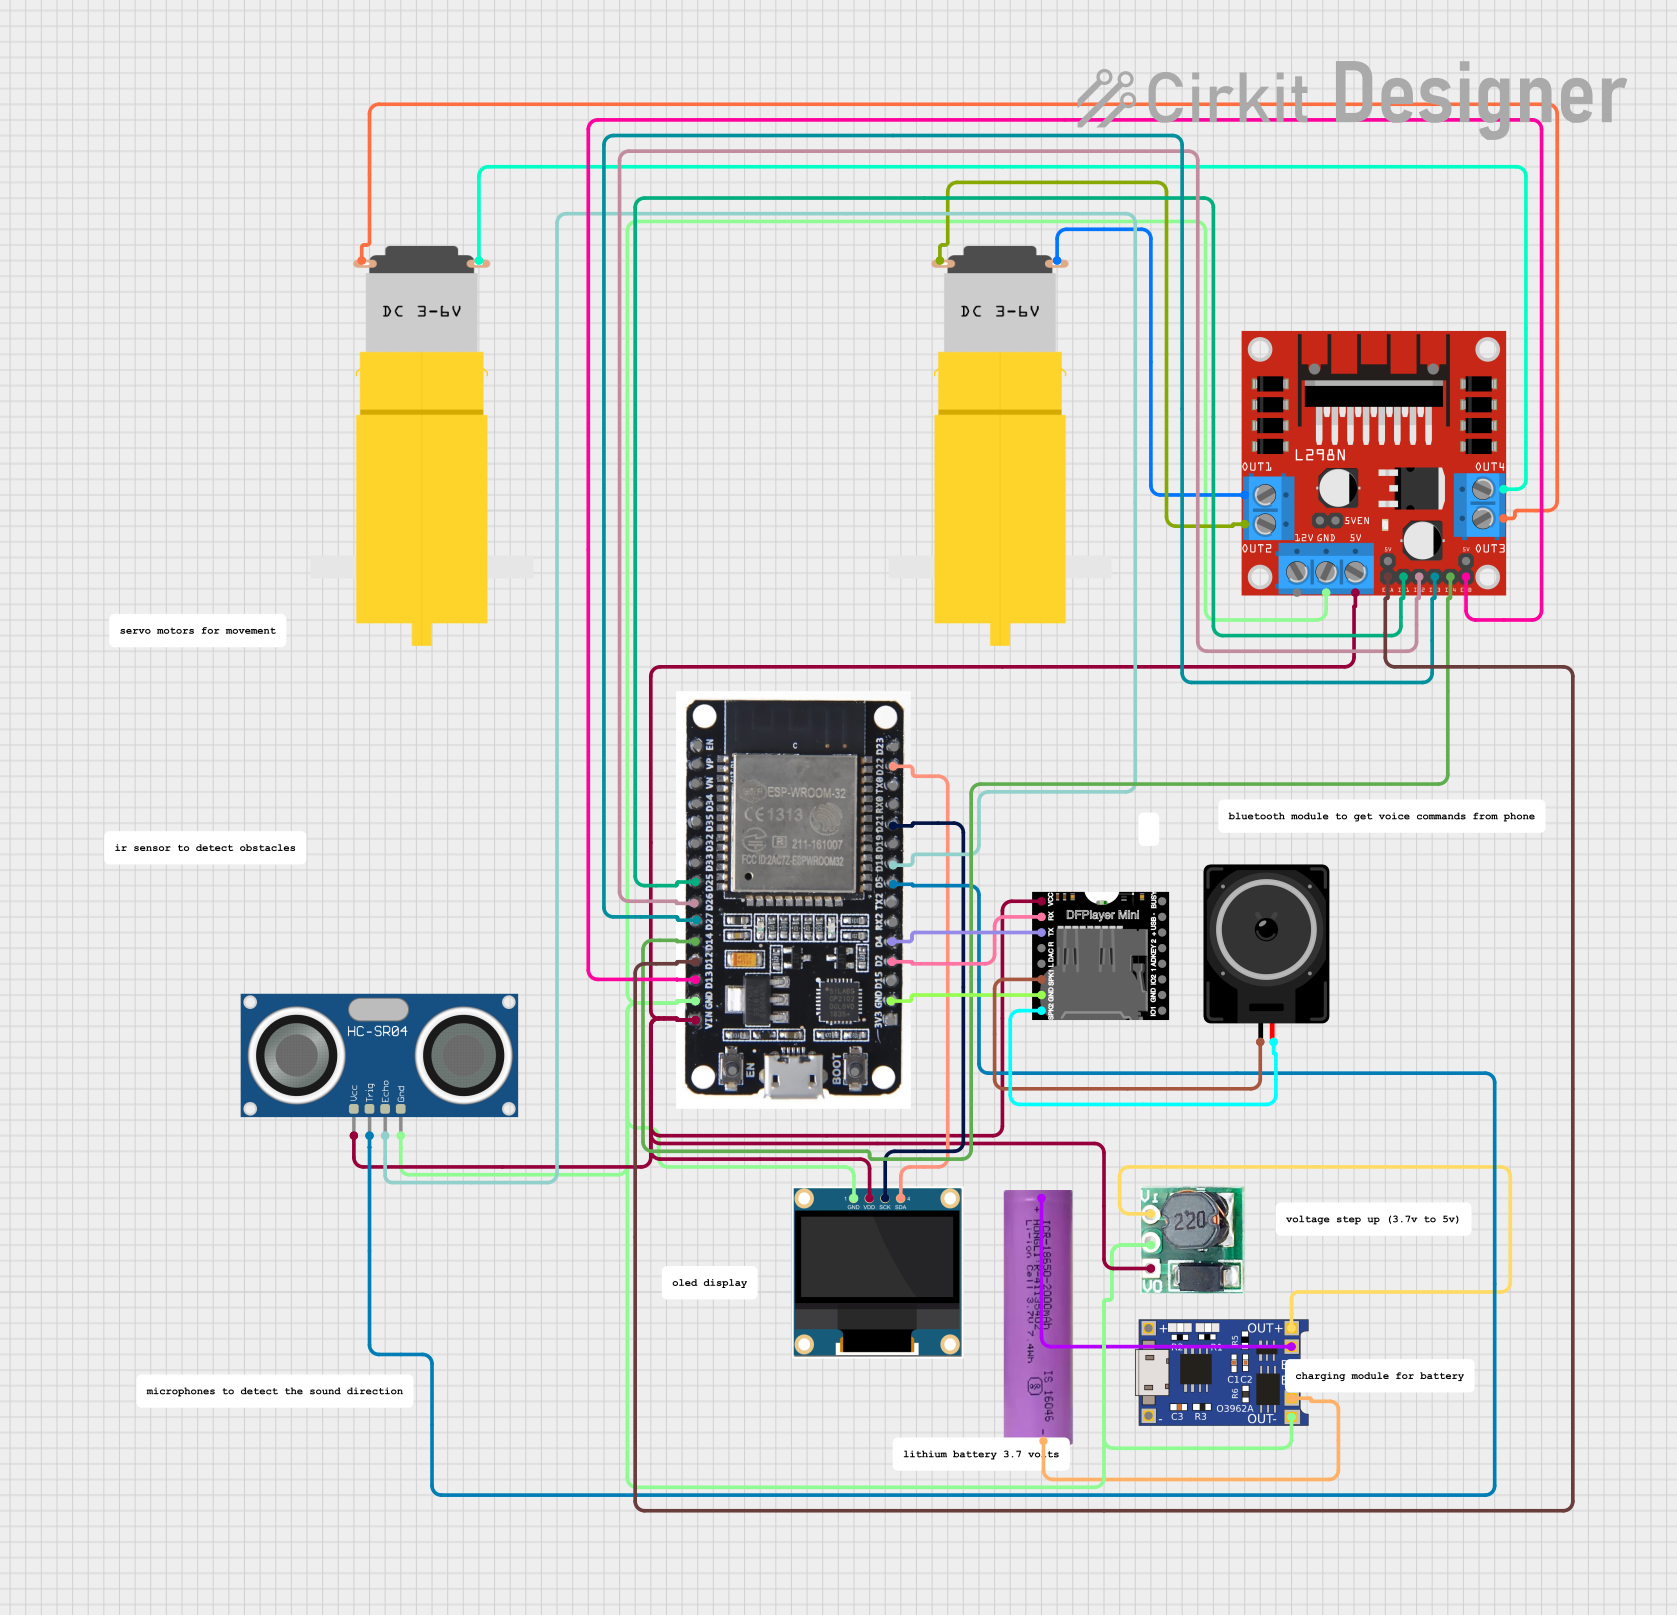
This circuit is a battery-powered system featuring an ESP32 microcontroller that controls an OLED display, a motor driver for two hobby motors, an ultrasonic sensor for distance measurement, and a DFPlayer Mini for audio output through a loudspeaker. The TP4056 module manages battery charging, and a step-up boost converter provides a stable 5V supply to the components.
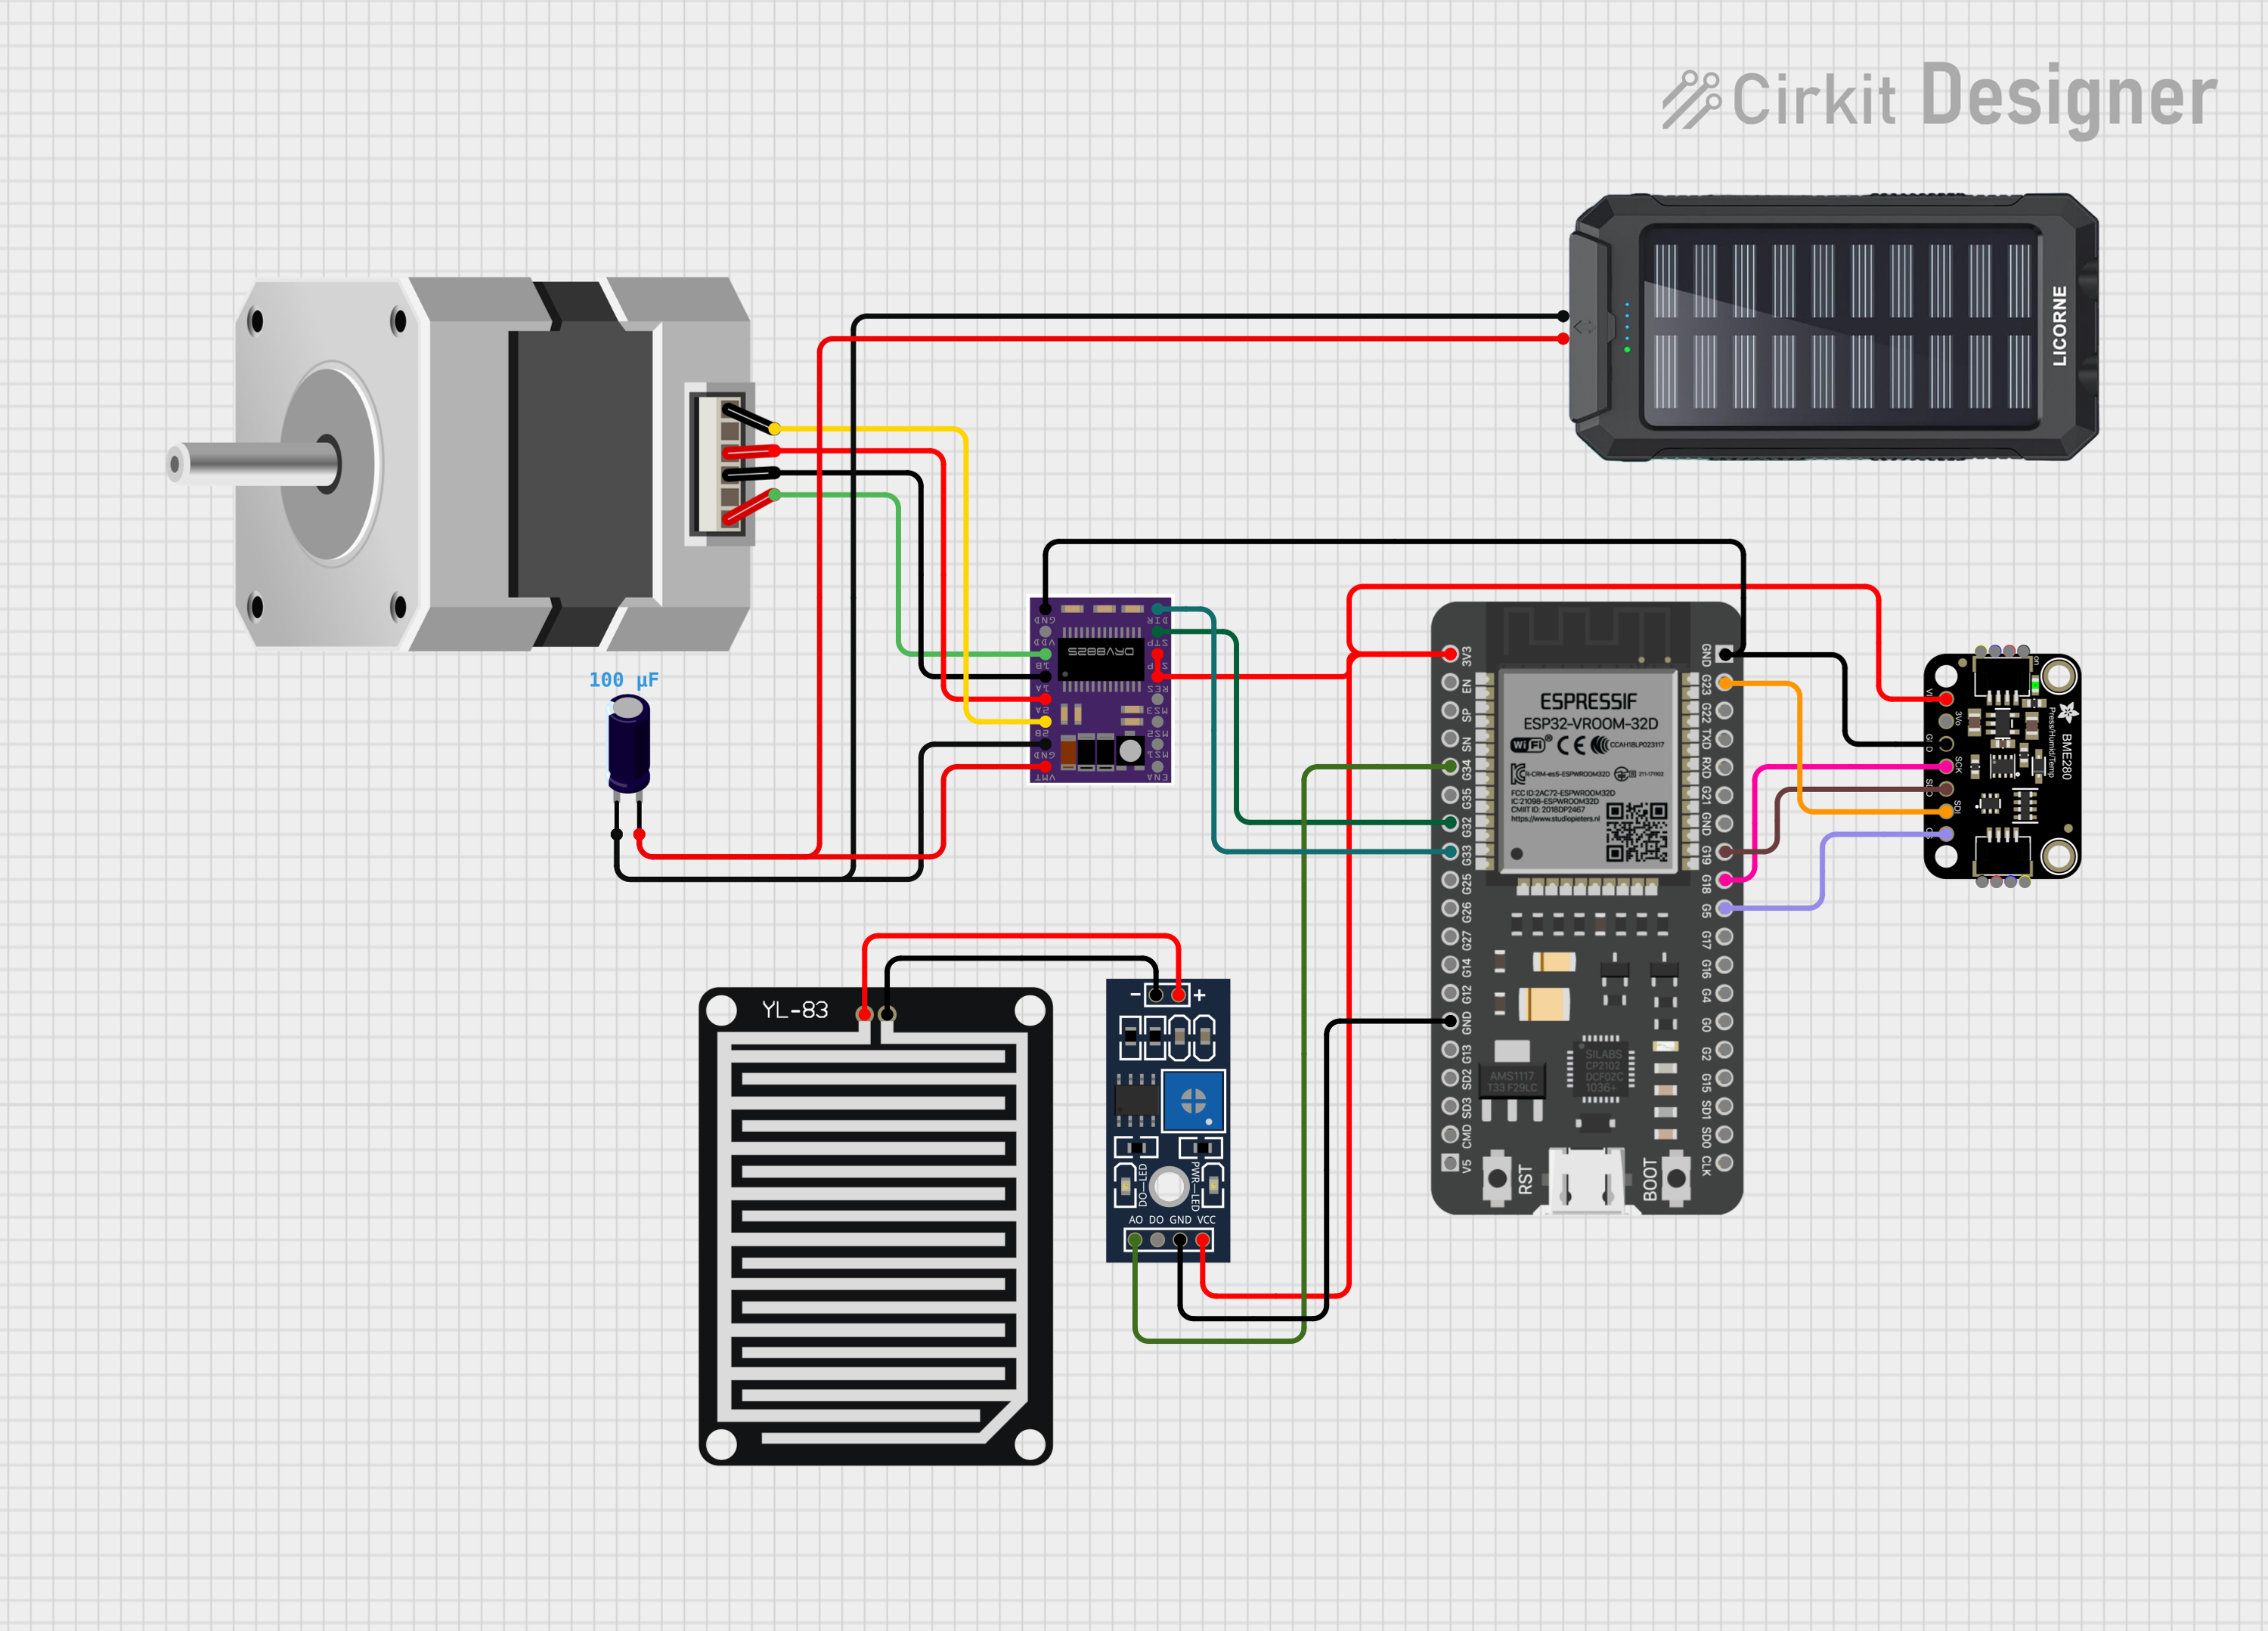
This circuit features an ESP32 microcontroller interfaced with a DRV8825 stepper motor driver to control a bipolar stepper motor, an Adafruit BME280 sensor for environmental monitoring, and a YL-83 rain sensor for detecting precipitation. The ESP32 uses I2C communication to interact with the BME280 sensor and digital/analog signals to read from the rain sensor's control board. Power management is handled by a solar charger power bank connected to the DRV8825 and a capacitor for voltage smoothing.
Overcurrent Protection: Built-in short-to-ground and shorted-load protection
Dimensions: 15mm x 20mm (approx.)
Pin Configuration and Descriptions
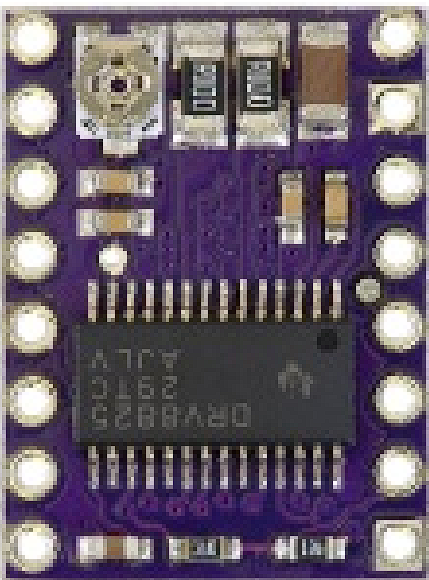
The DRV8825 module has 16 pins. Below is the pinout and description:
Pin
Name
Description
1
VMOT
Motor power supply (8.2V to 45V). Connect to the stepper motor power source.
2
GND
Ground for motor power supply.
3
B2
Motor coil B output 2.
4
B1
Motor coil B output 1.
5
A1
Motor coil A output 1.
6
A2
Motor coil A output 2.
7
GND
Ground for logic power supply.
8
VDD
Logic power supply (3.3V or 5V).
9
ENABLE
Enable/disable the driver (active low).
10
MS1
Microstepping resolution selector (see table below).
11
MS2
Microstepping resolution selector (see table below).
12
MS3
Microstepping resolution selector (see table below).
13
RESET
Resets the driver (active low).
14
SLEEP
Puts the driver into low-power sleep mode (active low).
15
STEP
Step input. Each pulse moves the motor one step.
16
DIR
Direction input. Determines the rotation direction of the motor.
Microstepping Resolution Table
The microstepping resolution is configured using the MS1, MS2, and MS3 pins:
MS1
MS2
MS3
Microstepping Mode
Low
Low
Low
Full Step
High
Low
Low
1/2 Step
Low
High
Low
1/4 Step
High
High
Low
1/8 Step
Low
Low
High
1/16 Step
High
Low
High
1/32 Step
Usage Instructions
Connecting the DRV8825 to a Stepper Motor
Power Supply: Connect the VMOT pin to the motor power supply (8.2V to 45V) and the GND pin to the power ground.
Motor Connections: Connect the stepper motor coils to the A1, A2, B1, and B2 pins. Ensure the correct pairing of the motor wires.
Logic Power: Connect the VDD pin to the logic power supply (3.3V or 5V) and the GND pin to the logic ground.
Control Pins: Connect the STEP and DIR pins to your microcontroller or control circuit. Use the ENABLE pin to enable or disable the driver.
Microstepping: Configure the MS1, MS2, and MS3 pins to set the desired microstepping resolution.
Current Adjustment: Use the onboard potentiometer to adjust the current limit. This prevents overheating and ensures optimal motor performance.
Example: Using DRV8825 with Arduino UNO
Below is an example code to control a stepper motor using the DRV8825 and Arduino UNO:
// Define the control pins for the DRV8825
#define STEP_PIN 3  // Connect to the STEP pin of DRV8825
#define DIR_PIN 4   // Connect to the DIR pin of DRV8825

void setup() {
  pinMode(STEP_PIN, OUTPUT); // Set STEP pin as output
  pinMode(DIR_PIN, OUTPUT);  // Set DIR pin as output

  digitalWrite(DIR_PIN, HIGH); // Set initial direction (HIGH = clockwise)
}

void loop() {
  // Generate a pulse to move the motor one step
  digitalWrite(STEP_PIN, HIGH); // Set STEP pin HIGH
  delayMicroseconds(500);       // Wait for 500 microseconds
  digitalWrite(STEP_PIN, LOW);  // Set STEP pin LOW
  delayMicroseconds(500);       // Wait for 500 microseconds
}
Important Considerations
Cooling: If driving motors at high currents, ensure proper cooling (e.g., heatsinks or fans) to prevent overheating.
Current Limit: Always set the current limit to match your motor's rated current to avoid damage.
Power Sequence: Always connect the logic power (VDD) before the motor power (VMOT) to prevent damage to the driver.
Decoupling Capacitors: Add a capacitor (e.g., 100µF) across VMOT and GND to reduce voltage spikes.
Troubleshooting and FAQs
Common Issues
Motor Not Moving:
Check the wiring of the motor coils (A1, A2, B1, B2).
Verify the STEP and DIR signals from the microcontroller.
Ensure the ENABLE pin is set to LOW.
Overheating:
Ensure the current limit is set correctly using the potentiometer.
Add a heatsink or fan for better cooling.
Erratic Motor Movement:
Check the microstepping configuration (MS1, MS2, MS3).
Verify the power supply voltage and current rating.
Driver Not Responding:
Ensure the RESET and SLEEP pins are not held LOW.
Verify the logic power (VDD) and motor power (VMOT) connections.
FAQs
Q: Can I use the DRV8825 with a unipolar stepper motor?
A: No, the DRV8825 is designed for bipolar stepper motors only.
Q: How do I calculate the current limit?
A: Use the formula: Current Limit = VREF / (8 * R_sense). For most DRV8825 modules, R_sense is 0.1Ω.
Q: What happens if I exceed the maximum current rating?
A: The driver may overheat or trigger overcurrent protection, potentially damaging the module.
Q: Can I daisy-chain multiple DRV8825 drivers?
A: Yes, you can control multiple drivers using separate STEP and DIR signals for each motor.
By following this documentation, you can effectively integrate the DRV8825 into your projects for precise and reliable stepper motor control.

 Open Project in Cirkit Designer