How to Use SerLCD_16x2: Examples, Pinouts, and Specs
Introduction
The SerLCD_16x2 is a serial LCD module that provides a simple and efficient way to add a user interface to a wide range of electronic projects. With its 16 characters by 2 lines display and blue backlight, it offers clear visibility and a straightforward serial interface for communication. This module is commonly used in DIY electronics, hobby projects, and prototyping, particularly when space is at a premium and ease of use is desired.
Explore Projects Built with SerLCD_16x2
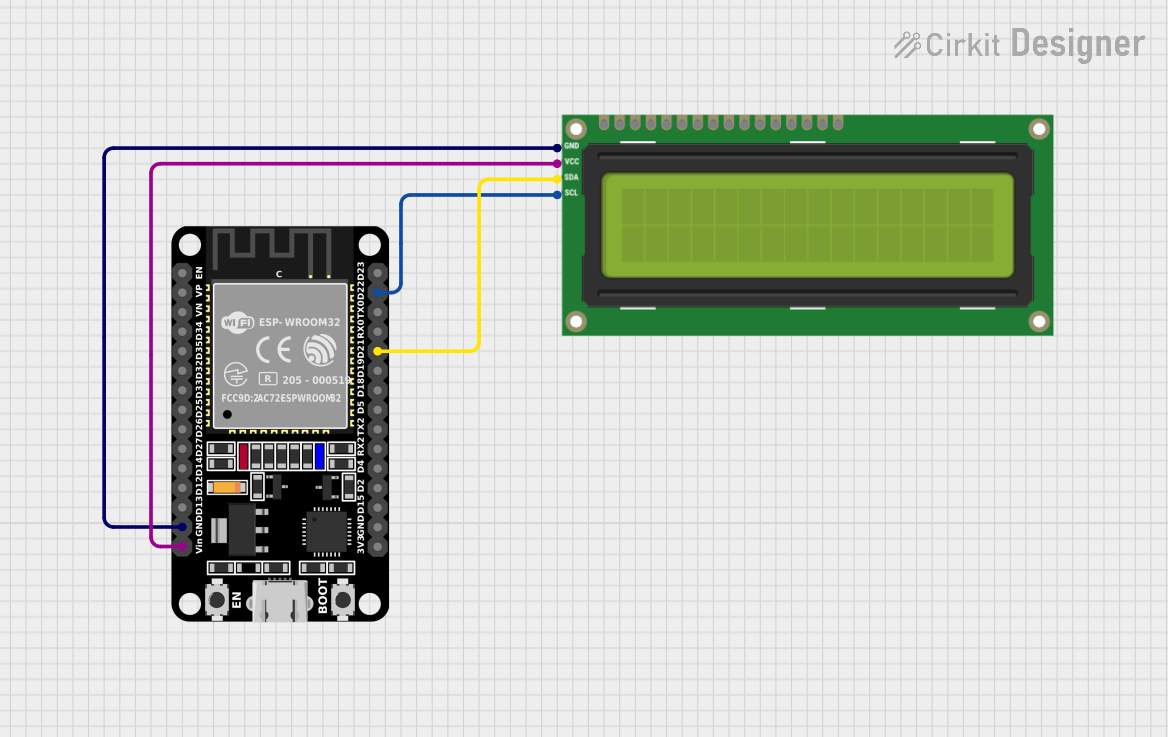
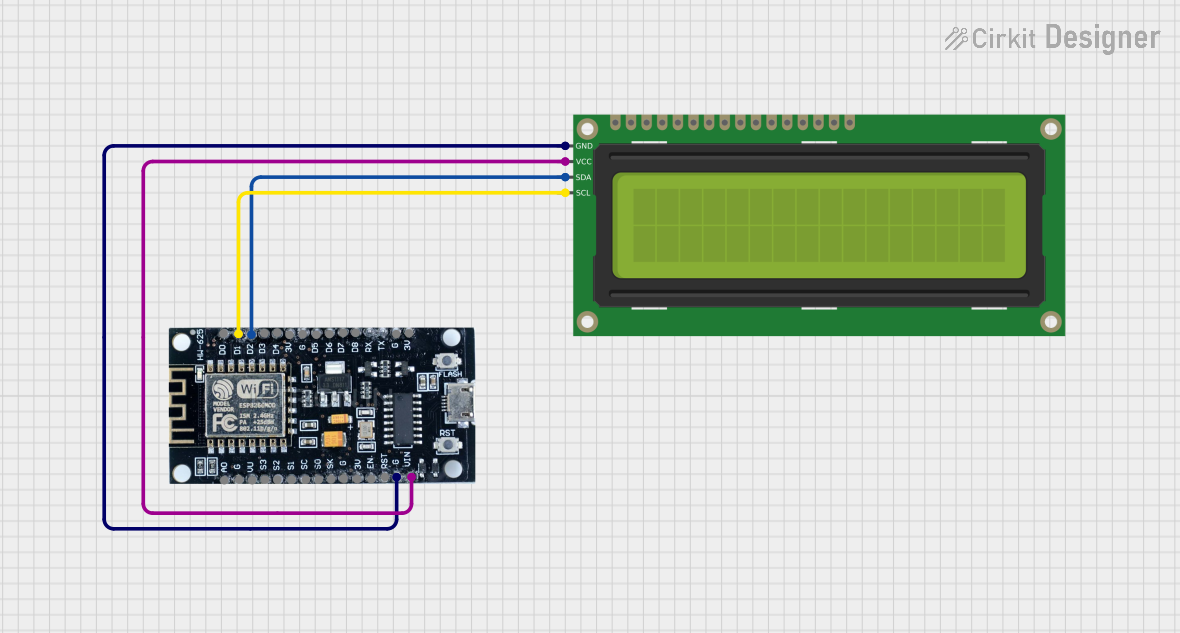

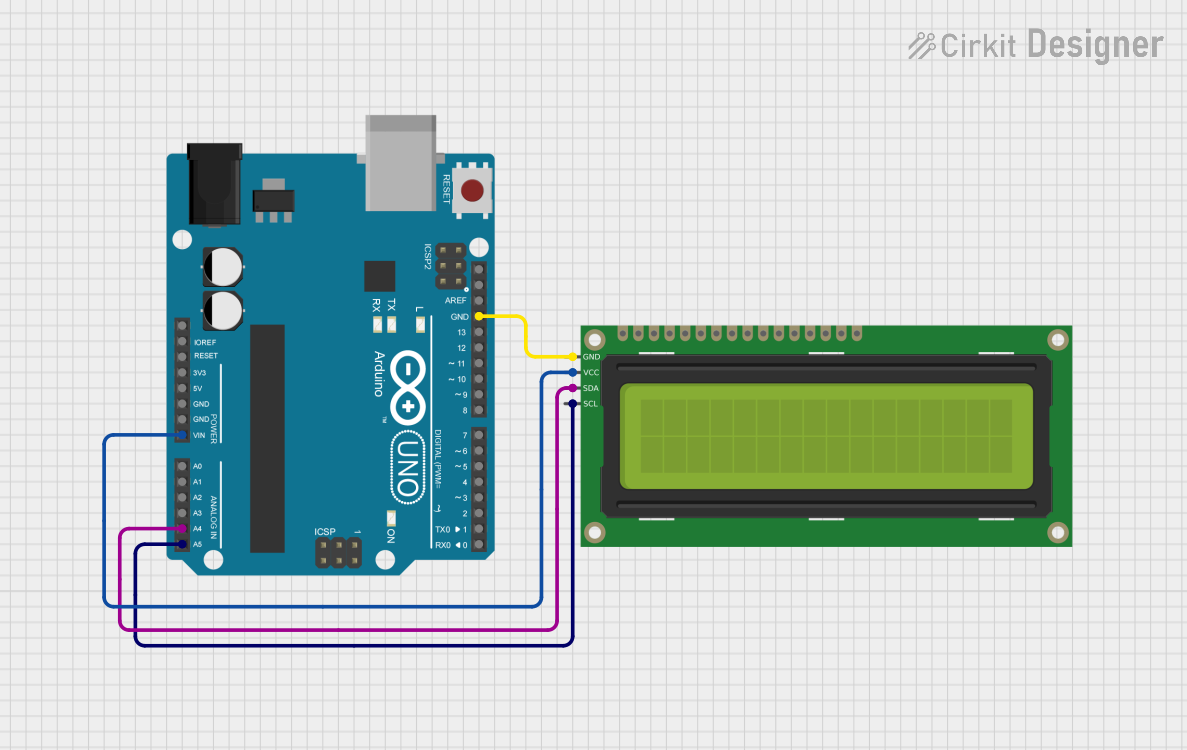
Explore Projects Built with SerLCD_16x2
Common Applications and Use Cases
- User interfaces for microcontroller projects
- Display for sensor readings
- Simple menus for device settings
- Debugging tool for displaying system statuses
Technical Specifications
Key Technical Details
- Display: 16 characters by 2 lines
- Backlight: Blue
- Communication: Serial (UART)
- Operating Voltage: 5V DC
- Current Consumption: 20mA (typical without backlight)
- Backlight Current: 80mA (max)
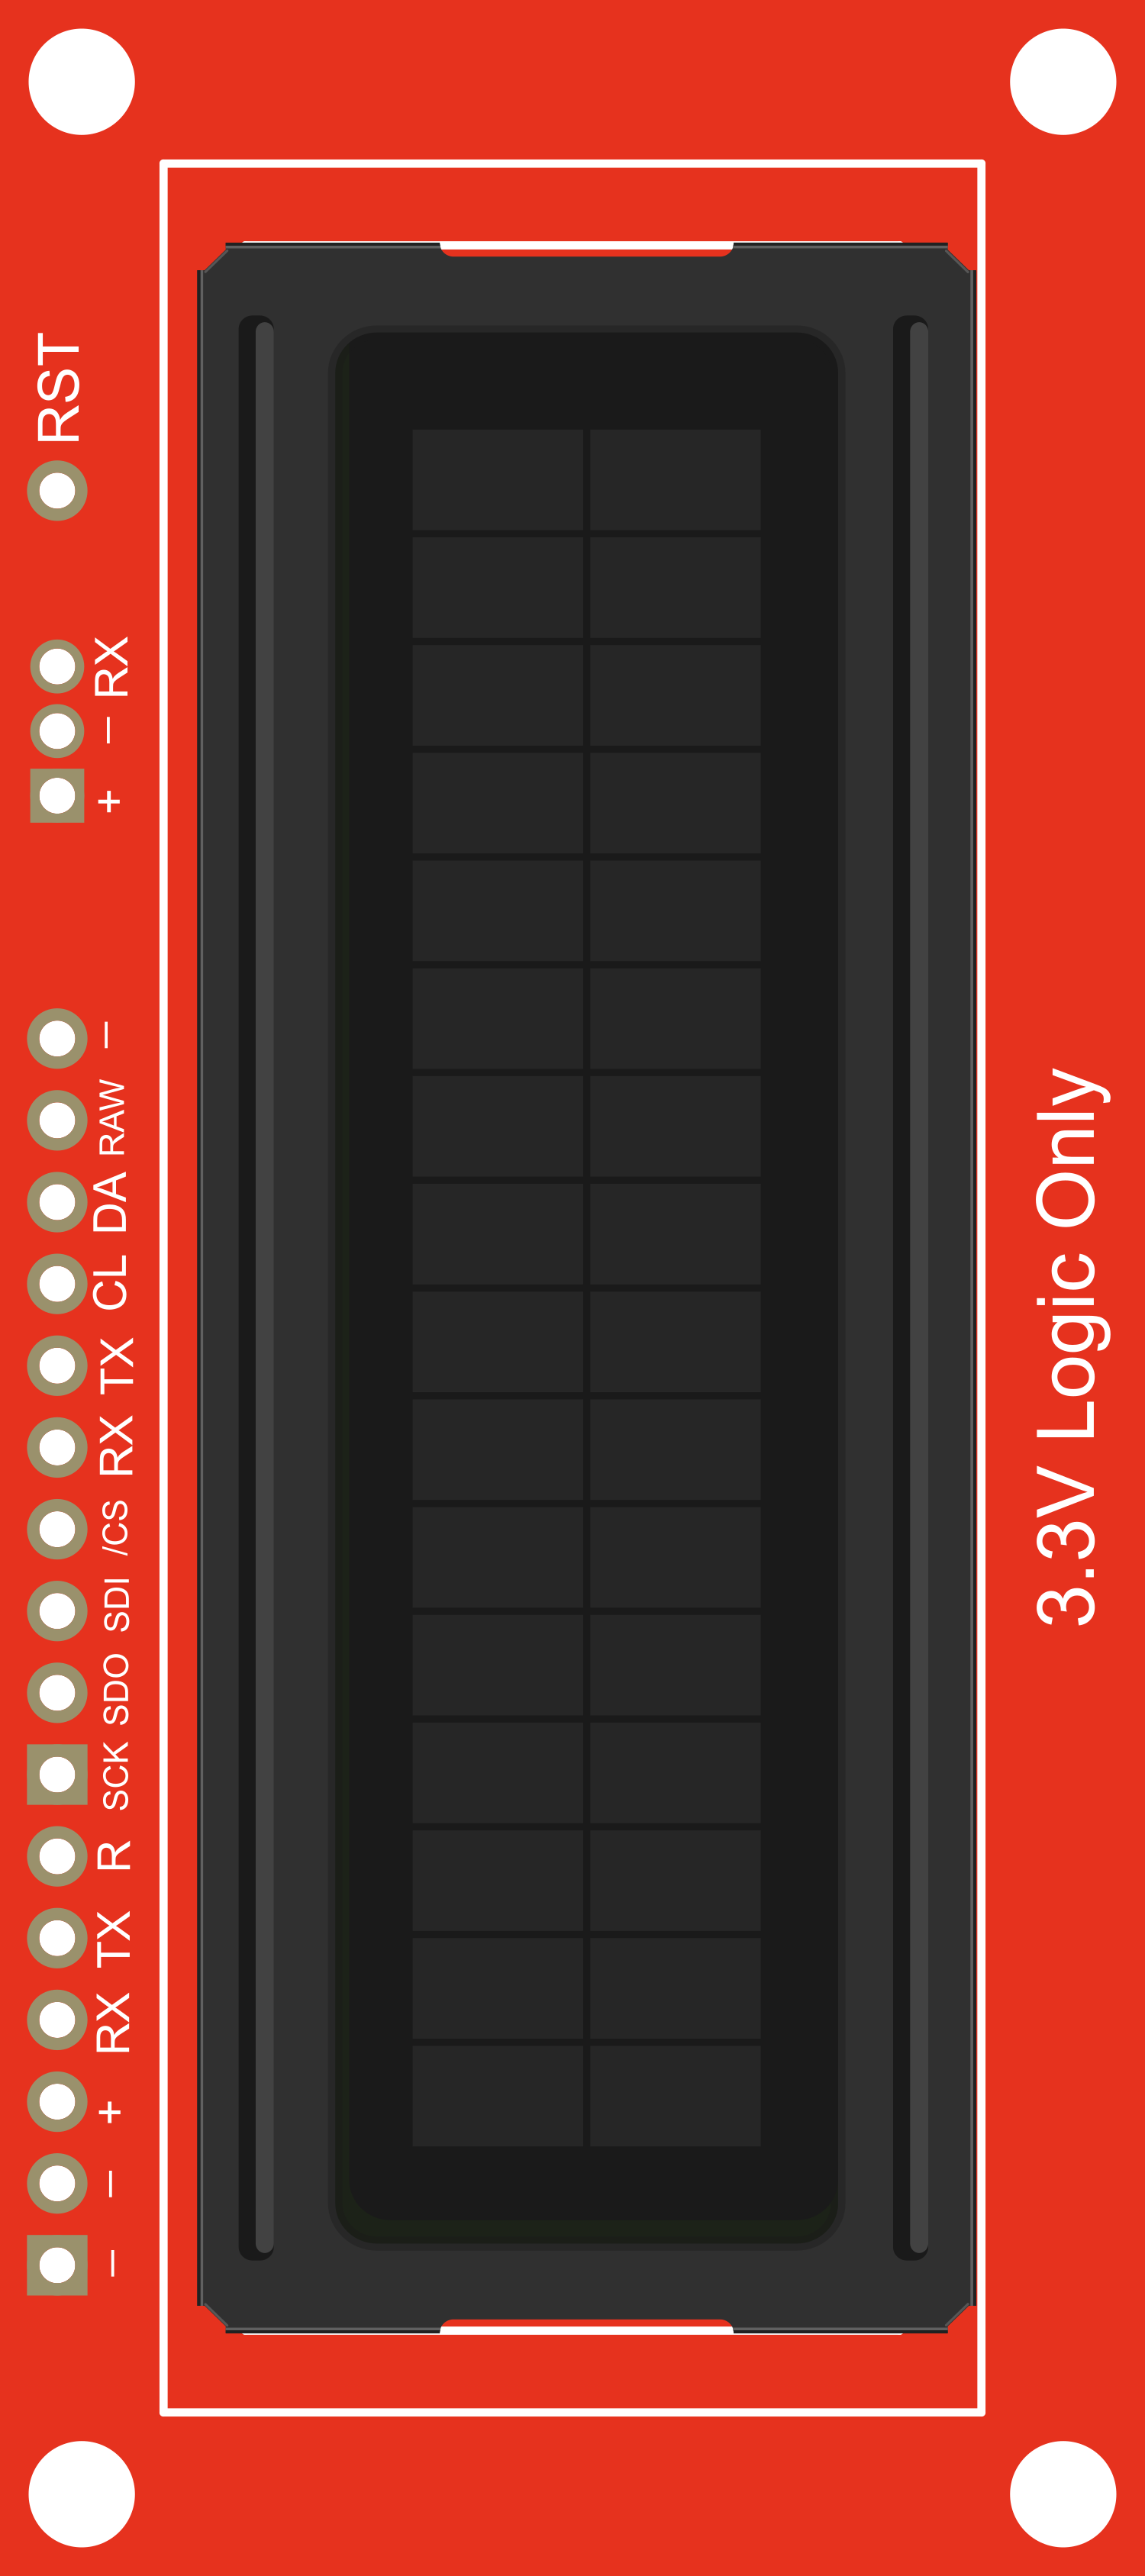
Pin Configuration and Descriptions
| Pin Number | Name | Description |
|---|---|---|
| 1 | VDD | Power supply (5V) |
| 2 | GND | Ground connection |
| 3 | RX | Serial receive pin |
| 4 | TX | Serial transmit pin (not typically used) |
Usage Instructions
How to Use the Component in a Circuit
- Connect the VDD pin to a 5V power supply.
- Connect the GND pin to the ground of the power supply.
- Connect the RX pin to the TX pin of your microcontroller or serial adapter.
- Optionally, if you need to read data from the SerLCD, connect the TX pin to the RX pin of your microcontroller (not commonly used).
Important Considerations and Best Practices
- Always ensure that the power supply is 5V; higher voltages can damage the module.
- When writing to the display, ensure that the serial data rate matches the expected baud rate of the SerLCD_16x2.
- Avoid placing the display in direct sunlight or near sources of heat, as this can affect the lifespan and visibility of the display.
- To prevent damage to the display, do not apply pressure to the LCD screen.
Example Code for Arduino UNO
#include <SoftwareSerial.h>

// Create a software serial port on pins 10 (RX) and 11 (TX)
SoftwareSerial serLCD(10, 11);

void setup() {
  // Set the data rate for the SoftwareSerial port
  serLCD.begin(9600);

  // Clear the display
  serLCD.write(0xFE); // Command flag
  serLCD.write(0x01); // Clear command
}

void loop() {
  // Set the cursor to the beginning of the first line
  serLCD.write(0xFE); // Command flag
  serLCD.write(0x80); // Position command

  // Print a message to the display
  serLCD.print("Hello, World!");

  // Wait for 3 seconds
  delay(3000);

  // Clear the display again
  serLCD.write(0xFE); // Command flag
  serLCD.write(0x01); // Clear command

  // Wait for another 3 seconds
  delay(3000);
}
Troubleshooting and FAQs
Common Issues Users Might Face
- Display not powering on: Check the power connections and ensure that the voltage is 5V.
- Garbled or no text on display: Ensure that the serial baud rate matches the display's expected rate.
- Backlight not working: Verify the backlight connections and check if the current draw is within the specified limits.
Solutions and Tips for Troubleshooting
- If the display is not responding, try resetting the power to the module.
- For issues with text display, ensure that the serial communication is correctly established and that the correct commands are being sent.
- If the backlight is too dim or not working, check the current supply to the backlight and ensure it is not exceeding 80mA.
FAQs
Q: Can I use the SerLCD_16x2 with a 3.3V system? A: The SerLCD_16x2 is designed for 5V operation. Using it with a 3.3V system may result in dim backlighting or insufficient contrast. Use a level shifter if necessary.
Q: How do I adjust the contrast of the display? A: The contrast can typically be adjusted through a potentiometer on the back of the display module. Turn the potentiometer until the desired contrast is achieved.
Q: Can I display custom characters on the SerLCD_16x2? A: Yes, the SerLCD_16x2 supports custom characters. You will need to create a bitmap for the character and upload it to the display using the appropriate commands.