How to Use Teensy Audio Adapter Rev D, D2: Examples, Pinouts, and Specs
Introduction
The Teensy Audio Adapter Rev D, D2 is a high-quality audio processing module designed to work seamlessly with Teensy microcontrollers. It enables advanced audio input, output, and processing capabilities, making it ideal for projects involving sound synthesis, audio effects, and digital signal processing (DSP). The adapter is equipped with a powerful SGTL5000 audio codec, which provides stereo audio input and output with excellent sound quality.
Explore Projects Built with Teensy Audio Adapter Rev D, D2


Explore Projects Built with Teensy Audio Adapter Rev D, D2
Common Applications and Use Cases
- Audio effects processors (e.g., reverb, delay, equalizers)
- Synthesizers and music production tools
- Voice changers and audio manipulation devices
- Real-time audio streaming and recording
- Educational projects in audio signal processing
Technical Specifications
Key Technical Details
- Audio Codec: SGTL5000
- Input/Output: Stereo line-in, stereo line-out, headphone output, and microphone input
- Sampling Rates: Supports 44.1 kHz (default) and other rates with configuration
- Power Supply: 3.3V (provided by the Teensy board)
- Communication Protocol: I2S (audio data) and I2C (control interface)
- PCB Dimensions: 1.4" x 1.0" (35.6mm x 25.4mm)
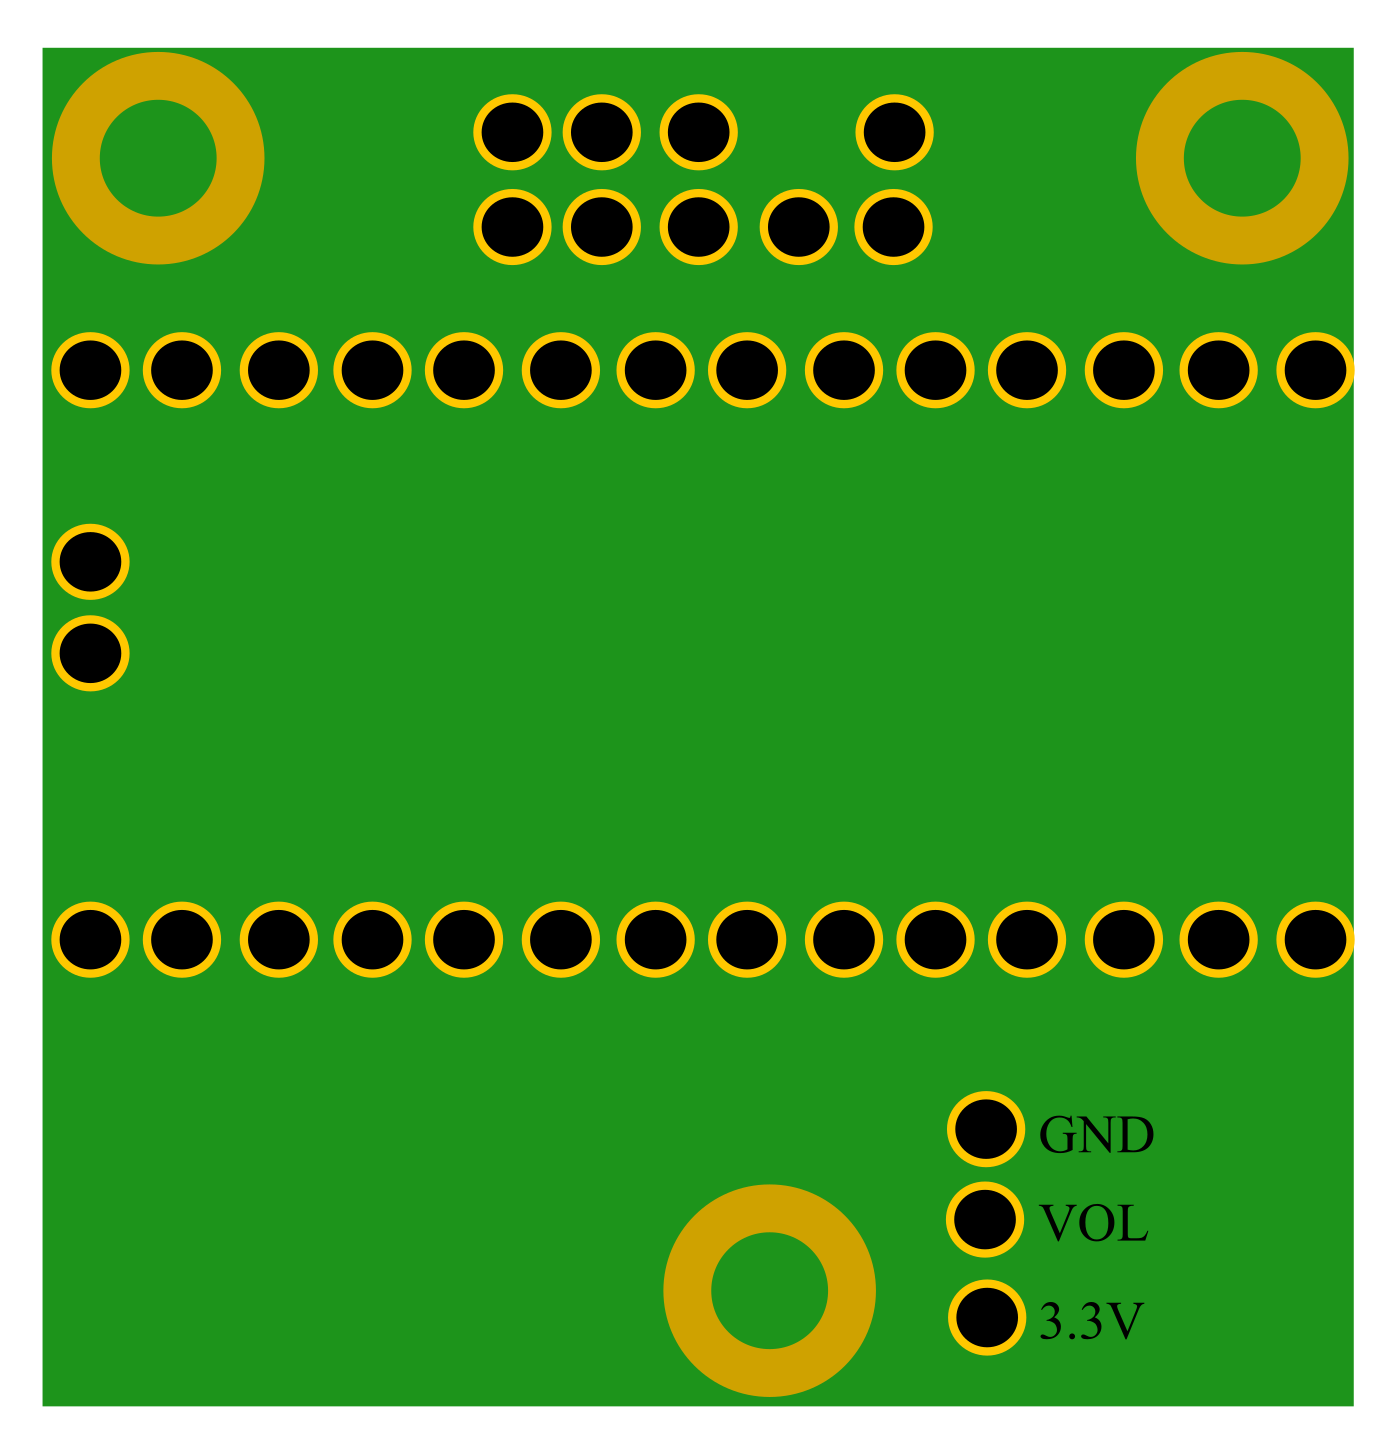
Pin Configuration and Descriptions
The Teensy Audio Adapter Rev D, D2 connects to the Teensy microcontroller via specific pins. Below is the pin configuration:
| Pin Name | Description | Teensy Pin |
|---|---|---|
| MCLK | Master Clock for I2S audio | Pin 11 |
| BCLK | Bit Clock for I2S audio | Pin 9 |
| LRCLK | Left/Right Clock for I2S audio | Pin 23 |
| DOUT | Data Output (I2S audio data) | Pin 22 |
| DIN | Data Input (I2S audio data) | Pin 13 |
| SDA | I2C Data Line (control interface) | Pin 18 |
| SCL | I2C Clock Line (control interface) | Pin 19 |
| GND | Ground | GND |
| VIN | Power Supply (3.3V from Teensy) | 3.3V |
Audio Input/Output Ports
- Line-In: Stereo 3.5mm jack for audio input
- Line-Out: Stereo 3.5mm jack for audio output
- Headphone Out: Amplified stereo output for headphones
- Microphone Input: Supports electret microphones with bias voltage
Usage Instructions
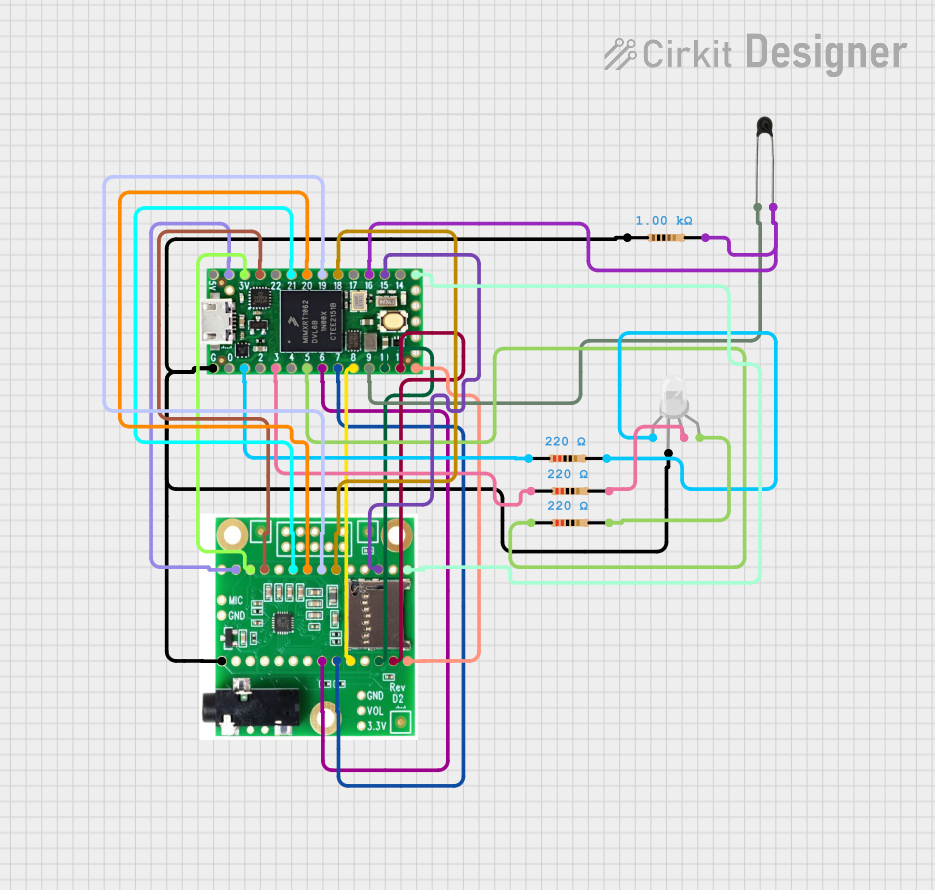
How to Use the Component in a Circuit
Hardware Setup:
- Mount the Teensy Audio Adapter onto the Teensy microcontroller using header pins.
- Connect the audio input/output devices (e.g., headphones, speakers, microphones) to the appropriate 3.5mm jacks on the adapter.
- Ensure the Teensy board is powered via USB or an external power source.
Software Setup:
- Install the Teensyduino add-on for the Arduino IDE.
- Include the
Audiolibrary in your Arduino sketch. This library provides tools for configuring and processing audio signals.
Basic Example Code: Below is an example of initializing the Teensy Audio Adapter and playing a sine wave tone:
// Include the Teensy Audio library
#include <Audio.h>
#include <Wire.h>
#include <SPI.h>
#include <SD.h>

// Create audio objects
AudioSynthWaveformSine sineWave; // Sine wave generator
AudioOutputI2S i2sOutput;        // I2S audio output
AudioControlSGTL5000 sgtl5000;   // SGTL5000 codec control

// Connect audio objects
AudioConnection patchCord1(sineWave, 0, i2sOutput, 0);
AudioConnection patchCord2(sineWave, 0, i2sOutput, 1);

void setup() {
  // Initialize the audio system
  AudioMemory(10); // Allocate memory for audio processing

  // Configure the SGTL5000 codec
  sgtl5000.enable();
  sgtl5000.volume(0.5); // Set volume to 50%

  // Configure the sine wave generator
  sineWave.frequency(440); // Set frequency to 440 Hz (A4 note)
  sineWave.amplitude(0.75); // Set amplitude to 75%
}

void loop() {
  // The sine wave will play continuously
}
Important Considerations and Best Practices
- Ensure proper alignment of the Teensy Audio Adapter with the Teensy board to avoid incorrect connections.
- Use shielded audio cables to minimize noise and interference in audio signals.
- When using the microphone input, ensure the microphone is compatible with the bias voltage provided by the adapter.
- Avoid exceeding the power supply voltage (3.3V) to prevent damage to the adapter.
Troubleshooting and FAQs
Common Issues and Solutions
No Audio Output:
- Verify that the Teensy board and Audio Adapter are properly connected.
- Check the volume settings in the code (
sgtl5000.volume()). - Ensure the audio output device (e.g., headphones or speakers) is functional.
Distorted Audio:
- Reduce the amplitude of the audio signal in the code (e.g.,
sineWave.amplitude()). - Check for loose or poor-quality audio cables.
- Reduce the amplitude of the audio signal in the code (e.g.,
Microphone Input Not Working:
- Ensure the microphone is an electret type and is properly connected.
- Verify that the microphone bias voltage is enabled in the code.
I2C Communication Errors:
- Check the connections for the SDA and SCL pins.
- Ensure no other devices on the I2C bus are causing conflicts.
FAQs
Q: Can I use the Teensy Audio Adapter with other microcontrollers?
A: The adapter is specifically designed for Teensy boards. Using it with other microcontrollers may require significant modifications and is not officially supported.
Q: What is the maximum sampling rate supported?
A: The default sampling rate is 44.1 kHz, but other rates can be configured with advanced settings in the Teensy Audio library.
Q: Can I use both the line-in and microphone inputs simultaneously?
A: No, the SGTL5000 codec allows only one input source at a time. You can switch between inputs in the code.
Q: Is it possible to record audio to an SD card?
A: Yes, the Teensy Audio Adapter includes an SD card slot for audio recording and playback. Use the SD library in conjunction with the Audio library for this purpose.