How to Use AD828 Stereo Preamp: Examples, Pinouts, and Specs
Introduction
The AD828 is a high-performance stereo preamplifier designed for audio applications. It features low noise and distortion characteristics, making it ideal for high-fidelity sound reproduction. This component is widely used in audio systems, including home theater setups, professional audio equipment, and portable audio devices. Its ability to amplify weak audio signals with minimal distortion makes it a popular choice for audiophiles and engineers alike.
Explore Projects Built with AD828 Stereo Preamp


Explore Projects Built with AD828 Stereo Preamp
Common Applications and Use Cases
- High-fidelity audio systems
- Home theater amplifiers
- Professional audio mixers
- Portable audio devices
- Signal conditioning for audio processing
Technical Specifications
The AD828 is designed to deliver excellent audio performance with the following key specifications:
| Parameter | Value |
|---|---|
| Supply Voltage Range | ±5V to ±15V |
| Input Voltage Range | ±12V (typical) |
| Gain Bandwidth Product | 80 MHz |
| Slew Rate | 250 V/µs |
| Total Harmonic Distortion | 0.0003% (typical) |
| Input Noise Voltage | 2.5 nV/√Hz |
| Output Voltage Swing | ±13V (typical, at ±15V supply) |
| Operating Temperature | -40°C to +85°C |
Pin Configuration and Descriptions
The AD828 is typically available in an 8-pin DIP or SOIC package. Below is the pinout and description:
| Pin Number | Pin Name | Description |
|---|---|---|
| 1 | Non-Inverting Input A | Positive input for Channel A |
| 2 | Inverting Input A | Negative input for Channel A |
| 3 | V- (Negative Supply) | Negative power supply |
| 4 | Non-Inverting Input B | Positive input for Channel B |
| 5 | Inverting Input B | Negative input for Channel B |
| 6 | Output B | Output for Channel B |
| 7 | V+ (Positive Supply) | Positive power supply |
| 8 | Output A | Output for Channel A |
Usage Instructions
The AD828 is straightforward to use in audio circuits. Below are the steps and considerations for integrating it into your design:
How to Use the Component in a Circuit
- Power Supply: Connect the V+ and V- pins to a dual power supply (e.g., ±12V or ±15V). Ensure the supply voltage is within the specified range.
- Input Connections: Connect the audio signal source to the non-inverting (Pin 1 or Pin 4) or inverting input (Pin 2 or Pin 5) as required by your circuit design.
- Output Connections: The amplified audio signal will be available at the output pins (Pin 6 for Channel B and Pin 8 for Channel A).
- Feedback Network: Use appropriate resistors and capacitors in the feedback loop to set the desired gain and frequency response.
- Decoupling Capacitors: Place decoupling capacitors (e.g., 0.1 µF) close to the power supply pins to reduce noise and ensure stable operation.
Important Considerations and Best Practices
- Impedance Matching: Ensure proper impedance matching between the input source and the AD828 to minimize signal loss.
- Thermal Management: Operate the AD828 within its specified temperature range to avoid performance degradation.
- PCB Layout: Use a clean and low-noise PCB layout. Keep signal traces short and avoid running them parallel to power lines.
- Bypass Capacitors: Use high-quality bypass capacitors to filter out power supply noise.
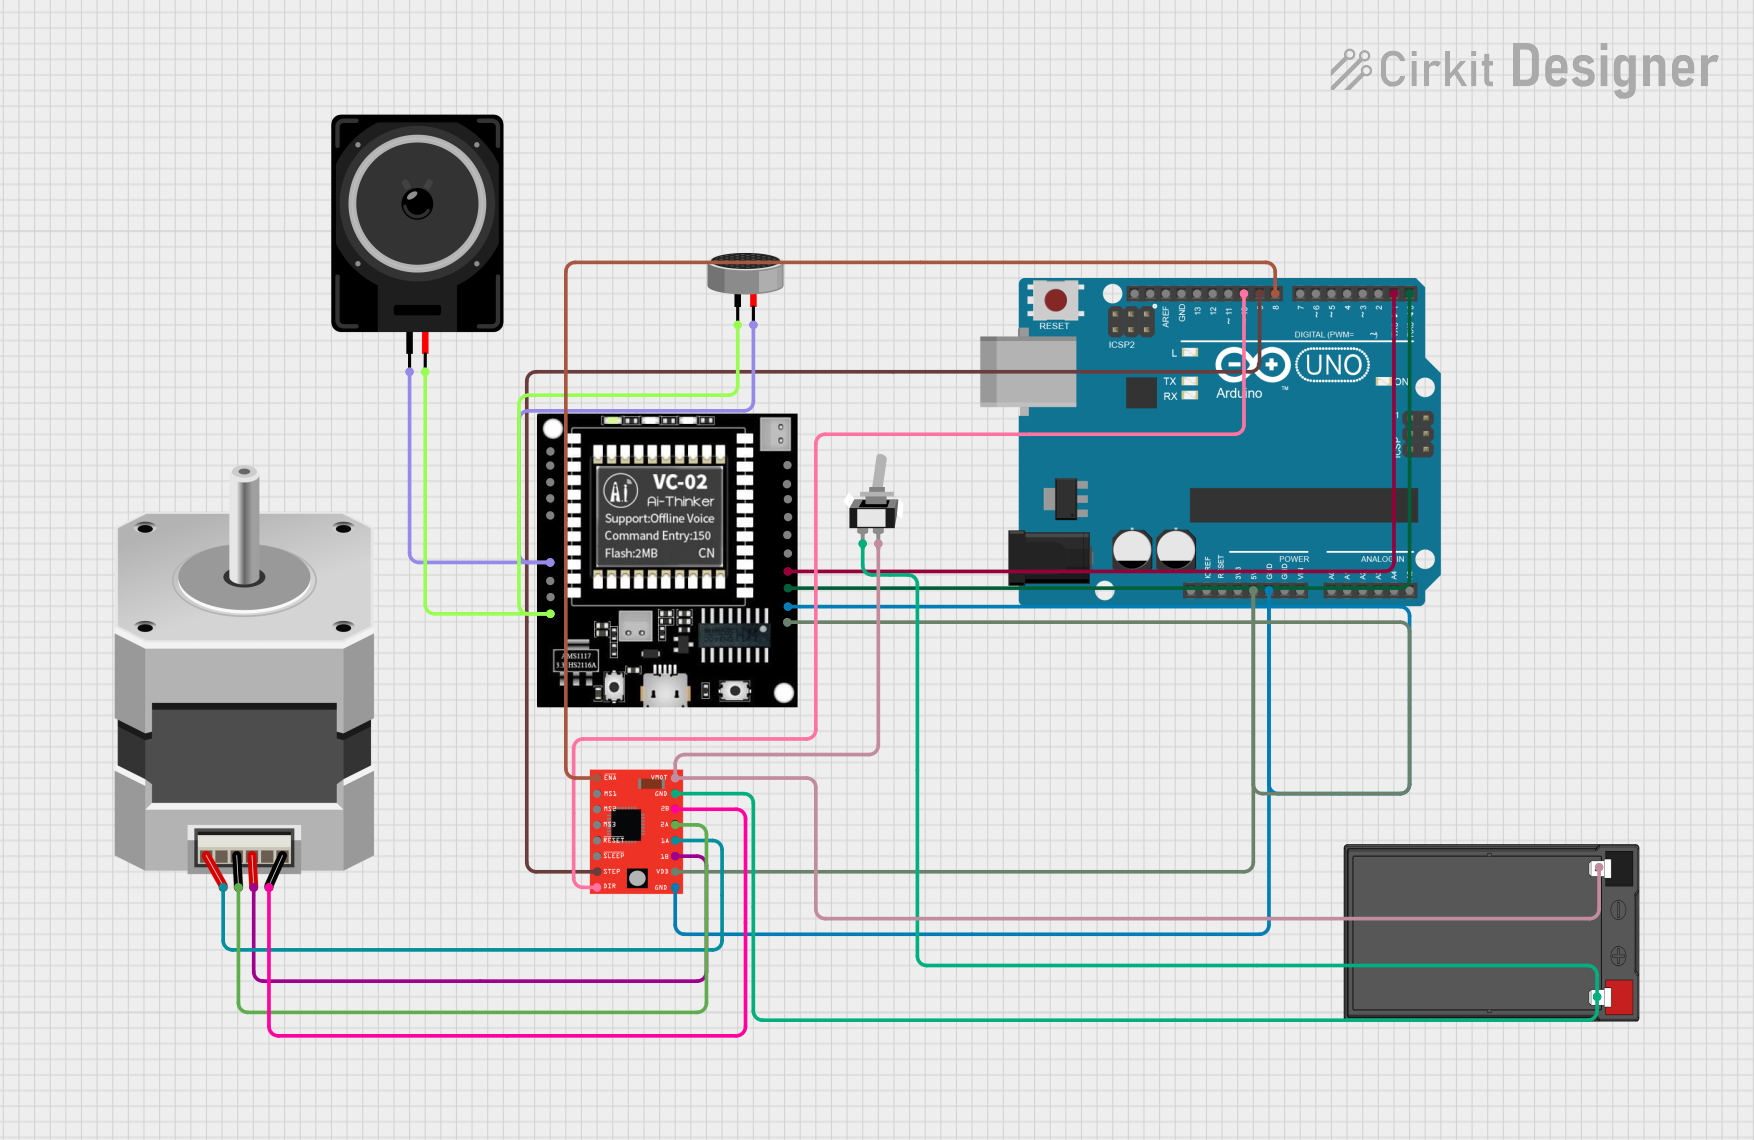
Example: Connecting the AD828 to an Arduino UNO
While the AD828 is not directly programmable, it can be used to amplify audio signals for processing by an Arduino UNO. Below is an example of how to connect the AD828 to an Arduino for audio signal analysis:
- Connect the audio signal source to the AD828's input.
- Connect the AD828's output to an analog input pin on the Arduino (e.g., A0).
- Use the following Arduino code to read and process the amplified signal:
// Example Arduino code to read audio signal from AD828
const int audioPin = A0; // Analog pin connected to AD828 output

void setup() {
  Serial.begin(9600); // Initialize serial communication
}

void loop() {
  int audioValue = analogRead(audioPin); // Read the amplified audio signal
  Serial.println(audioValue); // Print the signal value to the Serial Monitor

  delay(10); // Small delay to avoid overwhelming the Serial Monitor
}
Troubleshooting and FAQs
Common Issues and Solutions
No Output Signal
- Cause: Incorrect power supply connections.
- Solution: Verify that the V+ and V- pins are connected to the correct voltage levels.
Distorted Output
- Cause: Overdriving the input signal or incorrect feedback network.
- Solution: Reduce the input signal amplitude and check the feedback resistor values.
High Noise Levels
- Cause: Poor PCB layout or insufficient decoupling.
- Solution: Improve PCB layout and add decoupling capacitors near the power supply pins.
Overheating
- Cause: Operating outside the specified voltage or temperature range.
- Solution: Ensure the power supply voltage and ambient temperature are within the specified limits.
FAQs
Q: Can the AD828 be used with a single power supply?
A: No, the AD828 requires a dual power supply (e.g., ±12V or ±15V) for proper operation.
Q: What is the maximum gain achievable with the AD828?
A: The maximum gain depends on the feedback network design. The AD828 itself does not impose a strict limit, but stability and bandwidth should be considered.
Q: Is the AD828 suitable for battery-powered devices?
A: The AD828 can be used in battery-powered devices if a dual power supply is available. However, its power consumption should be considered for portable applications.
Q: Can the AD828 drive headphones directly?
A: No, the AD828 is a preamplifier and is not designed to drive low-impedance loads like headphones. Use a dedicated headphone amplifier for such applications.