How to Use arduino mega sensor shield v2: Examples, Pinouts, and Specs
Introduction
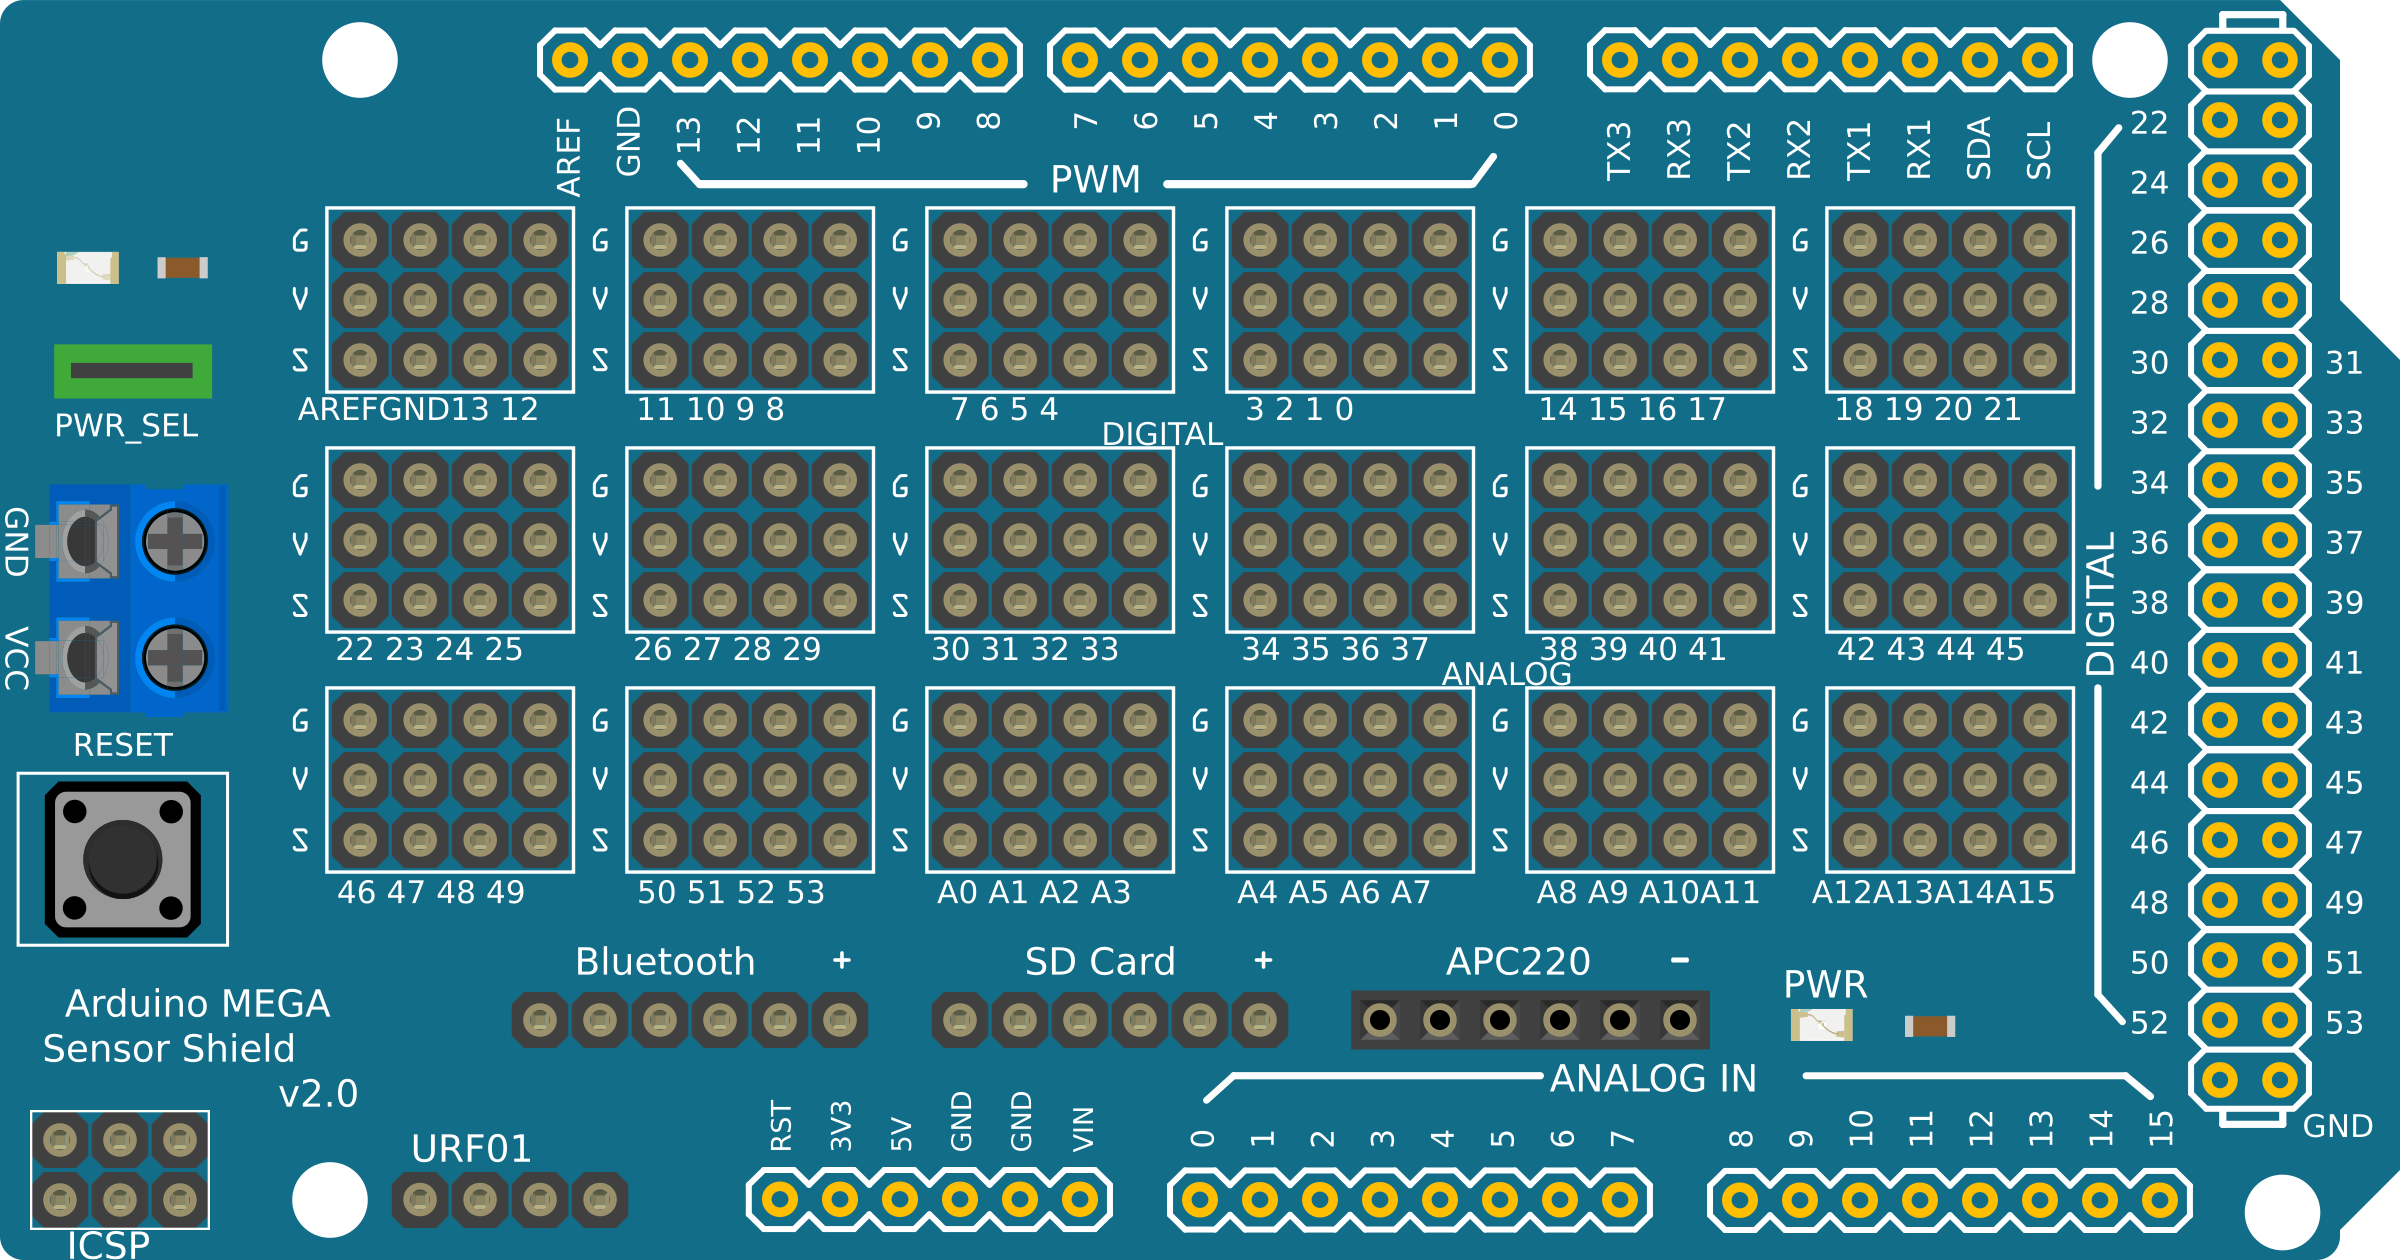
The Arduino Mega Sensor Shield V2 is an expansion board designed specifically for the Arduino Mega. It provides a convenient way to connect various sensors and modules, simplifying the process of prototyping and development. This shield is ideal for projects that require multiple sensor inputs and outputs, offering a streamlined and organized approach to wiring and connectivity.
Explore Projects Built with arduino mega sensor shield v2


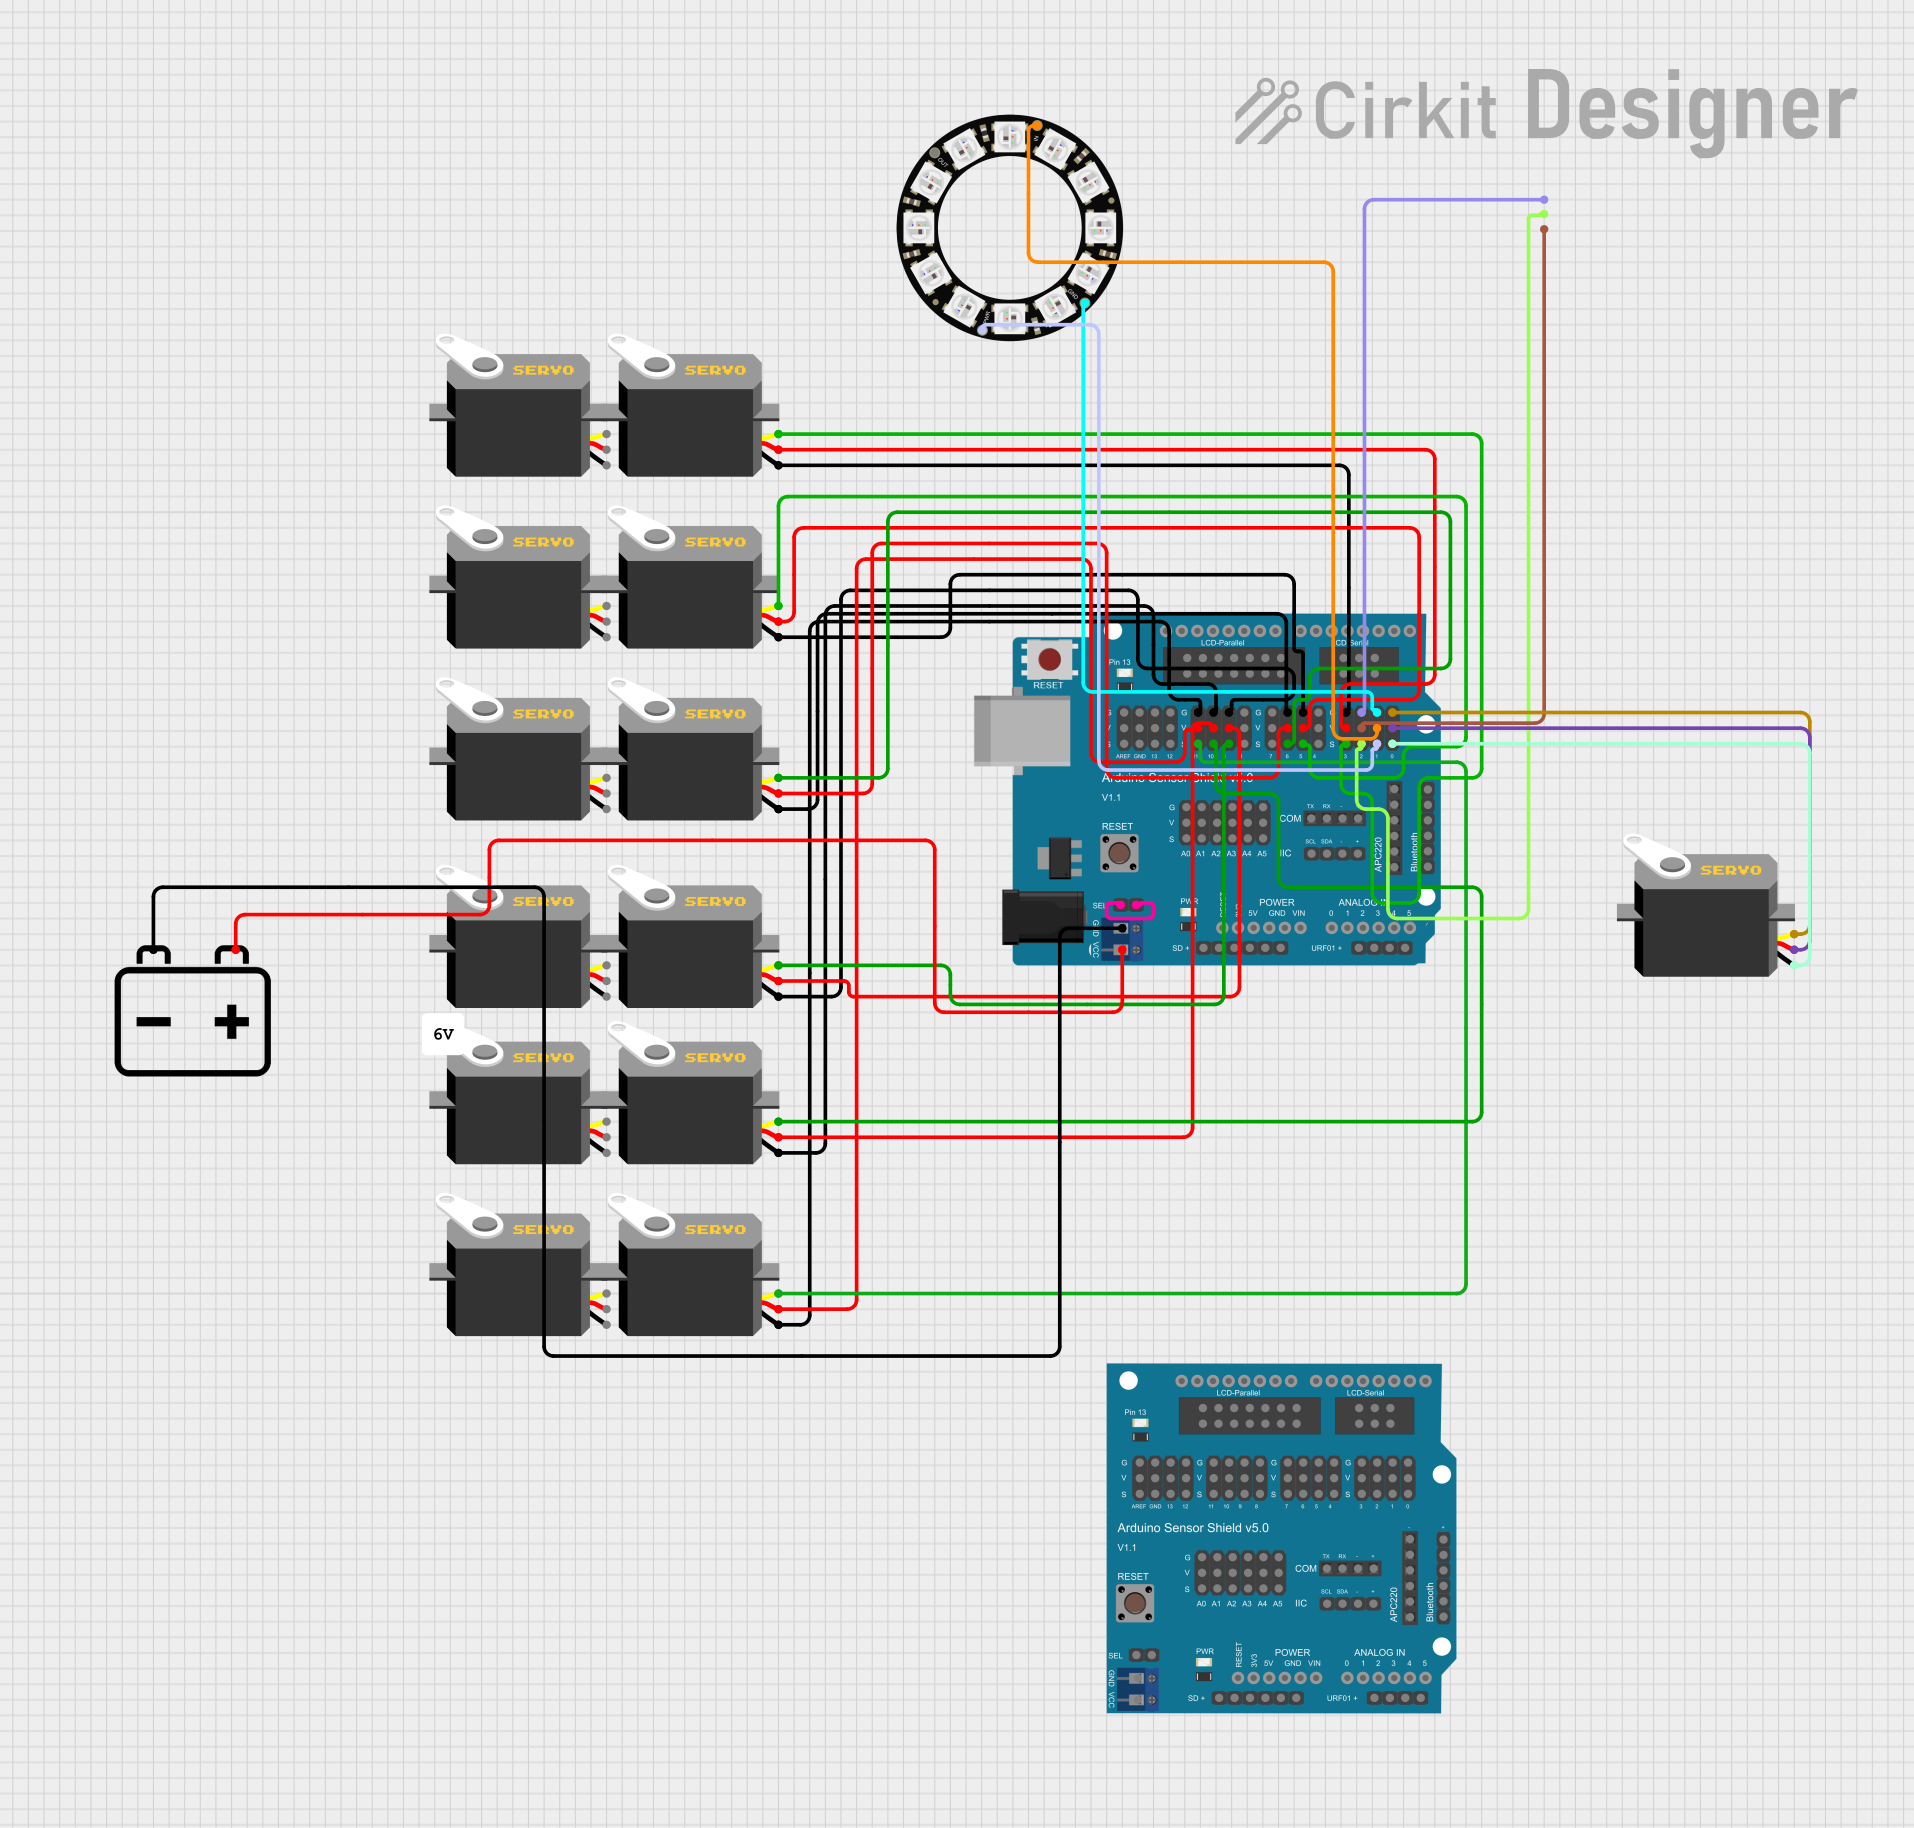
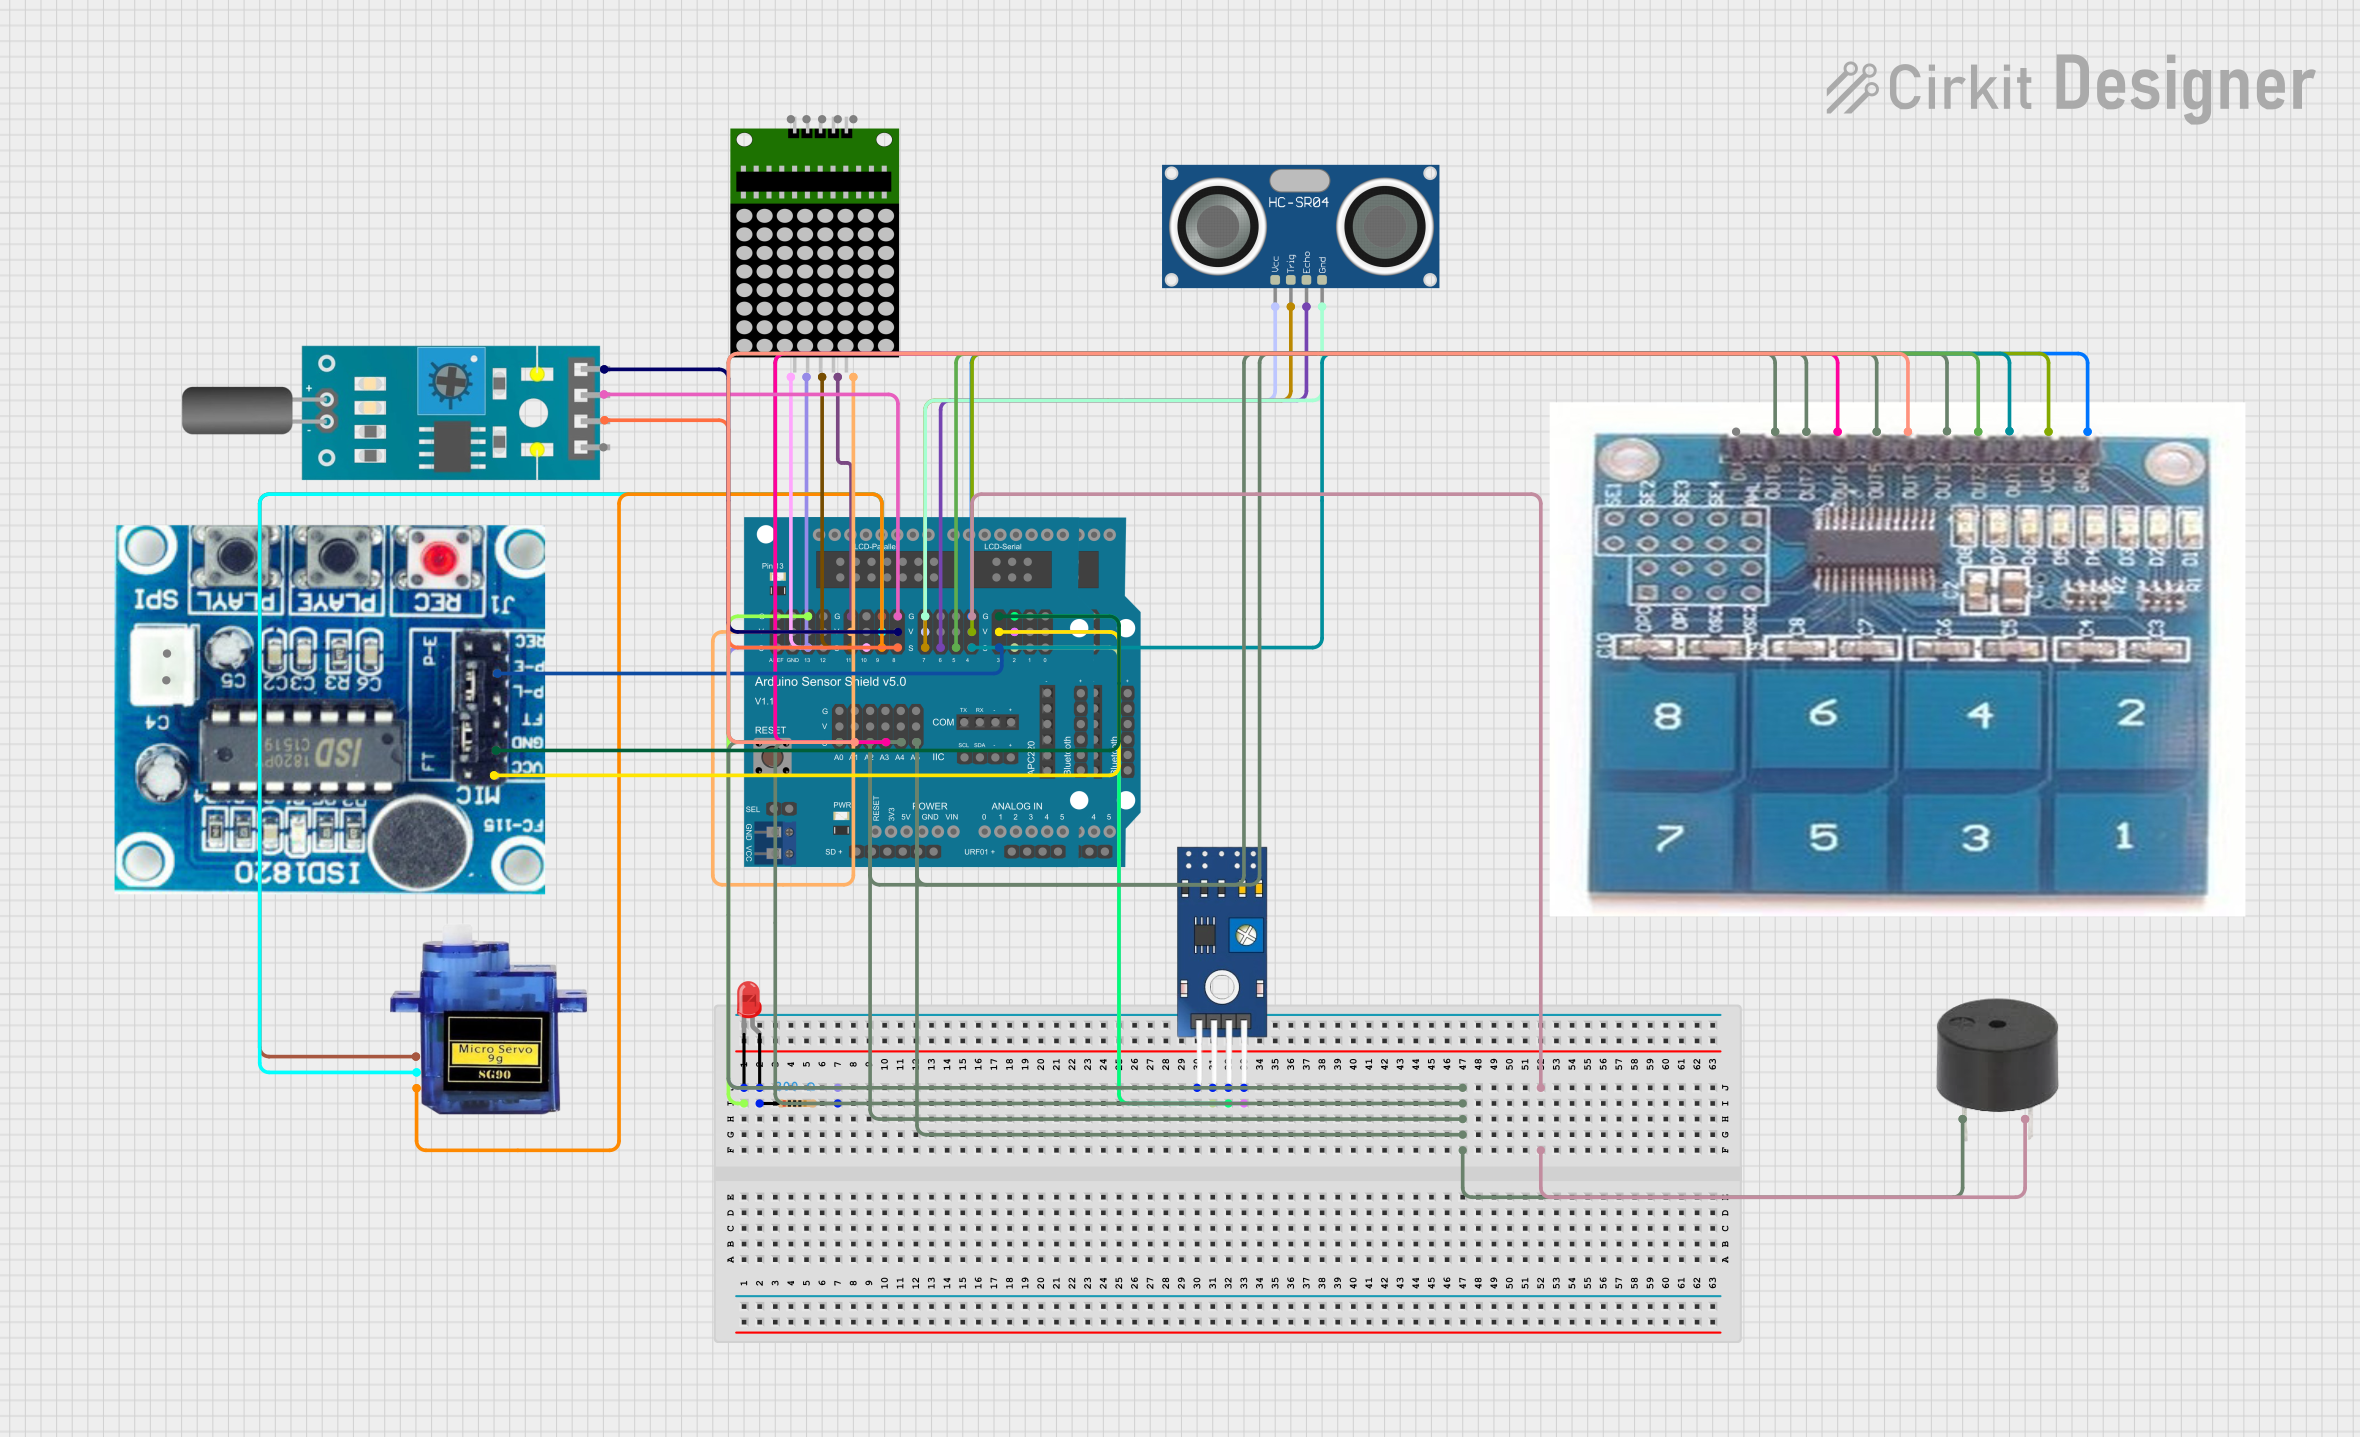
Explore Projects Built with arduino mega sensor shield v2
Common Applications and Use Cases
- Robotics: Easily connect multiple sensors for obstacle detection, line following, and more.
- Home Automation: Integrate various environmental sensors for smart home projects.
- Educational Projects: Simplify the learning process by providing a straightforward way to connect sensors.
- IoT Projects: Connect multiple sensors to gather data for Internet of Things applications.
Technical Specifications
Key Technical Details
| Specification | Value |
|---|---|
| Compatible Board | Arduino Mega |
| Operating Voltage | 5V |
| Communication | I2C, SPI, UART |
| Dimensions | 101.5mm x 53.3mm |
| Weight | 30g |
| Connector Type | Female Headers |
| Number of Pins | 54 Digital, 16 Analog |
Pin Configuration and Descriptions
| Pin Number | Pin Name | Description |
|---|---|---|
| 1-54 | D0-D53 | Digital I/O pins |
| 22-53 | A0-A15 | Analog input pins |
| 20, 21 | SDA, SCL | I2C communication pins |
| 50-53 | SPI | SPI communication pins (MISO, MOSI, SCK, SS) |
| 0, 1 | RX0, TX0 | UART communication pins |
| 2, 3 | RX1, TX1 | Additional UART communication pins |
| 18, 19 | RX2, TX2 | Additional UART communication pins |
| 14, 15 | RX3, TX3 | Additional UART communication pins |
| GND | GND | Ground |
| 5V | 5V | 5V power supply |
| 3.3V | 3.3V | 3.3V power supply |
| VIN | VIN | External power supply input |
Usage Instructions
How to Use the Component in a Circuit
- Mount the Shield: Place the Arduino Mega Sensor Shield V2 on top of the Arduino Mega, ensuring that all pins are correctly aligned and inserted.
- Connect Sensors: Use the female headers to connect your sensors and modules. Each pin is clearly labeled for easy identification.
- Power the Board: Connect the Arduino Mega to a power source via USB or an external power supply.
- Upload Code: Write and upload your Arduino sketch using the Arduino IDE.
Important Considerations and Best Practices
- Check Pin Compatibility: Ensure that the sensors and modules you are connecting are compatible with the pin configuration of the shield.
- Avoid Overloading: Do not exceed the current and voltage ratings of the shield to prevent damage.
- Secure Connections: Make sure all connections are secure to avoid intermittent issues.
- Use Proper Libraries: Utilize appropriate libraries for the sensors and modules you are using to simplify coding.
Example Code
Here is an example code to read data from a DHT11 temperature and humidity sensor connected to the Arduino Mega Sensor Shield V2.
#include <DHT.h>

#define DHTPIN 2     // Pin where the DHT11 is connected
#define DHTTYPE DHT11   // DHT 11

DHT dht(DHTPIN, DHTTYPE);

void setup() {
  Serial.begin(9600);
  dht.begin();
}

void loop() {
  // Wait a few seconds between measurements
  delay(2000);

  // Reading temperature or humidity takes about 250 milliseconds
  float h = dht.readHumidity();
  float t = dht.readTemperature();

  // Check if any reads failed and exit early (to try again)
  if (isnan(h) || isnan(t)) {
    Serial.println("Failed to read from DHT sensor!");
    return;
  }

  // Print the results to the Serial Monitor
  Serial.print("Humidity: ");
  Serial.print(h);
  Serial.print(" %\t");
  Serial.print("Temperature: ");
  Serial.print(t);
  Serial.println(" *C");
}
Troubleshooting and FAQs
Common Issues Users Might Face
Sensor Not Responding:
- Solution: Check the wiring and ensure that the sensor is properly connected to the correct pins. Verify that the sensor is receiving power.
Incorrect Readings:
- Solution: Ensure that the sensor is calibrated correctly. Check for any interference or noise in the circuit.
Upload Errors:
- Solution: Make sure the correct board and port are selected in the Arduino IDE. Check for any loose connections.
Solutions and Tips for Troubleshooting
- Double-Check Connections: Always verify that all connections are secure and correctly aligned.
- Use Serial Monitor: Utilize the Serial Monitor in the Arduino IDE to debug and monitor sensor readings.
- Refer to Datasheets: Consult the datasheets of the sensors and modules for specific troubleshooting tips and detailed information.
- Update Libraries: Ensure that you are using the latest versions of the libraries for your sensors and modules.
By following this documentation, you should be able to effectively use the Arduino Mega Sensor Shield V2 in your projects, making prototyping and development more efficient and organized.