Cirkit Designer Logo
Cirkit Designer
Your all-in-one circuit design IDE
Home / 
Component Documentation

How to Use 7 inch WaveShare (H): Examples, Pinouts, and Specs

Image of 7 inch WaveShare (H)
Cirkit Designer LogoDesign with 7 inch WaveShare (H) in Cirkit Designer

Introduction

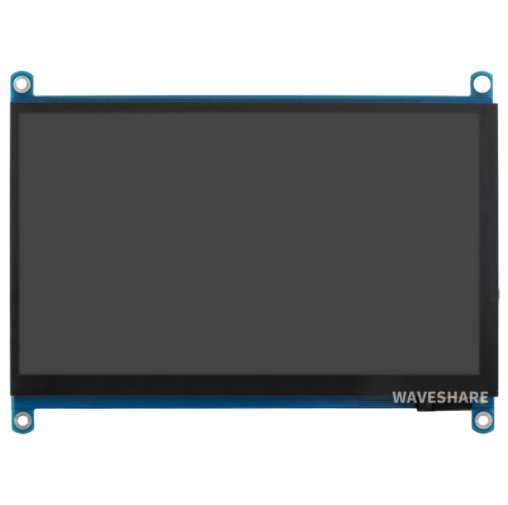
The 7 inch WaveShare (H) display is a versatile and high-resolution TFT LCD touchscreen designed for a wide range of applications. With its 800x480 pixel resolution, it offers clear and vibrant visuals, making it an ideal choice for embedded projects, interactive kiosks, and Raspberry Pi applications. Its capacitive touch capability allows for intuitive user interaction, enhancing the overall user experience.

Explore Projects Built with 7 inch WaveShare (H)

Use Cirkit Designer to design, explore, and prototype these projects online. Some projects support real-time simulation. Click "Open Project" to start designing instantly!
Battery-Powered Raspberry Pi and ESP32-CAM Smart Display with 7-inch WaveShare Touchscreen
Image of diagram: A project utilizing 7 inch WaveShare (H) in a practical application
This circuit integrates a Raspberry Pi 4b, a 7-inch WaveShare display, an ESP32-CAM, and a Li-ion battery. The Raspberry Pi is powered by the Li-ion battery and interfaces with the ESP32-CAM via GPIO pins for data communication, while the WaveShare display is also powered by the same battery to provide visual output.
Cirkit Designer LogoOpen Project in Cirkit Designer
Raspberry Pi 5 Controlled Dual Stepper Motor System with IR Sensor Feedback
Image of StemCON Board: A project utilizing 7 inch WaveShare (H) in a practical application
This circuit connects a Raspberry Pi 5 to a 7-inch WaveShare HDMI display for visual output. It also interfaces the Raspberry Pi with two ULN2003A breakout boards, which are in turn connected to two 28BYJ-48 stepper motors, allowing the Raspberry Pi to control the stepper motors. Additionally, a TCRT5000 IR sensor is connected to the Raspberry Pi for object detection or line tracking, with its digital output connected to a GPIO pin and powered by the Raspberry Pi's 3.3V supply.
Cirkit Designer LogoOpen Project in Cirkit Designer
Bluetooth-Controlled Multi-Function Arduino Nano Gadget
Image of Copy of Smarttt: A project utilizing 7 inch WaveShare (H) in a practical application
This is a portable, microcontroller-driven interactive device featuring Bluetooth connectivity, visual (RGB LED), auditory (loudspeaker), and haptic (vibration motor) feedback, user input (pushbutton), and a rechargeable power system (TP4056 with Li-ion battery).
Cirkit Designer LogoOpen Project in Cirkit Designer
Dual-Microcontroller Audio Processing System with Visual Indicators and Battery Management
Image of proto thesis 2: A project utilizing 7 inch WaveShare (H) in a practical application
This is a portable audio-visual device featuring two Wemos microcontrollers for processing, Adafruit MAX4466 microphone amplifiers for audio input, and an LCD TFT screen for display. It includes power management with TP4056 modules and LiPo batteries, and user-controlled toggle and rocker switches.
Cirkit Designer LogoOpen Project in Cirkit Designer

Explore Projects Built with 7 inch WaveShare (H)

Use Cirkit Designer to design, explore, and prototype these projects online. Some projects support real-time simulation. Click "Open Project" to start designing instantly!
Image of diagram: A project utilizing 7 inch WaveShare (H) in a practical application
Battery-Powered Raspberry Pi and ESP32-CAM Smart Display with 7-inch WaveShare Touchscreen
This circuit integrates a Raspberry Pi 4b, a 7-inch WaveShare display, an ESP32-CAM, and a Li-ion battery. The Raspberry Pi is powered by the Li-ion battery and interfaces with the ESP32-CAM via GPIO pins for data communication, while the WaveShare display is also powered by the same battery to provide visual output.
Cirkit Designer LogoOpen Project in Cirkit Designer
Image of StemCON Board: A project utilizing 7 inch WaveShare (H) in a practical application
Raspberry Pi 5 Controlled Dual Stepper Motor System with IR Sensor Feedback
This circuit connects a Raspberry Pi 5 to a 7-inch WaveShare HDMI display for visual output. It also interfaces the Raspberry Pi with two ULN2003A breakout boards, which are in turn connected to two 28BYJ-48 stepper motors, allowing the Raspberry Pi to control the stepper motors. Additionally, a TCRT5000 IR sensor is connected to the Raspberry Pi for object detection or line tracking, with its digital output connected to a GPIO pin and powered by the Raspberry Pi's 3.3V supply.
Cirkit Designer LogoOpen Project in Cirkit Designer
Image of Copy of Smarttt: A project utilizing 7 inch WaveShare (H) in a practical application
Bluetooth-Controlled Multi-Function Arduino Nano Gadget
This is a portable, microcontroller-driven interactive device featuring Bluetooth connectivity, visual (RGB LED), auditory (loudspeaker), and haptic (vibration motor) feedback, user input (pushbutton), and a rechargeable power system (TP4056 with Li-ion battery).
Cirkit Designer LogoOpen Project in Cirkit Designer
Image of proto thesis 2: A project utilizing 7 inch WaveShare (H) in a practical application
Dual-Microcontroller Audio Processing System with Visual Indicators and Battery Management
This is a portable audio-visual device featuring two Wemos microcontrollers for processing, Adafruit MAX4466 microphone amplifiers for audio input, and an LCD TFT screen for display. It includes power management with TP4056 modules and LiPo batteries, and user-controlled toggle and rocker switches.
Cirkit Designer LogoOpen Project in Cirkit Designer

Common Applications and Use Cases

  • Human-machine interfaces (HMIs) for industrial controls
  • Information kiosks and point-of-sale (POS) systems
  • Educational and DIY projects with Raspberry Pi
  • Multimedia and gaming applications
  • Home automation control panels

Technical Specifications

Key Technical Details

  • Display Type: TFT LCD
  • Screen Size: 7 inches (diagonal)
  • Resolution: 800x480 pixels
  • Touchscreen: Capacitive touch
  • Display Interface: HDMI
  • Touch Interface: USB
  • Dimensions: 165.30mm x 121mm x 7.75mm
  • Operating Voltage: 5V DC

Pin Configuration and Descriptions

Pin Number Signal Name Description
1 5V Power supply (5V input)
2 GND Ground
3 HDMI HDMI signal input
4 USB USB touch signal output

Usage Instructions

How to Use the Component in a Circuit

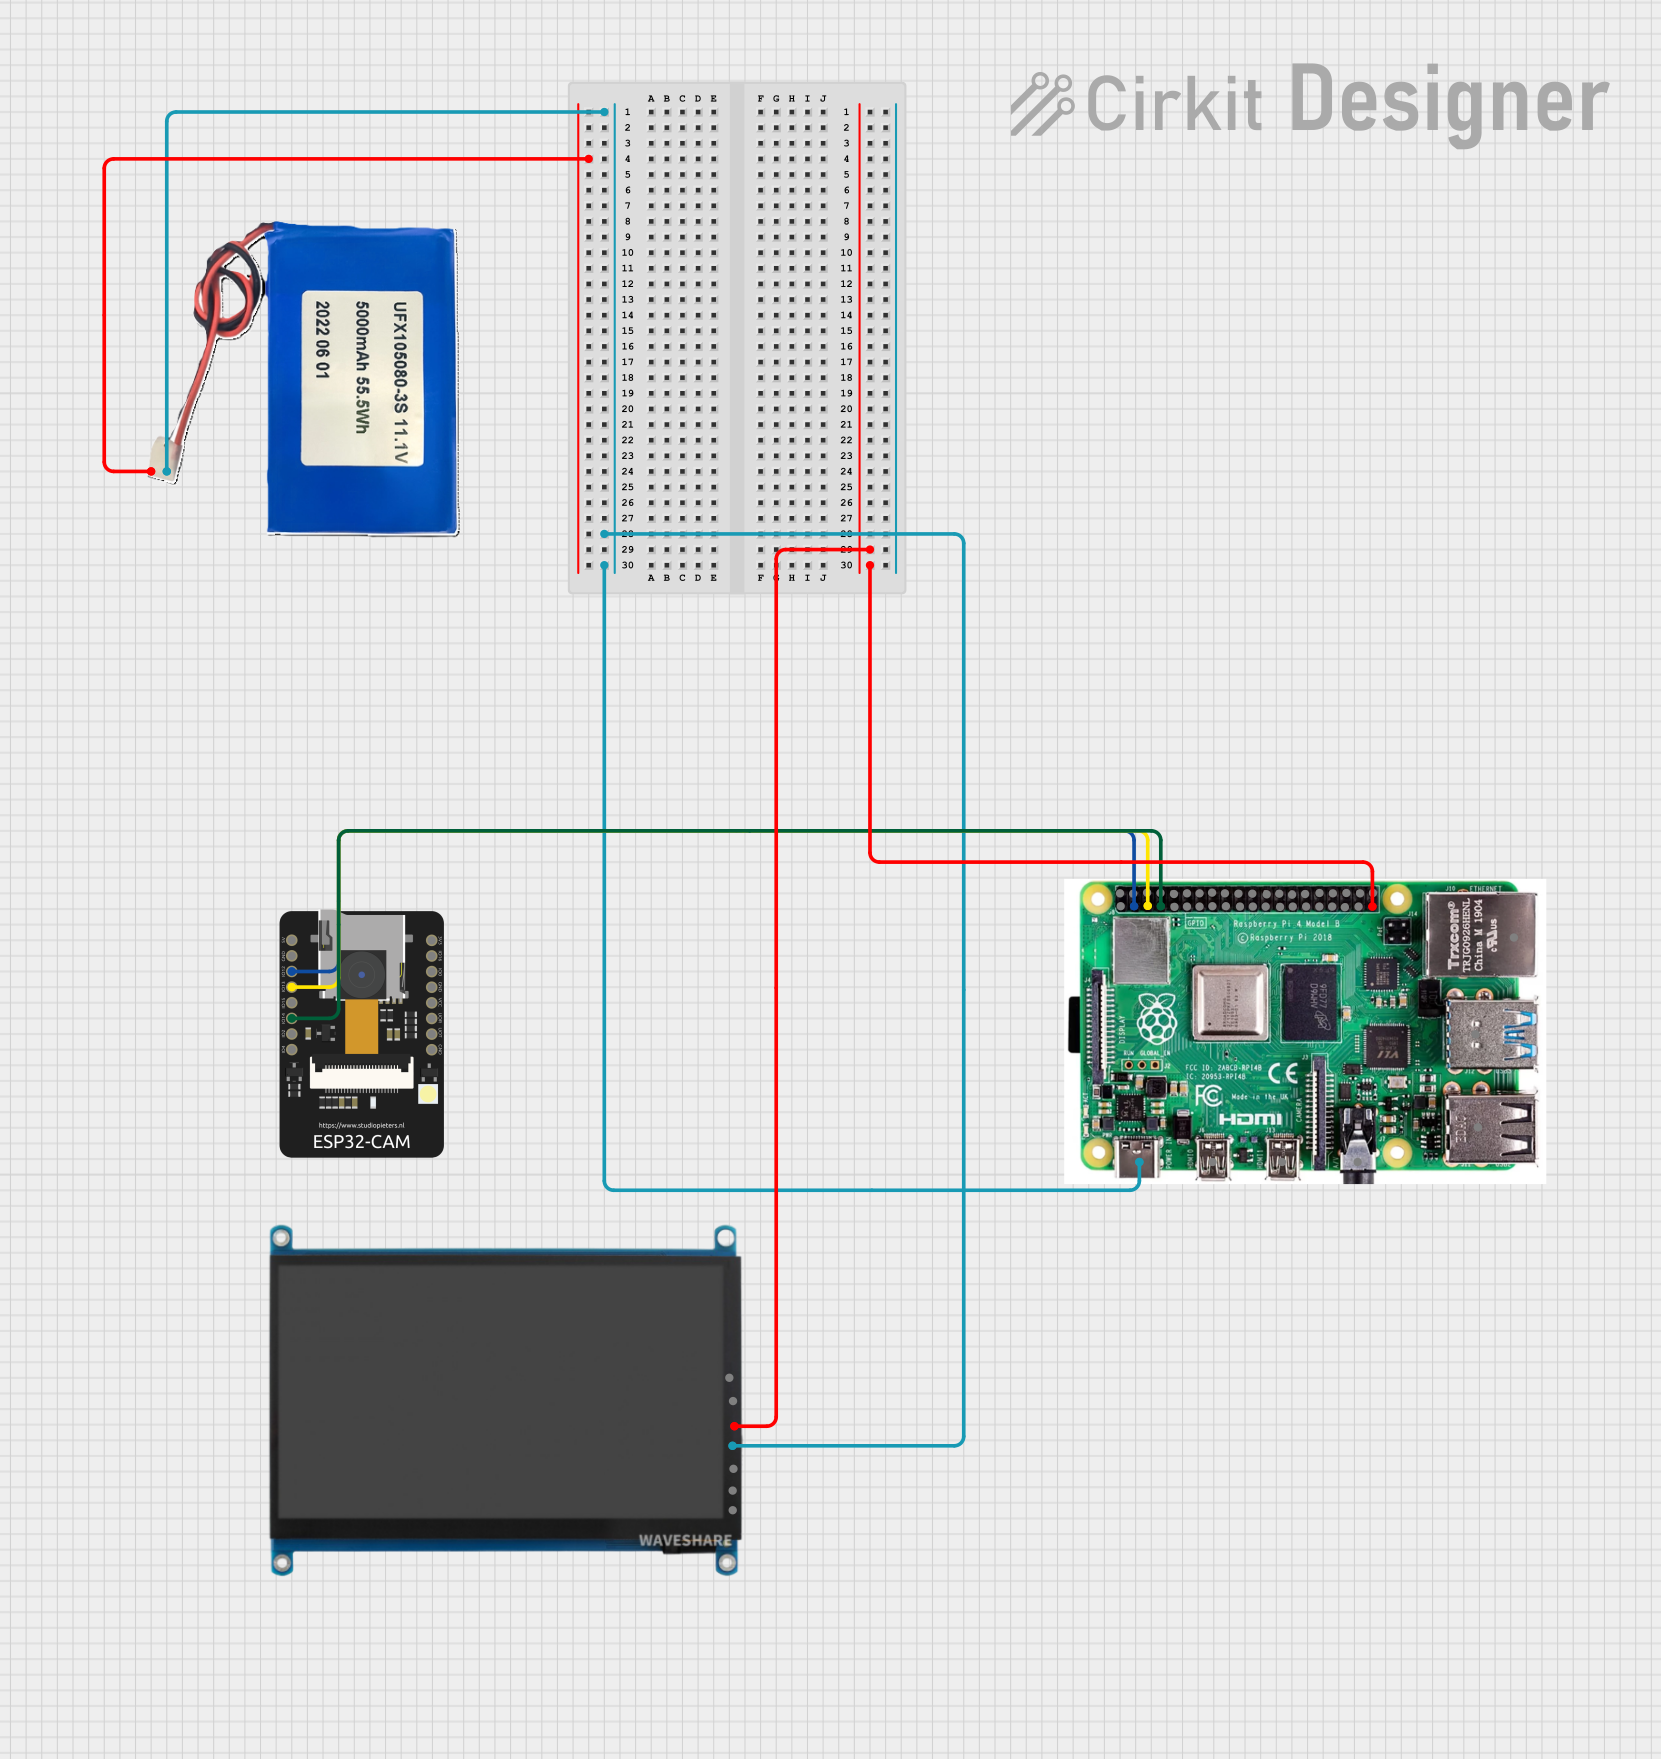
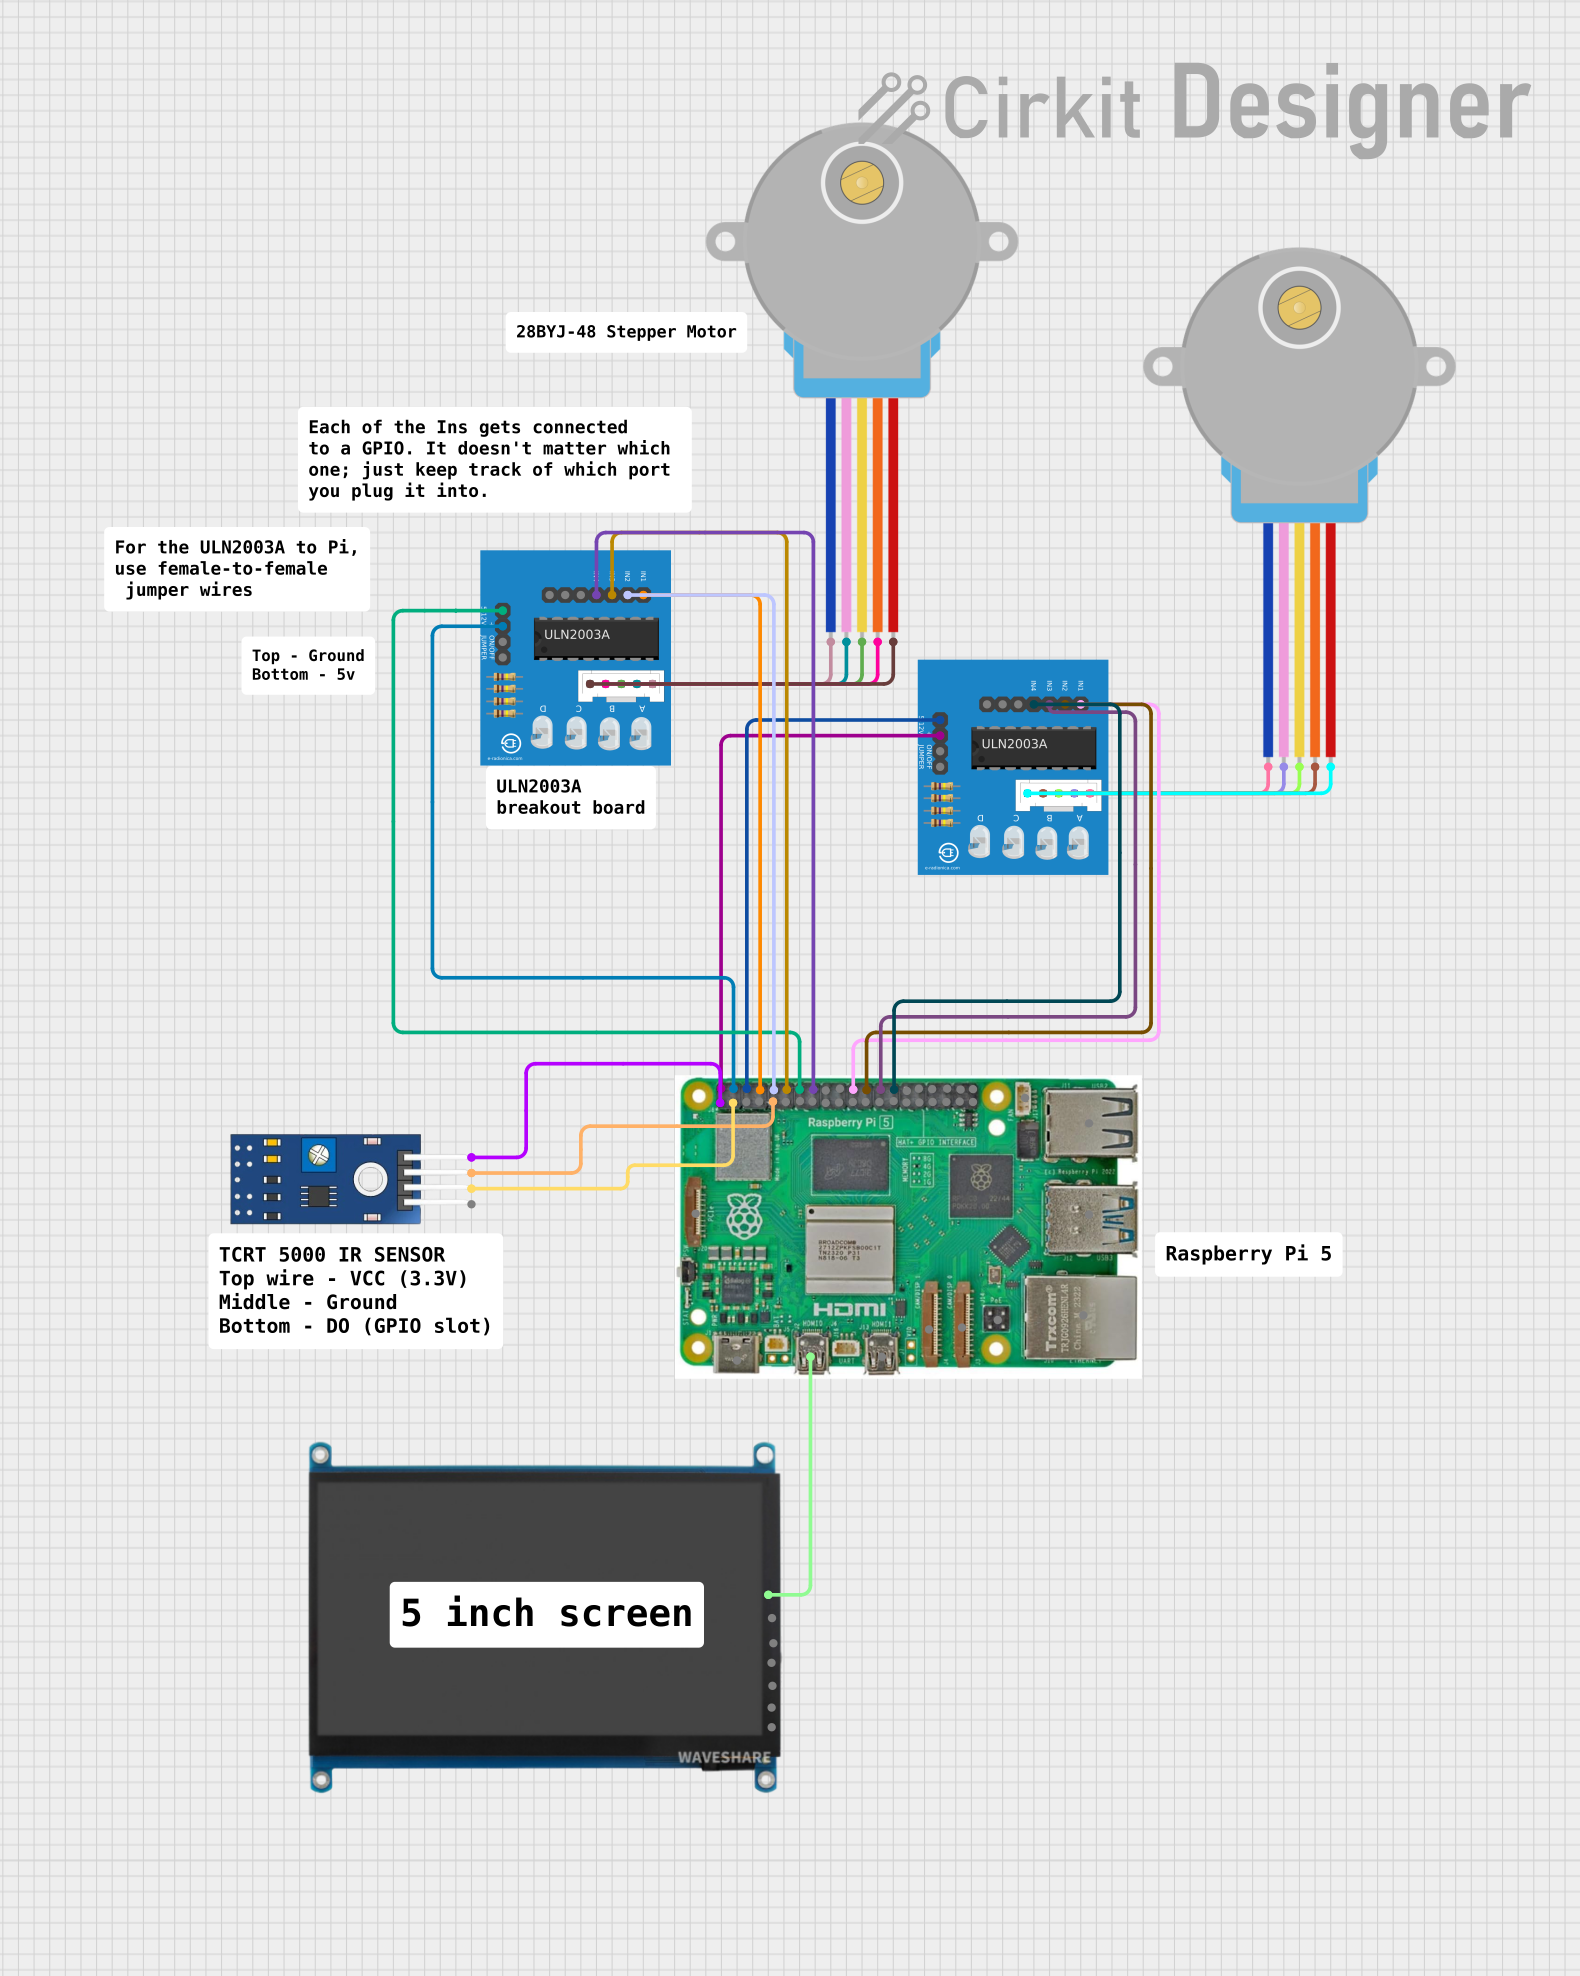
  1. Power Connection: Connect the 5V and GND pins to a suitable 5V power supply.
  2. Video Signal: Connect the HDMI port to the HDMI output of your device (e.g., Raspberry Pi).
  3. Touch Interface: Connect the USB port to a USB host to enable touch functionality.

Important Considerations and Best Practices

  • Ensure the power supply is capable of providing sufficient current for the display.
  • Use a high-quality HDMI cable to avoid signal degradation.
  • Calibrate the touchscreen according to the manufacturer's instructions for optimal performance.
  • Avoid exposing the display to direct sunlight or high temperatures to prevent damage.
  • Handle the display with care to avoid pressure on the screen and connections.

Troubleshooting and FAQs

Common Issues Users Might Face

  • Display not powering on: Check the power supply and connections.
  • No video signal: Ensure the HDMI cable is properly connected and the source device is outputting the correct resolution.
  • Touchscreen not responsive: Verify the USB connection and ensure drivers (if required) are installed.

Solutions and Tips for Troubleshooting

  • If the display does not turn on, confirm that the power supply is rated at 5V and can provide adequate current.
  • In case of video issues, try a different HDMI cable or check the video output settings on your source device.
  • For touchscreen problems, reconnect the USB cable and restart the device. Ensure that the operating system supports the touch functionality.

FAQs

Q: Can I use the display with platforms other than Raspberry Pi? A: Yes, the display can be used with any device that has an HDMI output and USB port for touch functionality.

Q: Is additional software required to use the touchscreen? A: This depends on the operating system. Some systems may require driver installation, while others support plug-and-play functionality.

Q: How do I calibrate the touchscreen? A: Calibration instructions are typically provided by the manufacturer. For Raspberry Pi, you can use the xinput_calibrator tool available in the repository.

Q: What is the maximum length for the HDMI and USB cables? A: For best performance, it is recommended to use cables no longer than 5 meters to prevent signal loss.

Example Code for Arduino UNO

The 7 inch WaveShare (H) display is not directly compatible with an Arduino UNO due to the HDMI interface. However, if you wish to use the display with an Arduino for demonstration purposes, you can use an HDMI to SPI converter and the following example code to display basic graphics:

#include <SPI.h>
#include <Adafruit_GFX.h>
#include <Adafruit_ILI9341.h>

// For the Adafruit shield, these are the default.
#define TFT_CS     10
#define TFT_RST    9
#define TFT_DC     8

Adafruit_ILI9341 tft = Adafruit_ILI9341(TFT_CS, TFT_DC, TFT_RST);

void setup() {
  tft.begin();
  tft.setRotation(3); // Rotate to landscape mode
  tft.fillScreen(ILI9341_BLACK); // Clear the screen
}

void loop() {
  // Draw a white circle at the center of the screen
  tft.drawCircle(tft.width()/2, tft.height()/2, 50, ILI9341_WHITE);
  delay(500);

  // Fill the circle with blue color
  tft.fillCircle(tft.width()/2, tft.height()/2, 50, ILI9341_BLUE);
  delay(500);
}

Please note that this code is for demonstration purposes and requires additional hardware to interface the display with an Arduino UNO. Always refer to the manufacturer's datasheet for accurate information and instructions.