How to Use ENS160+AHT21: Examples, Pinouts, and Specs
Introduction
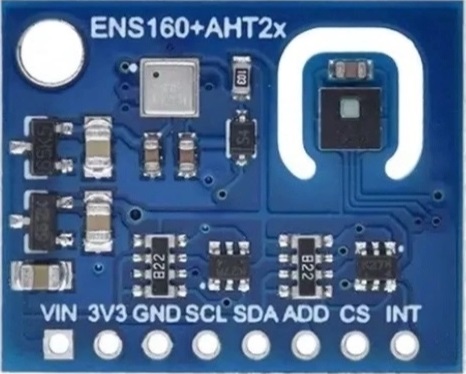
The ENS160+AHT21 integrated sensor module combines the capabilities of the ENS160 TrueVOC™ air quality sensor with the AHT21 precision temperature and humidity sensor. This compact module is designed to provide accurate measurements of temperature, humidity, and volatile organic compounds (VOCs) in a variety of applications, including smart home automation, HVAC systems, and indoor air quality monitoring.
Explore Projects Built with ENS160+AHT21

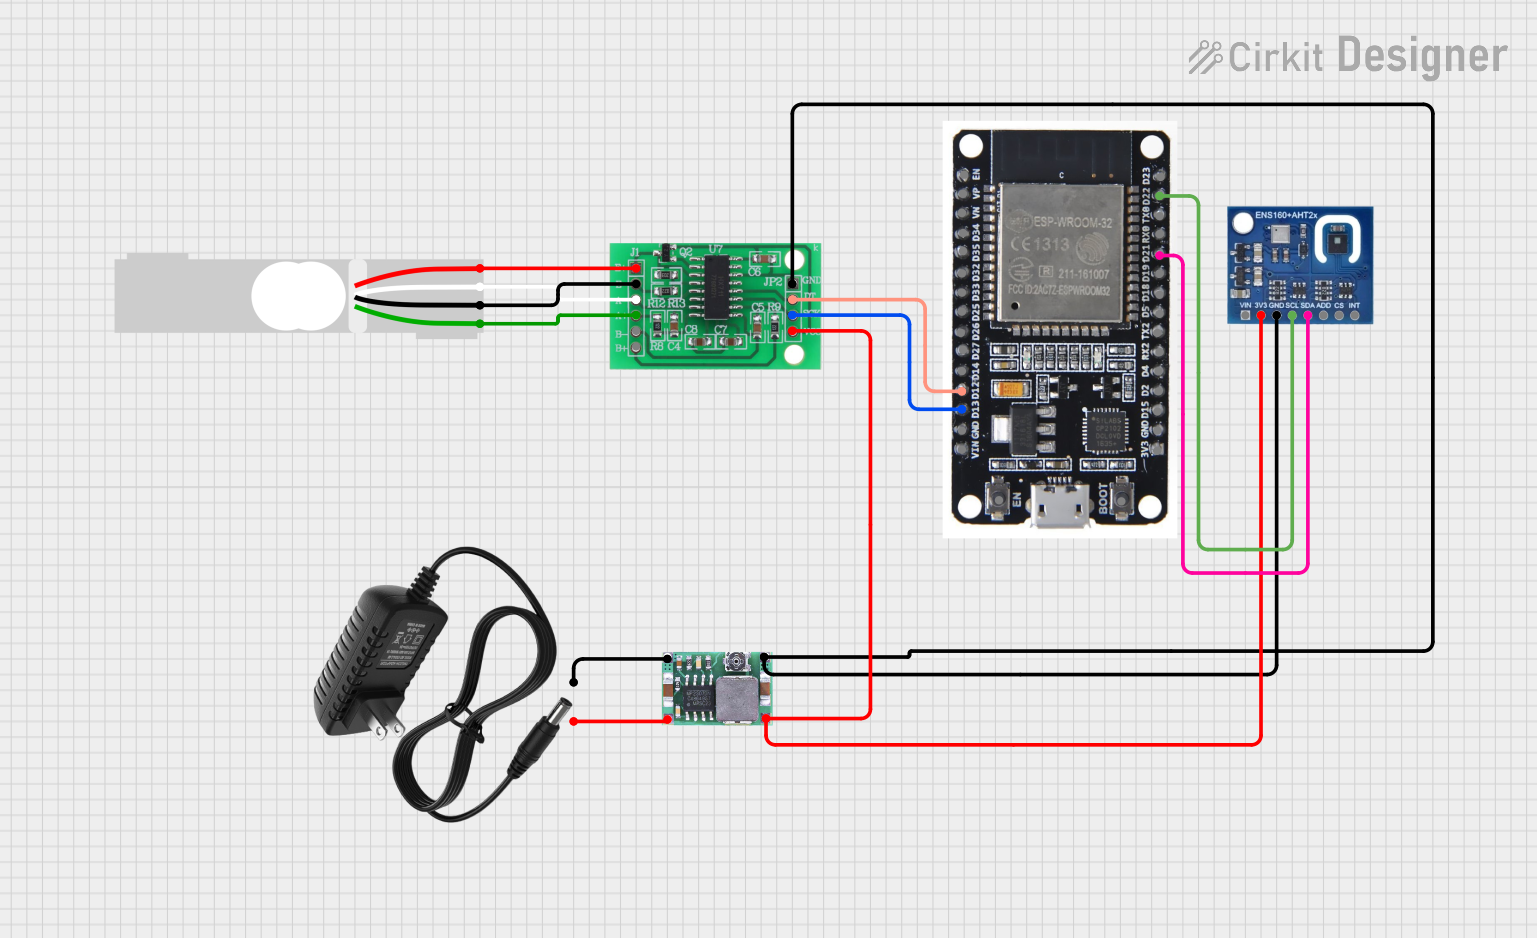

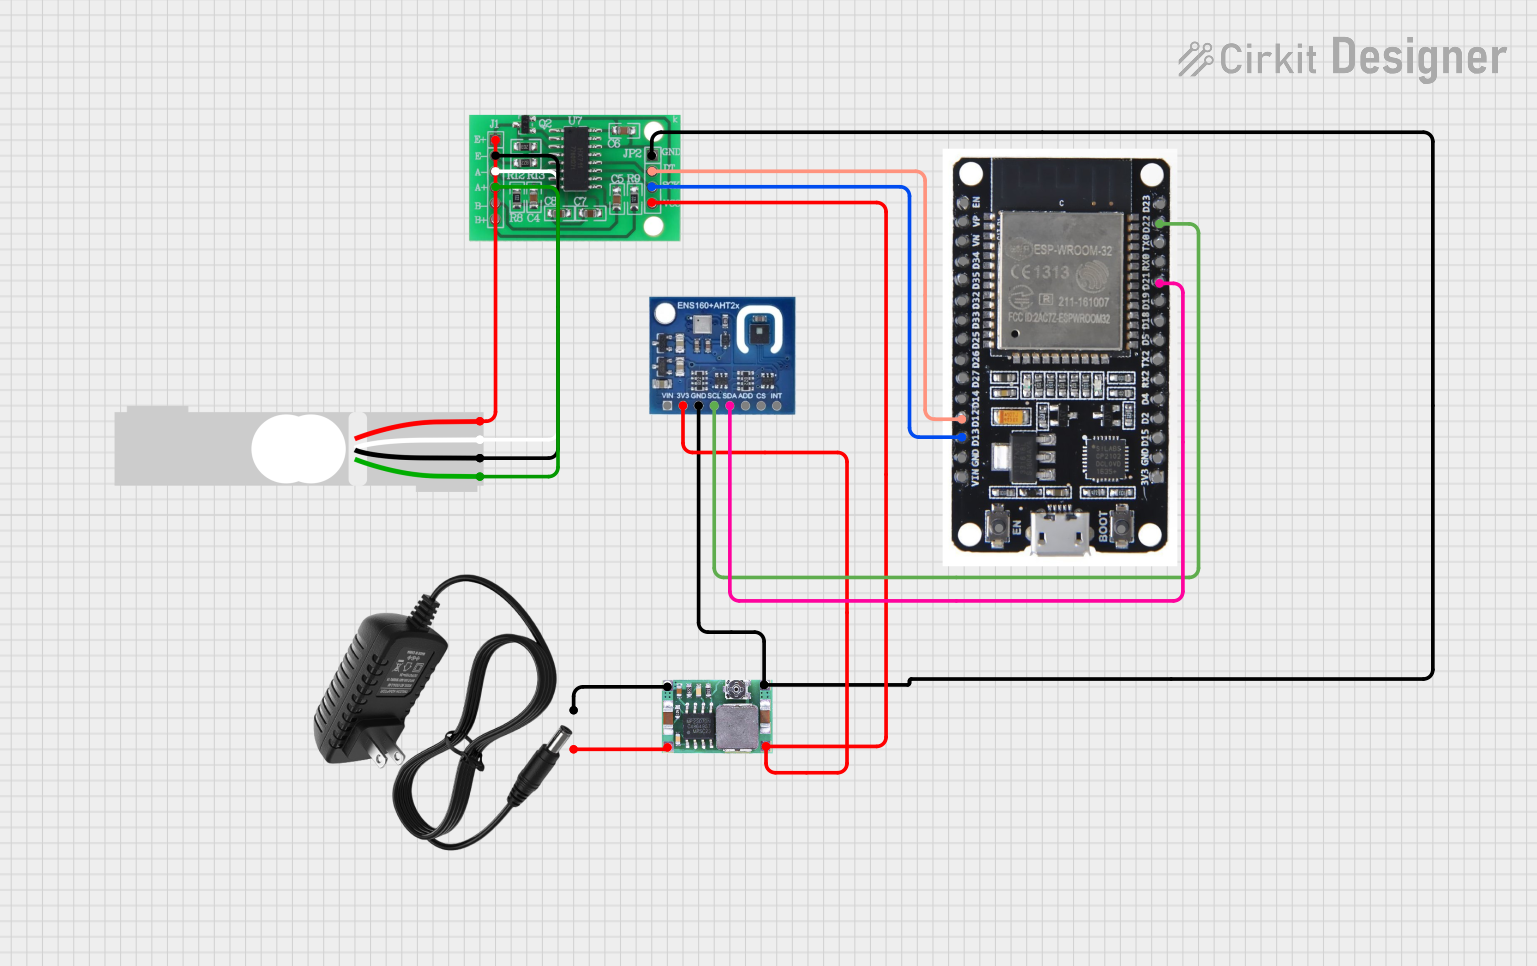
Explore Projects Built with ENS160+AHT21
Common Applications and Use Cases
- Smart home devices (thermostats, air purifiers)
- HVAC control systems
- Indoor air quality monitoring
- Environmental data logging
- Weather stations
Technical Specifications
Key Technical Details
- Supply Voltage (Vcc): 3.3V
- Operating Current: 10 mA (typical)
- Temperature Measurement Range: -40°C to +80°C
- Humidity Measurement Range: 0% to 100% RH
- VOC Measurement Range: 0 to 1000 ppb
- Interface: I2C
Pin Configuration and Descriptions
| Pin Number | Name | Description |
|---|---|---|
| 1 | VDD | Power supply (3.3V) |
| 2 | GND | Ground |
| 3 | SDA | I2C Data Line |
| 4 | SCL | I2C Clock Line |
| 5 | NC | No Connection (reserved for future use) |
Usage Instructions
Integration into a Circuit
To use the ENS160+AHT21 sensor module in a circuit:
- Connect the VDD pin to a 3.3V power supply.
- Connect the GND pin to the ground of the power supply.
- Connect the SDA and SCL pins to the I2C data and clock lines, respectively.
Important Considerations and Best Practices
- Ensure that the power supply is stable and within the specified voltage range.
- Use pull-up resistors on the I2C lines if they are not already present on the microcontroller board.
- Avoid placing the sensor near heat sources or in direct sunlight to prevent inaccurate readings.
- Allow the sensor to acclimate to the environment for accurate humidity readings.
Example Code for Arduino UNO
#include <Wire.h>
#include "AHT21.h"
#include "ENS160.h"

AHT21 aht21;
ENS160 ens160;

void setup() {
  Wire.begin(); // Initialize I2C
  Serial.begin(9600); // Start serial communication at 9600 baud rate

  if (!aht21.begin()) {
    Serial.println("Failed to initialize AHT21!");
    while (1);
  }

  if (!ens160.begin()) {
    Serial.println("Failed to initialize ENS160!");
    while (1);
  }
}

void loop() {
  float temperature = aht21.readTemperature();
  float humidity = aht21.readHumidity();
  uint16_t voc = ens160.readVOC();

  Serial.print("Temperature: ");
  Serial.print(temperature);
  Serial.println(" °C");
  Serial.print("Humidity: ");
  Serial.print(humidity);
  Serial.println(" %");
  Serial.print("VOC: ");
  Serial.print(voc);
  Serial.println(" ppb");

  delay(2000); // Wait for 2 seconds before reading again
}
Troubleshooting and FAQs
Common Issues
- Sensor not responding: Ensure that the wiring is correct and that the sensor is properly powered.
- Inaccurate readings: Check for any environmental factors that could affect the sensor's readings, such as direct sunlight or heat sources.
- I2C communication errors: Verify that the pull-up resistors are in place and that there are no shorts on the I2C lines.
Solutions and Tips for Troubleshooting
- Double-check the connections and solder joints.
- Make sure that the sensor has had sufficient time to acclimate to the environment before taking readings.
- Use a logic analyzer or oscilloscope to debug I2C communication issues.
FAQs
Q: Can the ENS160+AHT21 sensor module be used with a 5V system?
A: No, the sensor module is designed to operate at 3.3V. Using it with a 5V supply could damage the module.
Q: How long does the sensor need to acclimate to the environment?
A: It is recommended to allow the sensor to acclimate for at least 30 minutes for accurate humidity readings.
Q: Is calibration required for the ENS160+AHT21 sensor module?
A: The sensors are factory-calibrated, but recalibration may be necessary for precise applications or after extended use.
Q: What is the I2C address of the ENS160 and AHT21 sensors?
A: The I2C addresses are fixed and can be found in the respective datasheets for the ENS160 and AHT21 sensors. Ensure that there are no address conflicts on the I2C bus.