How to Use 0-40kpa TM711 pressure sensor: Examples, Pinouts, and Specs
Introduction
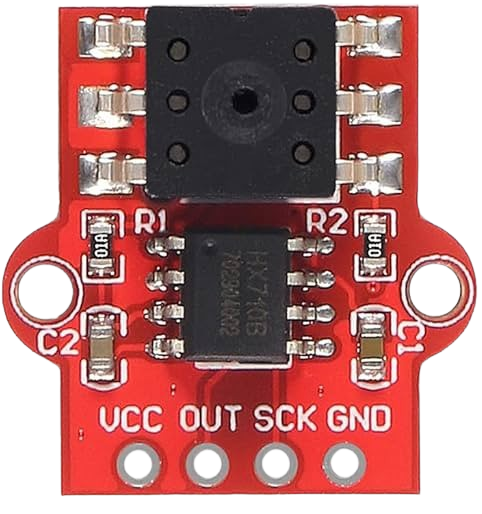
The 0-40kPa TM711 pressure sensor, manufactured by ZyrexRobotics (Part ID: Pressure Sensor), is a highly sensitive device designed to measure low-pressure ranges from 0 to 40 kPa. This sensor is ideal for applications requiring precise pressure monitoring, such as HVAC systems, weather stations, and industrial automation. Its compact design and reliable performance make it a popular choice for both hobbyists and professionals.
Explore Projects Built with 0-40kpa TM711 pressure sensor
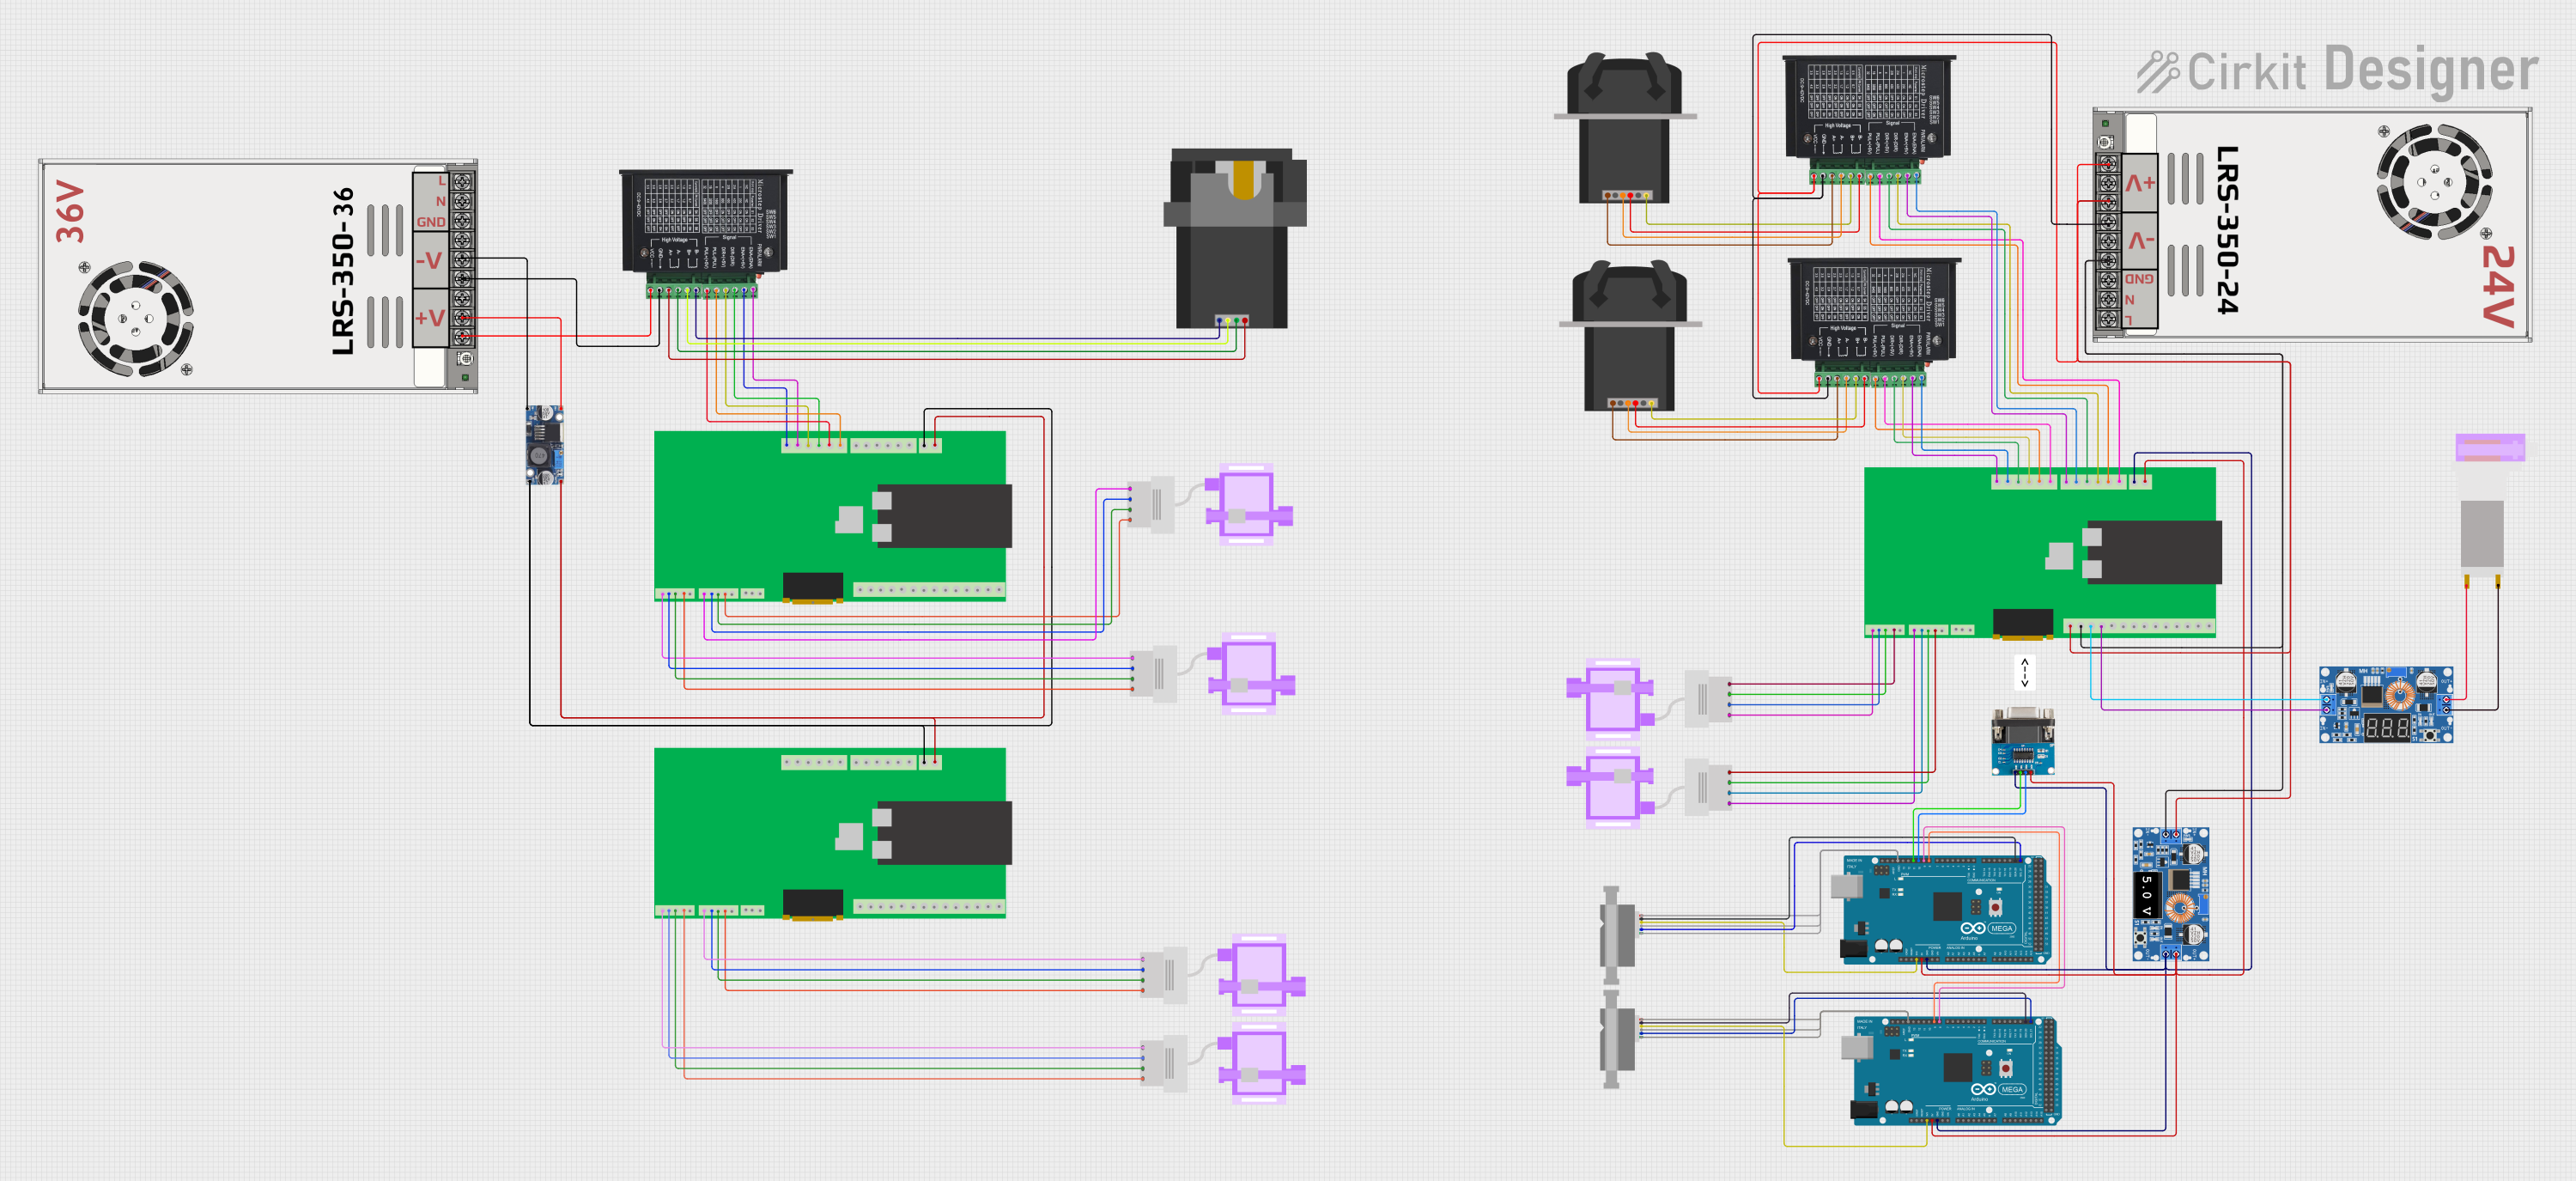
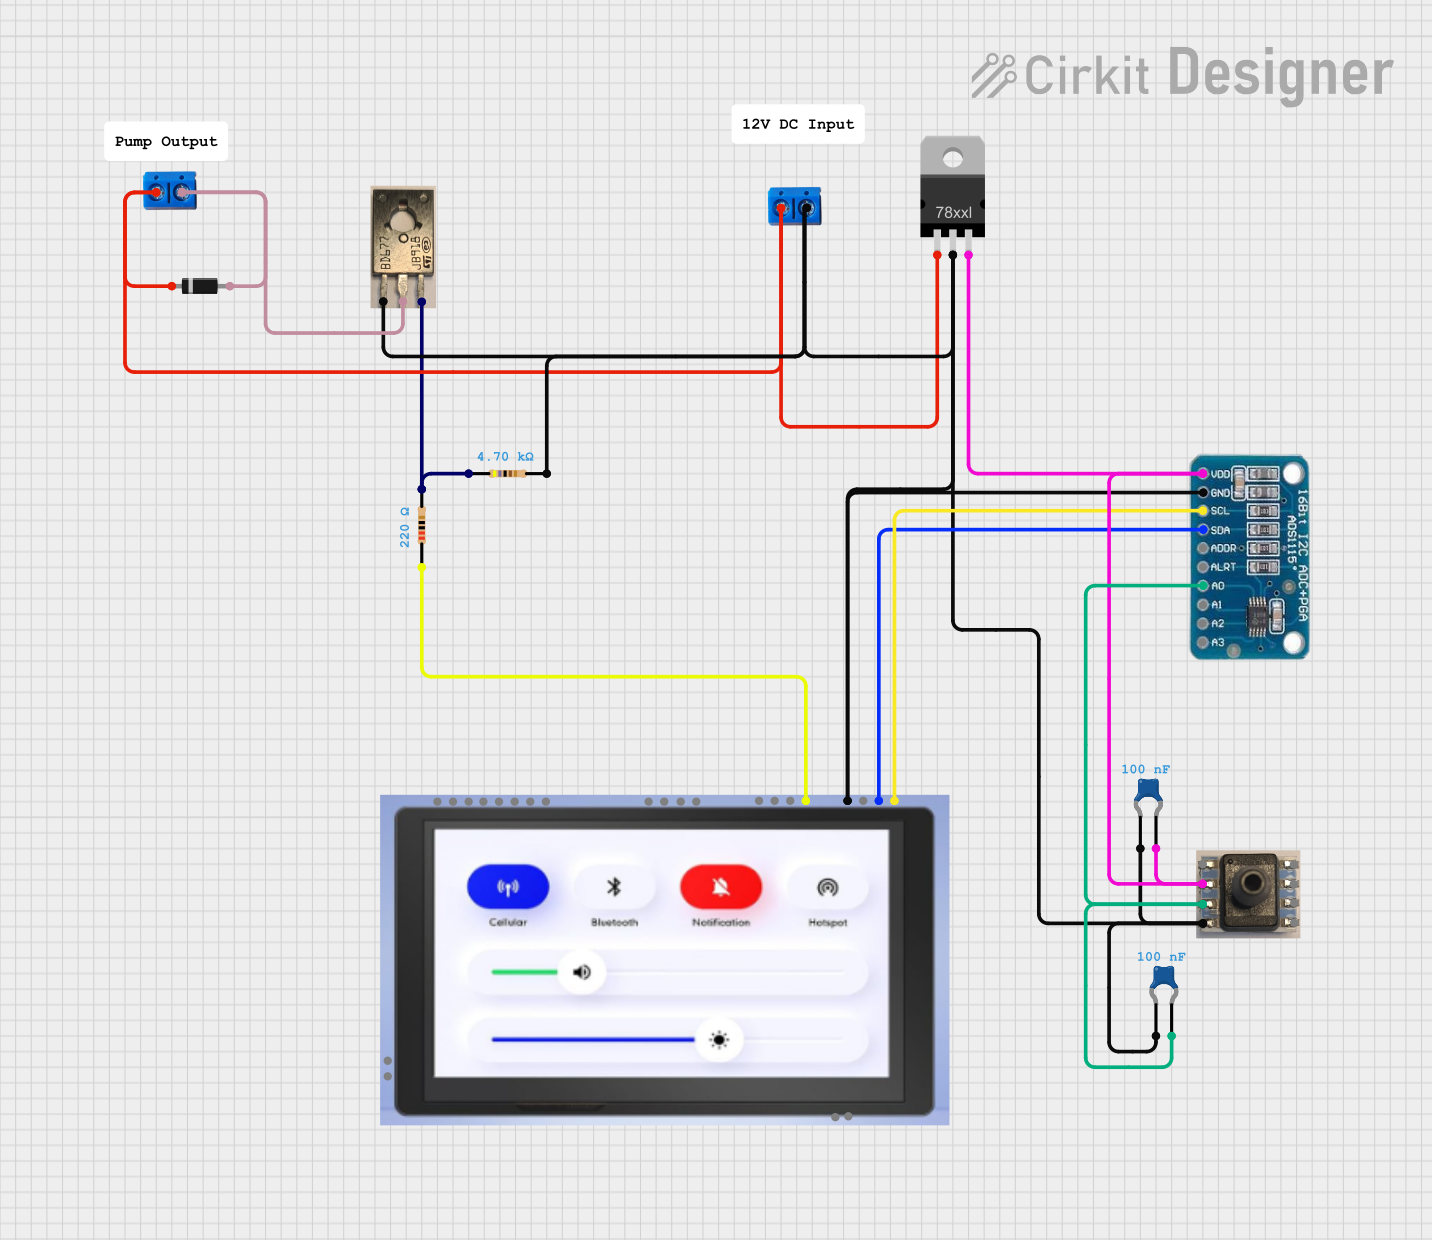
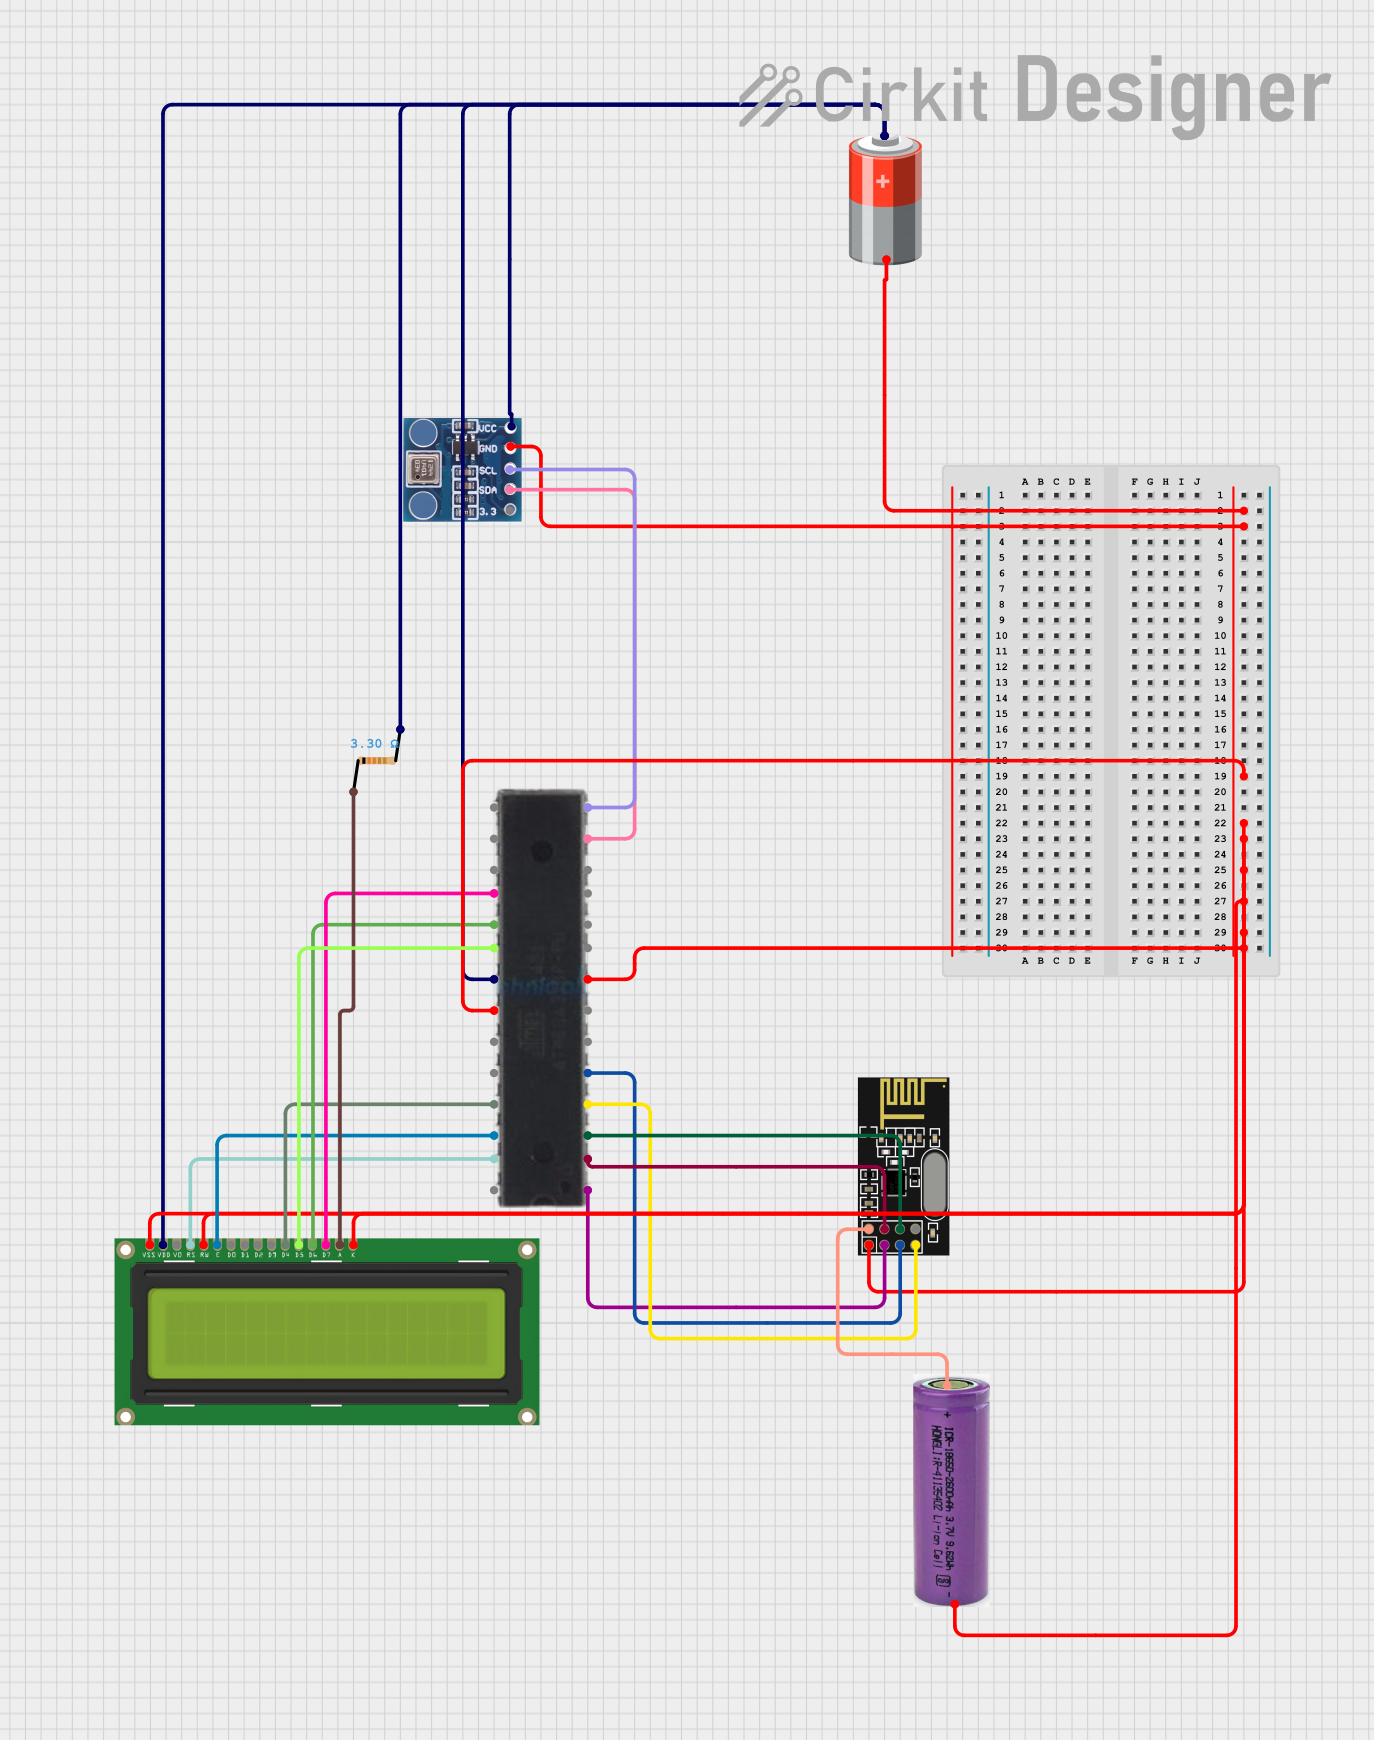
Explore Projects Built with 0-40kpa TM711 pressure sensor
Common Applications
- HVAC systems for monitoring air pressure
- Weather stations for atmospheric pressure measurement
- Industrial automation for pressure control and monitoring
- Medical devices requiring low-pressure sensing
- Educational projects and prototyping
Technical Specifications
The following table outlines the key technical details of the 0-40kPa TM711 pressure sensor:
| Parameter | Value |
|---|---|
| Pressure Range | 0 to 40 kPa |
| Supply Voltage | 3.3V to 5V |
| Output Signal | Analog (0.5V to 4.5V) |
| Accuracy | ±1.5% Full Scale |
| Operating Temperature | -20°C to 85°C |
| Response Time | < 1 ms |
| Sensor Type | Piezoresistive |
| Dimensions | 18mm x 12mm x 8mm |
Pin Configuration
The TM711 pressure sensor has a 3-pin interface. The pinout is as follows:
| Pin | Name | Description |
|---|---|---|
| 1 | VCC | Power supply input (3.3V to 5V) |
| 2 | GND | Ground connection |
| 3 | OUT | Analog output signal (proportional to pressure) |
Usage Instructions
Connecting the Sensor
To use the TM711 pressure sensor in a circuit:
- Connect the VCC pin to a 3.3V or 5V power supply.
- Connect the GND pin to the ground of your circuit.
- Connect the OUT pin to an analog input pin of your microcontroller or ADC (Analog-to-Digital Converter).
Important Considerations
- Ensure the supply voltage is within the specified range (3.3V to 5V) to avoid damaging the sensor.
- Use a stable power source to minimize noise in the output signal.
- Avoid exposing the sensor to pressures beyond its rated range (40 kPa) to prevent permanent damage.
- If using the sensor in a noisy environment, consider adding a capacitor (e.g., 0.1 µF) between the VCC and GND pins to filter out noise.
Example: Using the TM711 with Arduino UNO
Below is an example of how to interface the TM711 pressure sensor with an Arduino UNO to read and display pressure values:
// TM711 Pressure Sensor Example with Arduino UNO
// Reads the analog output from the sensor and converts it to pressure (kPa)

const int sensorPin = A0; // Connect the OUT pin of the sensor to A0
const float sensorMinVoltage = 0.5; // Minimum output voltage (V) at 0 kPa
const float sensorMaxVoltage = 4.5; // Maximum output voltage (V) at 40 kPa
const float pressureRange = 40.0;   // Pressure range of the sensor (kPa)

void setup() {
  Serial.begin(9600); // Initialize serial communication at 9600 baud
}

void loop() {
  int sensorValue = analogRead(sensorPin); // Read the analog value (0-1023)
  float voltage = sensorValue * (5.0 / 1023.0); // Convert to voltage (0-5V)

  // Calculate pressure in kPa based on sensor output
  float pressure = (voltage - sensorMinVoltage) * (pressureRange /
                    (sensorMaxVoltage - sensorMinVoltage));

  // Ensure pressure is within valid range
  if (pressure < 0) pressure = 0;
  if (pressure > pressureRange) pressure = pressureRange;

  // Print the pressure value to the Serial Monitor
  Serial.print("Pressure: ");
  Serial.print(pressure);
  Serial.println(" kPa");

  delay(500); // Wait for 500 ms before the next reading
}
Notes:
- The above code assumes a 5V Arduino UNO. If using a 3.3V microcontroller, adjust the voltage calculations accordingly.
- Use the Serial Monitor in the Arduino IDE to view the pressure readings.
Troubleshooting and FAQs
Common Issues
No Output Signal
- Ensure the sensor is powered correctly (check VCC and GND connections).
- Verify that the analog output pin (OUT) is connected to the correct input pin on your microcontroller.
Inaccurate Readings
- Check for noise in the power supply and add a decoupling capacitor if necessary.
- Ensure the sensor is not exposed to pressures outside its specified range.
- Verify the calibration values in your code (e.g.,
sensorMinVoltageandsensorMaxVoltage).
Fluctuating Output
- Ensure stable power supply voltage.
- Check for loose or poor connections in the circuit.
FAQs
Q: Can the TM711 measure negative pressure?
A: No, the TM711 is designed to measure pressures in the range of 0 to 40 kPa only.
Q: Can I use the TM711 with a 3.3V microcontroller?
A: Yes, the TM711 operates with a supply voltage of 3.3V to 5V. Ensure the output signal is within the ADC range of your microcontroller.
Q: How do I protect the sensor from overpressure?
A: Use a pressure relief valve or a mechanical limiter to prevent the sensor from being exposed to pressures beyond 40 kPa.
Q: Is the sensor waterproof?
A: No, the TM711 is not waterproof. Avoid exposing it to liquids or high humidity environments.
By following the guidelines and best practices outlined in this documentation, you can effectively integrate the 0-40kPa TM711 pressure sensor into your projects for reliable and accurate pressure measurements.