How to Use Arduino Motor Shield (Rev3): Examples, Pinouts, and Specs
Introduction
The Arduino Motor Shield (Rev3) is a versatile expansion board designed for the Arduino platform, enabling users to easily control and drive motors. It is an essential tool for hobbyists, educators, and professionals involved in robotics, automation, and interactive art installations. The shield allows for the direct control of two DC motors or one stepper motor, making it an ideal choice for projects requiring precise motor manipulation.
Explore Projects Built with Arduino Motor Shield (Rev3)
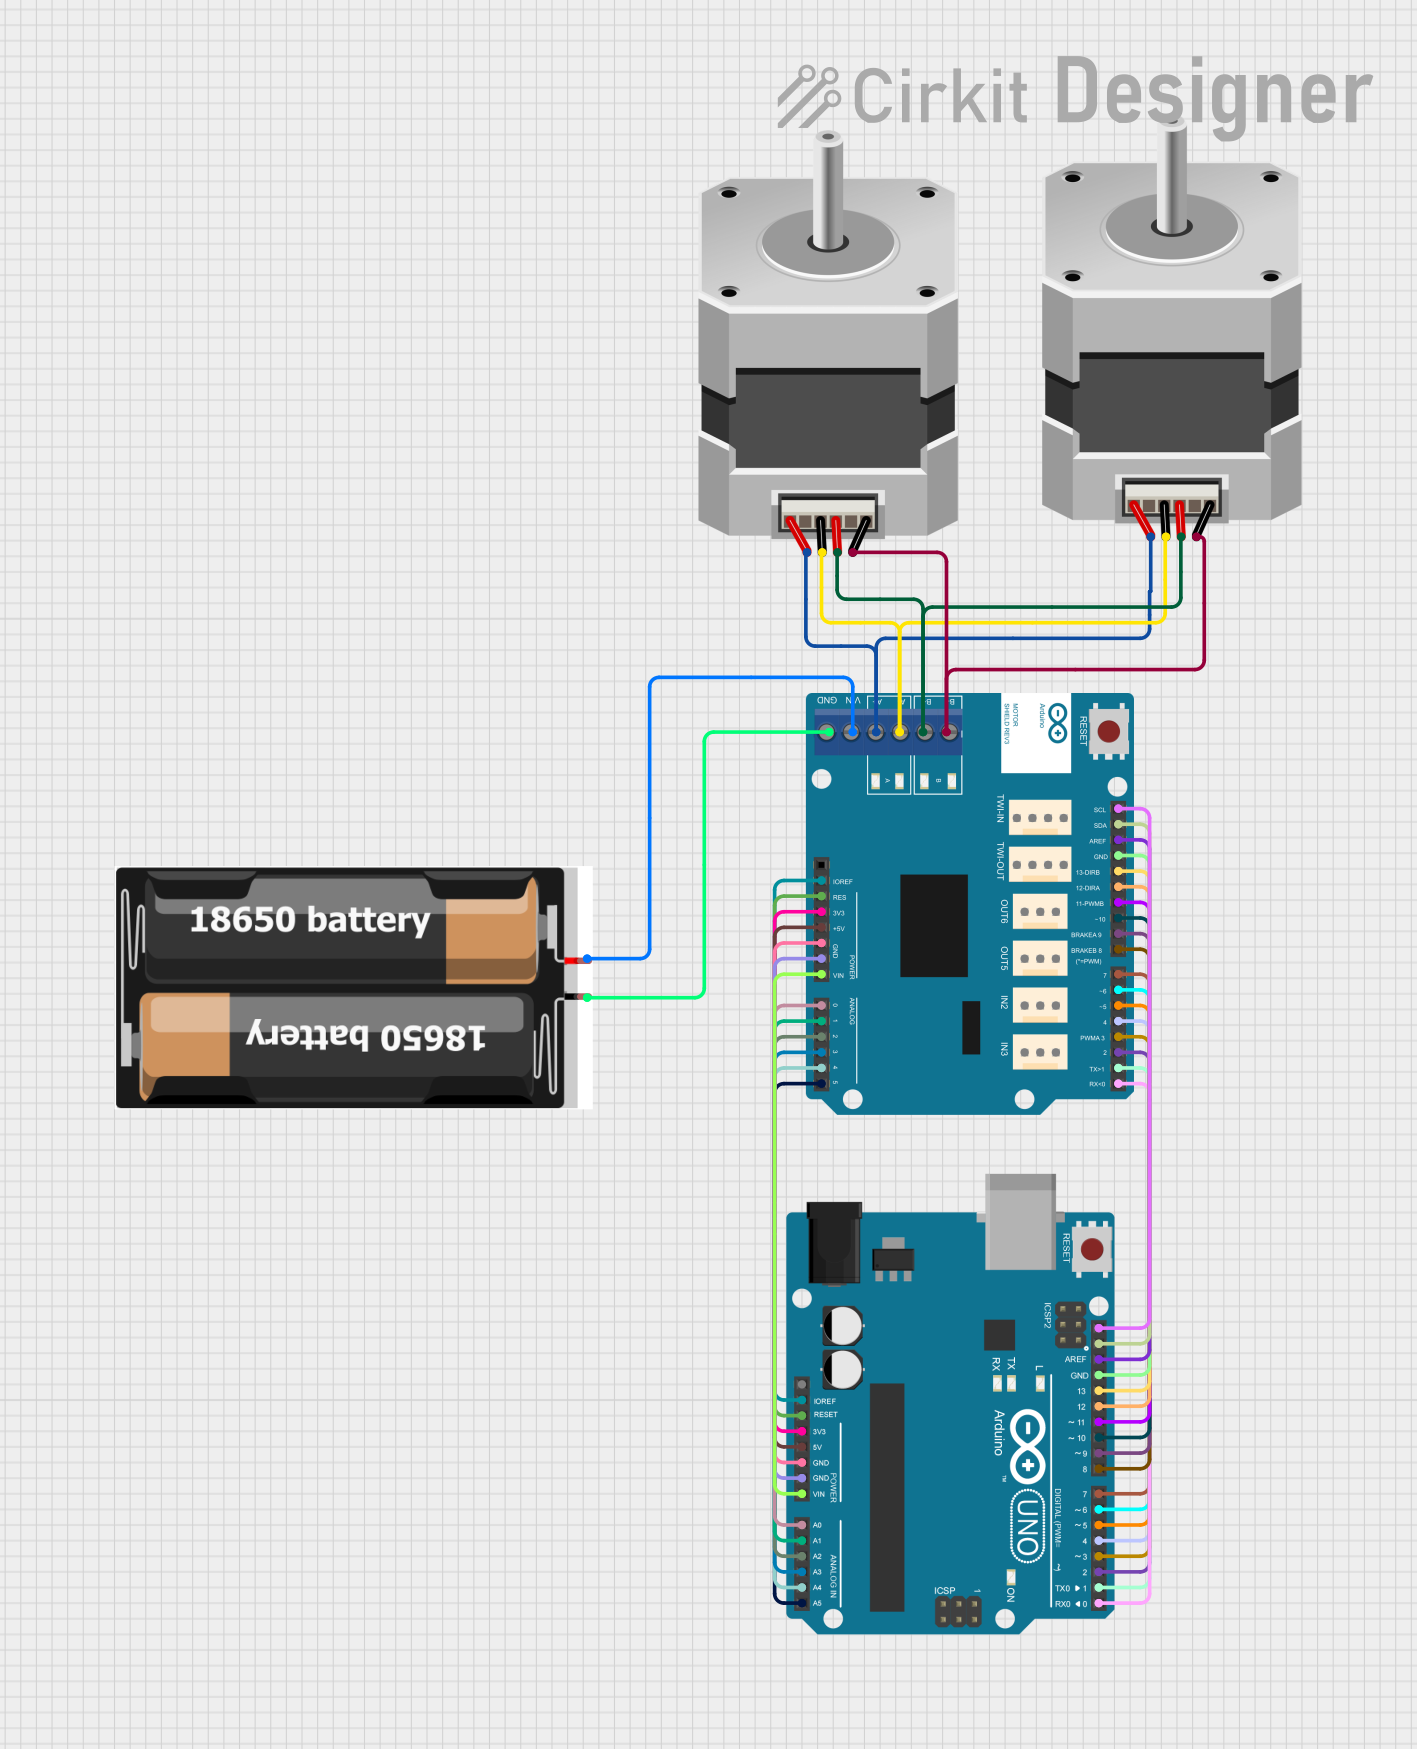
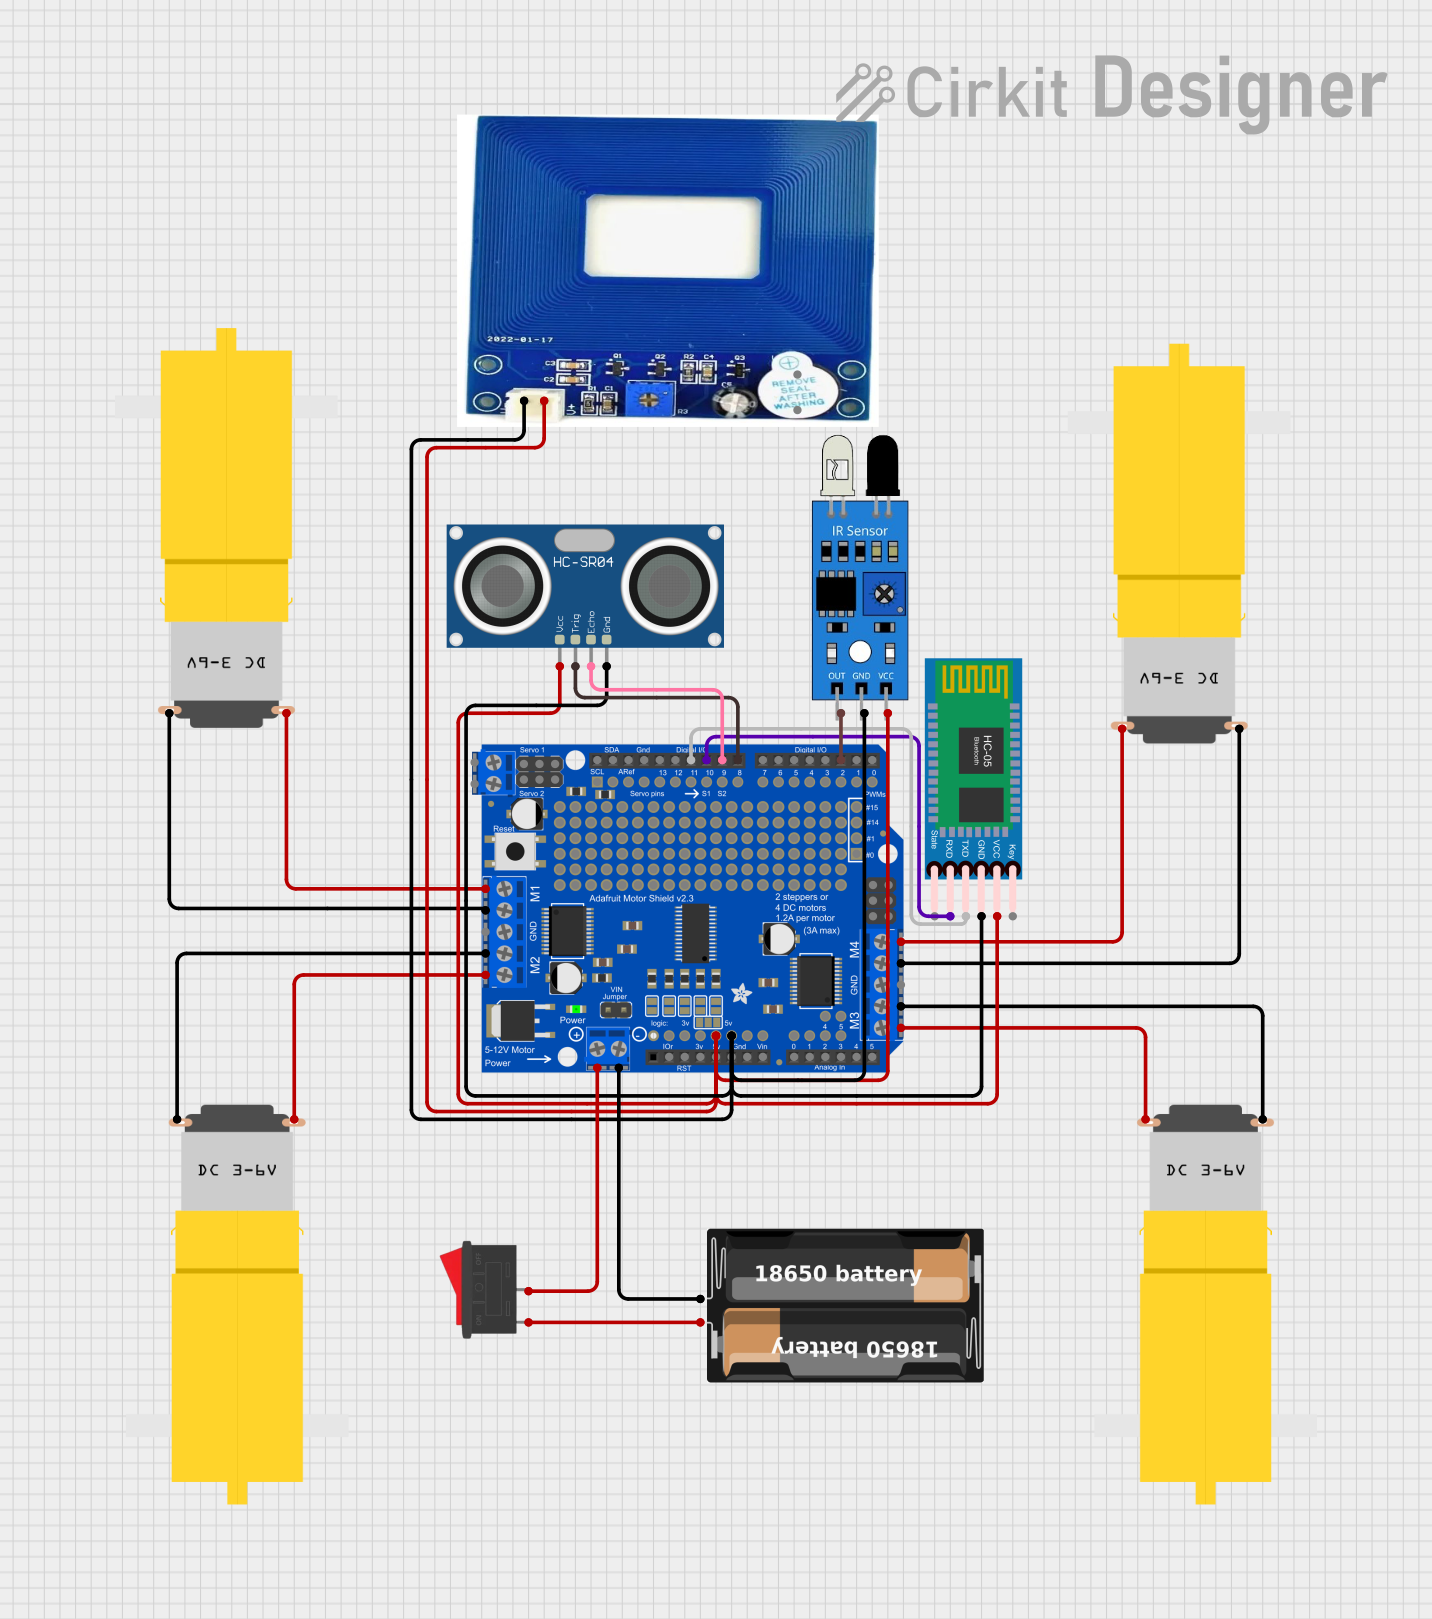

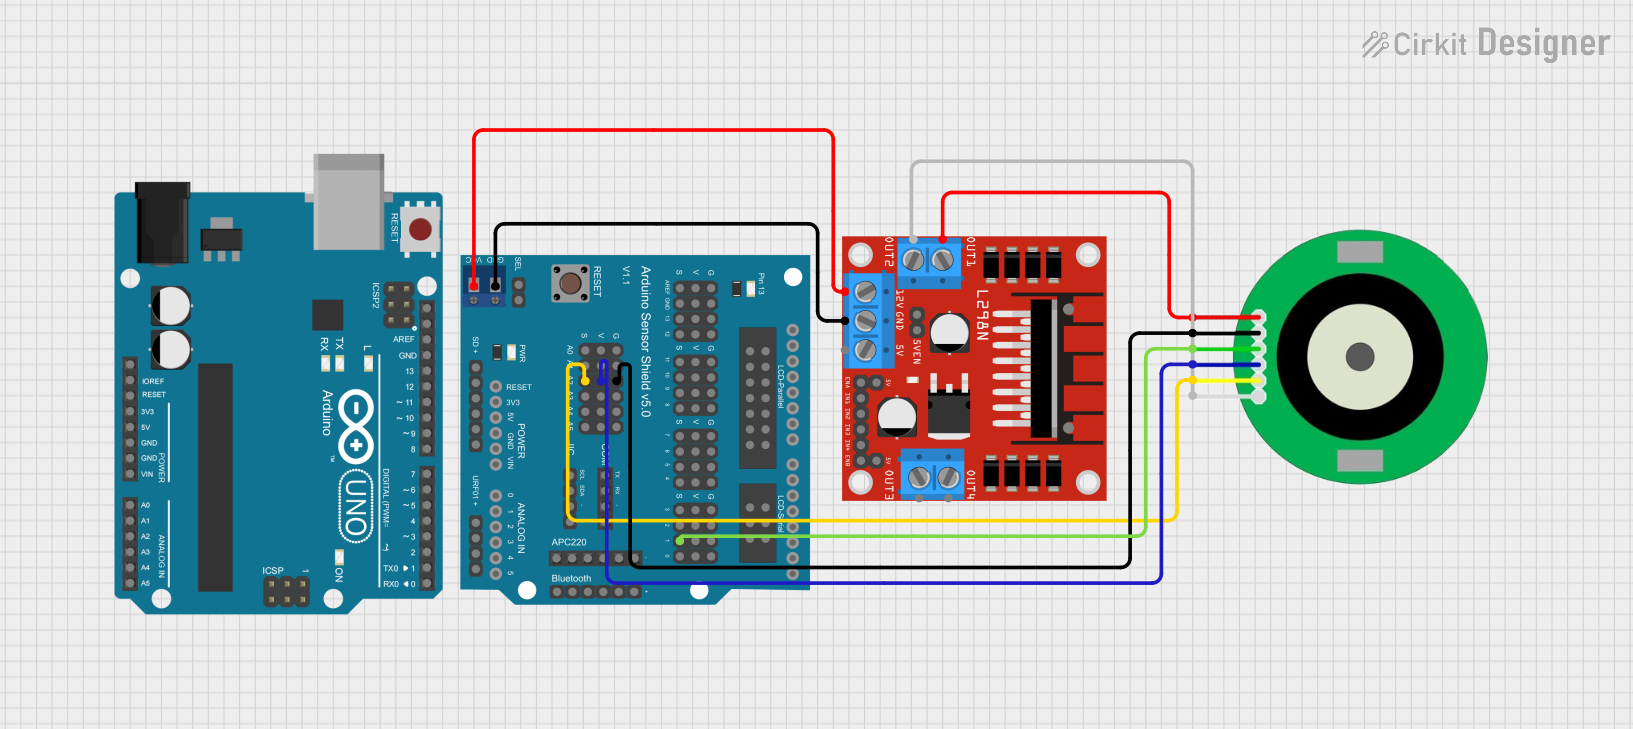
Explore Projects Built with Arduino Motor Shield (Rev3)
Common Applications and Use Cases
- Robotics: Drive wheels or actuate robotic arms.
- Automation: Control conveyor belts, linear actuators, or mixing machines.
- Interactive Art: Create moving installations or kinetic sculptures.
- Educational Projects: Teach principles of mechanical motion and control systems.
Technical Specifications
Key Technical Details
- Operating Voltage: 5V to 12V
- Motor Controller: L298P, Drives 2 DC motors or 1 stepper motor
- Max Current: 2A per channel or 4A max (with external power supply)
- Current Sensing: 1.65V/A
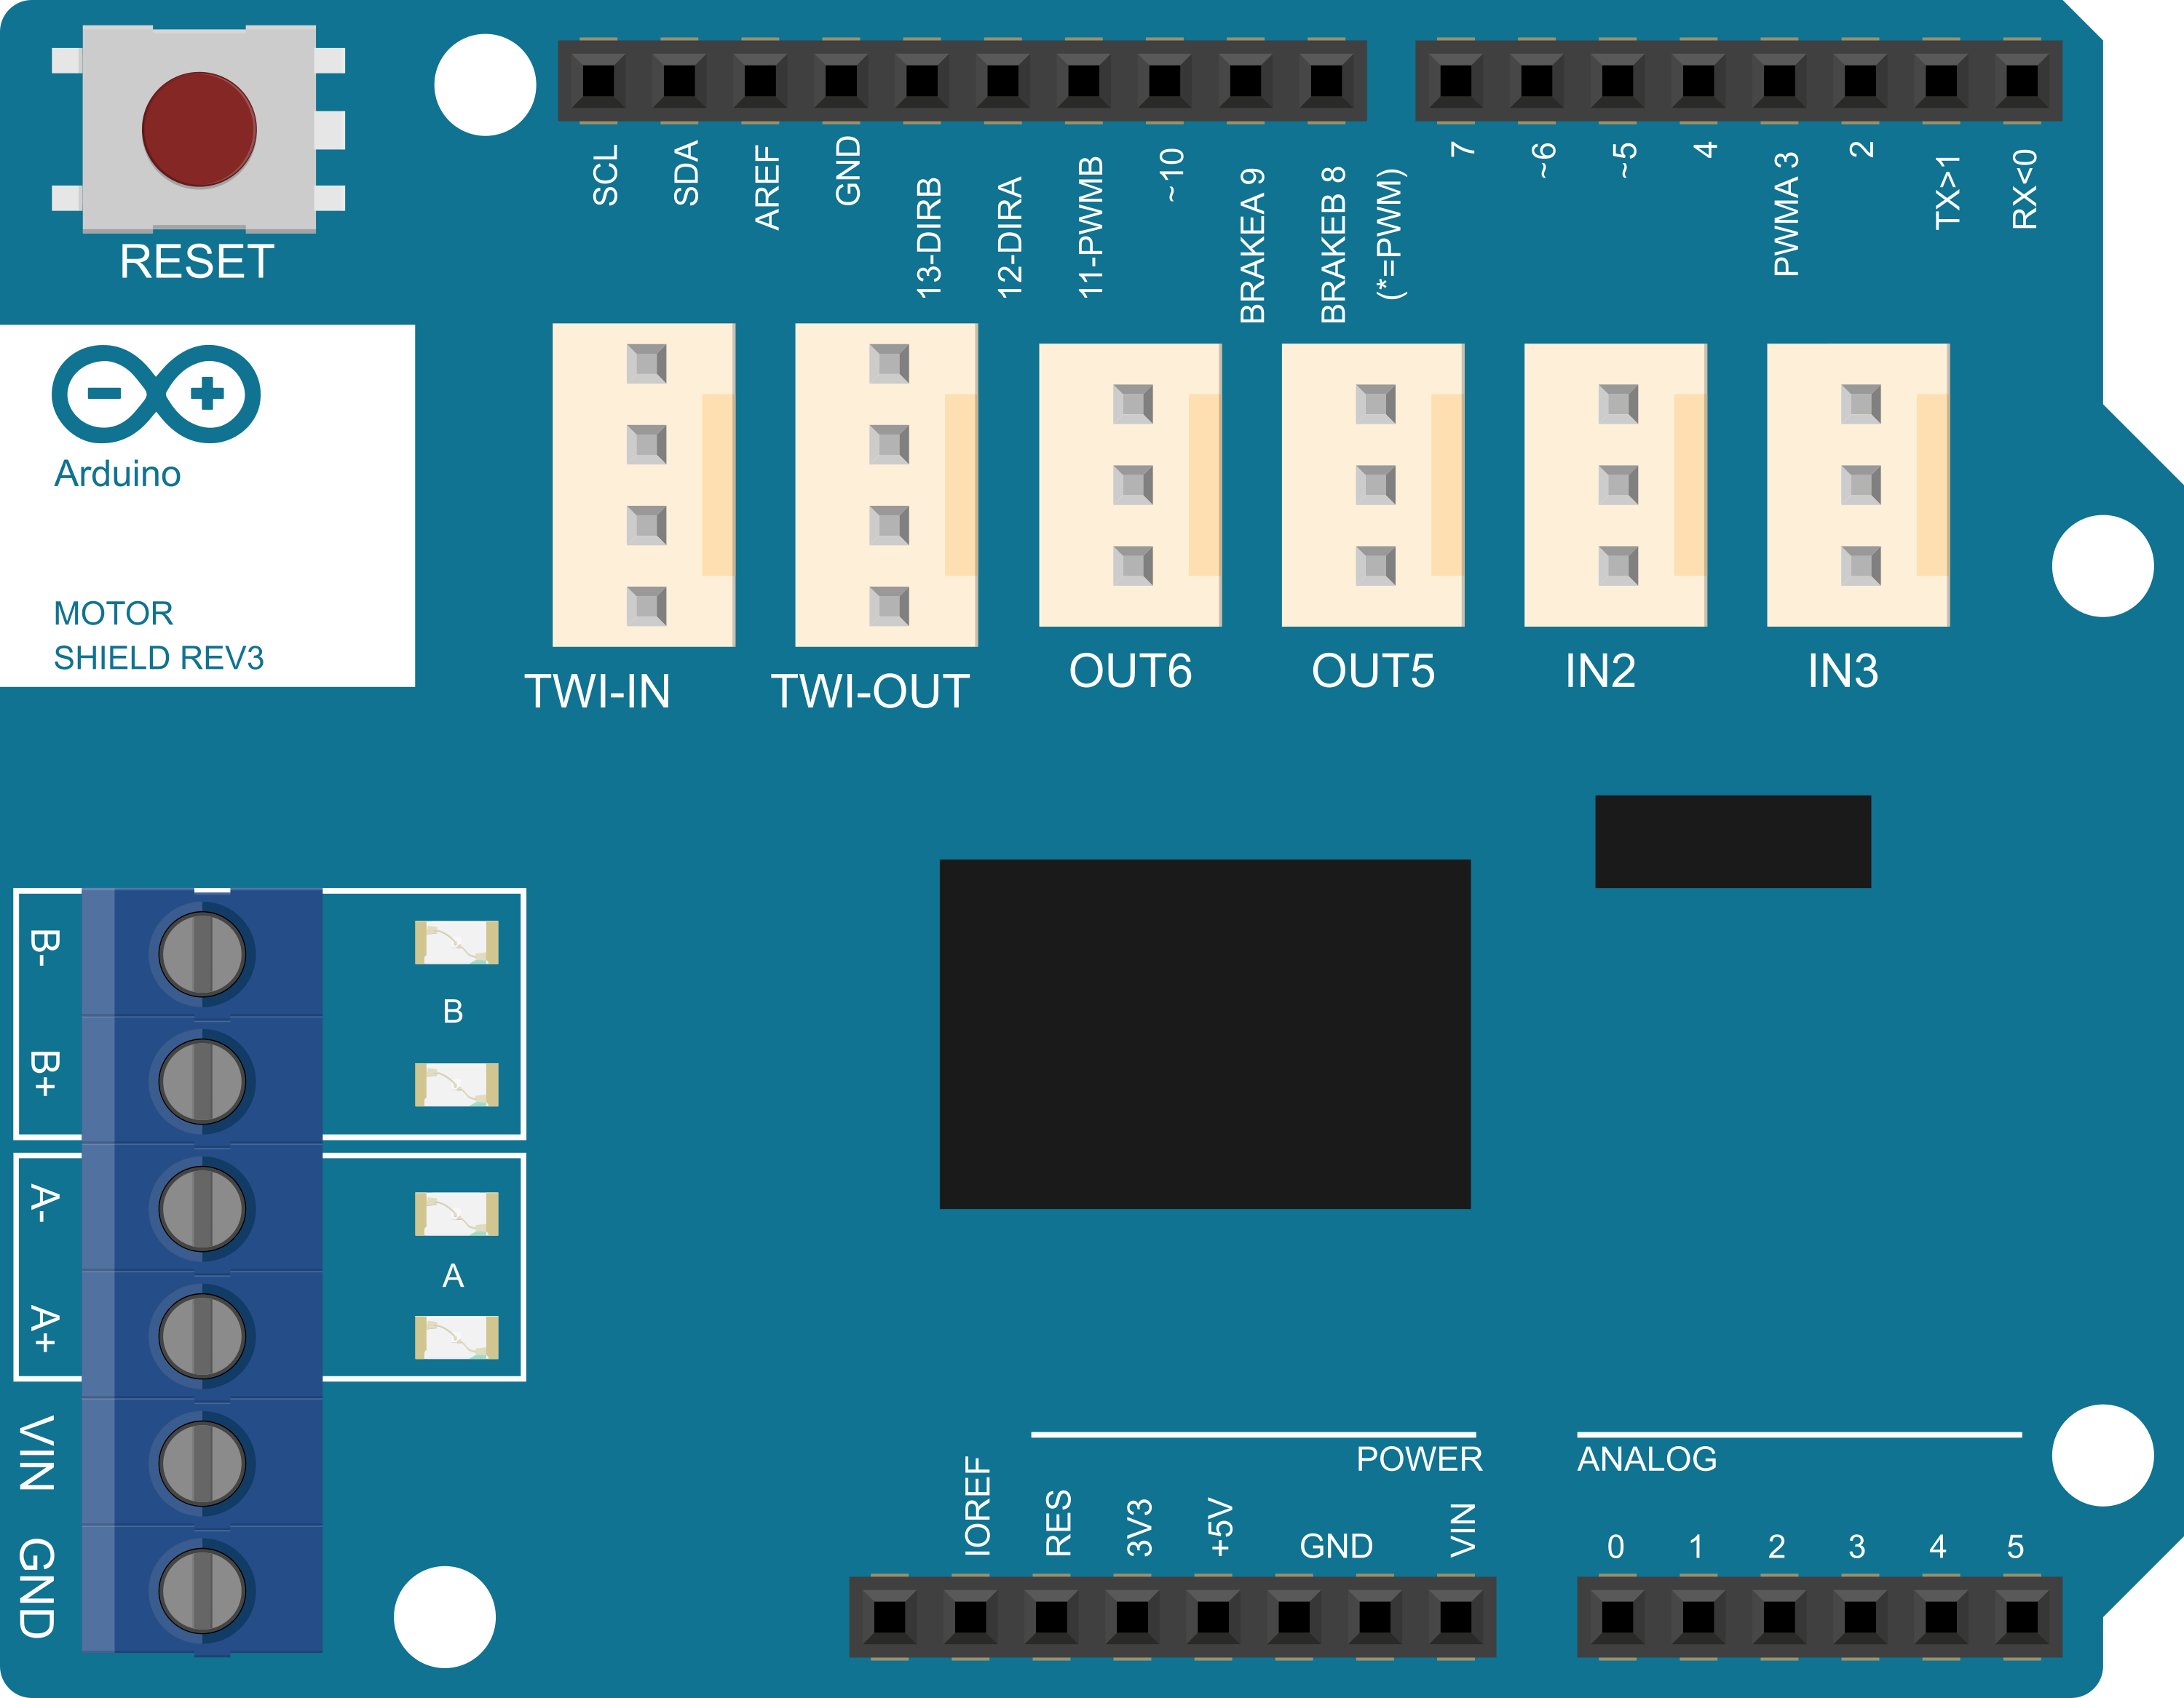
Pin Configuration and Descriptions
| Pin Number | Functionality | Description |
|---|---|---|
| D3 | Motor 1 Direction | Controls the direction of motor 1 |
| D11 | Motor 1 Speed (PWM) | Controls the speed of motor 1 (Pulse Width Modulation) |
| D9 | Motor 2 Direction | Controls the direction of motor 2 |
| D10 | Motor 2 Speed (PWM) | Controls the speed of motor 2 (Pulse Width Modulation) |
| D12 | Brake for Motor 1 | Enables the brake function for motor 1 |
| D8 | Brake for Motor 2 | Enables the brake function for motor 2 |
| A0 | Current Sensing for M1 | Analog input for sensing current drawn by motor 1 |
| A1 | Current Sensing for M2 | Analog input for sensing current drawn by motor 2 |
| SDA | I2C Data Line | Used for I2C communication if the shield has such capability |
| SCL | I2C Clock Line | Used for I2C communication if the shield has such capability |
Usage Instructions
How to Use the Component in a Circuit
- Mounting the Shield: Attach the Motor Shield to the Arduino board by aligning the pins and gently pressing down.
- Connecting Motors: Connect your DC motors to the Motor Shield's screw terminals marked as M1 and M2.
- Power Supply: Connect an external power supply to the Motor Shield if the motors require more current than the Arduino can provide.
- Programming: Write a sketch (program) to control the motors using the Arduino IDE and upload it to the Arduino board.
Important Considerations and Best Practices
- Ensure the external power supply voltage and current do not exceed the shield's specifications.
- Always disconnect the power supply before making or altering connections to prevent damage.
- Use PWM pins for speed control and digital pins for direction control.
- Utilize the brake functionality to stop the motors quickly.
- Monitor motor current draw using the analog sensing pins to prevent overloading.
Example Code for Arduino UNO
#include <Arduino.h>

// Motor 1
const int motor1Speed = 11; // Speed control
const int motor1Dir = 12;   // Direction control

// Motor 2
const int motor2Speed = 3;  // Speed control
const int motor2Dir = 9;    // Direction control

void setup() {
  // Set motor control pins as outputs
  pinMode(motor1Speed, OUTPUT);
  pinMode(motor1Dir, OUTPUT);
  pinMode(motor2Speed, OUTPUT);
  pinMode(motor2Dir, OUTPUT);
}

void loop() {
  // Set direction of motor 1 to clockwise
  digitalWrite(motor1Dir, HIGH);
  // Set speed of motor 1 (0-255)
  analogWrite(motor1Speed, 200);

  // Set direction of motor 2 to counter-clockwise
  digitalWrite(motor2Dir, LOW);
  // Set speed of motor 2 (0-255)
  analogWrite(motor2Speed, 200);

  delay(2000); // Run motors for 2 seconds

  // Stop motors
  digitalWrite(motor1Speed, LOW);
  digitalWrite(motor2Speed, LOW);

  delay(1000); // Wait for 1 second
}
Troubleshooting and FAQs
Common Issues Users Might Face
- Motor not running: Check connections, ensure the power supply is adequate, and verify that the code is uploaded correctly.
- Motor runs erratically: Ensure PWM signals are correctly applied and that there is no electrical noise.
- Overheating: Motors drawing too much current can cause the shield to overheat. Check the current draw and ensure it's within limits.
Solutions and Tips for Troubleshooting
- Double-check wiring against the pin configuration table.
- Use serial output to debug and monitor motor control signals.
- Implement current sensing to actively monitor and adjust the motor's power draw.
FAQs
Q: Can I control a stepper motor with this shield? A: Yes, the Motor Shield can control a single stepper motor.
Q: What is the maximum voltage and current the shield can handle? A: The shield can handle up to 12V and 2A per channel or 4A max with an external power supply.
Q: Can I use this shield with other Arduino boards? A: Yes, as long as the board is compatible with the shield's form factor and pinout.
Q: How do I use the brake functionality? A: Apply a HIGH signal to the brake pins (D8 for Motor 2, D9 for Motor 1) to activate the brake.
Remember, this documentation is a starting point. Always refer to the latest datasheets and resources provided by the manufacturer for the most up-to-date information.