
How to Use I2C LCD: Examples, Pinouts, and Specs
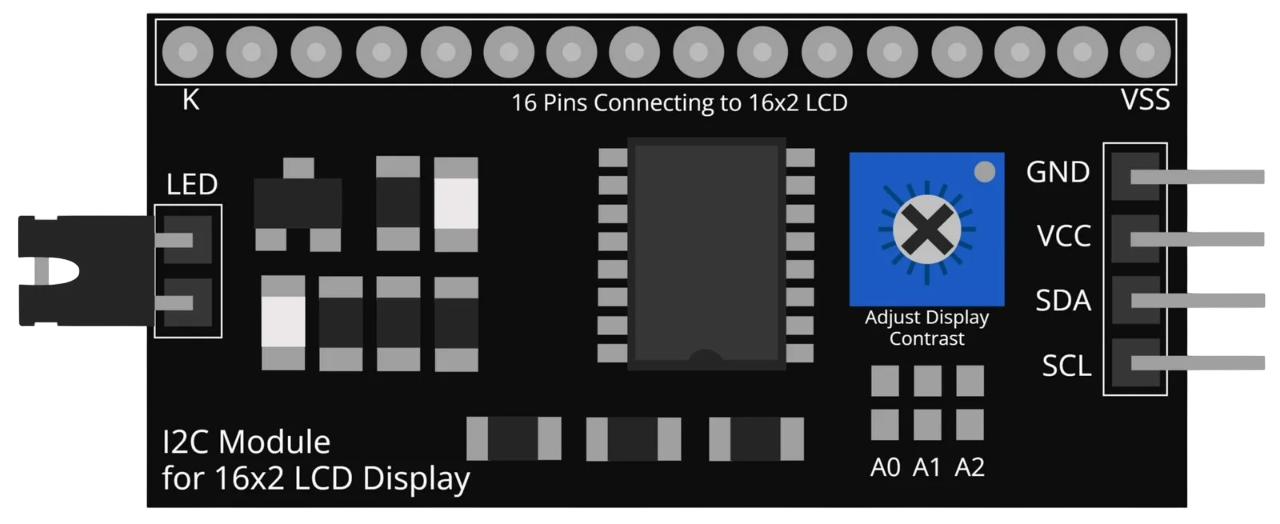
 Design with I2C LCD in Cirkit Designer
Introduction
An I2C LCD is a liquid crystal display that uses the I2C (Inter-Integrated Circuit) protocol for communication. This design significantly reduces the number of pins required to interface with microcontrollers, making it an efficient and convenient choice for projects with limited GPIO availability. The I2C LCD is commonly used for displaying text, numbers, and simple characters in embedded systems and DIY electronics projects.
Explore Projects Built with I2C LCD
 Open Project in Cirkit Designer
 Open Project in Cirkit Designer
 Open Project in Cirkit Designer
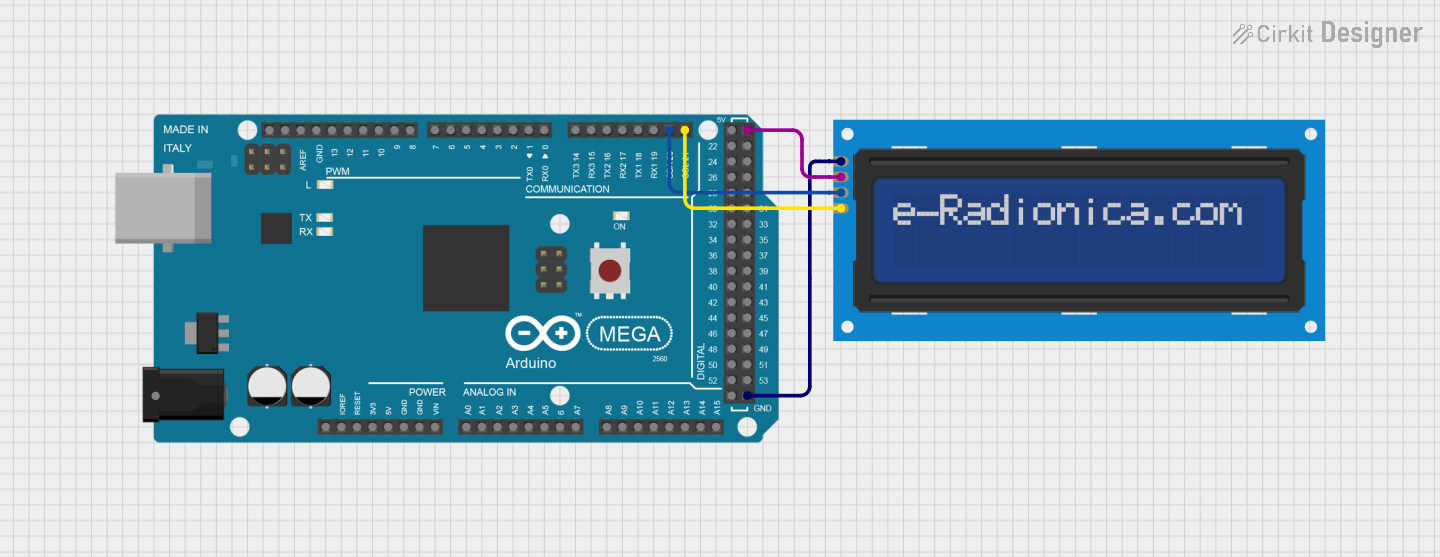
 Open Project in Cirkit Designer
Explore Projects Built with I2C LCD

 Open Project in Cirkit Designer
 Open Project in Cirkit Designer
 Open Project in Cirkit Designer
 Open Project in Cirkit Designer
Common Applications and Use Cases
- Displaying sensor data in real-time
- User interfaces for embedded systems
- Menu systems for microcontroller-based projects
- Educational and prototyping purposes
- Home automation displays
Technical Specifications
Key Technical Details
- Manufacturer: Arduino
- Part ID: UNO
- Communication Protocol: I2C (SDA and SCL lines)
- Operating Voltage: 5V DC
- Backlight: LED (controllable via software)
- Character Display: Typically 16x2 or 20x4 (16 or 20 characters per row, 2 or 4 rows)
- I2C Address: Default is
0x27(can vary depending on the module) - Adjustable Contrast: Via onboard potentiometer
Pin Configuration and Descriptions
The I2C LCD module has a 4-pin interface for connection to a microcontroller. Below is the pinout:
| Pin | Name | Description |
|---|---|---|
| 1 | GND | Ground (0V) |
| 2 | VCC | Power supply (5V DC) |
| 3 | SDA | Serial Data Line for I2C communication |
| 4 | SCL | Serial Clock Line for I2C communication |
Usage Instructions
How to Use the Component in a Circuit
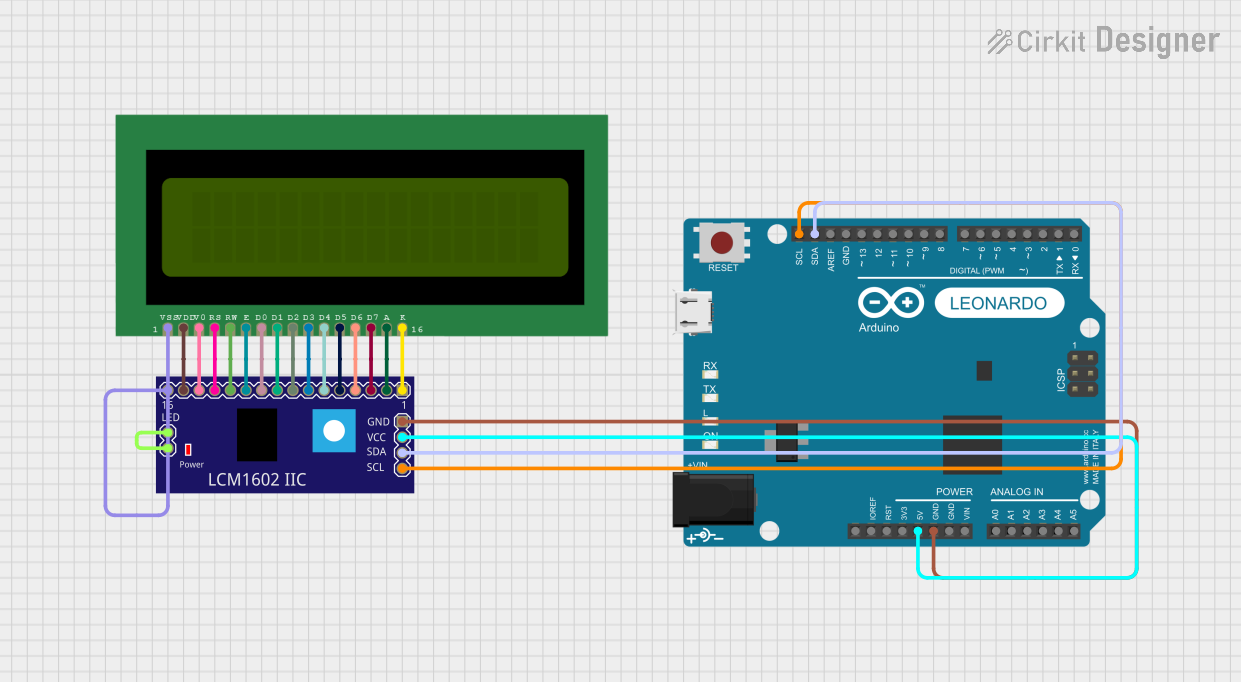
Wiring the I2C LCD to an Arduino UNO:
- Connect the GND pin of the I2C LCD to the GND pin on the Arduino UNO.
- Connect the VCC pin of the I2C LCD to the 5V pin on the Arduino UNO.
- Connect the SDA pin of the I2C LCD to the A4 pin on the Arduino UNO.
- Connect the SCL pin of the I2C LCD to the A5 pin on the Arduino UNO.
Install the Required Library:
- Download and install the
LiquidCrystal_I2Clibrary in the Arduino IDE.
To do this, go to Sketch > Include Library > Manage Libraries, search forLiquidCrystal_I2C, and install it.
- Download and install the
Upload Example Code:
- Use the following example code to display "Hello, World!" on the I2C LCD.
#include <Wire.h>
#include <LiquidCrystal_I2C.h>

// Initialize the LCD with I2C address 0x27 and a 16x2 display
LiquidCrystal_I2C lcd(0x27, 16, 2);

void setup() {
  lcd.begin(); // Initialize the LCD
  lcd.backlight(); // Turn on the backlight
  lcd.setCursor(0, 0); // Set cursor to the first column, first row
  lcd.print("Hello, World!"); // Print text to the LCD
}

void loop() {
  // No actions needed in the loop for this example
}
Important Considerations and Best Practices
- I2C Address: Verify the I2C address of your LCD module. If the default address (
0x27) does not work, use an I2C scanner sketch to determine the correct address. - Contrast Adjustment: Use the onboard potentiometer to adjust the contrast of the display for optimal visibility.
- Power Supply: Ensure the module is powered with 5V DC. Using a lower voltage may result in dim or non-functional displays.
- Pull-Up Resistors: Some I2C LCD modules include onboard pull-up resistors for the SDA and SCL lines. If your module does not, you may need to add external pull-up resistors (typically 4.7kΩ) to ensure proper I2C communication.
Troubleshooting and FAQs
Common Issues and Solutions
The LCD does not display any text:
- Verify the wiring connections, especially the SDA and SCL lines.
- Check the I2C address of the module using an I2C scanner sketch.
- Adjust the contrast using the onboard potentiometer.
The text is garbled or unreadable:
- Ensure the correct I2C address is specified in the code.
- Verify that the
LiquidCrystal_I2Clibrary is properly installed and up to date. - Check for loose or faulty connections.
The backlight does not turn on:
- Confirm that the
lcd.backlight()function is called in the code. - Ensure the module is receiving 5V power.
- Confirm that the
The display flickers or behaves erratically:
- Add pull-up resistors to the SDA and SCL lines if they are not already present.
- Ensure the power supply is stable and capable of providing sufficient current.
FAQs
Q: Can I use the I2C LCD with a 3.3V microcontroller?
A: Most I2C LCD modules are designed for 5V operation. However, some modules are compatible with 3.3V systems. Check the module's datasheet or use a logic level shifter if necessary.
Q: How do I display custom characters on the I2C LCD?
A: The LiquidCrystal_I2C library supports custom characters. You can define them using the createChar() function. Refer to the library documentation for details.
Q: Can I connect multiple I2C devices to the same Arduino?
A: Yes, the I2C protocol supports multiple devices on the same bus. Ensure each device has a unique I2C address.
Q: How do I find the I2C address of my LCD module?
A: Use an I2C scanner sketch to detect the address. This sketch is widely available online and can be run on the Arduino.
By following this documentation, you should be able to successfully integrate and use an I2C LCD in your projects!