How to Use Intel Galileo: Examples, Pinouts, and Specs
Introduction
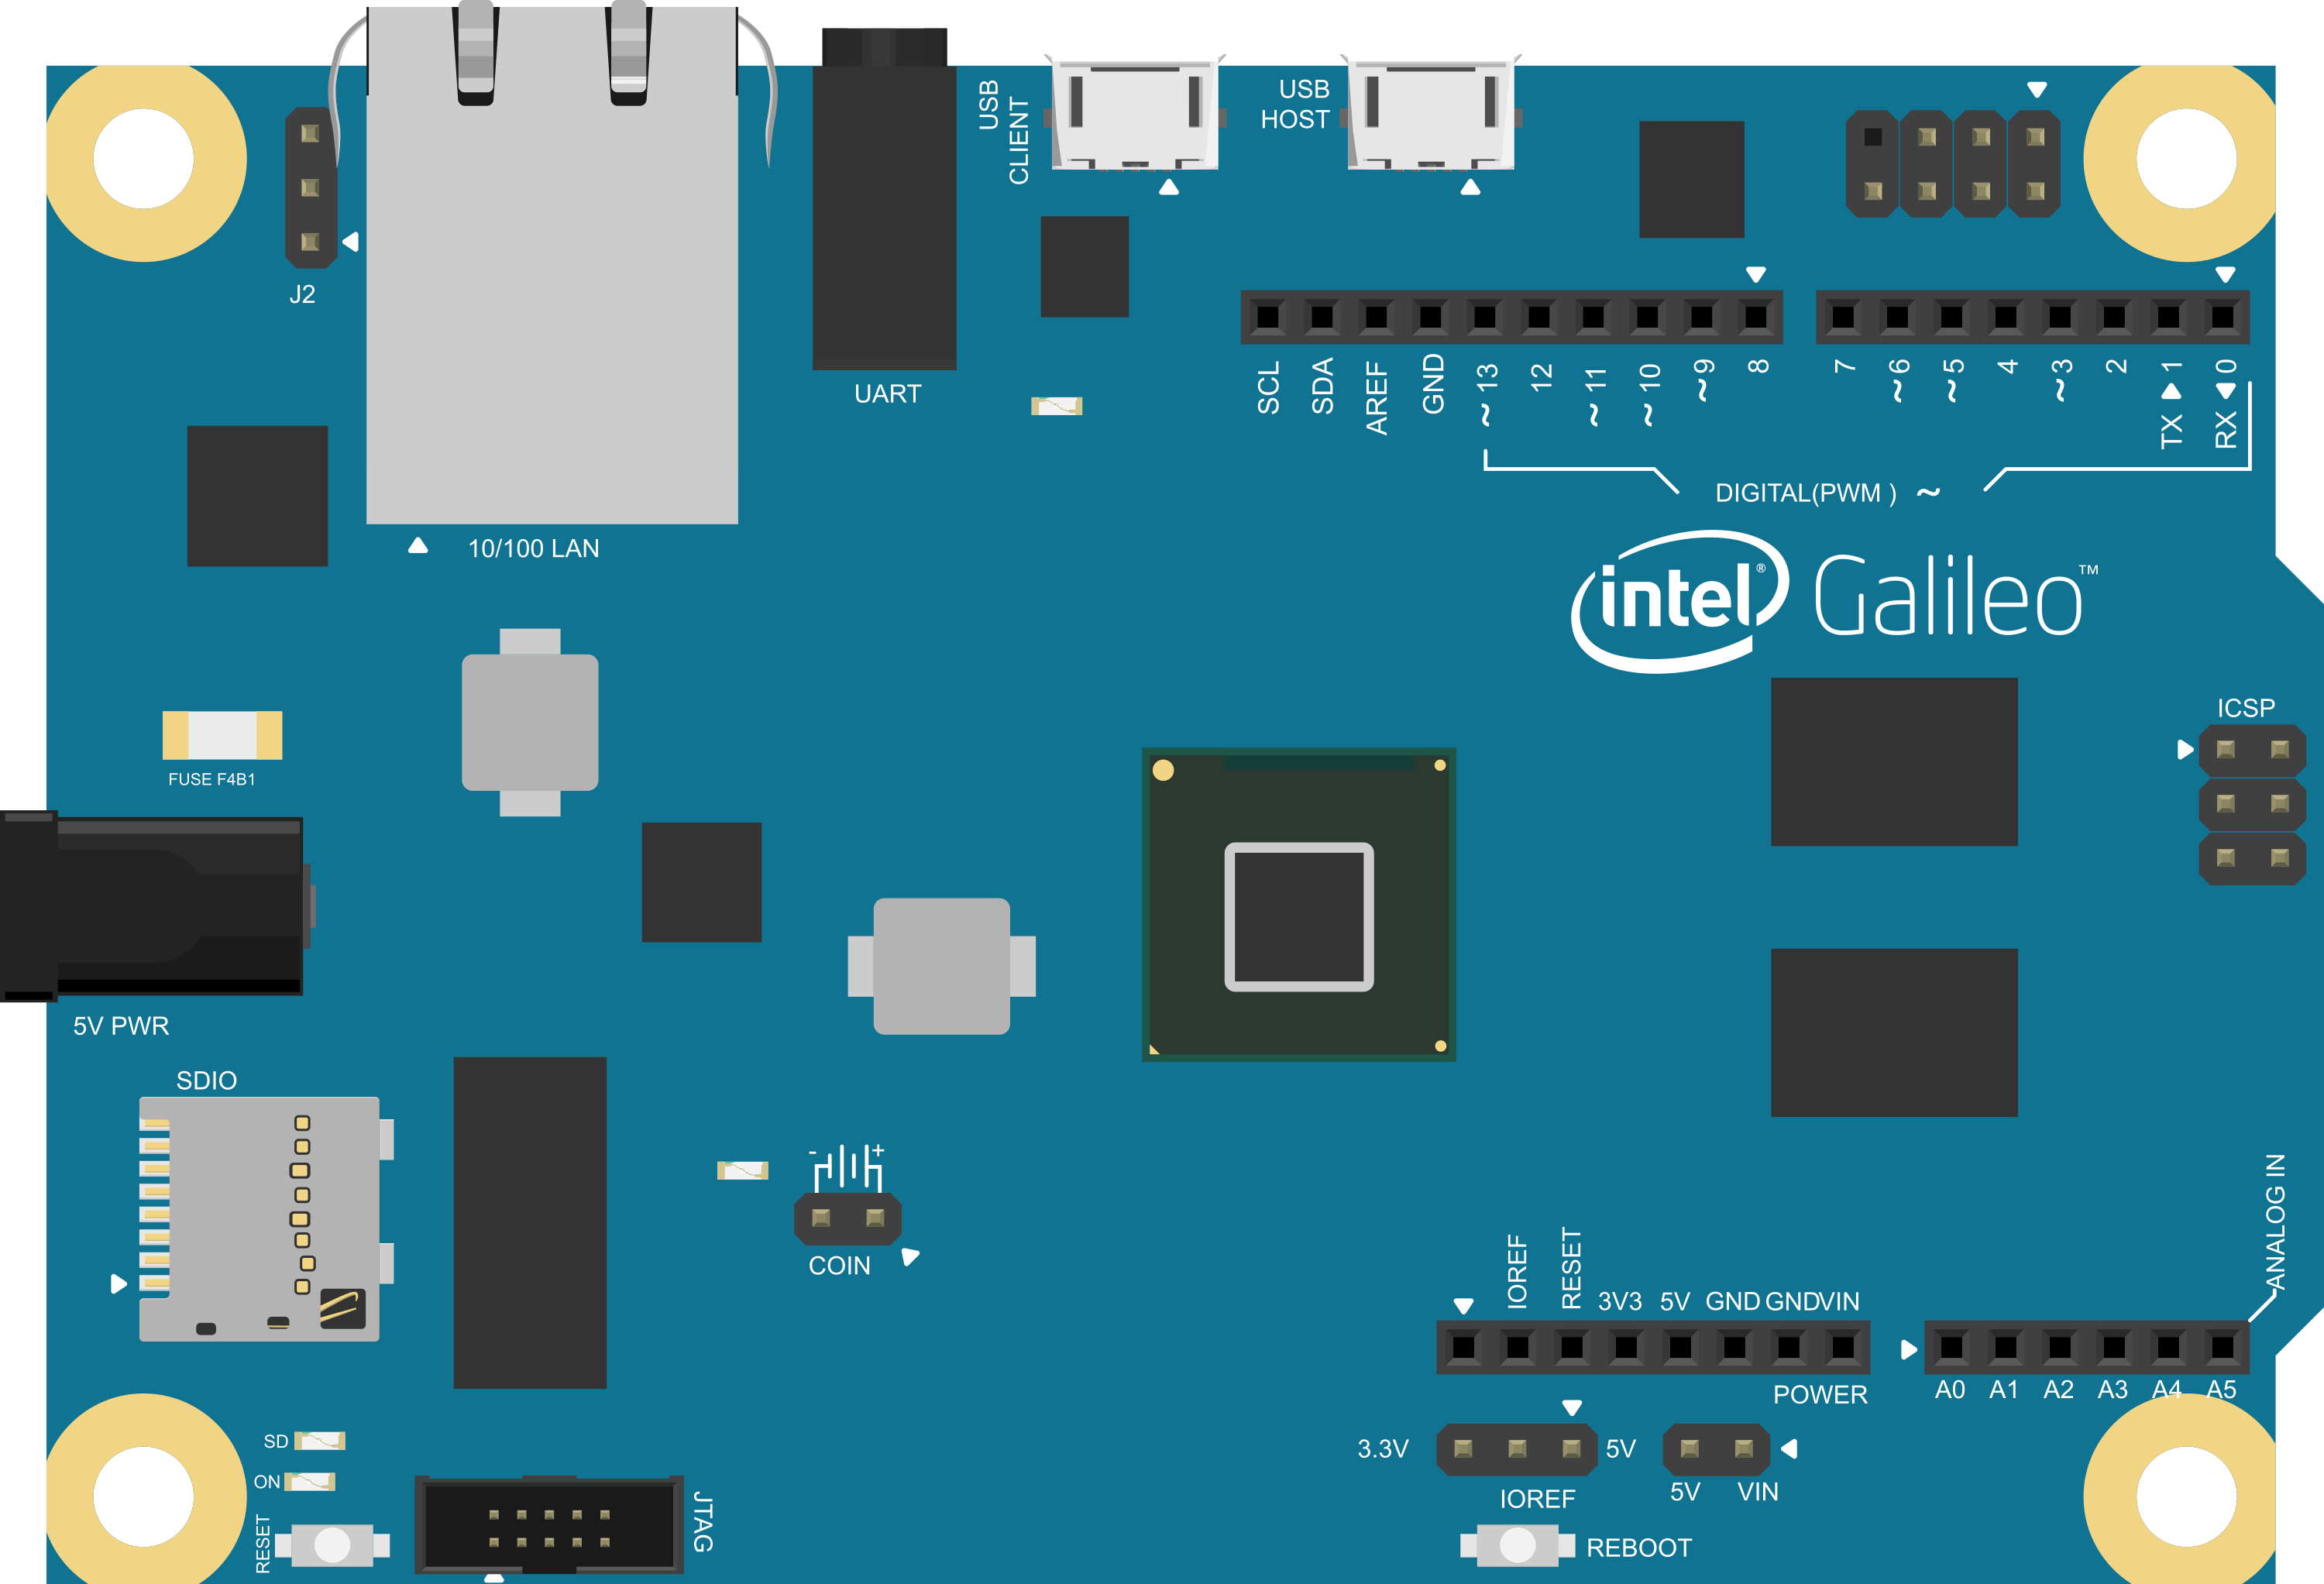
The Intel Galileo is a powerful microcontroller board based on the Intel Quark SoC X1000 Application Processor, a 32-bit Intel Pentium-class system on a chip (SoC). It is the first board based on Intel architecture designed to be hardware and software pin-compatible with Arduino shields designed for the Uno R3. The Galileo board is a great tool for quickly prototyping simple interactive designs like LED light displays, temperature and sensor readings, or for more complex projects from automata to robotics.
Common applications of the Intel Galileo board include:
- Internet of Things (IoT) devices
- Educational platforms for teaching computing and electronics
- Home automation systems
- Wearable technology
- DIY electronics projects
Explore Projects Built with Intel Galileo

Explore Projects Built with Intel Galileo
Technical Specifications
Key Technical Details
- Processor: 400MHz 32-bit Intel Pentium-class SoC
- Memory: 256MB DDR3, 512KB embedded SRAM
- Storage: Micro SD card slot, 8MB NOR Flash
- Operating Voltage: 5V
- Recommended Input Voltage: 7-15V
- Digital I/O Pins: 14 (of which 6 provide PWM output)
- Analog Input Pins: 6
- Total DC Output Current on all I/O lines: 130 mA
- DC Current for 3.3V Pin: 800 mA
- DC Current for 5V Pin: 800 mA
- Connectivity: 10/100 Ethernet port, USB 2.0 full host/device, Micro-USB port
Pin Configuration and Descriptions
| Pin Number | Function | Description |
|---|---|---|
| 1-14 | Digital I/O | Digital pins which can be used for I/O |
| 3, 5, 6, 9, 10, 11 | PWM Output | Pins capable of providing PWM output |
| A0-A5 | Analog Input | Analog pins which can be used to read analog signals |
| - | Ground | Ground pins |
| - | Reset | Resets the microcontroller |
Usage Instructions
Integrating with a Circuit
To use the Intel Galileo in a circuit:
- Connect the Galileo board to your computer using a Micro-USB cable.
- Ensure that the board is powered either through the USB connection or an external power supply.
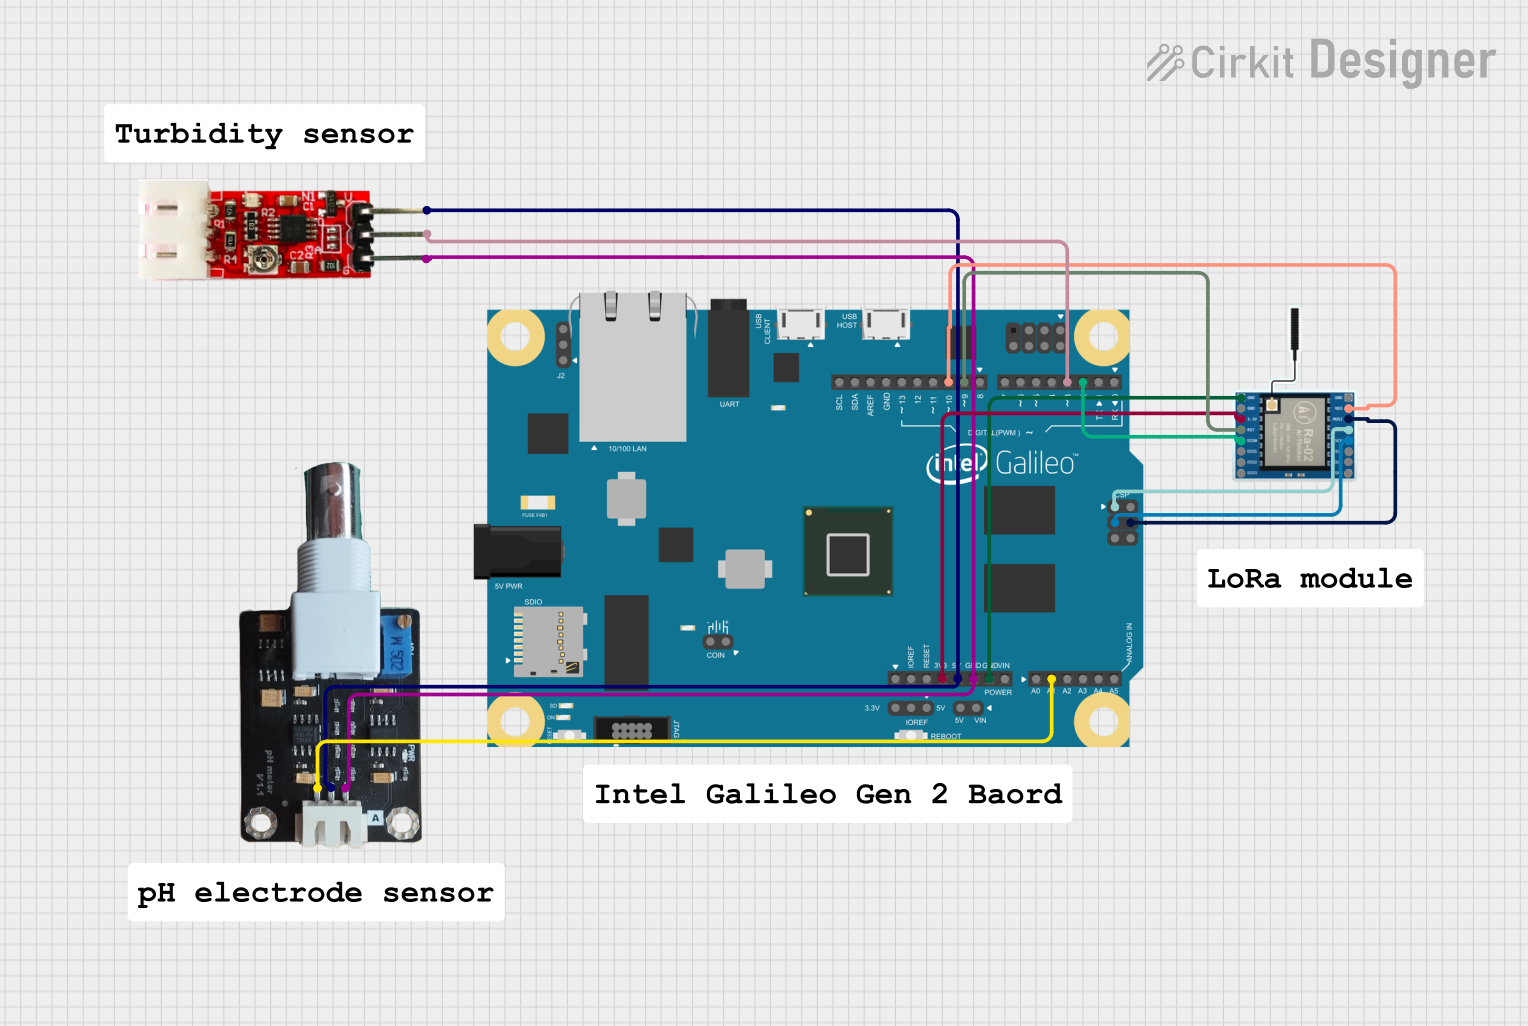
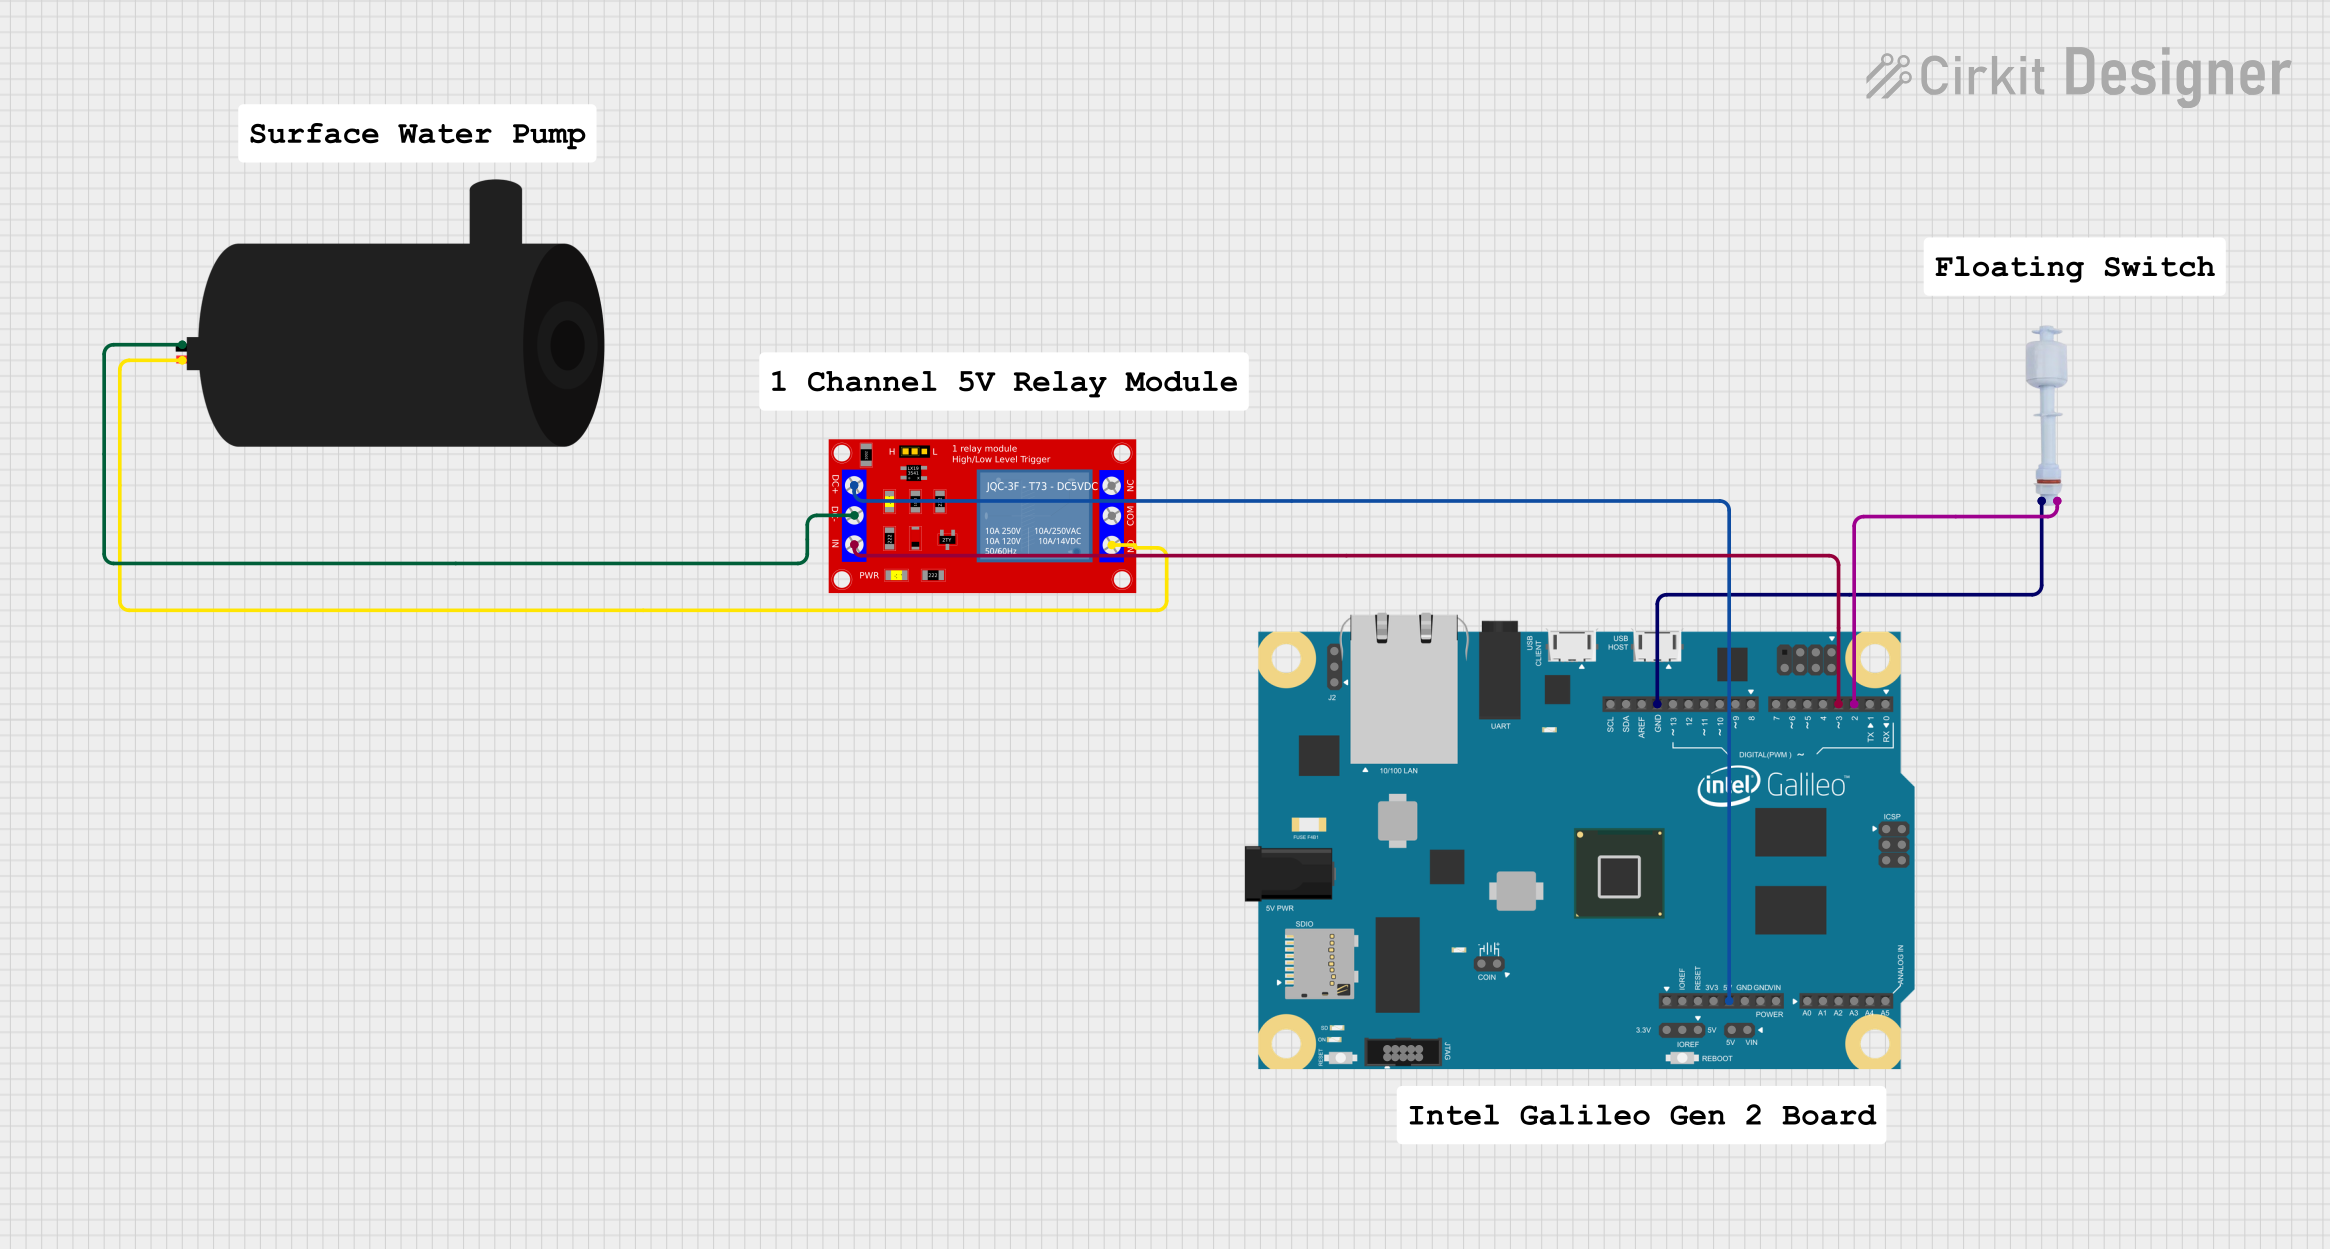
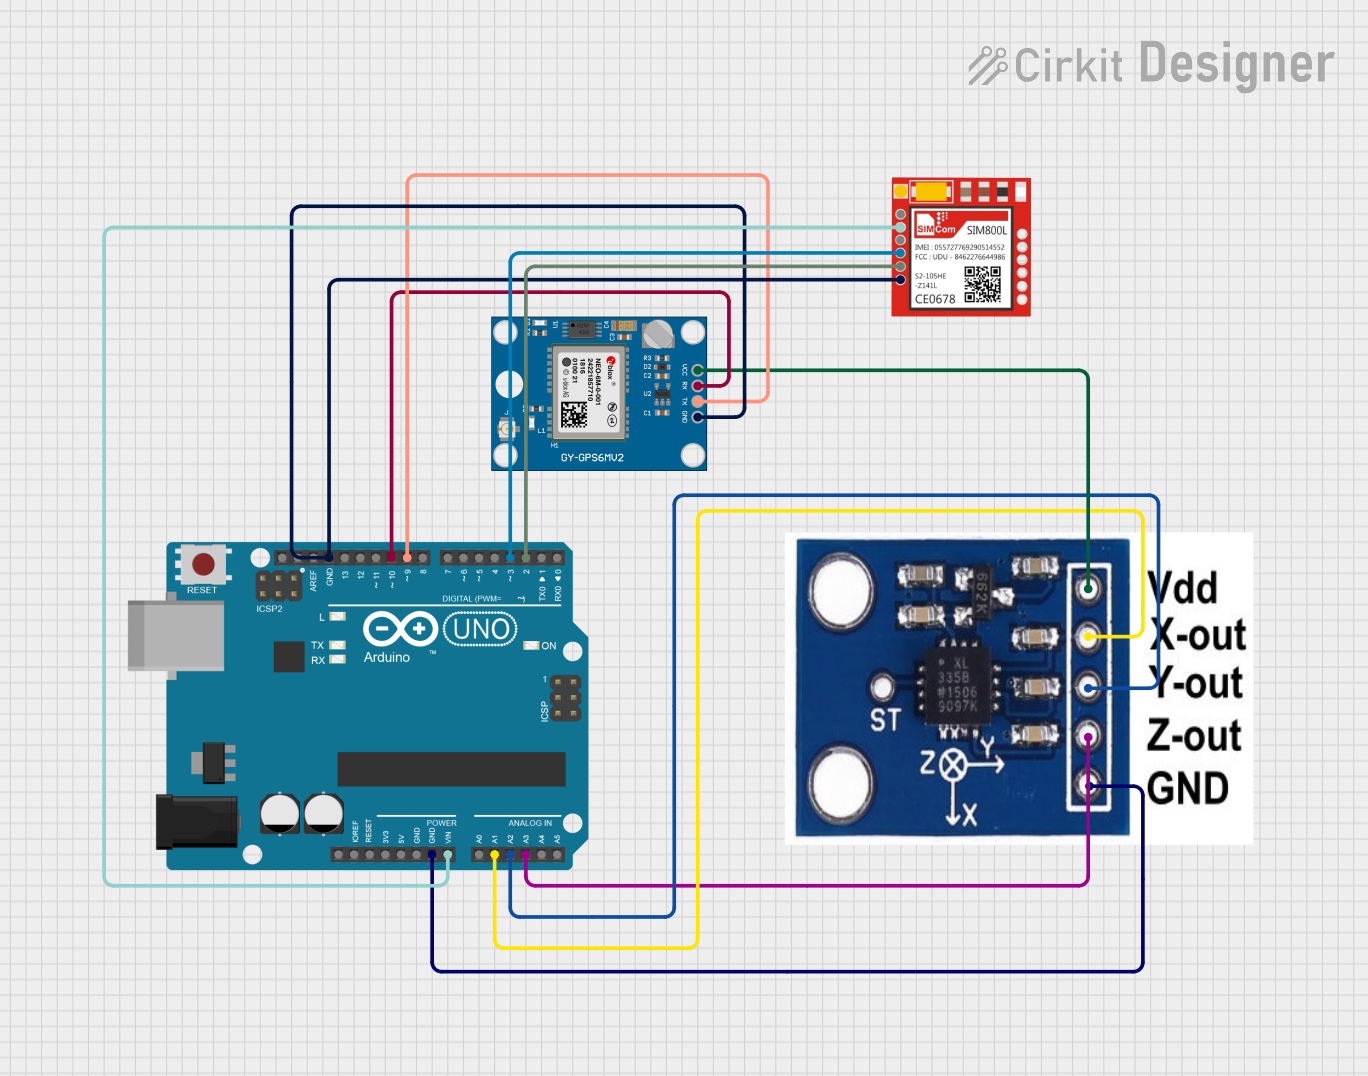
- Use jumper wires to connect components to the Galileo's GPIO (General Purpose Input/Output) pins.
- If using Arduino shields, plug them directly onto the board, aligning the pins correctly.
Important Considerations and Best Practices
- Always ensure the power supply is within the recommended range to prevent damage.
- When connecting external components, make sure they are compatible with the Galileo's voltage and current specifications.
- Use proper static handling procedures to avoid damaging the board with electrostatic discharge.
- Update the Galileo's firmware to the latest version for optimal performance and compatibility with the Arduino software.
Troubleshooting and FAQs
Common Issues
- Board not recognized by computer: Check the USB cable and drivers.
- Inconsistent behavior: Ensure the power supply is stable and within the recommended range.
- Unable to upload sketches: Verify the correct board and port are selected in the Arduino IDE.
Solutions and Tips
- If the board is not recognized, try a different USB port or cable and ensure the correct drivers are installed.
- For power issues, use a regulated power supply and avoid powering the board through USB if using high-current peripherals.
- Always double-check connections and pin assignments when experiencing unexpected behavior.
FAQs
Q: Can I use Arduino Uno shields with the Galileo board? A: Yes, the Galileo is designed to be compatible with Arduino Uno R3 shields.
Q: What operating systems are compatible with the Galileo board? A: The Galileo board is compatible with Windows, Mac OS, and Linux.
Q: How do I update the firmware on my Galileo board? A: Firmware updates can be done through the Arduino IDE or by downloading the latest firmware from the Intel website.
Example Code for Arduino UNO Compatibility
Here is a simple example of blinking an LED on pin 13, which is compatible with the Arduino Uno:
// Pin 13 has an LED connected on most Arduino boards.
int led = 13;

// The setup routine runs once when you press reset:
void setup() {
  // Initialize the digital pin as an output.
  pinMode(led, OUTPUT);
}

// The loop routine runs over and over again forever:
void loop() {
  digitalWrite(led, HIGH);   // Turn the LED on (HIGH is the voltage level)
  delay(1000);               // Wait for a second
  digitalWrite(led, LOW);    // Turn the LED off by making the voltage LOW
  delay(1000);               // Wait for a second
}
Remember to keep the code comments concise and within the 80 character line length limit. This example demonstrates the basic structure of an Arduino sketch, including setup and loop functions, which are common to all Arduino programs.