How to Use Peristaltic Pump: Examples, Pinouts, and Specs
Introduction
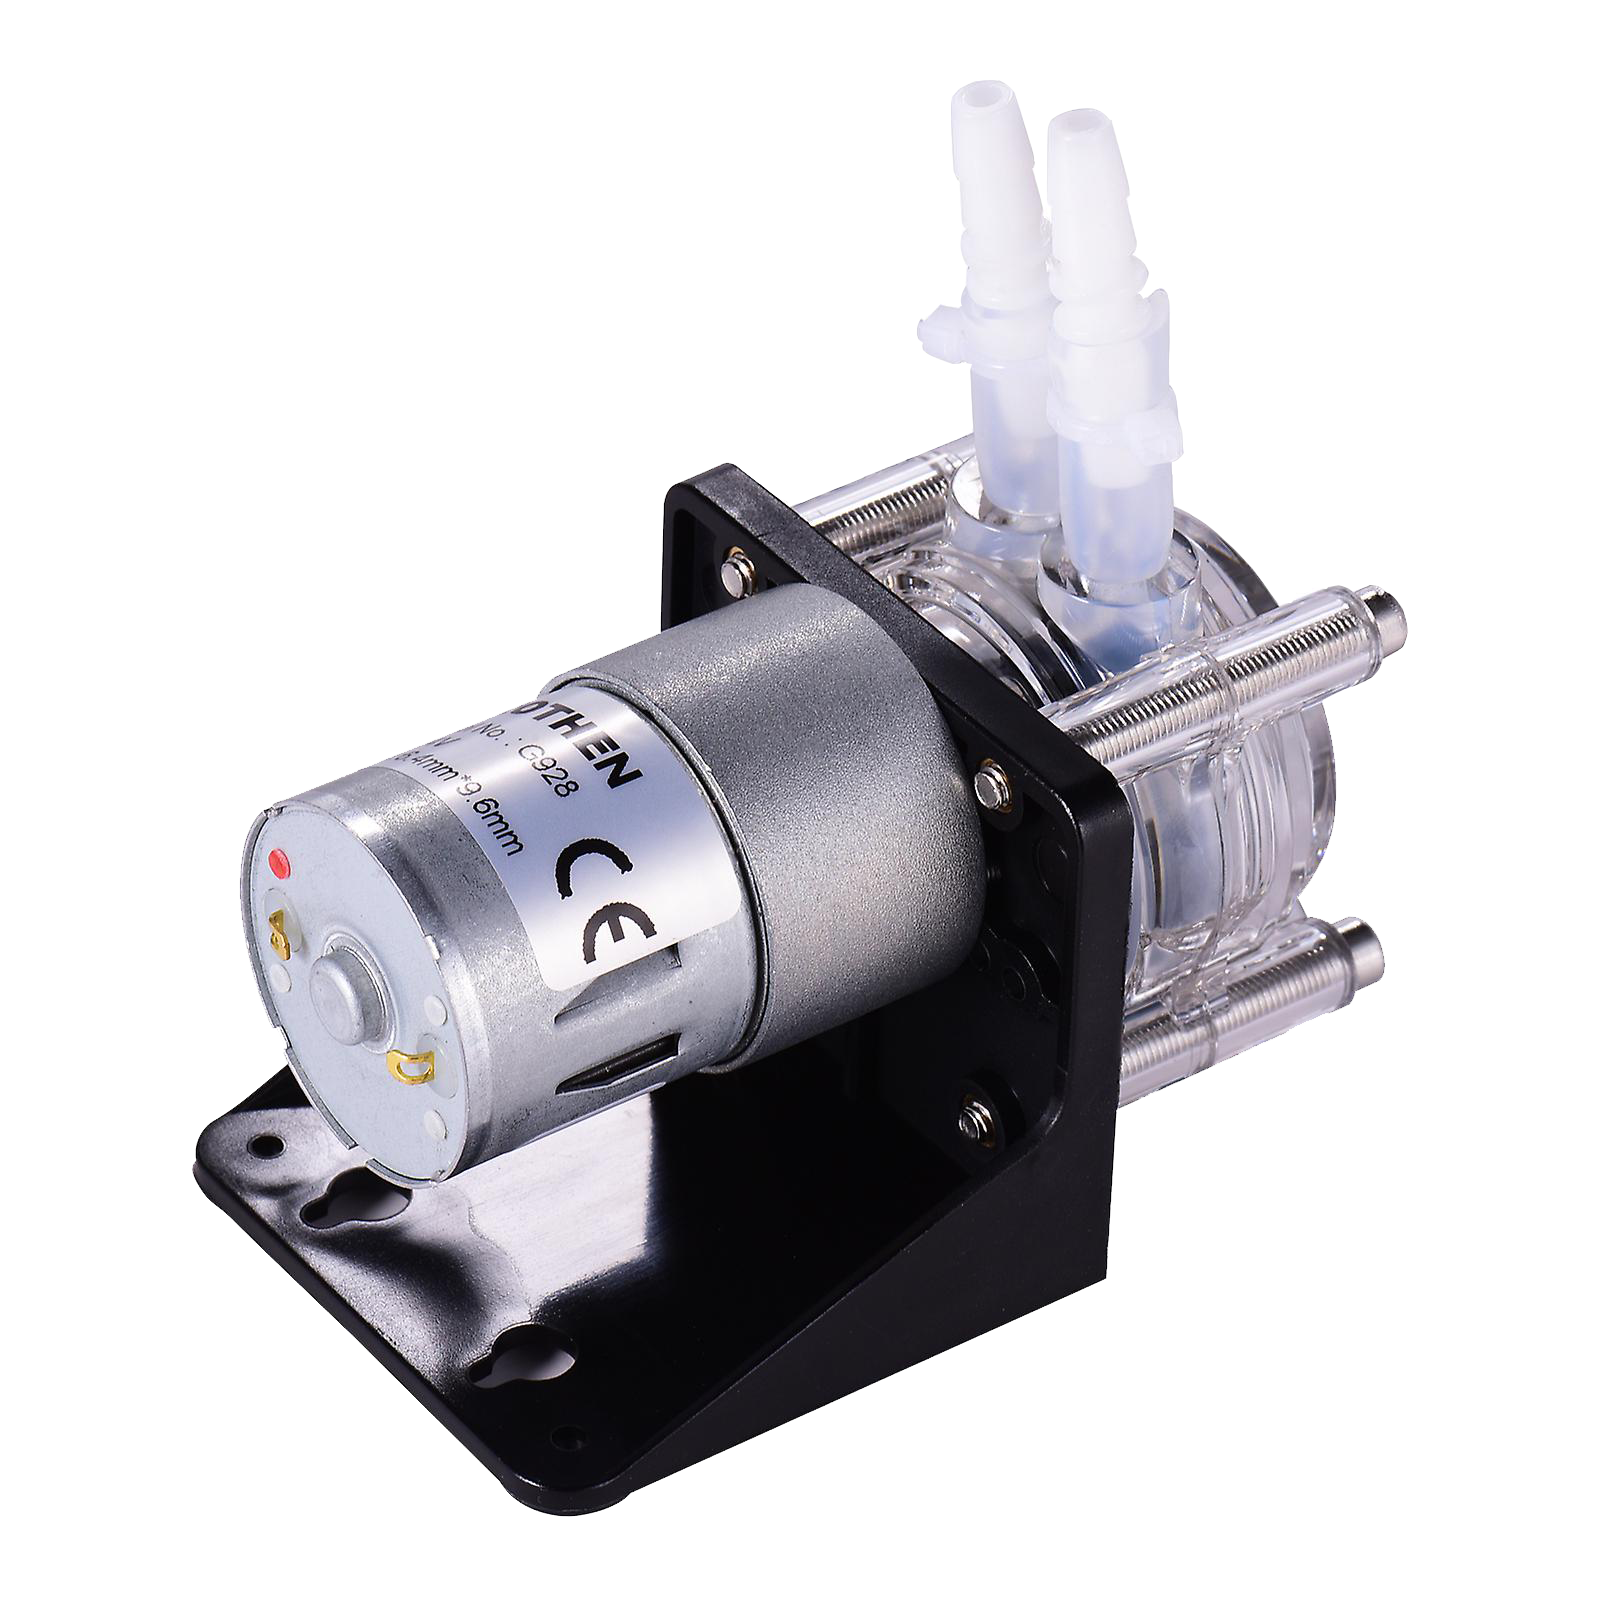
A peristaltic pump is a versatile and precise fluid handling device commonly used in medical, laboratory, and industrial applications. Its design ensures that the fluid only contacts the inside of a flexible tube, which is compressed externally by rollers or shoes to propel the fluid. This unique mechanism makes it ideal for handling sterile, aggressive, or viscous fluids without contamination.
Explore Projects Built with Peristaltic Pump
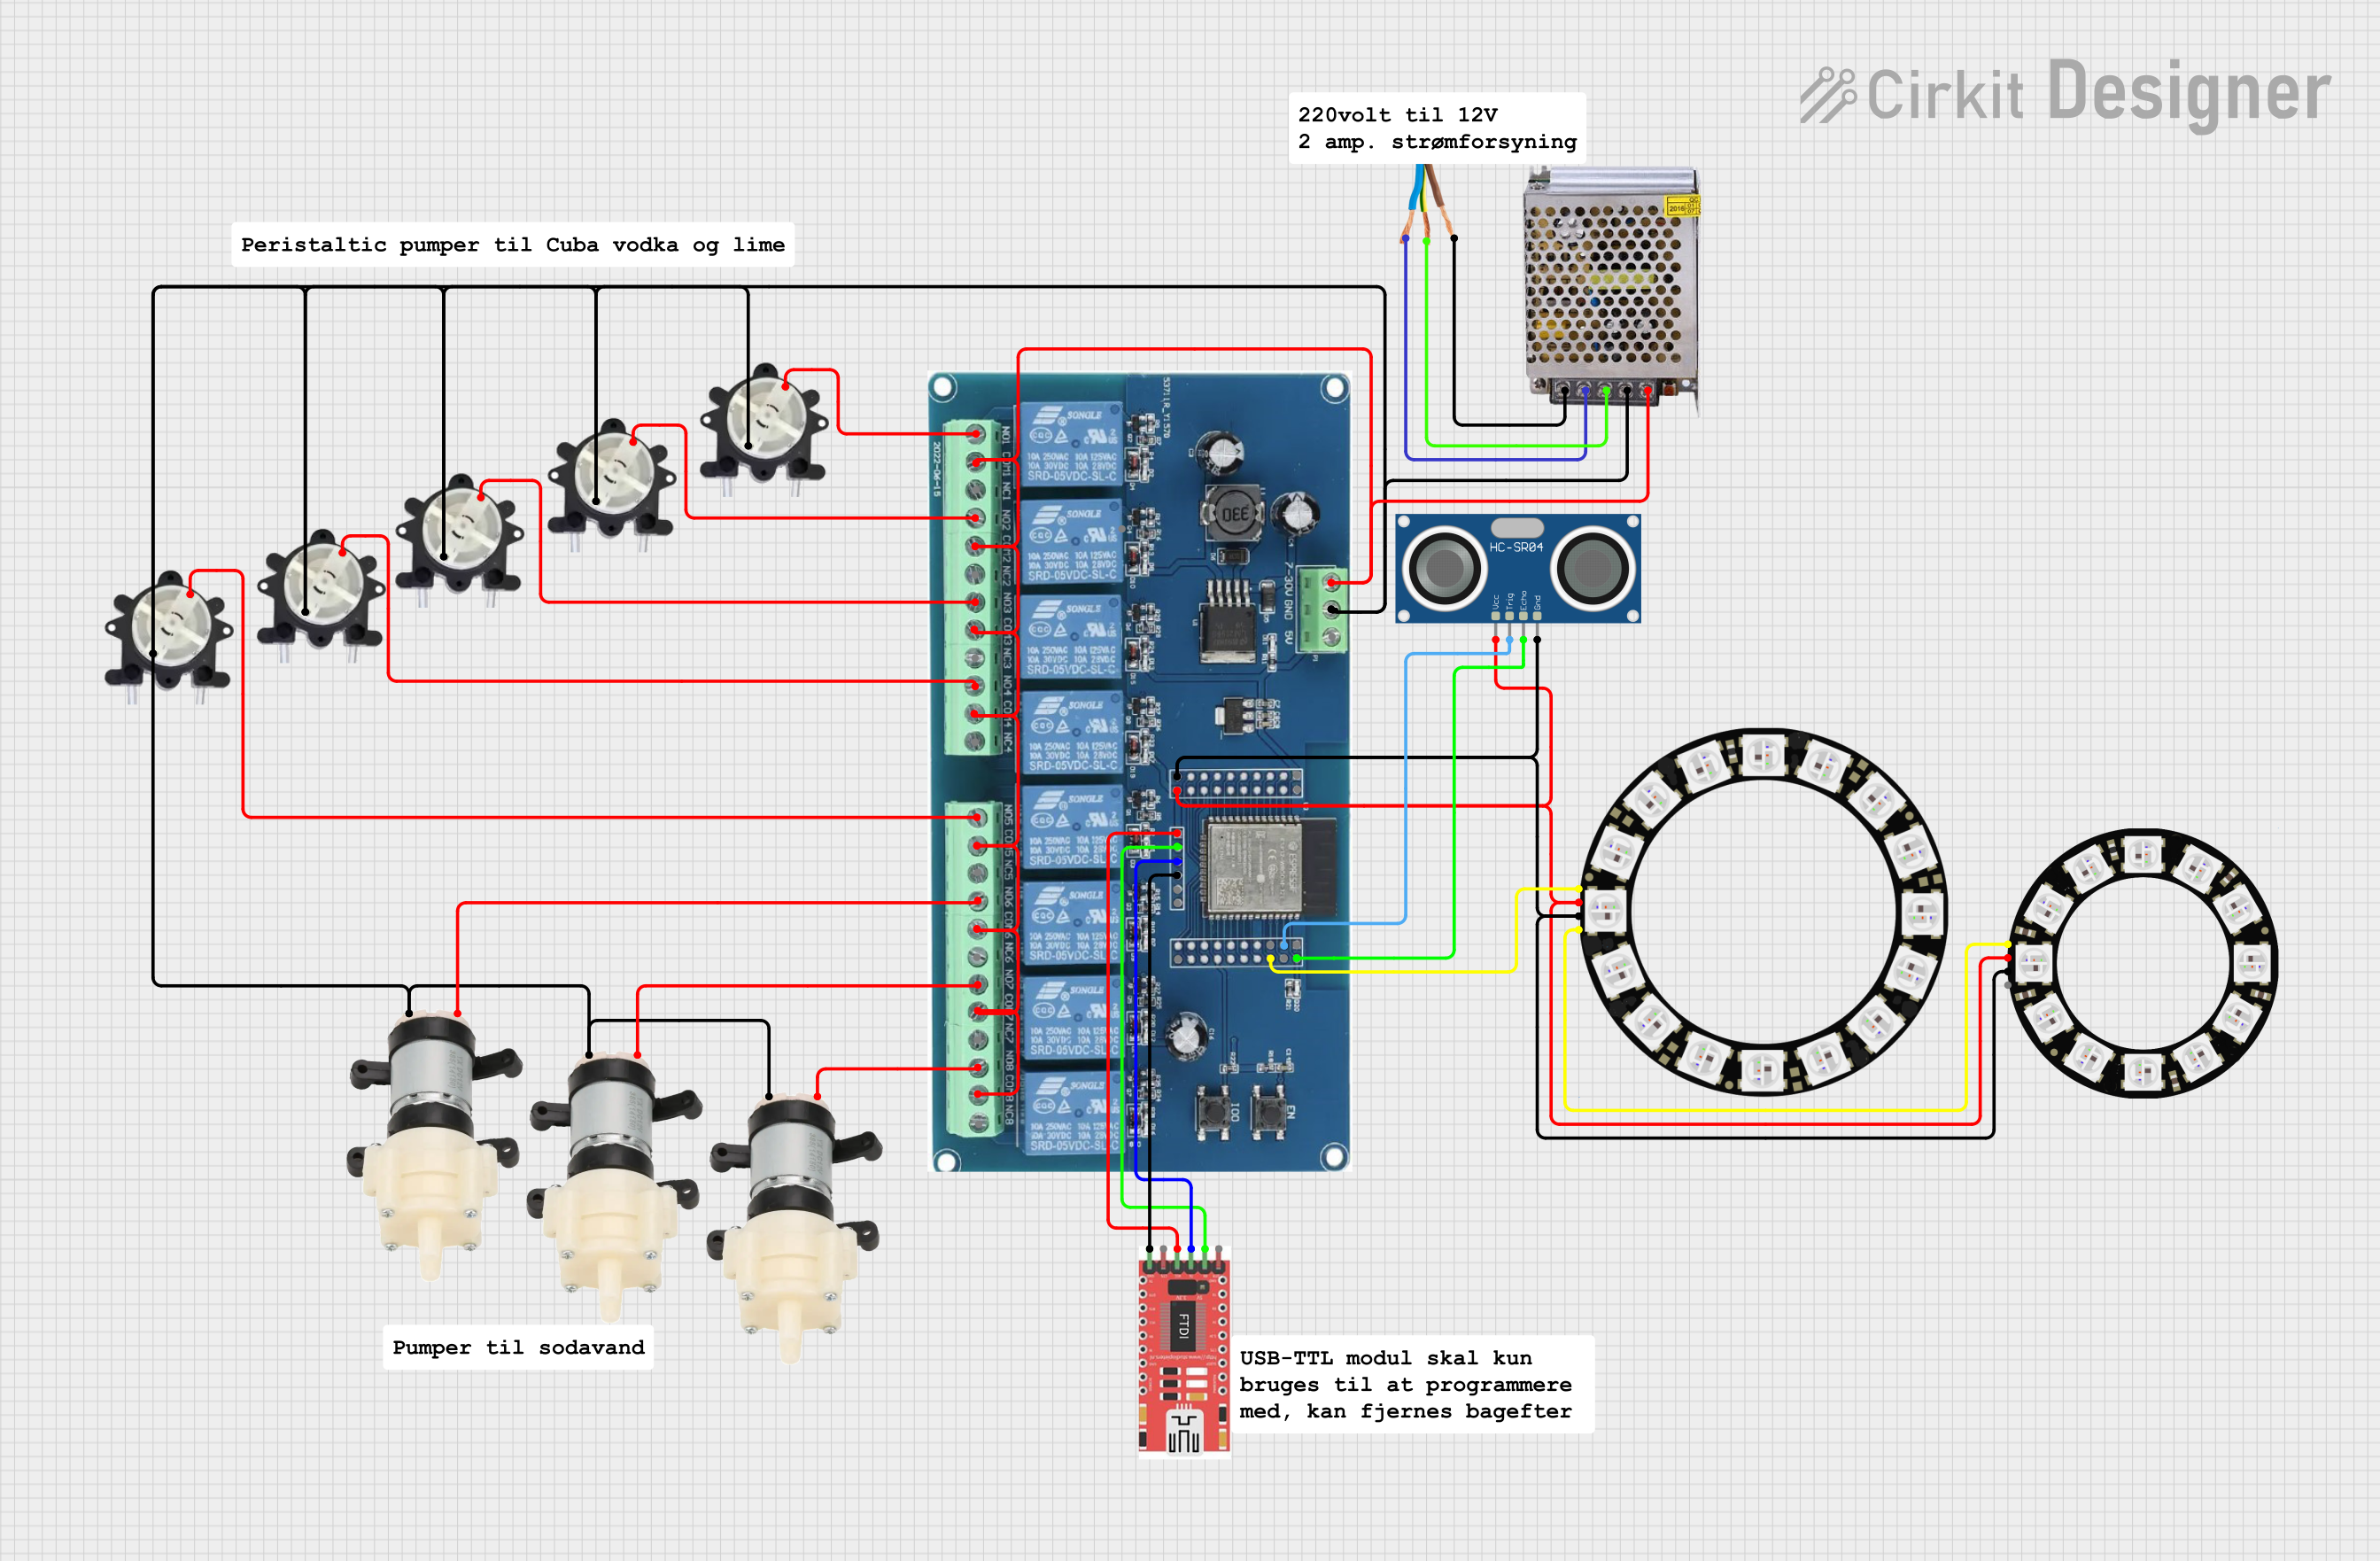
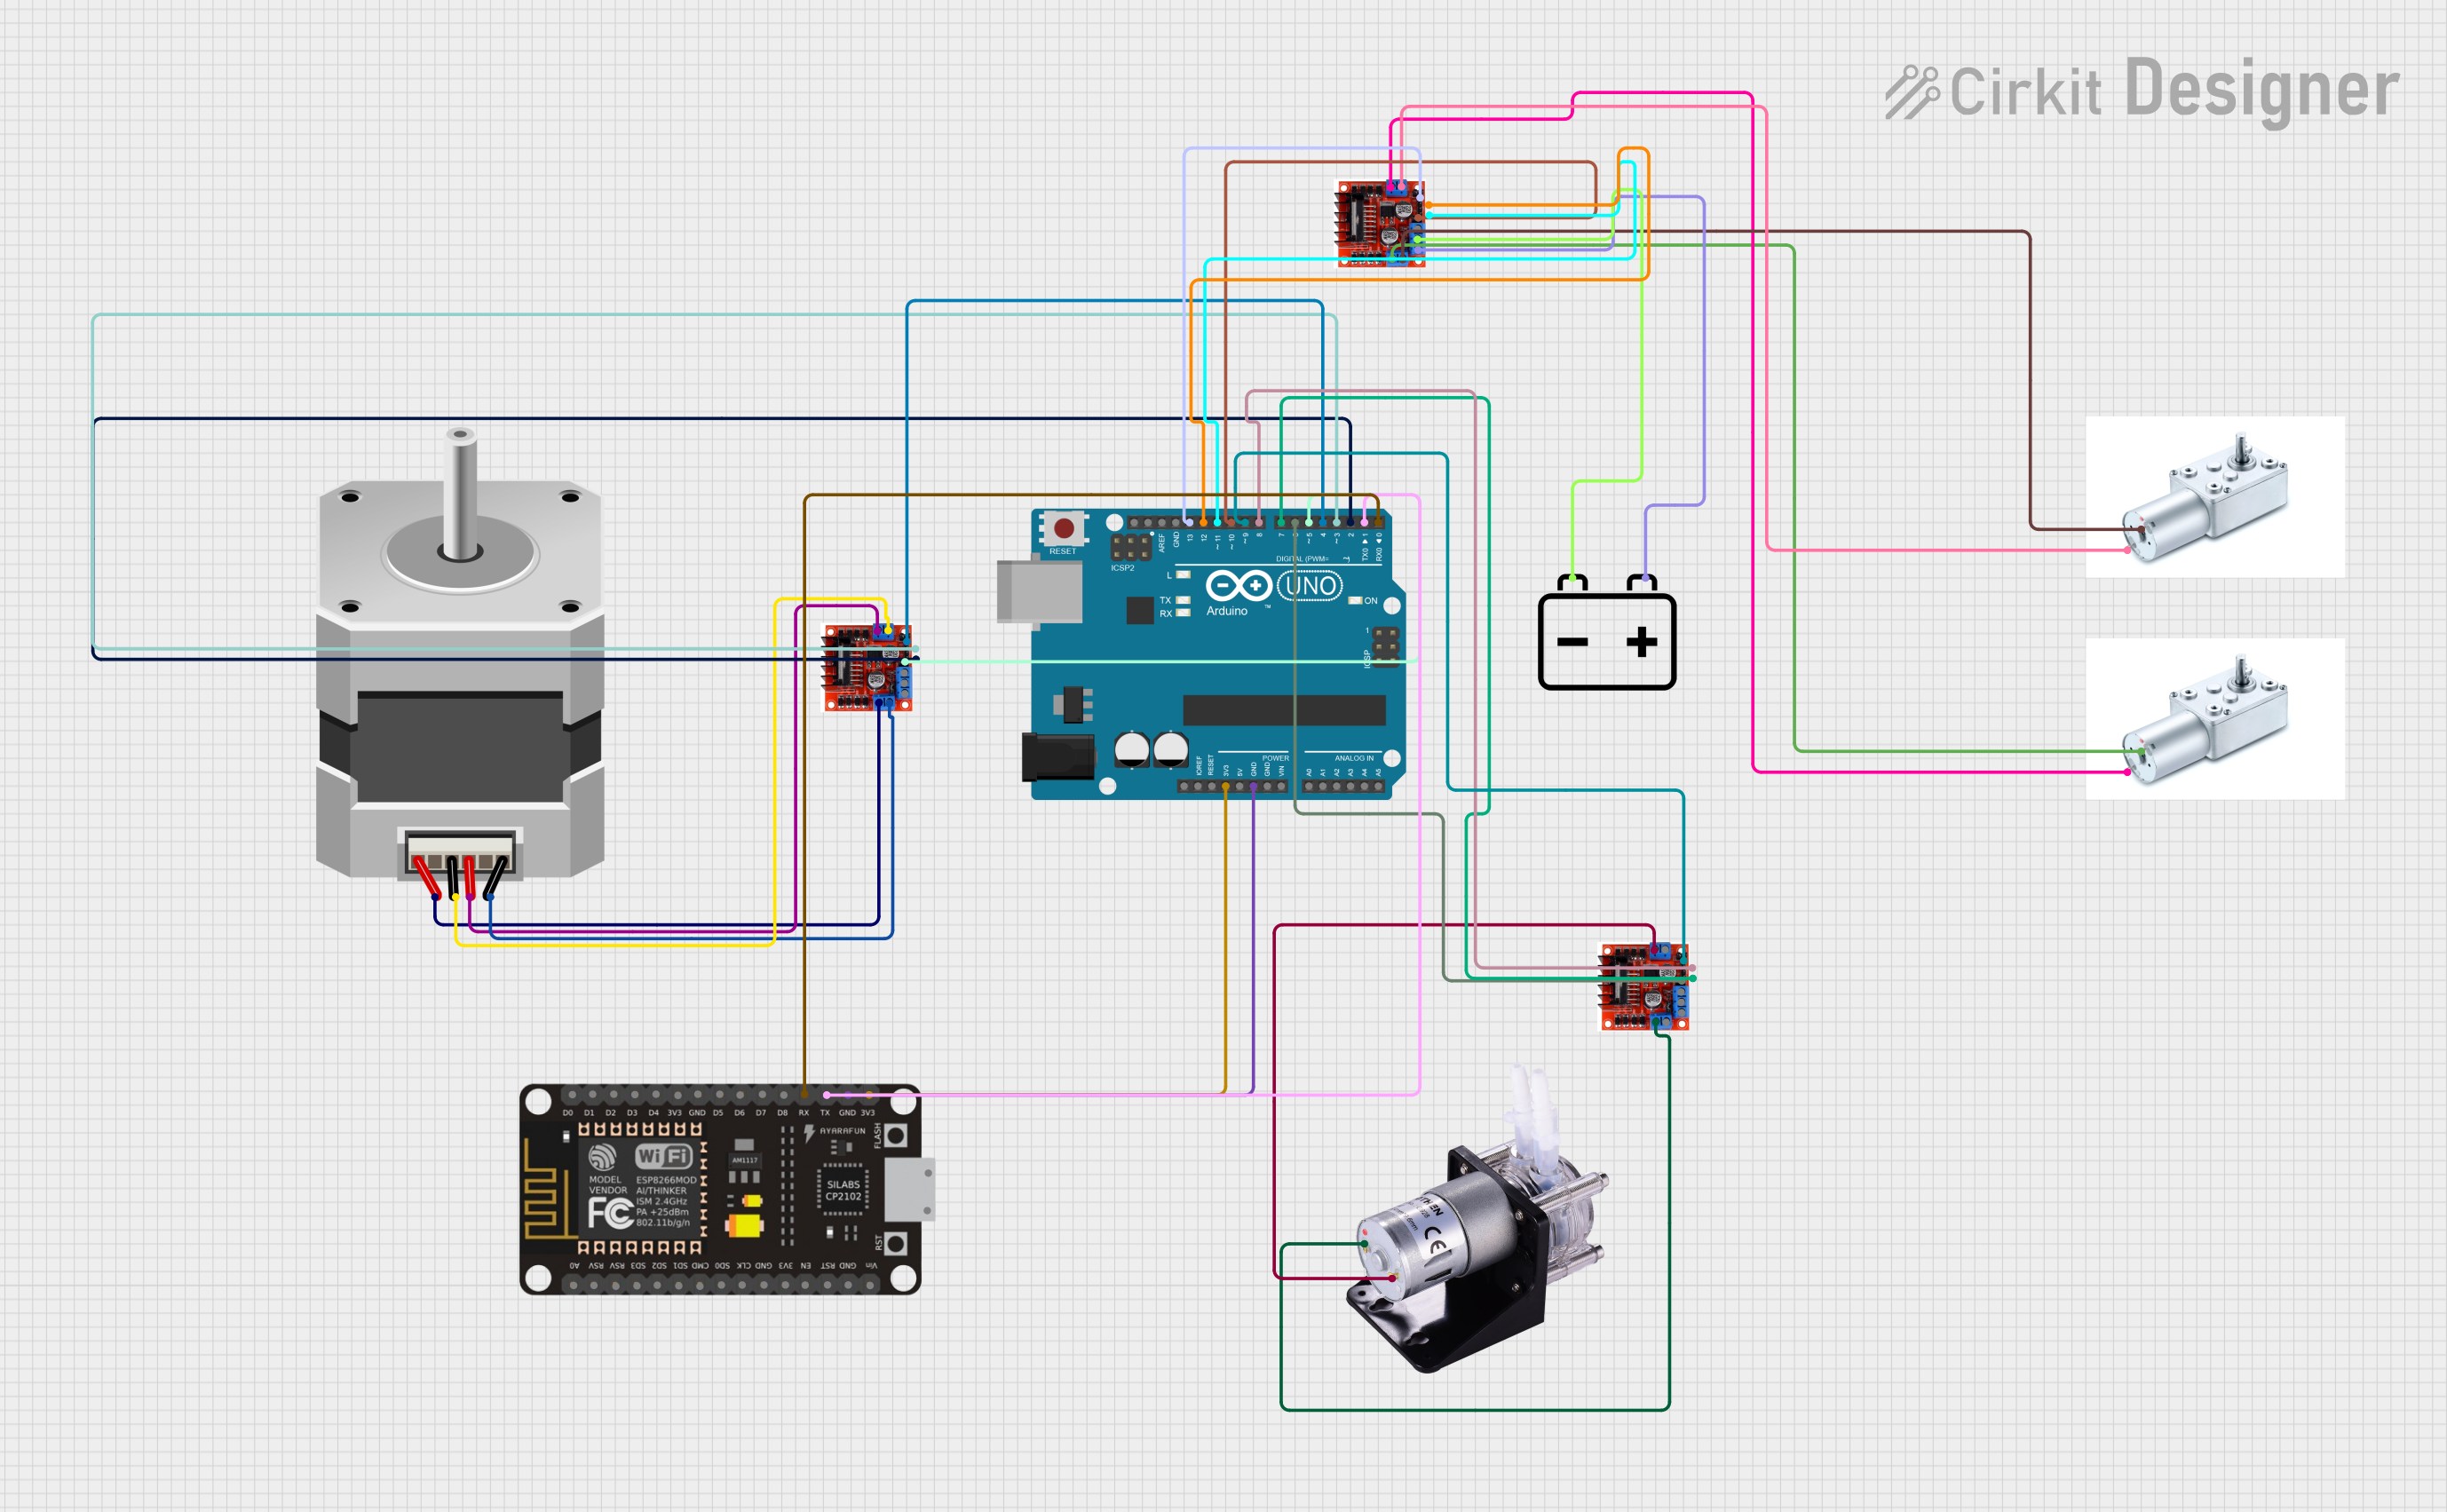
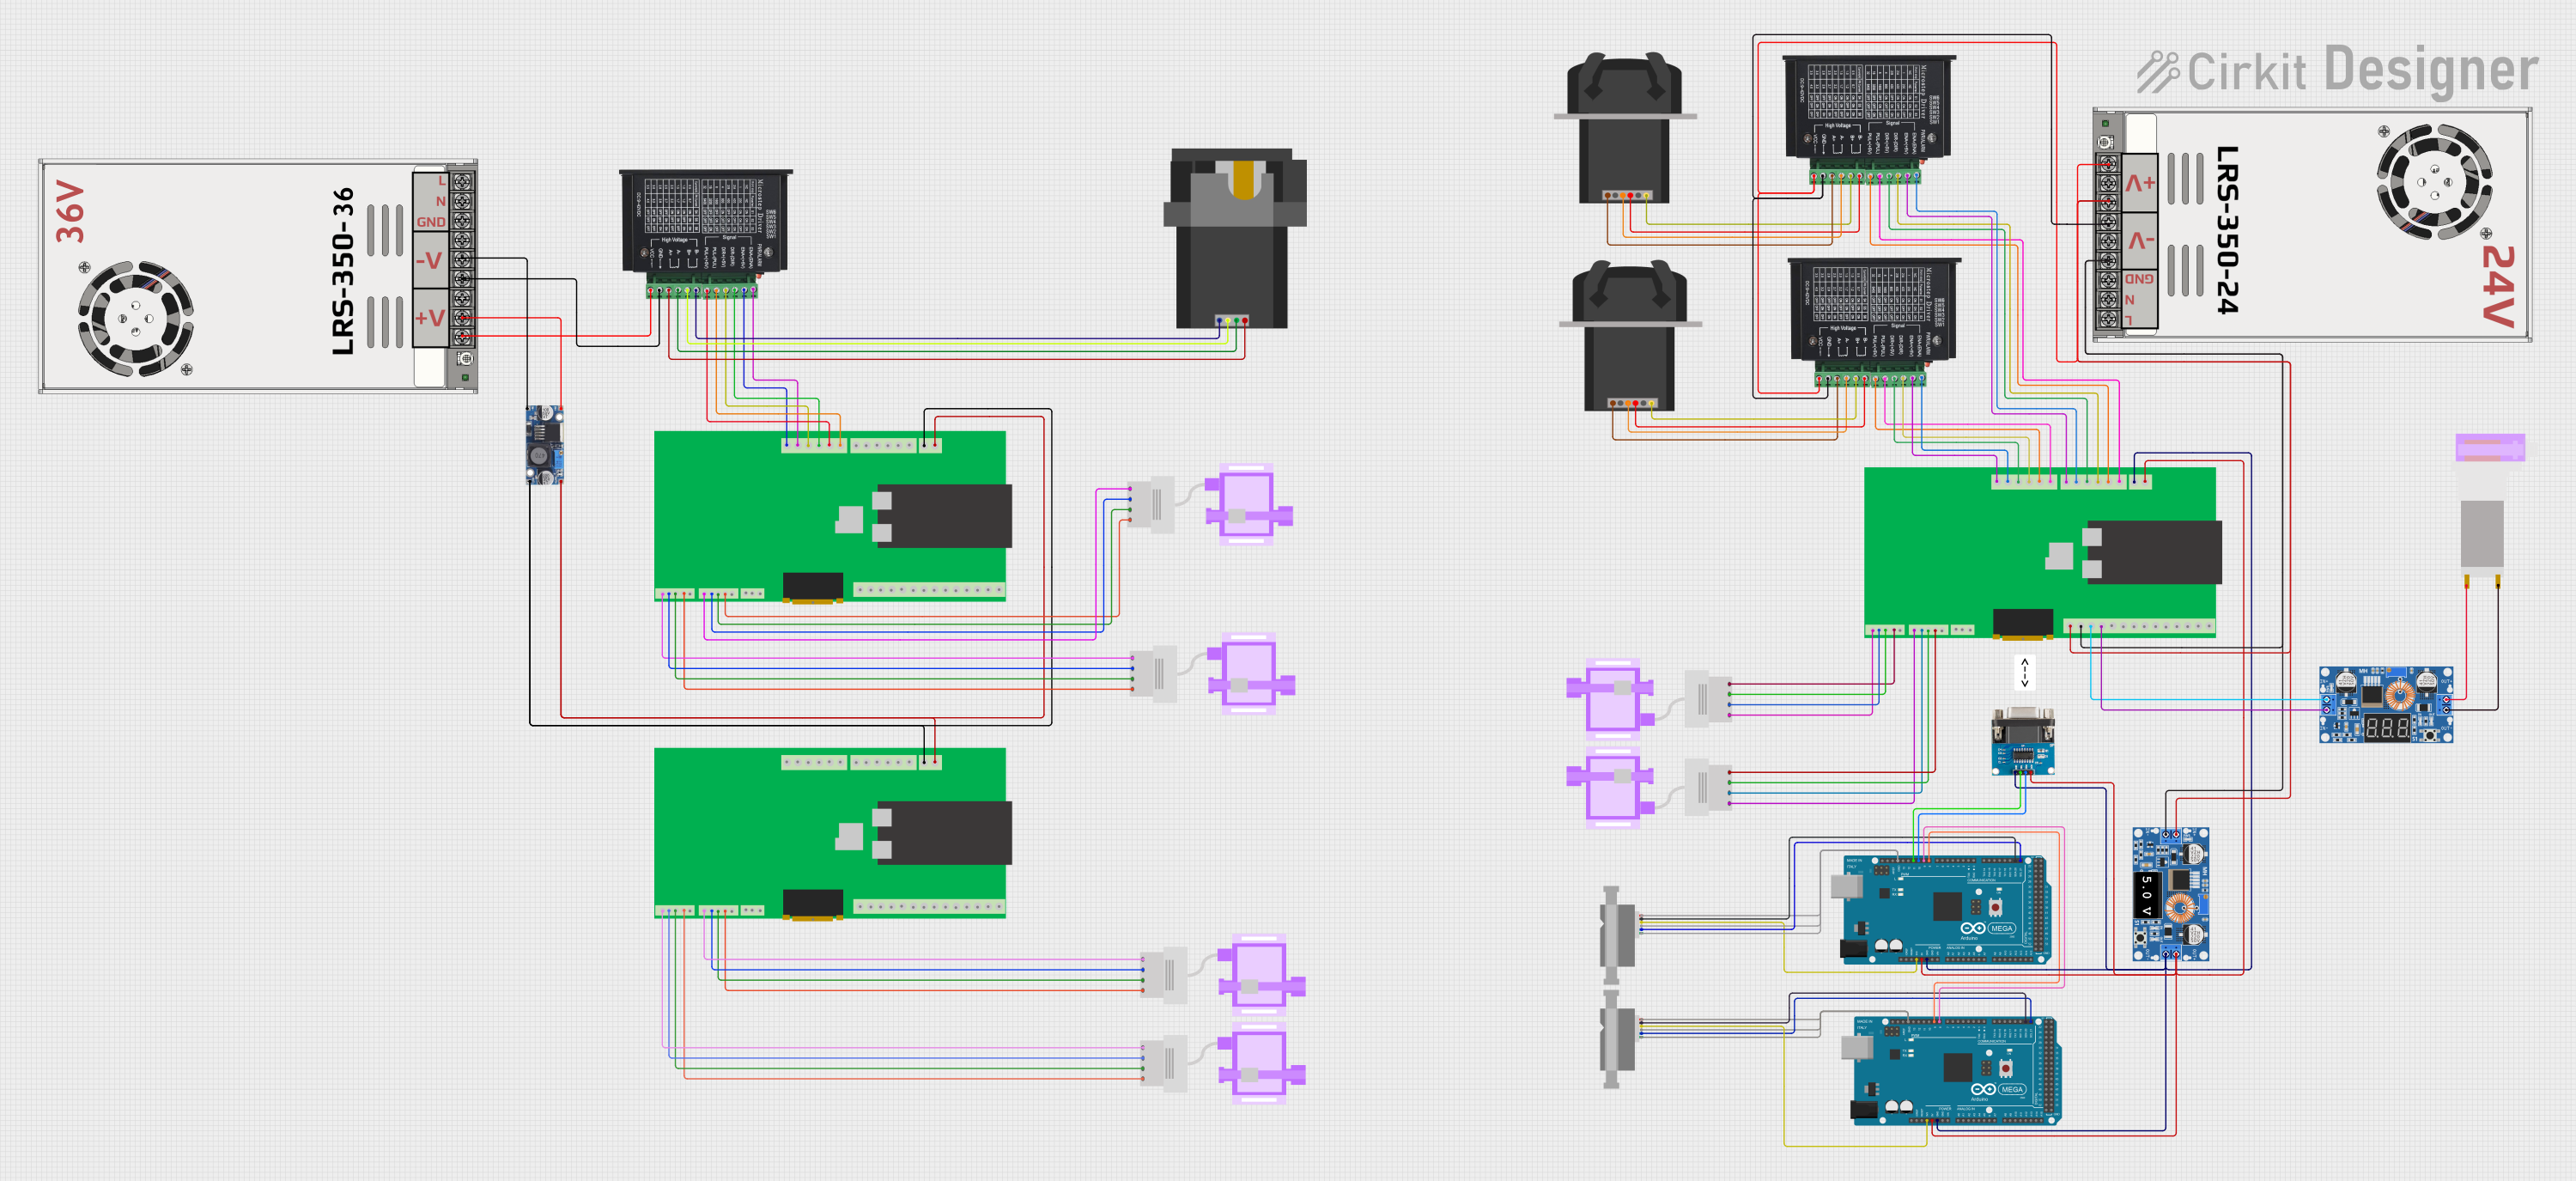
Explore Projects Built with Peristaltic Pump
Common Applications and Use Cases
- Medical infusion pumps
- Laboratory fluid transfer
- Chemical dosing and processing
- Food and beverage production
- Wastewater treatment
Technical Specifications
Key Technical Details
- Voltage: Typically 12V or 24V DC
- Current: Varies with motor size and load
- Power Ratings: Depends on the pump size and design
- Flow Rate: Adjustable, often up to several liters per minute
- Tubing Material Compatibility: Silicone, Tygon, etc.
- Operating Environment: Temperature and chemical compatibility
Pin Configuration and Descriptions
| Pin Number | Description | Notes |
|---|---|---|
| 1 | V+ (Power Supply) | Connect to positive voltage |
| 2 | GND (Ground) | Connect to system ground |
| 3 | Control Signal Input | PWM or digital signal for speed |
Usage Instructions
How to Use the Peristaltic Pump in a Circuit
- Power Supply Connection: Connect the pump's power supply pin to a suitable DC voltage source and the ground pin to the system ground.
- Control Signal: Apply a PWM (Pulse Width Modulation) signal to the control input to regulate the speed of the pump. The duty cycle of the PWM signal will determine the flow rate.
- Tubing Installation: Ensure the flexible tubing is properly installed and secured in the pump head to prevent leaks or slips during operation.
Important Considerations and Best Practices
- Voltage Matching: Ensure the voltage rating of the pump matches the power supply.
- Current Capacity: The power supply should be capable of supplying sufficient current for the pump's operation.
- Pulse Width Modulation (PWM): Use a PWM signal for variable speed control.
- Priming: Prime the pump before use to prevent air locks and ensure consistent flow.
- Tubing Selection: Choose tubing that is compatible with the fluid and the pump's specifications.
Troubleshooting and FAQs
Common Issues
- Pump Does Not Start: Check power supply connections and control signal.
- Inconsistent Flow Rate: Ensure the tubing is properly installed and not worn out.
- Noisy Operation: Check for obstructions or misalignment in the tubing.
Solutions and Tips for Troubleshooting
- Power Supply Issues: Verify that the voltage and current supplied to the pump are within the specified range.
- Control Signal: If using PWM control, ensure the signal is being generated correctly and is within the required frequency range.
- Tubing Wear: Regularly inspect and replace the tubing as needed to maintain performance.
FAQs
- Q: Can the pump run dry?
- A: It is not recommended to run the pump dry as it can shorten the lifespan of the tubing.
- Q: How do I clean the pump?
- A: Run a suitable cleaning solution through the pump, following the manufacturer's guidelines.
Example Arduino Code for Peristaltic Pump Control
// Define the control pin
const int pumpControlPin = 3; // Connect to the control signal input of the pump

void setup() {
  // Set the pump control pin as an output
  pinMode(pumpControlPin, OUTPUT);
}

void loop() {
  // Set the speed of the pump (0-255 for PWM)
  analogWrite(pumpControlPin, 128); // Set to 50% speed

  // Run the pump for 5 seconds
  delay(5000);

  // Stop the pump
  analogWrite(pumpControlPin, 0);

  // Wait for 5 seconds
  delay(5000);
}
Note: The above code is a simple demonstration of controlling a peristaltic pump using an Arduino UNO. The analogWrite function is used to send a PWM signal to the pump, allowing for speed control. Adjust the PWM value (0-255) to control the flow rate. Ensure that the pump's voltage and current requirements are compatible with the Arduino's capabilities, and use an appropriate driver or relay if necessary.