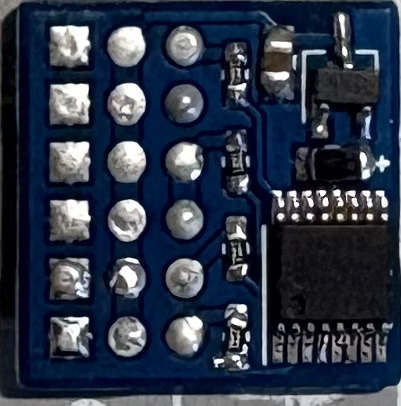
How to Use Preprocessor (flipped): Examples, Pinouts, and Specs
Introduction
The Preprocessor (Flipped) is an electronic component designed to modify input signals or data before they are processed by the main circuit. This preprocessing step is crucial for enhancing the performance, compatibility, or reliability of the overall system. By conditioning, filtering, or transforming the input, the Preprocessor ensures that the main circuit receives optimized data or signals for further processing.
Explore Projects Built with Preprocessor (flipped)


Explore Projects Built with Preprocessor (flipped)
Common Applications and Use Cases
- Signal conditioning in sensor systems
- Data filtering for noise reduction
- Voltage level shifting for compatibility between components
- Preprocessing audio signals in sound systems
- Enhancing data integrity in communication systems
Technical Specifications
The Preprocessor (Flipped) is a versatile component with the following key specifications:
General Specifications
| Parameter | Value |
|---|---|
| Operating Voltage Range | 3.3V to 5V |
| Input Signal Range | 0V to 5V |
| Output Signal Range | 0V to 5V |
| Power Consumption | < 50 mW |
| Operating Temperature | -40°C to +85°C |
| Signal Processing Delay | < 1 ms |
Pin Configuration and Descriptions
The Preprocessor (Flipped) typically comes in a 6-pin configuration. Below is the pinout description:
| Pin Number | Pin Name | Description |
|---|---|---|
| 1 | VCC | Power supply input (3.3V to 5V) |
| 2 | GND | Ground connection |
| 3 | IN | Input signal or data to be preprocessed |
| 4 | OUT | Preprocessed output signal or data |
| 5 | CONFIG | Configuration pin for selecting preprocessing mode |
| 6 | ENABLE | Enable/disable the preprocessor functionality |
Usage Instructions
How to Use the Preprocessor in a Circuit
- Power Supply: Connect the
VCCpin to a 3.3V or 5V power source and theGNDpin to the ground of your circuit. - Input Signal: Feed the signal or data to be preprocessed into the
INpin. - Output Signal: Connect the
OUTpin to the input of the main circuit where the preprocessed signal will be used. - Configuration: Use the
CONFIGpin to select the desired preprocessing mode. This can be done by connecting it to a specific voltage level or using a microcontroller to set the mode dynamically. - Enable Functionality: Ensure the
ENABLEpin is set to a high logic level (e.g., 3.3V or 5V) to activate the preprocessor. Pulling this pin low will disable the component.
Important Considerations and Best Practices
- Signal Compatibility: Ensure that the input signal range matches the specified range (0V to 5V) to avoid damage or incorrect operation.
- Power Supply Stability: Use a decoupling capacitor (e.g., 0.1 µF) near the
VCCpin to stabilize the power supply and reduce noise. - Configuration Modes: Refer to the manufacturer's datasheet for details on the available preprocessing modes and their corresponding
CONFIGpin settings. - Avoid Overloading: Do not exceed the maximum current rating of the
OUTpin to prevent damage to the component.
Example: Using the Preprocessor with an Arduino UNO
Below is an example of how to use the Preprocessor (Flipped) with an Arduino UNO to preprocess an analog signal:
// Define pin connections
const int preprocessorIn = A0;  // Input signal to the preprocessor
const int preprocessorOut = A1; // Preprocessed output signal
const int enablePin = 7;        // Enable pin for the preprocessor
const int configPin = 8;        // Configuration pin for preprocessing mode

void setup() {
  // Initialize serial communication for debugging
  Serial.begin(9600);

  // Set pin modes
  pinMode(enablePin, OUTPUT);
  pinMode(configPin, OUTPUT);
  pinMode(preprocessorOut, INPUT);

  // Enable the preprocessor
  digitalWrite(enablePin, HIGH);

  // Set preprocessing mode (example: HIGH for Mode 1)
  digitalWrite(configPin, HIGH);
}

void loop() {
  // Read the preprocessed signal
  int processedSignal = analogRead(preprocessorOut);

  // Print the preprocessed signal value to the Serial Monitor
  Serial.print("Preprocessed Signal: ");
  Serial.println(processedSignal);

  delay(500); // Delay for readability
}
Troubleshooting and FAQs
Common Issues and Solutions
No Output Signal
- Cause: The
ENABLEpin is not set to a high logic level. - Solution: Ensure the
ENABLEpin is connected to 3.3V or 5V.
- Cause: The
Incorrect Output Signal
- Cause: The input signal is outside the specified range (0V to 5V).
- Solution: Verify the input signal range and adjust it if necessary.
High Noise in Output
- Cause: Power supply instability or insufficient decoupling.
- Solution: Add a 0.1 µF capacitor near the
VCCpin to stabilize the power supply.
Preprocessor Not Responding to Configuration Changes
- Cause: Incorrect voltage levels on the
CONFIGpin. - Solution: Check the voltage levels and ensure they match the required settings for the desired mode.
- Cause: Incorrect voltage levels on the
FAQs
Q1: Can the Preprocessor (Flipped) handle digital signals?
A1: Yes, the component can preprocess both analog and digital signals, depending on the configuration.
Q2: What happens if the ENABLE pin is left floating?
A2: Leaving the ENABLE pin floating may result in unpredictable behavior. Always connect it to a defined logic level.
Q3: How do I know which preprocessing modes are available?
A3: Refer to the manufacturer's datasheet for detailed information on the available modes and their corresponding CONFIG pin settings.
Q4: Can I use the Preprocessor with a 12V power supply?
A4: No, the component is designed to operate within a voltage range of 3.3V to 5V. Using a higher voltage may damage the component.