How to Use Transfo 220V AC to 24V AC: Examples, Pinouts, and Specs
Introduction
The Transfo 220V AC to 24V AC is a step-down transformer designed to reduce the input voltage from 220V AC to a safer and more manageable 24V AC. This component is widely used in applications requiring low-voltage AC power, such as industrial control systems, HVAC systems, and low-voltage lighting. Its robust design ensures reliable performance in both residential and commercial environments.
Explore Projects Built with Transfo 220V AC to 24V AC

Explore Projects Built with Transfo 220V AC to 24V AC
Common Applications and Use Cases
- Powering low-voltage AC devices
- Industrial control panels
- HVAC systems
- Doorbells and intercom systems
- Low-voltage lighting systems
Technical Specifications
The following table outlines the key technical details of the Transfo 220V AC to 24V AC:
| Parameter | Value |
|---|---|
| Input Voltage | 220V AC ±10% |
| Output Voltage | 24V AC ±5% |
| Frequency | 50/60 Hz |
| Power Rating | 50 VA (varies by model) |
| Efficiency | ≥ 90% |
| Insulation Resistance | ≥ 100 MΩ |
| Operating Temperature | -10°C to 50°C |
| Storage Temperature | -20°C to 70°C |
| Dimensions | Varies by model |
| Weight | Varies by model |
Pin Configuration and Descriptions
The transformer typically has four terminals: two for the primary (input) side and two for the secondary (output) side. The table below describes the pin configuration:
| Pin | Description |
|---|---|
| Primary 1 | Live (L) input for 220V AC |
| Primary 2 | Neutral (N) input for 220V AC |
| Secondary 1 | Live (L) output for 24V AC |
| Secondary 2 | Neutral (N) output for 24V AC |
Note: Ensure proper wiring to avoid damage to the transformer or connected devices.
Usage Instructions
How to Use the Component in a Circuit
- Safety First: Before handling the transformer, ensure the power supply is turned off to avoid electric shock.
- Wiring the Primary Side:
- Connect the Live (L) and Neutral (N) wires of the 220V AC power source to the Primary 1 and Primary 2 terminals, respectively.
- Use insulated connectors to prevent accidental short circuits.
- Wiring the Secondary Side:
- Connect the Live (L) and Neutral (N) terminals of the secondary side to the load requiring 24V AC.
- Verify the load's power rating to ensure compatibility with the transformer.
- Testing:
- After completing the wiring, turn on the power supply and measure the output voltage using a multimeter to confirm it is 24V AC.
- If the output voltage is incorrect, double-check the wiring.
Important Considerations and Best Practices
- Overloading: Do not exceed the transformer's power rating (e.g., 50 VA). Overloading can cause overheating and damage.
- Grounding: Ensure proper grounding of the transformer to enhance safety and reduce electrical noise.
- Ventilation: Install the transformer in a well-ventilated area to prevent overheating.
- Isolation: Use the transformer for electrical isolation between the primary and secondary circuits to enhance safety.
Example: Connecting to an Arduino UNO
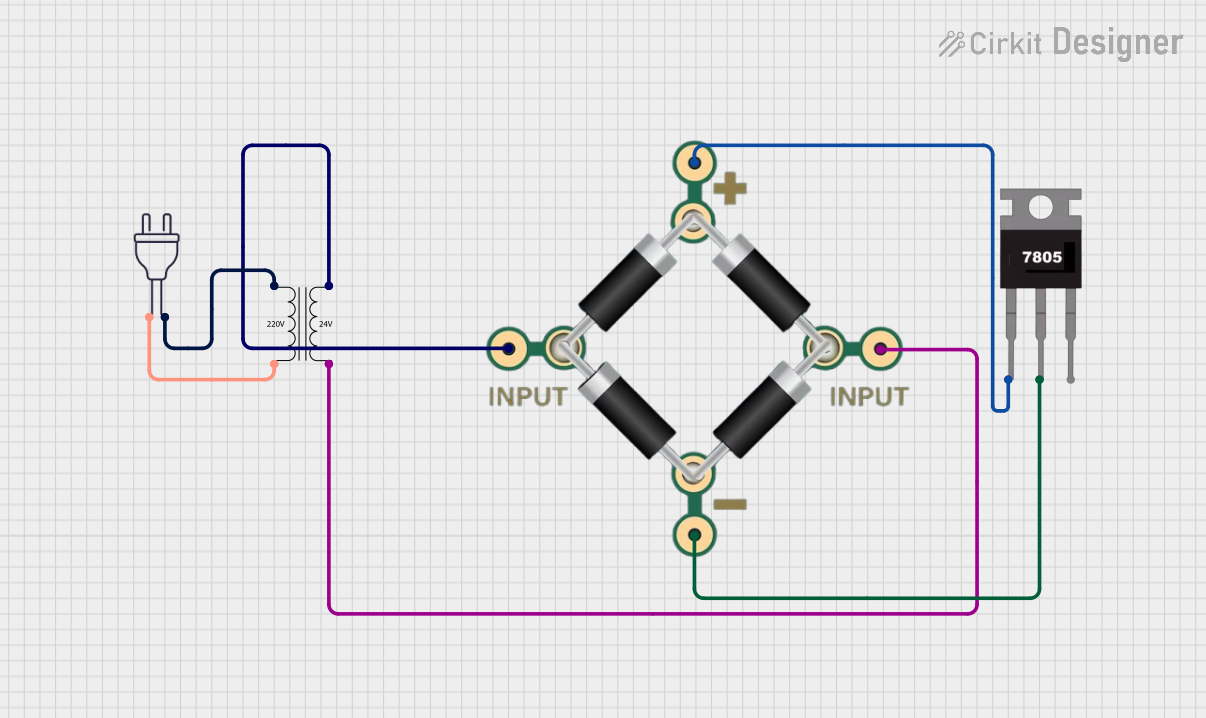
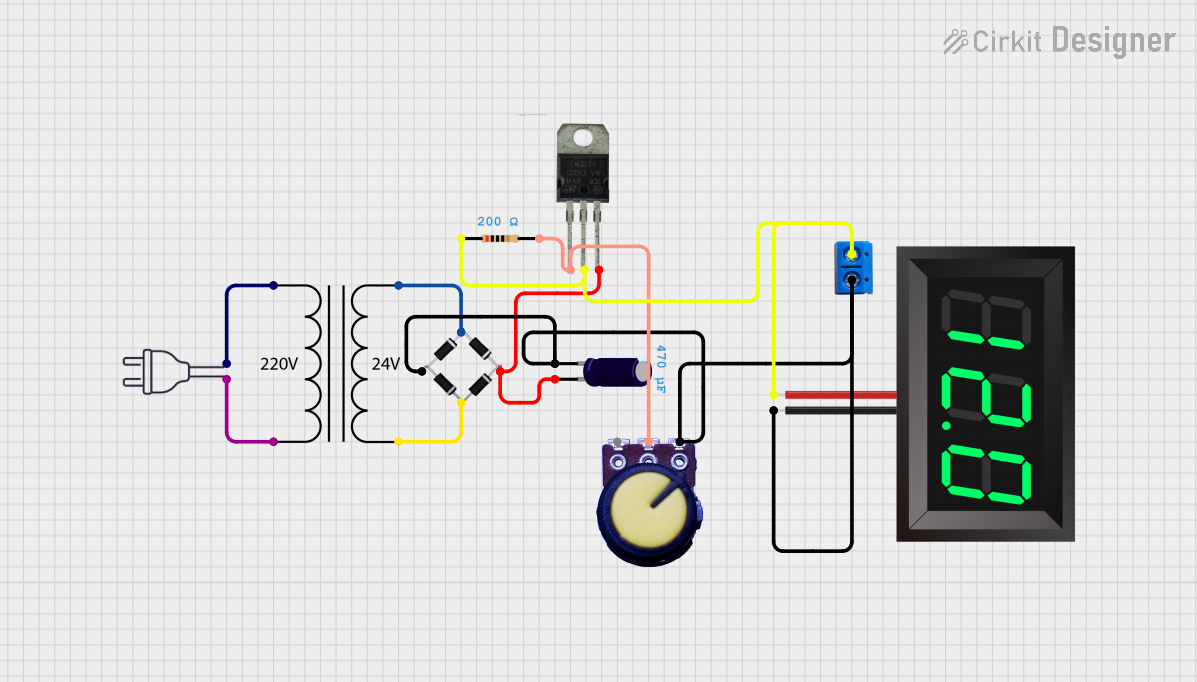
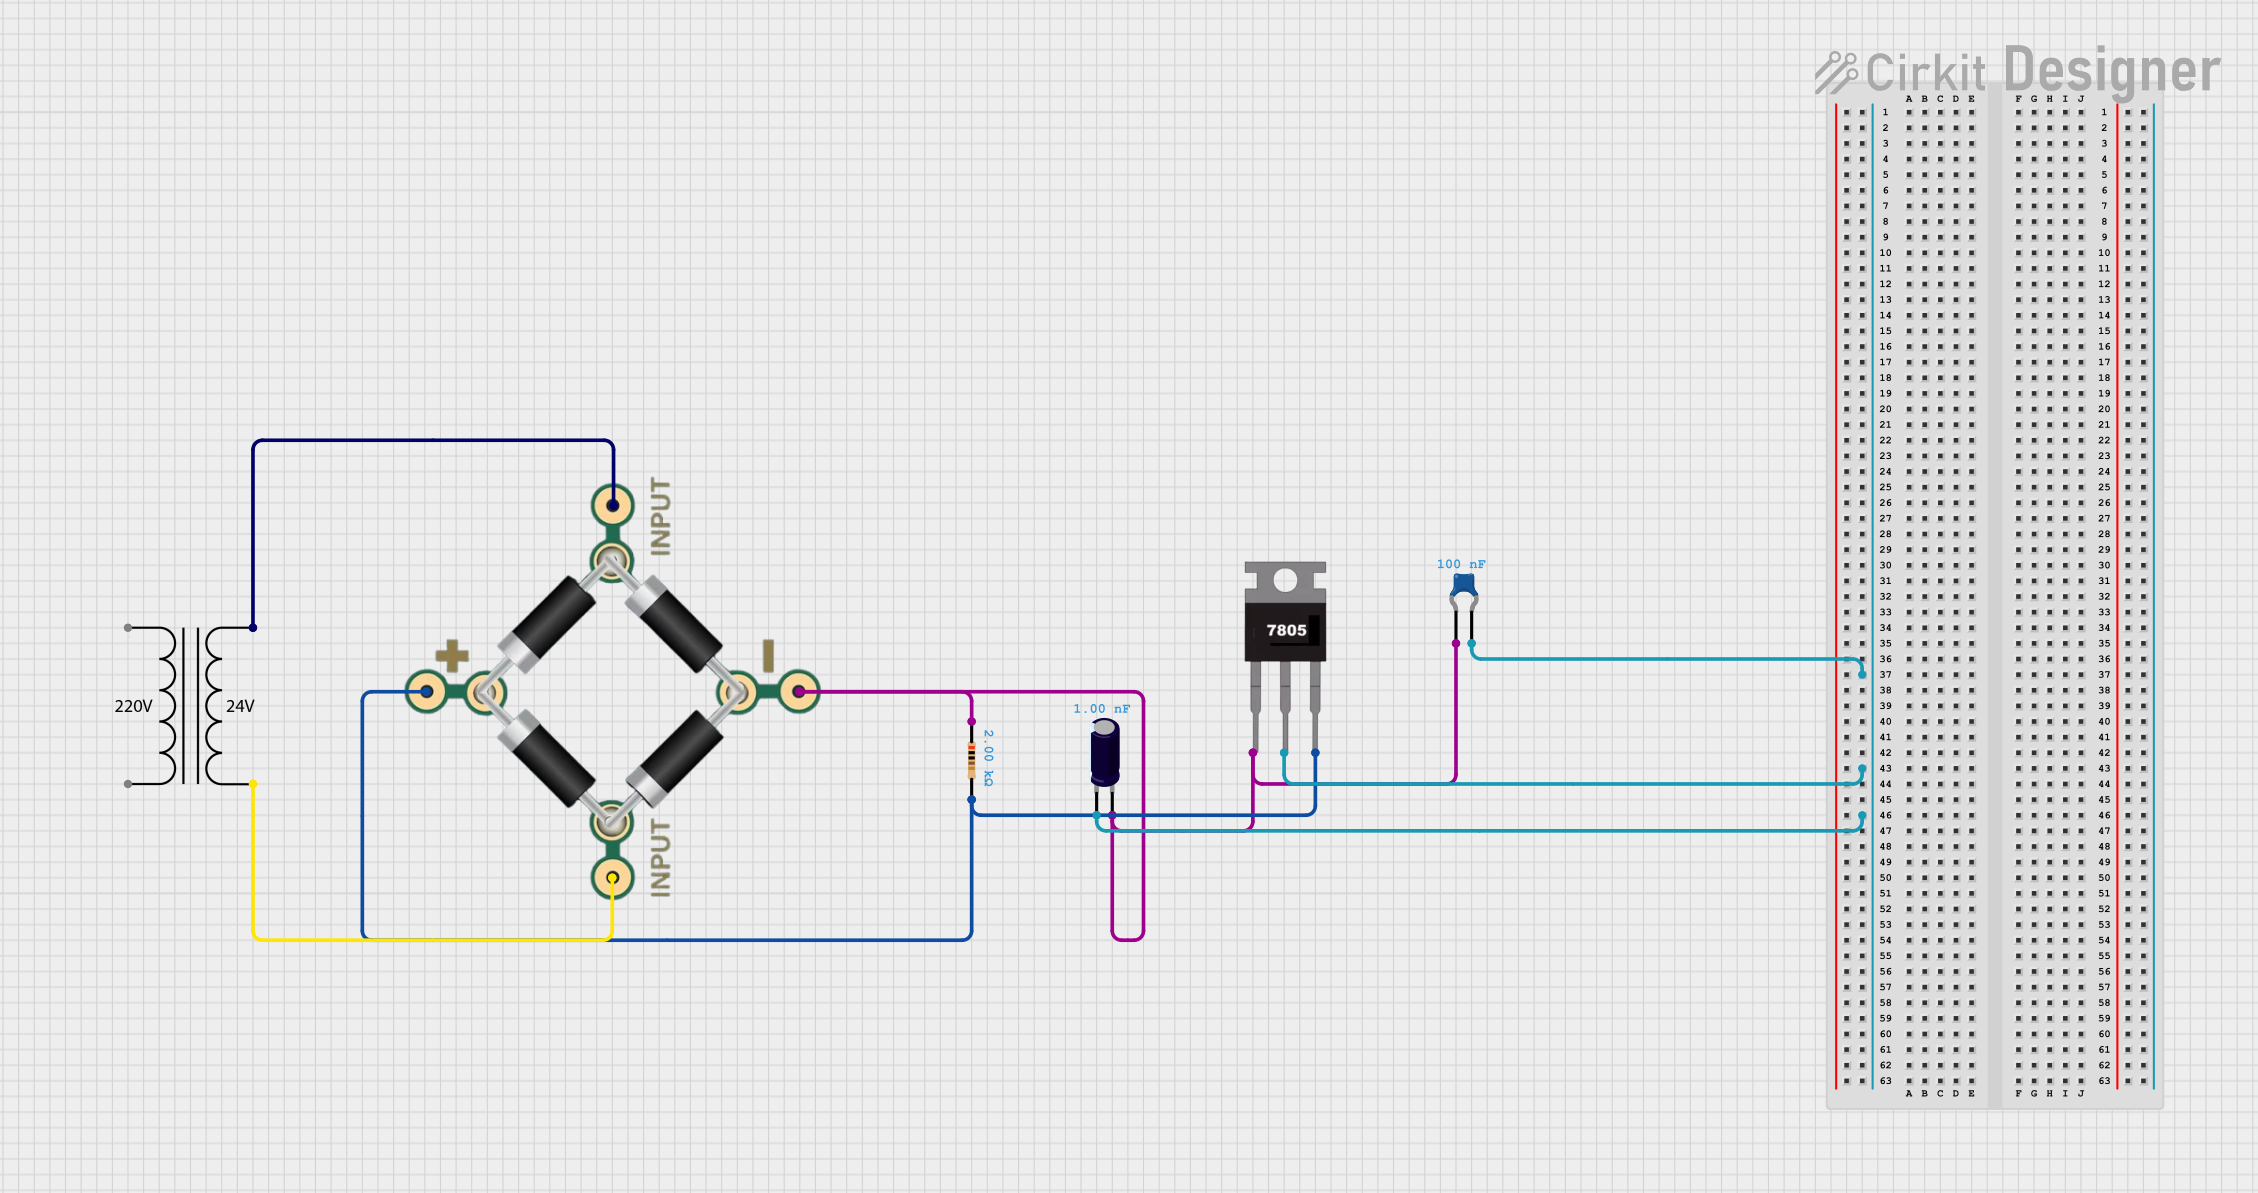
While the transformer itself provides AC voltage, it can be used in conjunction with a rectifier and voltage regulator to power DC devices like an Arduino UNO. Below is an example circuit and code:
Circuit Setup:
- Use a bridge rectifier to convert the 24V AC output to DC.
- Add a 7805 voltage regulator to step down the DC voltage to 5V for the Arduino UNO.
- Connect the regulated 5V DC output to the Arduino's 5V and GND pins.
Arduino Code:
// Example code to blink an LED connected to pin 13 void setup() { pinMode(13, OUTPUT); // Set pin 13 as an output } void loop() { digitalWrite(13, HIGH); // Turn the LED on delay(1000); // Wait for 1 second digitalWrite(13, LOW); // Turn the LED off delay(1000); // Wait for 1 second }Note: Ensure the rectifier and voltage regulator are properly rated for the transformer's output.
Troubleshooting and FAQs
Common Issues Users Might Face
No Output Voltage:
- Cause: Incorrect wiring on the primary or secondary side.
- Solution: Double-check the wiring connections and ensure the power supply is active.
Overheating:
- Cause: Overloading the transformer or poor ventilation.
- Solution: Reduce the load to within the transformer's power rating and ensure proper ventilation.
Voltage Drop:
- Cause: Excessive load or long cable runs.
- Solution: Use thicker cables to reduce resistance and ensure the load is within the transformer's capacity.
Humming Noise:
- Cause: Loose laminations or mounting.
- Solution: Tighten the mounting screws and ensure the transformer is securely installed.
FAQs
Can this transformer be used with DC input?
- No, the transformer is designed for AC input only. Using DC input will damage the transformer.
What happens if I connect the secondary side to a DC load directly?
- The transformer outputs AC voltage. Connecting it directly to a DC load may damage the load. Use a rectifier and voltage regulator for DC applications.
Is the transformer waterproof?
- No, the transformer is not waterproof. Install it in a dry, protected environment.
Can I use this transformer for 110V AC input?
- No, this transformer is specifically designed for 220V AC input. Using 110V AC will result in incorrect output voltage.
By following this documentation, you can safely and effectively use the Transfo 220V AC to 24V AC in your projects.