How to Use Adafruit DC+Stepper Motor HAT: Examples, Pinouts, and Specs
Introduction
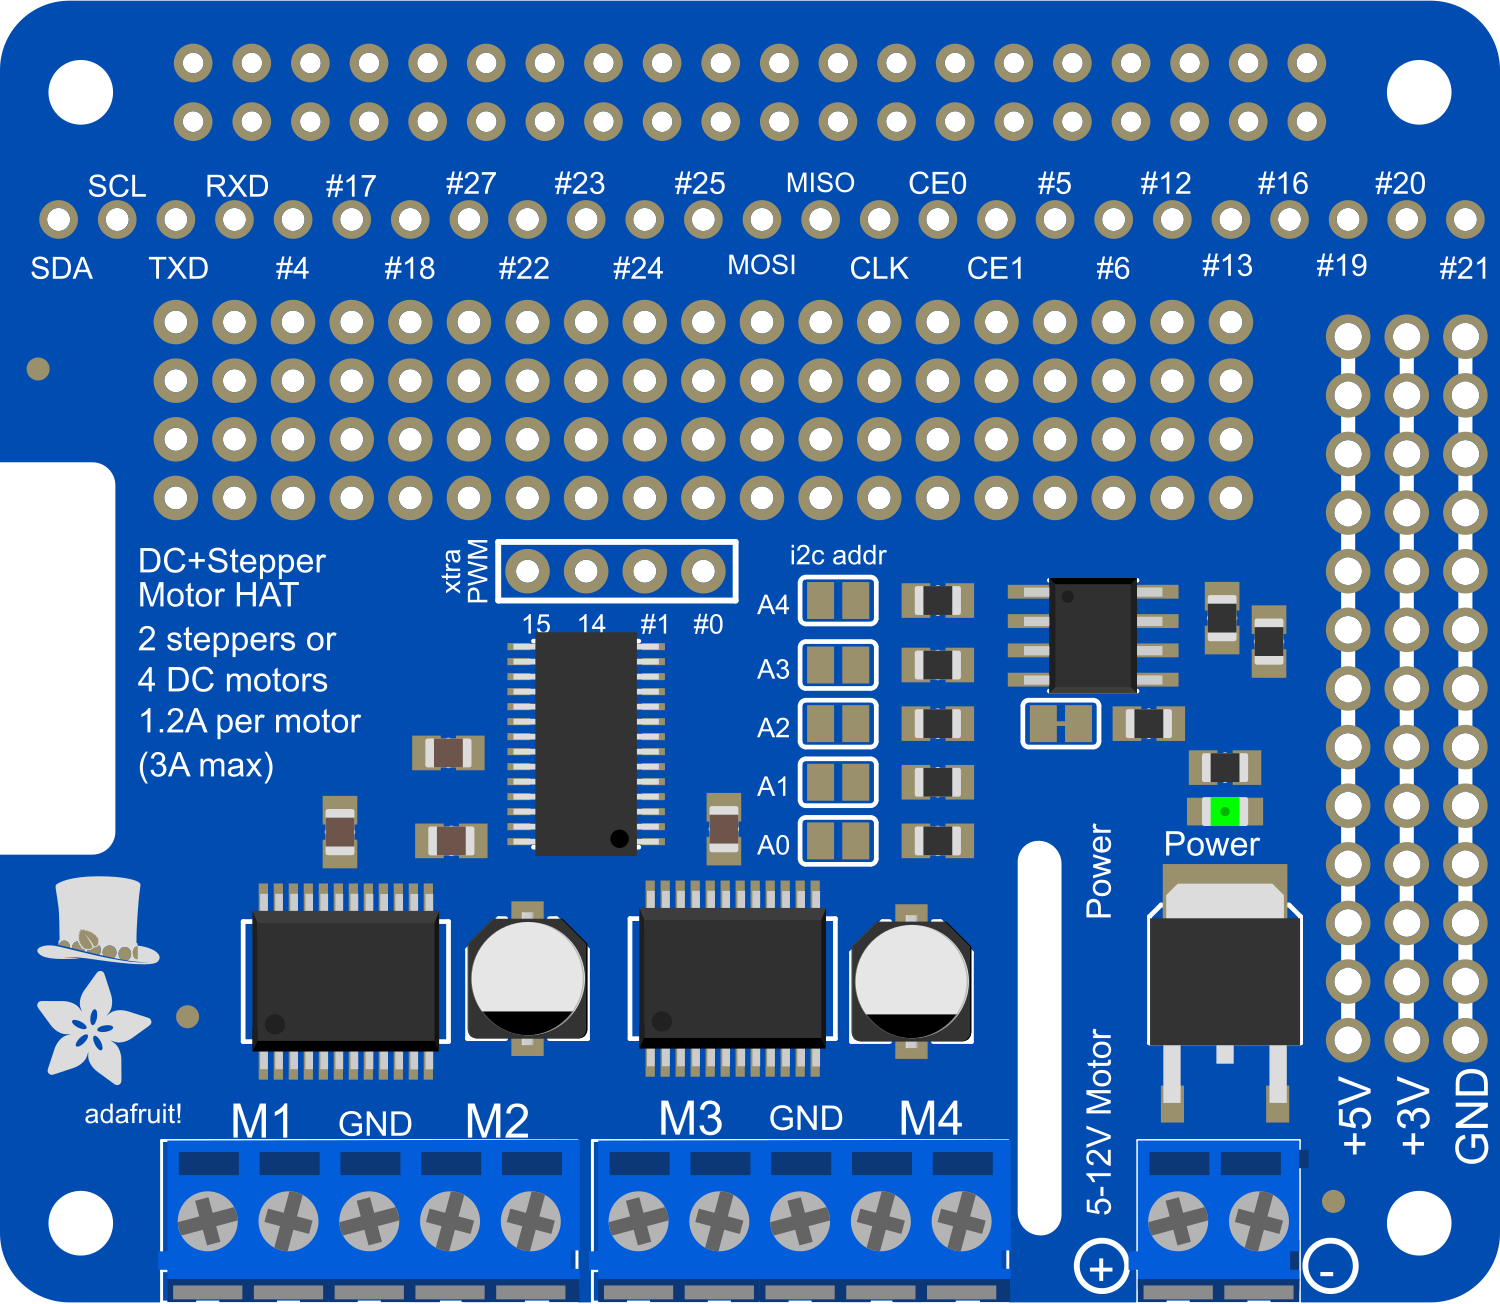
The Adafruit DC+Stepper Motor HAT is a versatile motor driver board designed for use with the Raspberry Pi. This HAT (Hardware Attached on Top) allows users to control up to four DC motors or two stepper motors, as well as two servo motors, making it an ideal choice for a wide range of robotics and automation projects. With its easy-to-use Python library, users can quickly get their motors running without having to deal with complex wiring or intricate motor control algorithms.
Explore Projects Built with Adafruit DC+Stepper Motor HAT

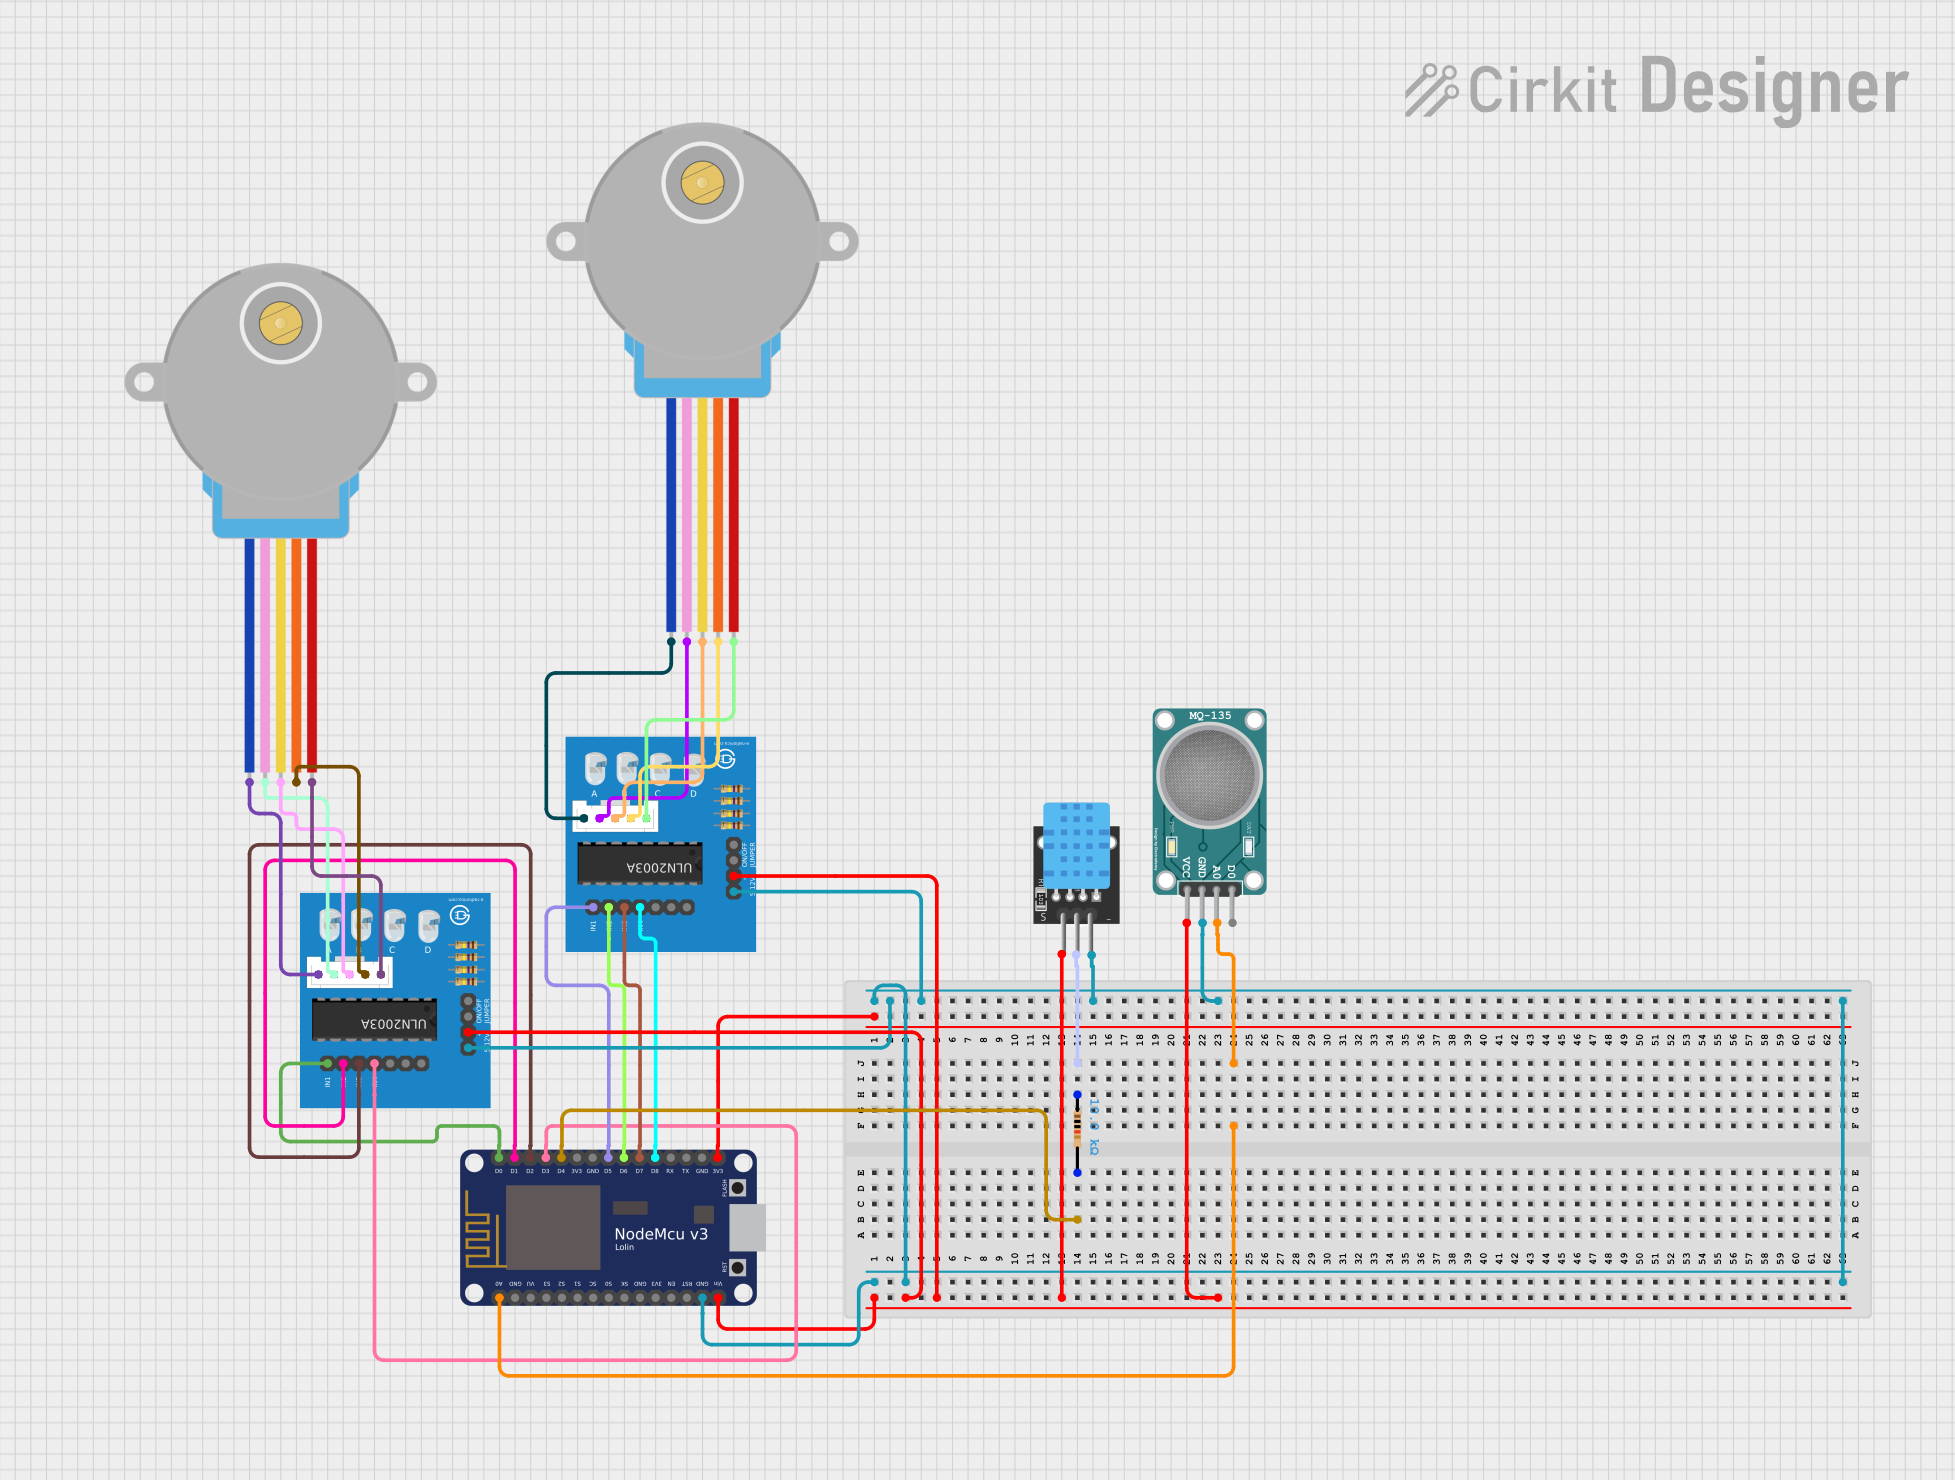
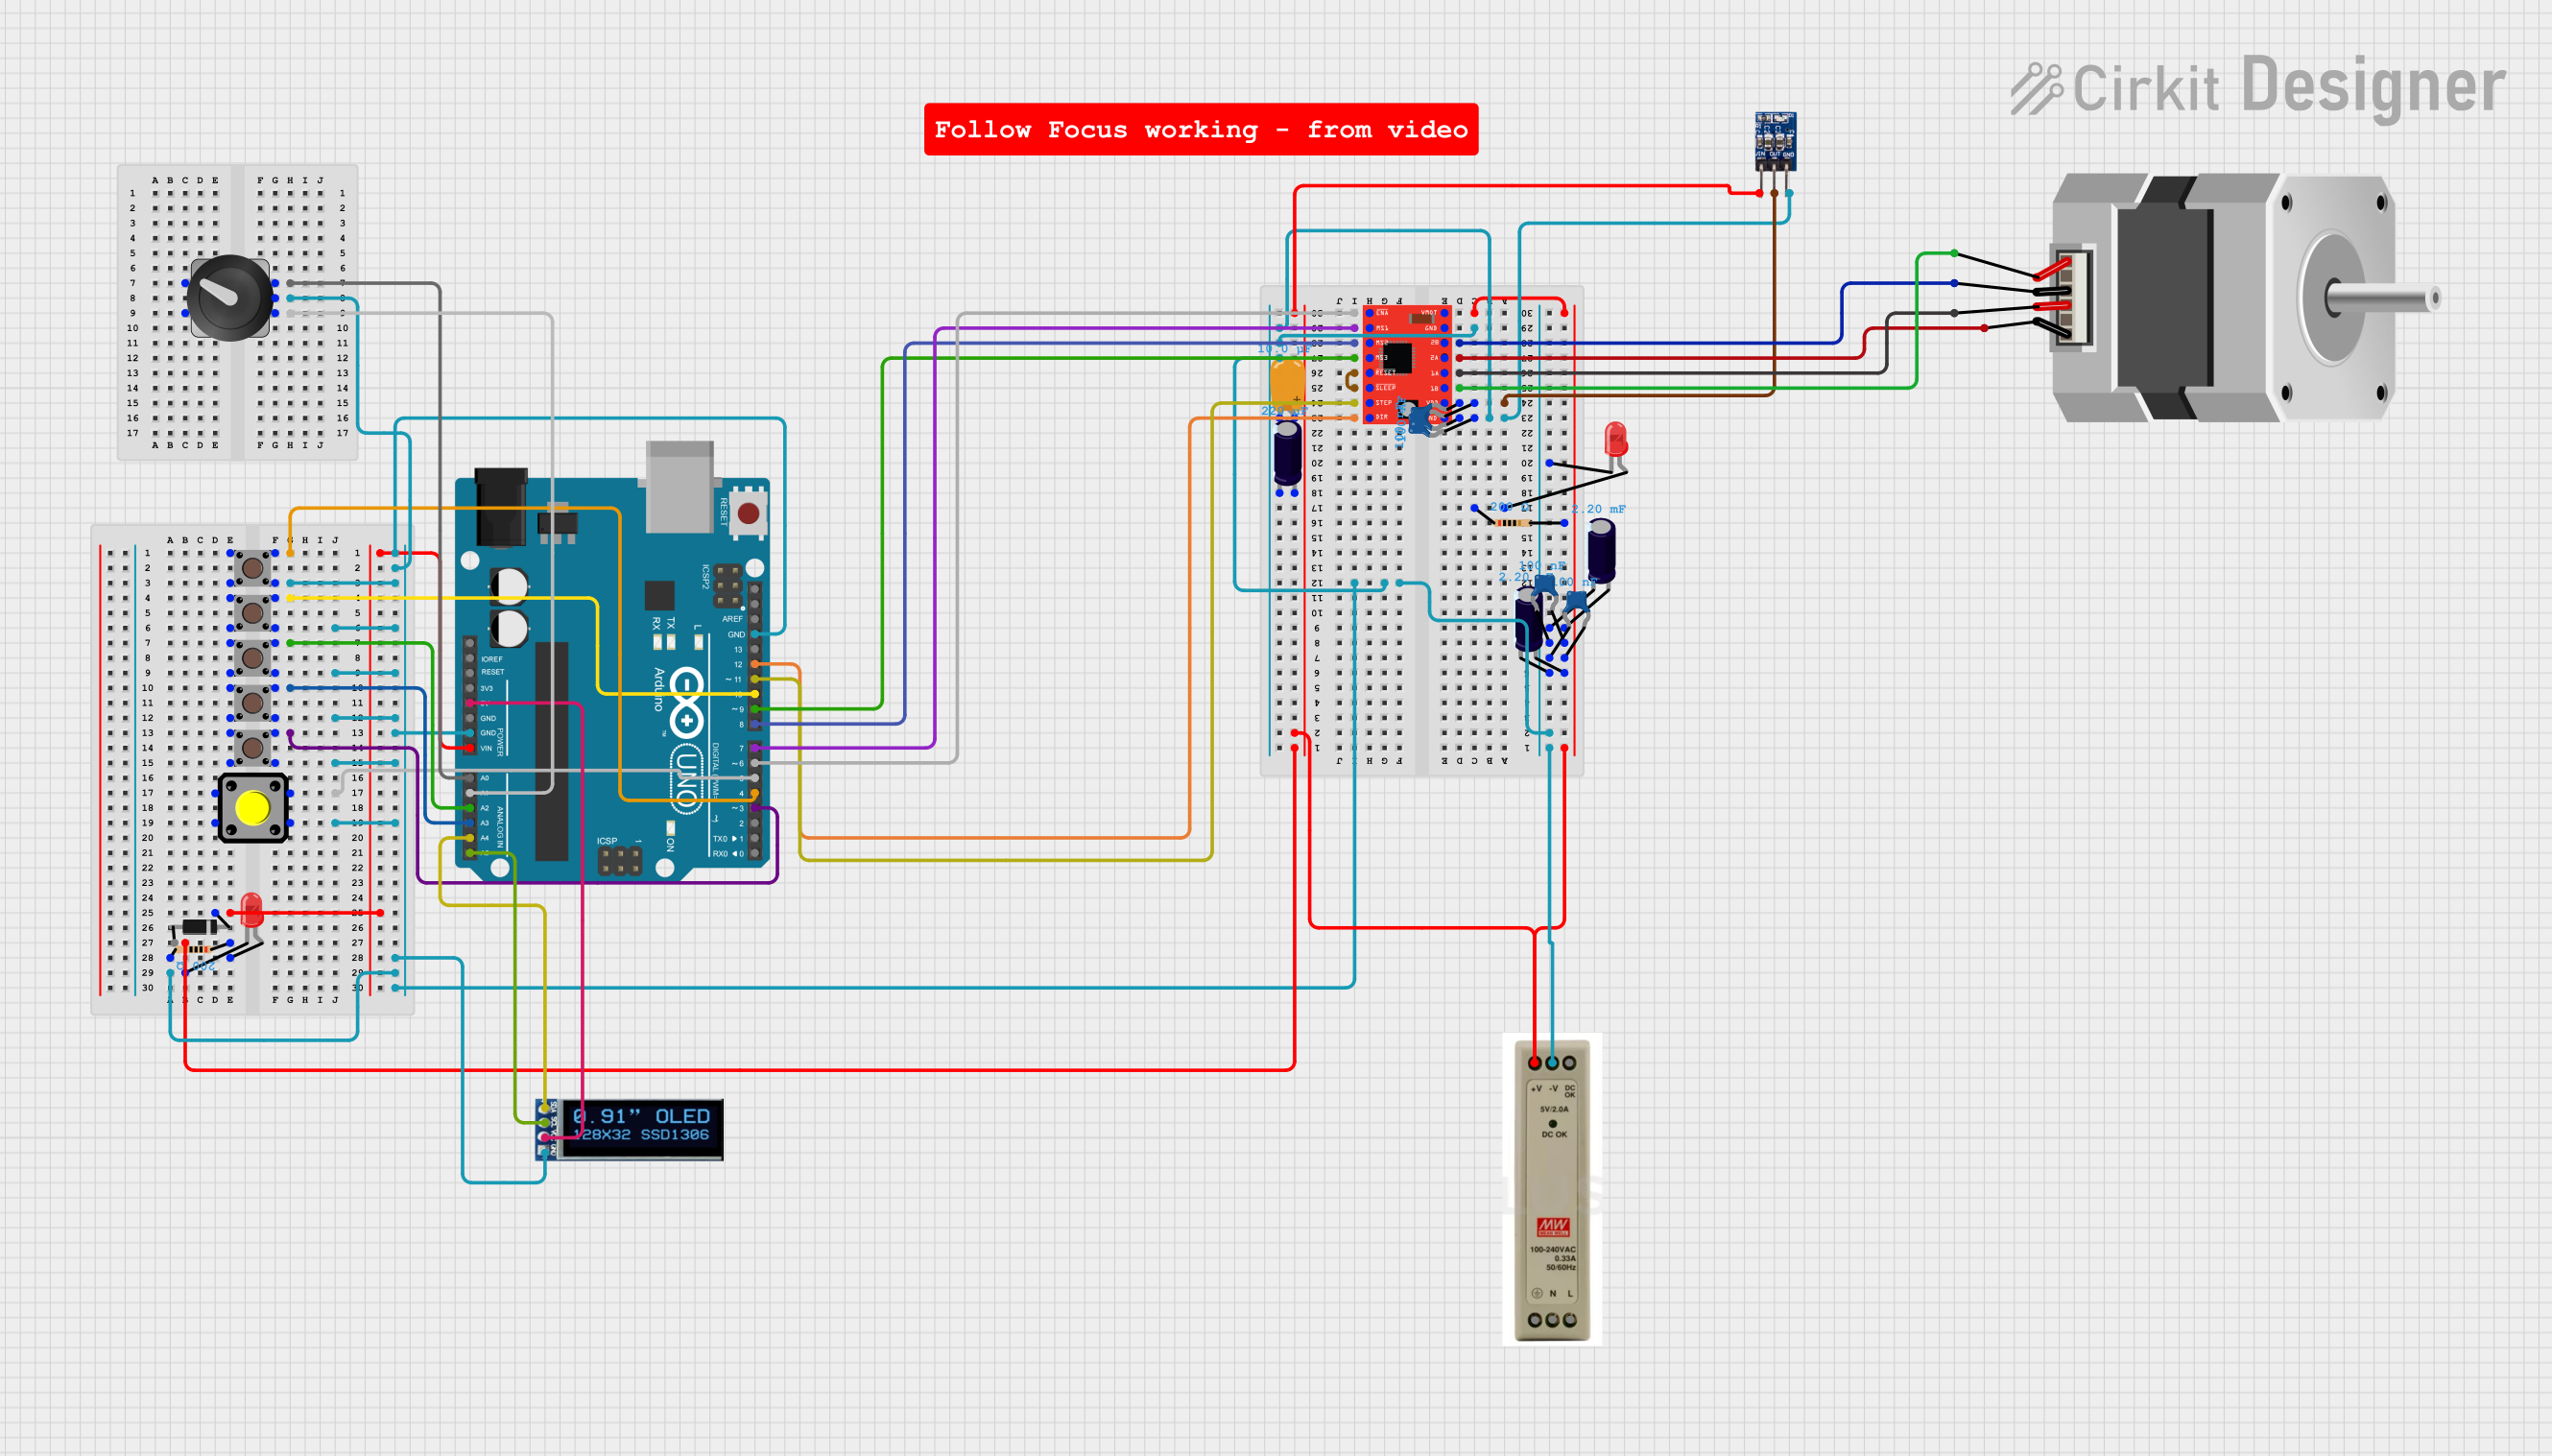
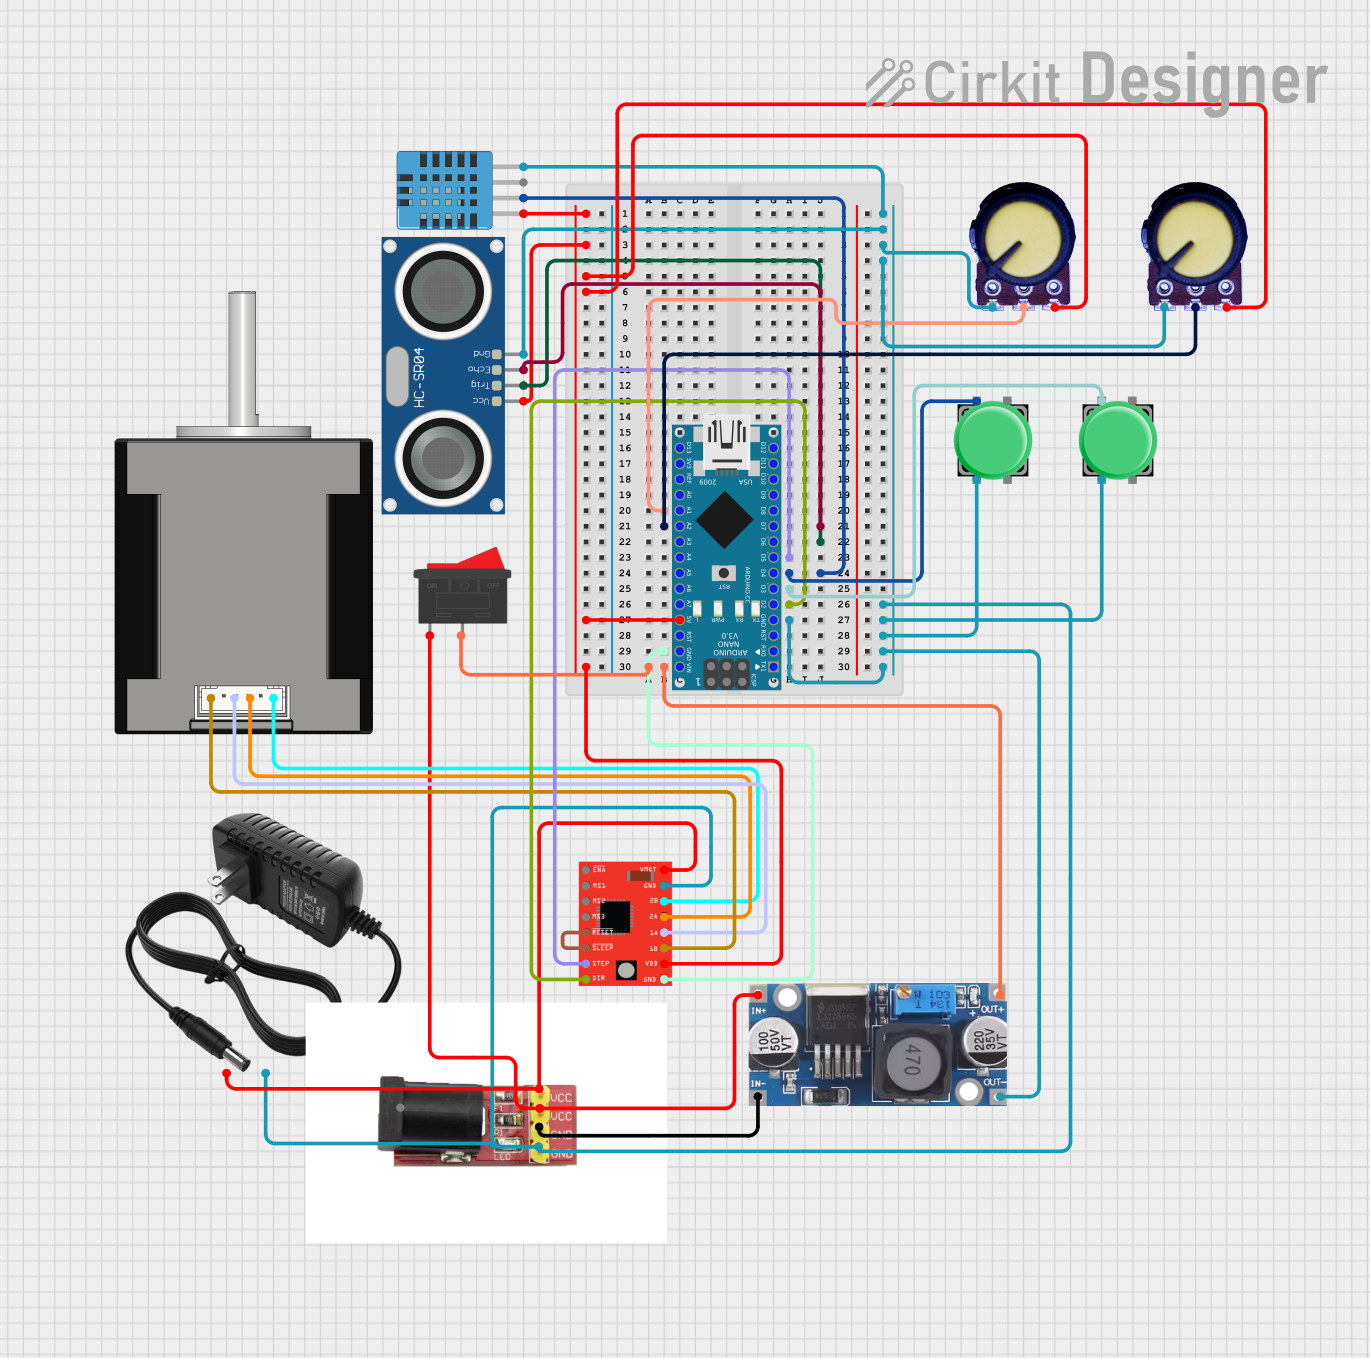
Explore Projects Built with Adafruit DC+Stepper Motor HAT
Common Applications and Use Cases
- Robotics: Drive wheels, arms, and other moving parts.
- Automation: Control conveyor belts, linear actuators, and other machinery.
- Art installations: Animate kinetic sculptures and interactive exhibits.
- Educational projects: Teach students about motor control and automation.
Technical Specifications
Key Technical Details
- Voltage: 4.5V to 13.5V DC motors/steppers
- Current: Up to 1.2A per channel (3A peak) with proper heat-sinking
- Power Ratings: 1.2A per channel, 3A peak
- Communication: I2C interface
- Dimensions: 65mm x 56mm x 13mm
Pin Configuration and Descriptions
| Pin Number | Description |
|---|---|
| 1-4 | Motor/Stepper Outputs |
| 5-6 | Servo Motor Outputs |
| SDA, SCL | I2C Data and Clock lines |
| GND | Ground |
| 5V | 5V Power for logic |
| 6-16V | Motor Power Supply (VMOT) |
Usage Instructions
How to Use the Component in a Circuit
- Powering the HAT: Connect a 6-16V power supply to the VMOT and GND pins to power the motors. The Raspberry Pi powers the logic on the HAT.
- Connecting Motors:
- DC Motors: Connect to the Motor Outputs 1-4.
- Stepper Motors: Connect to the Motor Outputs as per the HAT's stepper configuration.
- Servo Motors: Connect to the Servo Motor Outputs 5-6.
- I2C Communication: Connect the SDA and SCL pins to the corresponding pins on the Raspberry Pi for I2C communication.
- Software Setup: Install the Adafruit Motor HAT Python library on the Raspberry Pi to control the motors through software.
Important Considerations and Best Practices
- Ensure the power supply voltage and current do not exceed the HAT's specifications.
- Use proper heat-sinking for applications that require currents near the maximum rating.
- Always disconnect the power before making or changing connections to the HAT.
- Use external power when driving motors; do not rely on the Raspberry Pi's power.
Troubleshooting and FAQs
Common Issues
- Motors not responding: Check power supply connections and ensure the HAT is properly seated on the Raspberry Pi.
- Inaccurate motor movements: Verify that the motor specifications match the HAT's capabilities and that the software is correctly configured.
Solutions and Tips for Troubleshooting
- Double-check wiring and solder joints for any loose connections or shorts.
- Ensure the Python library is up to date and correctly installed.
- Review your code to ensure that the correct motor channels are being addressed.
FAQs
Q: Can I control more than two stepper motors with this HAT? A: No, the HAT is designed to control up to two stepper motors at a time.
Q: Is it possible to stack multiple HATs to control more motors? A: Yes, you can stack multiple Motor HATs on top of a Raspberry Pi, assigning unique I2C addresses to each.
Q: Can I power the Raspberry Pi through the Motor HAT? A: No, the Motor HAT does not provide power to the Raspberry Pi. You need to power the Raspberry Pi separately.
Example Code for Raspberry Pi
Below is an example Python code snippet for controlling a DC motor with the Adafruit DC+Stepper Motor HAT. Ensure you have installed the Adafruit Motor HAT Python library before running this code.
from Adafruit_MotorHAT import Adafruit_MotorHAT, Adafruit_DCMotor
Create a default object, no changes to I2C address or frequency
mh = Adafruit_MotorHAT(addr=0x60)
Choose the motor (1-4)
myMotor = mh.getMotor(3)
Set the speed (0-255)
myMotor.setSpeed(150)
To turn the motor on (forward)
myMotor.run(Adafruit_MotorHAT.FORWARD)
To turn the motor off
myMotor.run(Adafruit_MotorHAT.RELEASE)
Remember to wrap up your code with proper cleanup to ensure that the motor stops when your script ends or is interrupted.

```python
Recommended to include at the end of your script
def turnOffMotors(): mh.getMotor(1).run(Adafruit_MotorHAT.RELEASE) mh.getMotor(2).run(Adafruit_MotorHAT.RELEASE) mh.getMotor(3).run(Adafruit_MotorHAT.RELEASE) mh.getMotor(4).run(Adafruit_MotorHAT.RELEASE)
When the script is interrupted, run this function
import atexit atexit.register(turnOffMotors)
This documentation provides a starting point for working with the Adafruit DC+Stepper Motor HAT. For more detailed information, refer to the official Adafruit documentation and the Python library's API.