How to Use AdaGator Top Yellow: Examples, Pinouts, and Specs
Introduction
The AdaGator Top Yellow is a versatile prototyping board tailored for Adafruit's Feather development boards. It offers a user-friendly platform for hobbyists, educators, and professionals to prototype electronics projects. The board's design allows for easy integration with Feather boards, enabling quick transitions from concept to prototype without the need for soldering.
Explore Projects Built with AdaGator Top Yellow


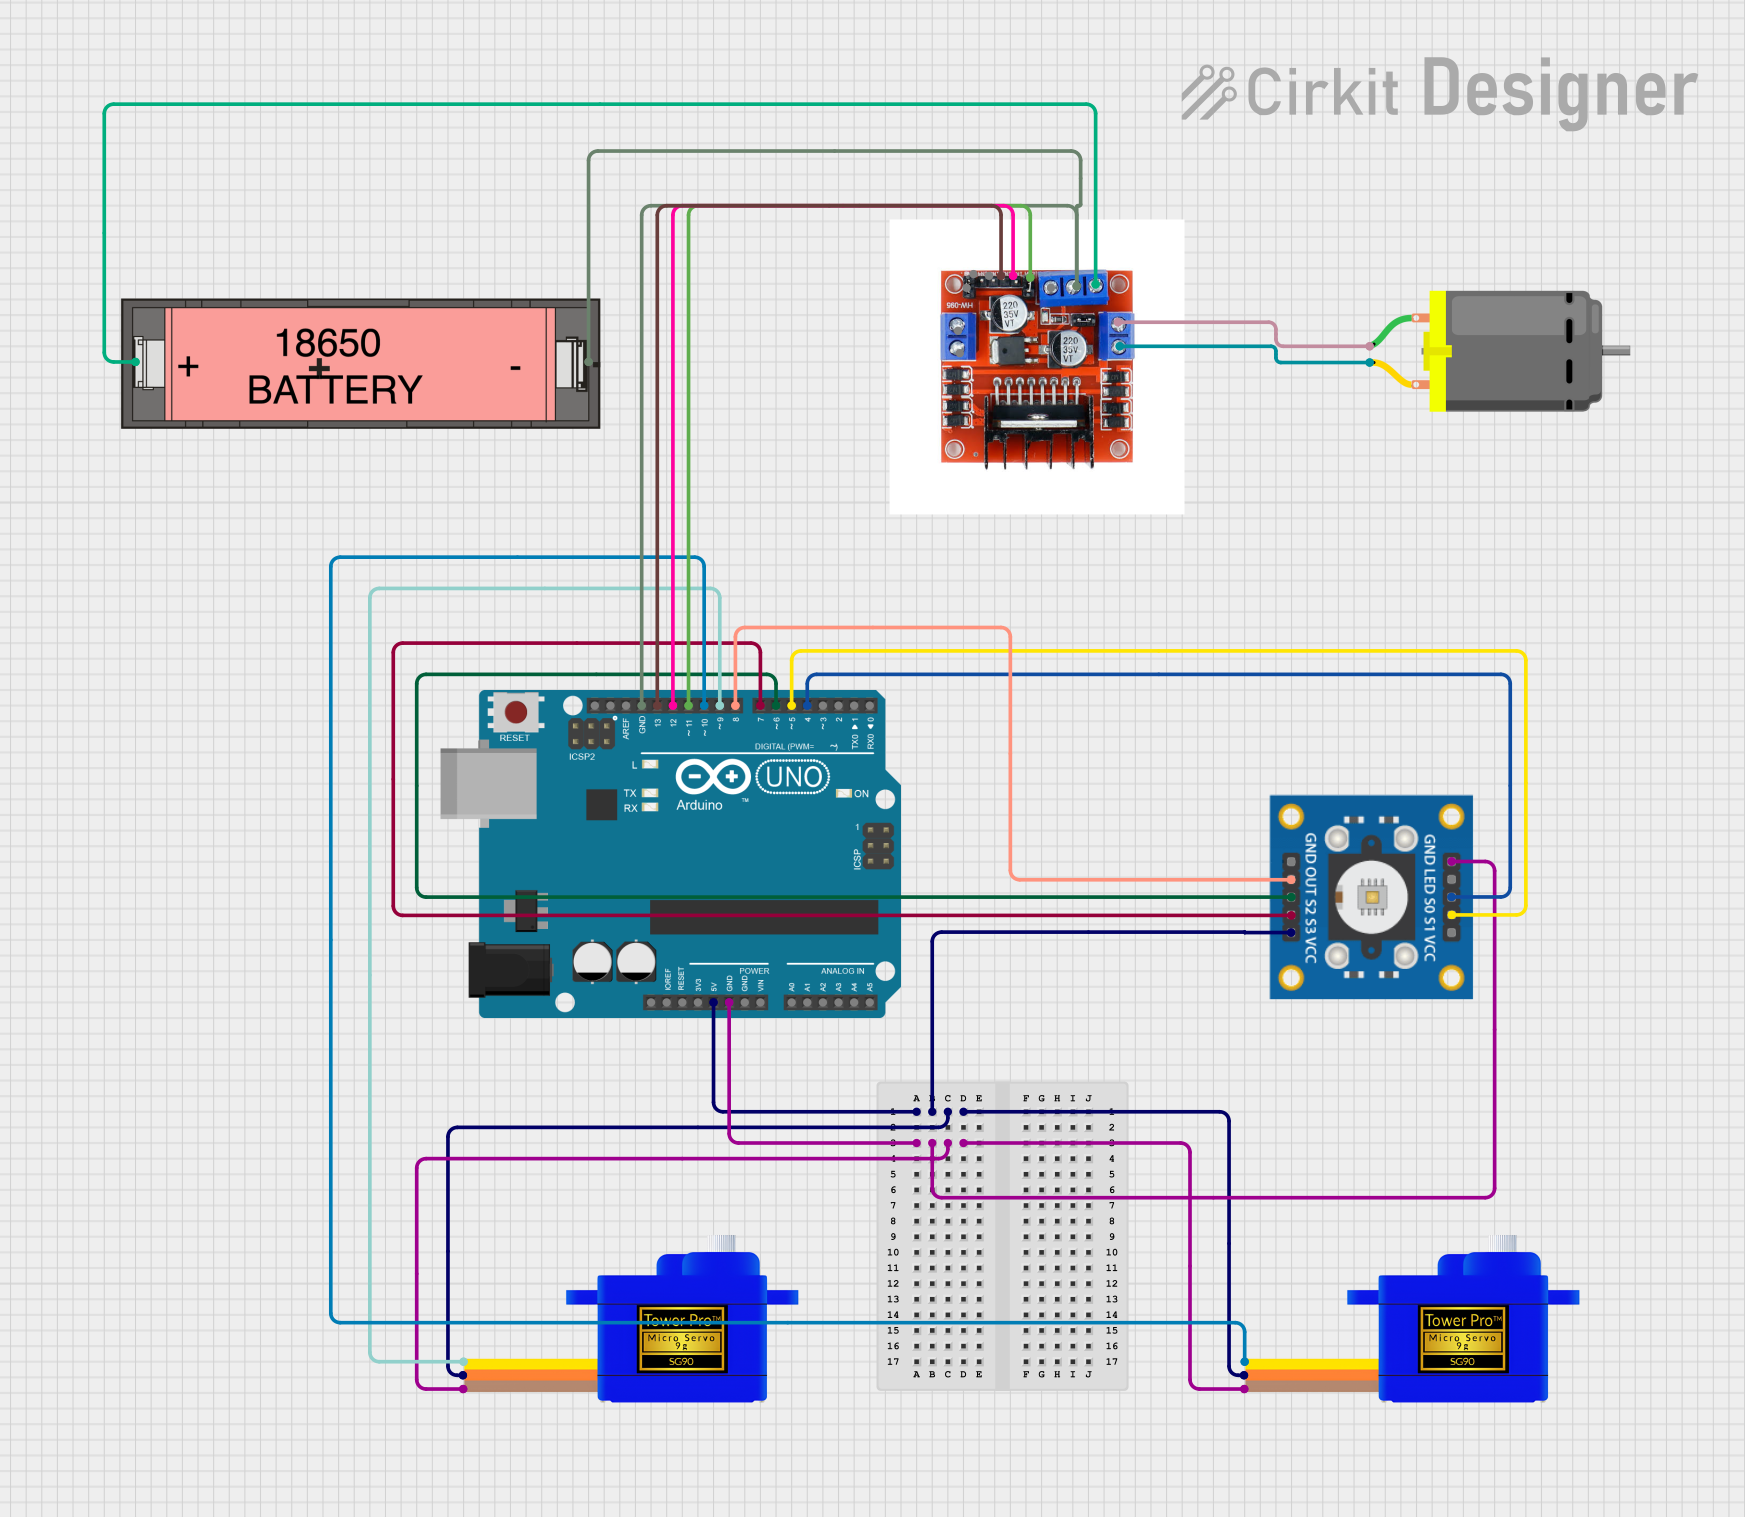
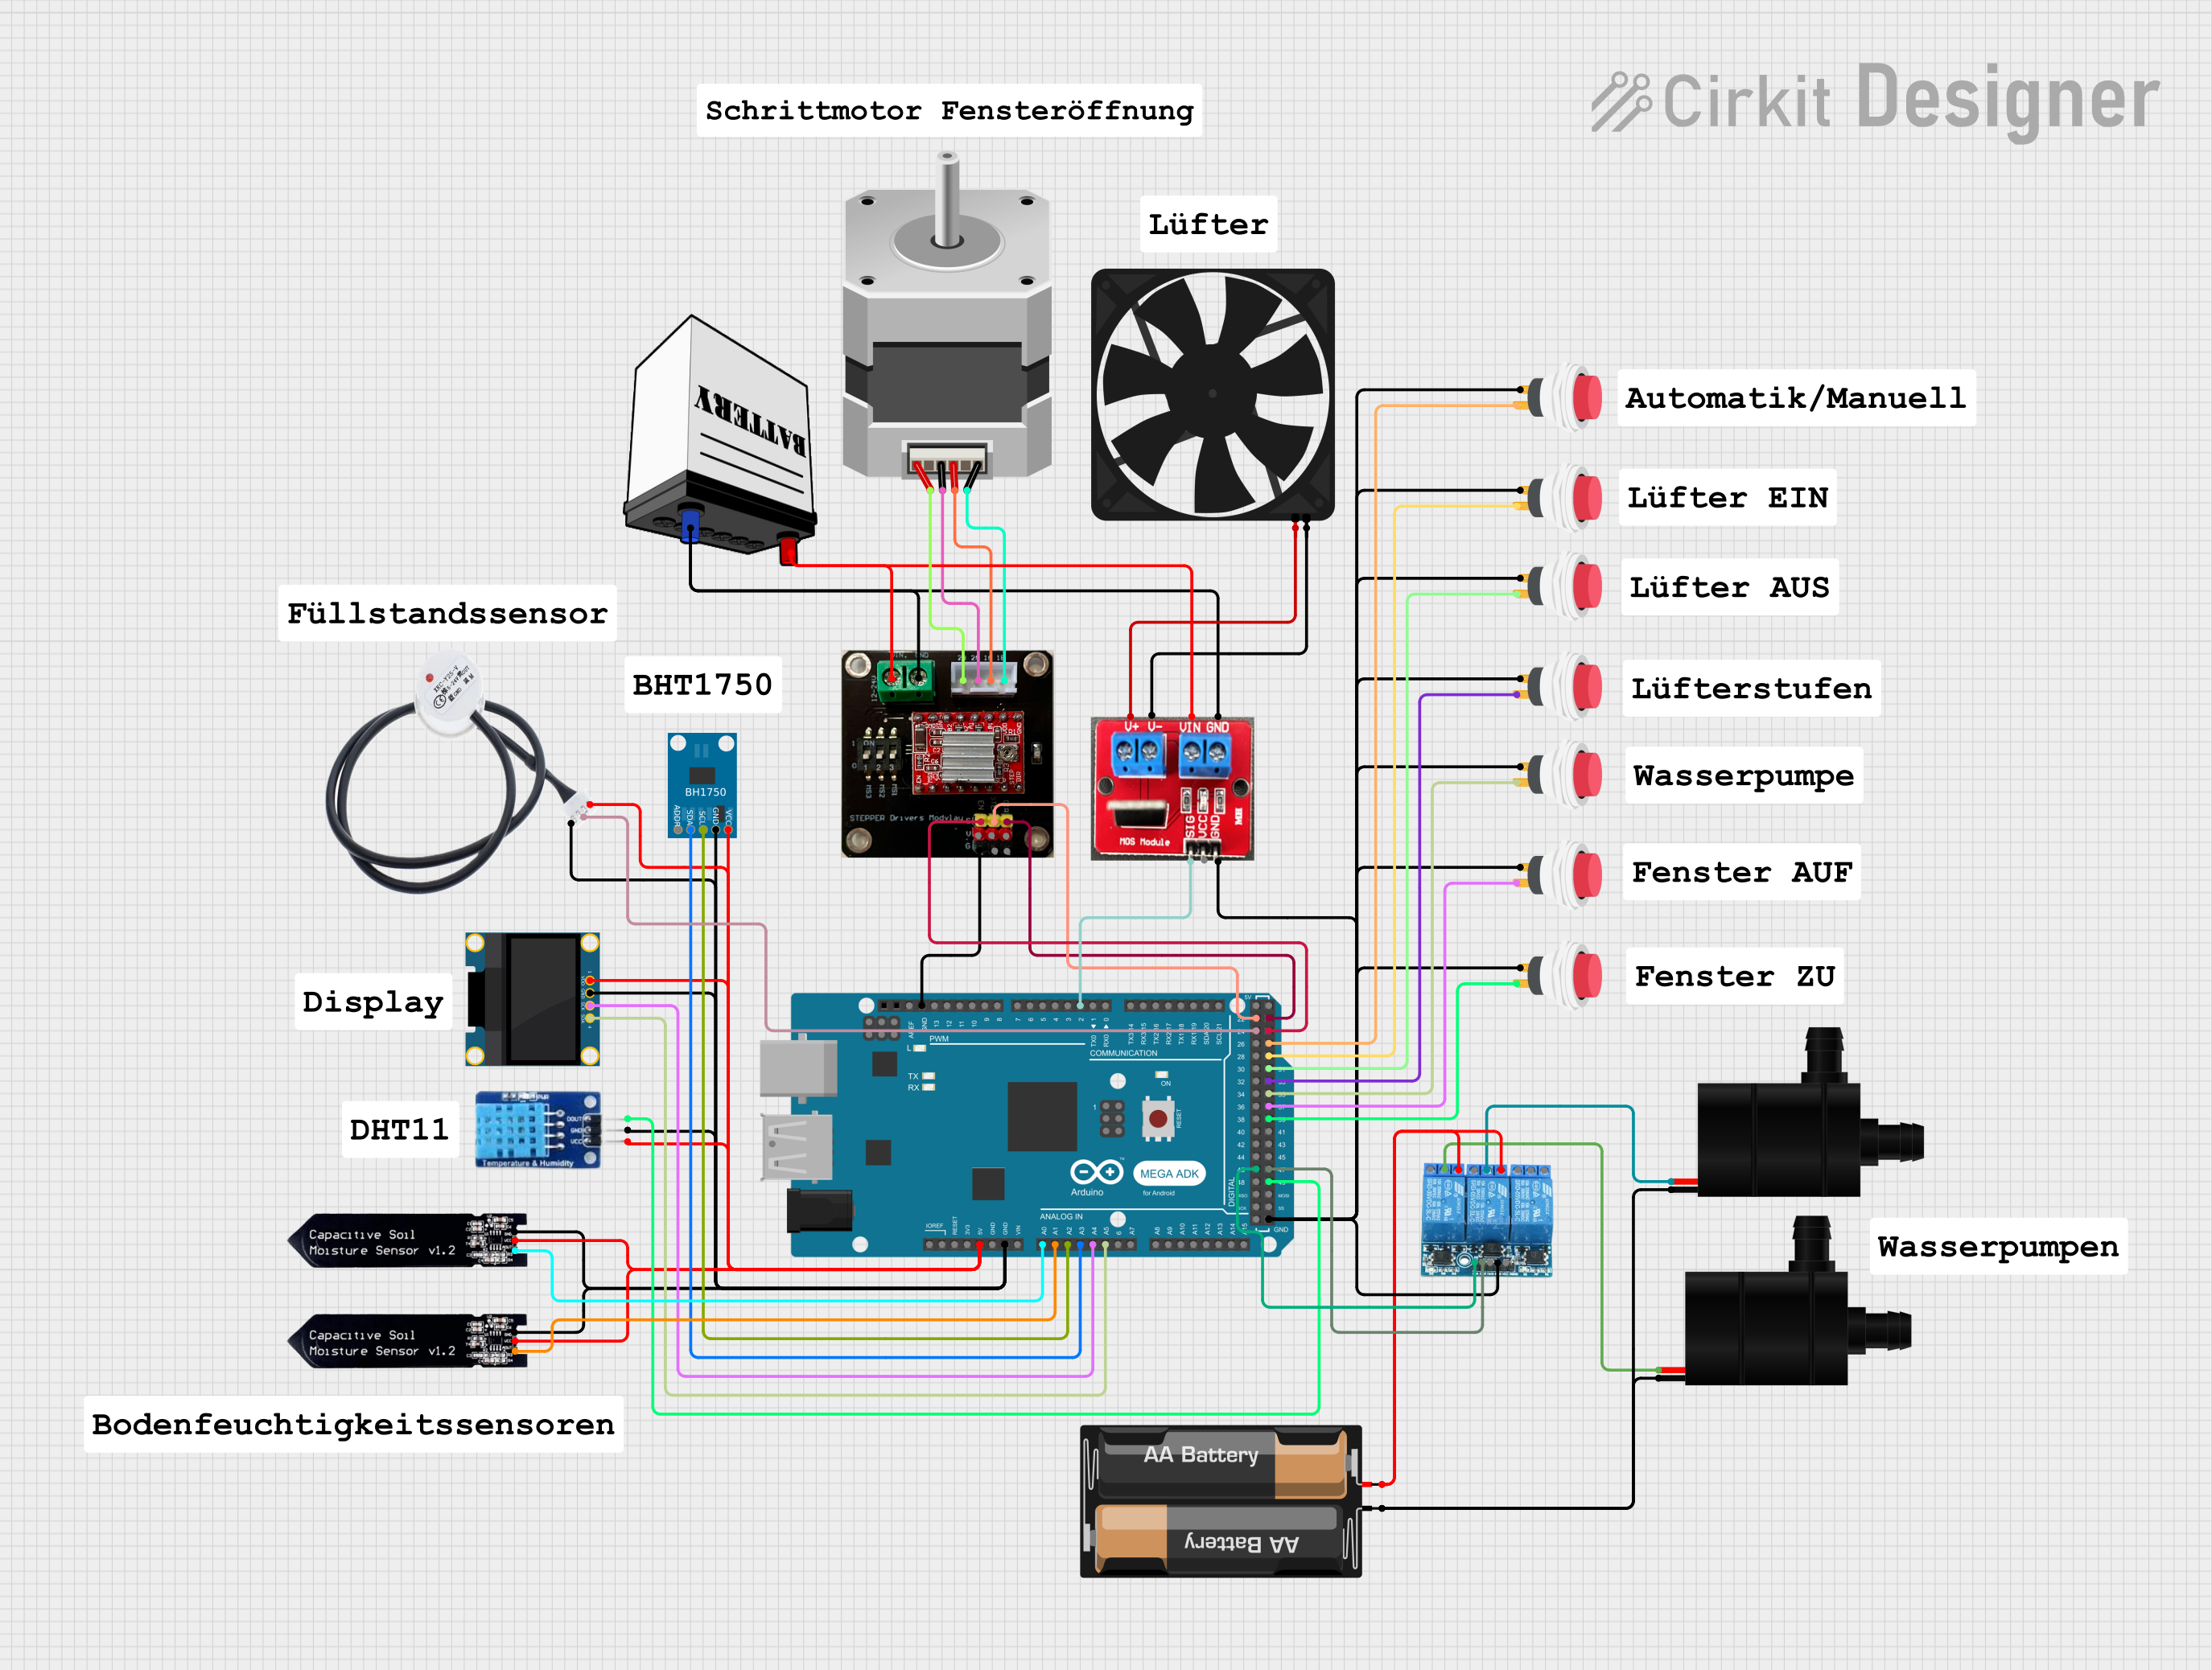
Explore Projects Built with AdaGator Top Yellow
Common Applications and Use Cases
- Rapid prototyping of electronic circuits
- Educational projects for learning electronics and programming
- Development of IoT (Internet of Things) devices
- Testing sensor integrations with microcontrollers
- Building prototypes for wearables and smart devices
Technical Specifications
Key Technical Details
- Compatibility: Designed to interface with Adafruit Feather boards
- Dimensions: Matches the Feather board form factor
- Material: High-quality FR4 with yellow solder mask
- Mounting Points: Pre-drilled holes for secure attachment to Feather boards
Pin Configuration and Descriptions
| Pin Number | Description | Notes |
|---|---|---|
| 1-16 | Corresponding Feather Board I/O Pins | Direct pass-through connections |
| GND | Ground Connections | Multiple points for convenience |
| 3V | 3.3V Power Rail | Sourced from the Feather board |
| BAT | Battery Voltage (if available) | For battery-powered projects |
| USB | USB Power (5V) | When connected to USB |
Usage Instructions
How to Use the Component in a Circuit
- Attach the Feather Board: Securely mount your Adafruit Feather board onto the AdaGator Top Yellow using the provided mounting holes.
- Connect Components: Insert components such as resistors, capacitors, sensors, and wires into the prototyping area.
- Wire to Feather Pins: Use jumper wires to connect the components to the corresponding Feather board I/O pins on the AdaGator Top Yellow.
- Power the Circuit: Ensure the Feather board is powered either via USB or an external battery if applicable.
Important Considerations and Best Practices
- Power Ratings: Always check the power ratings of your Feather board and ensure that the components used are compatible.
- Short Circuits: Avoid creating short circuits that can damage the Feather board or components.
- Firmware: Update your Feather board with the appropriate firmware before use.
- Testing: Test connections with a multimeter before applying power to prevent damage.
Troubleshooting and FAQs
Common Issues Users Might Face
- Loose Connections: Ensure all components and wires are inserted firmly into the prototyping area.
- Incorrect Wiring: Double-check wiring against the circuit diagram to ensure accuracy.
- Power Issues: Verify that the Feather board is properly powered and that the battery (if used) is charged.
Solutions and Tips for Troubleshooting
- Visual Inspection: Look for any obvious signs of damage or incorrect connections.
- Continuity Testing: Use a multimeter to test for continuity and ensure that connections are solid.
- Isolate Components: If a circuit is not working, isolate components and test them individually.
FAQs
Q: Can I solder components onto the AdaGator Top Yellow? A: Yes, the board is designed to accommodate both soldered and non-soldered components.
Q: Is the AdaGator Top Yellow reusable? A: Absolutely, the board can be reused for multiple projects, especially when using non-soldered connections.
Q: Does the AdaGator Top Yellow come with its own power supply? A: No, it relies on the power supplied by the attached Feather board.
Example Code for Arduino UNO
// Example code for blinking an LED connected to the AdaGator Top Yellow
// and an Adafruit Feather board compatible with Arduino UNO

void setup() {
  pinMode(13, OUTPUT); // Set the LED pin as an output
}

void loop() {
  digitalWrite(13, HIGH);   // Turn the LED on
  delay(1000);              // Wait for a second
  digitalWrite(13, LOW);    // Turn the LED off
  delay(1000);              // Wait for a second
}
Note: The example code provided is for illustrative purposes. Ensure that the pin numbers and functionality match the specific Feather board you are using with the AdaGator Top Yellow.