How to Use 3W 8-Ohm Speaker: Examples, Pinouts, and Specs
Introduction
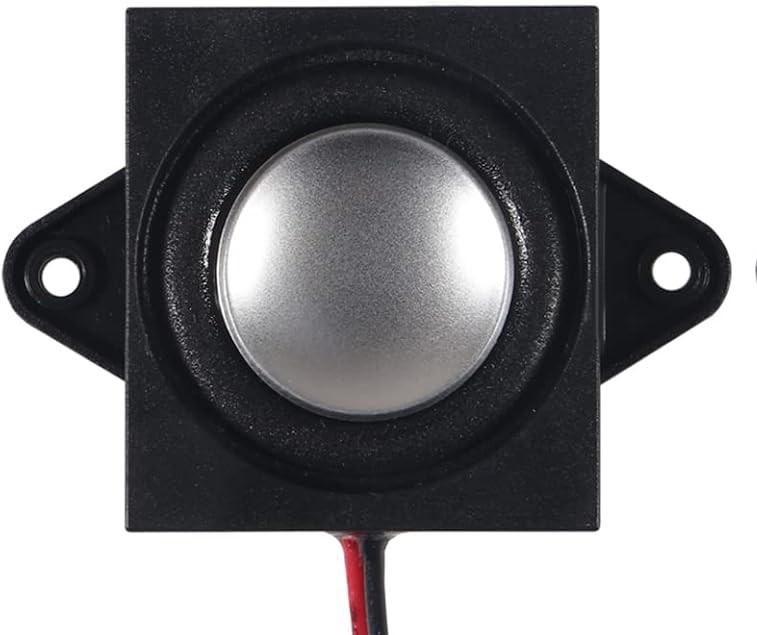
The 3W 8-Ohm Speaker is a compact audio output device designed to convert electrical signals into sound. With a power rating of 3 watts and an impedance of 8 ohms, this speaker is ideal for a wide range of audio applications. Its small size and efficient performance make it suitable for use in portable audio devices, DIY electronics projects, and embedded systems requiring sound output.
Explore Projects Built with 3W 8-Ohm Speaker


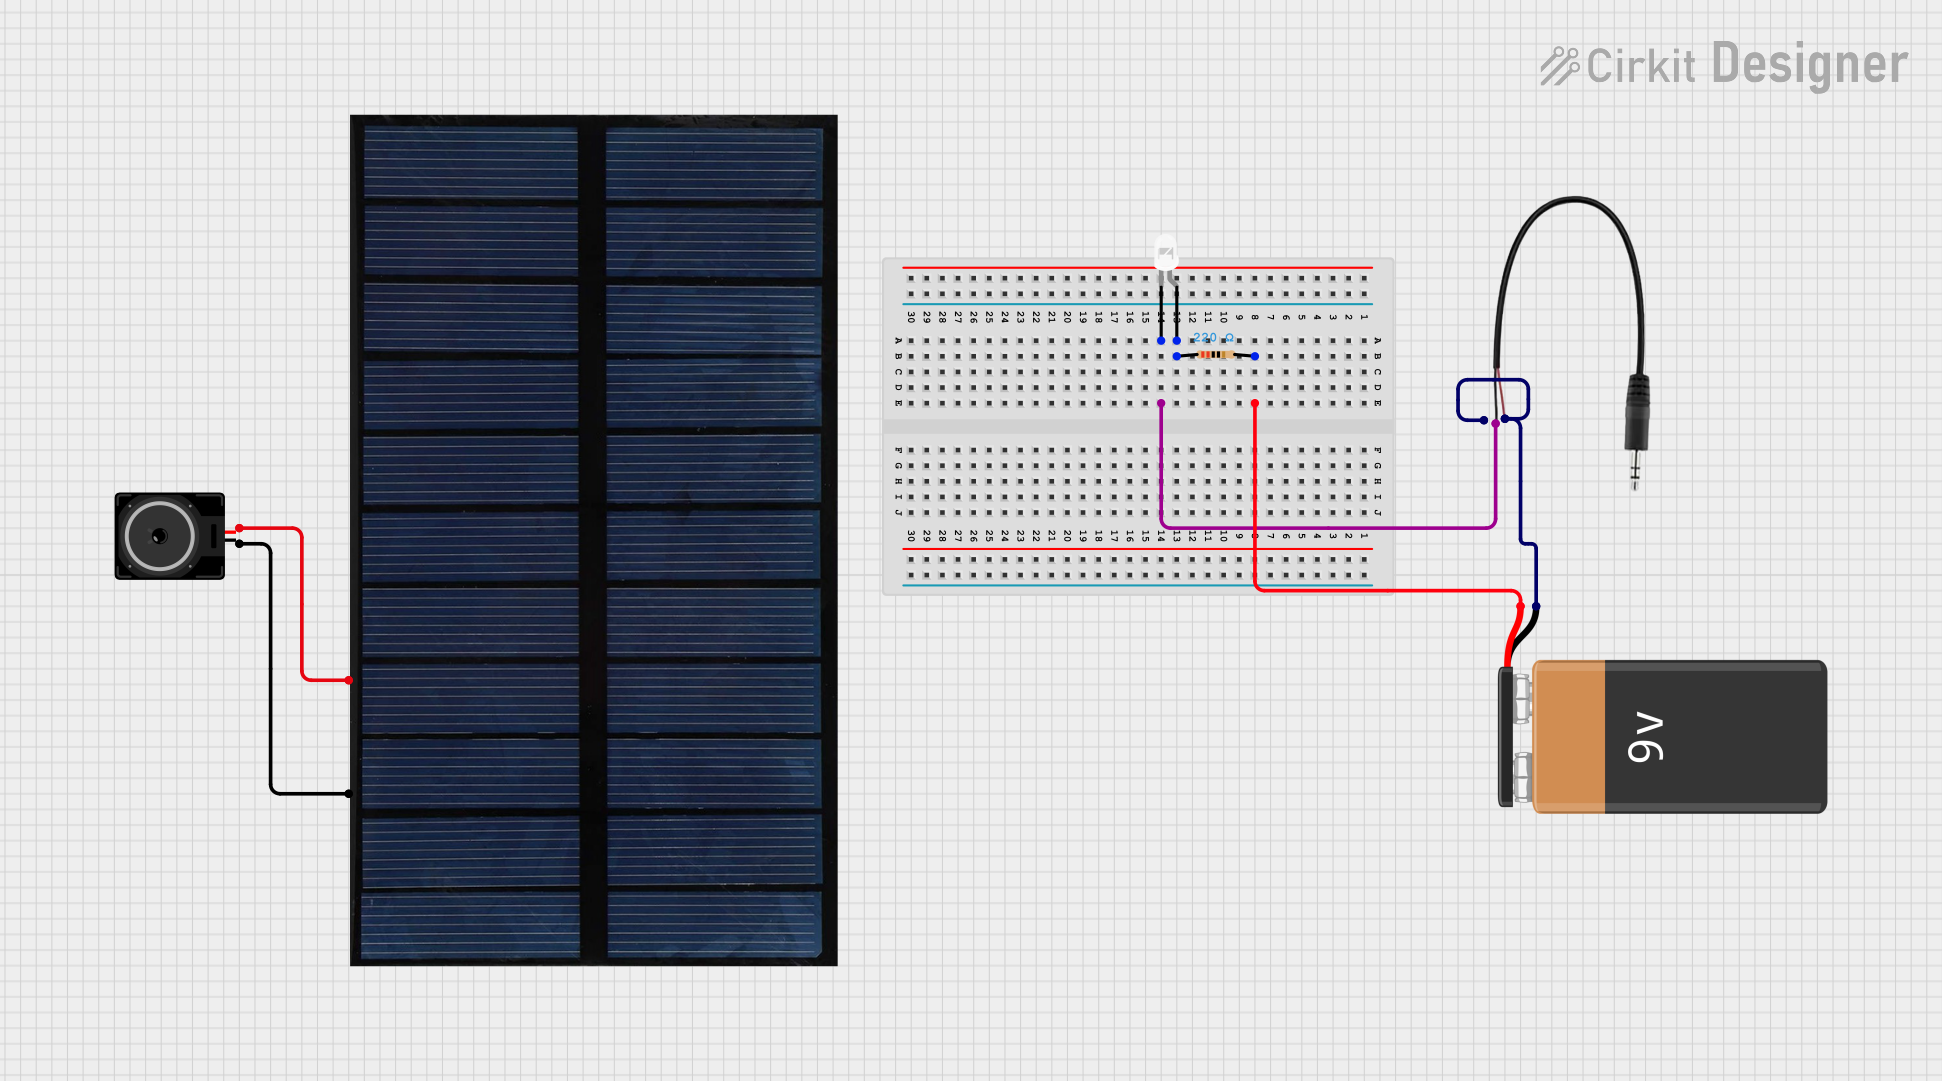
Explore Projects Built with 3W 8-Ohm Speaker
Common Applications and Use Cases
- Portable audio systems
- DIY electronics projects
- Arduino-based sound applications
- Alarm systems and notification devices
- Educational projects for sound generation
Technical Specifications
Below are the key technical details of the 3W 8-Ohm Speaker:
| Parameter | Value |
|---|---|
| Rated Power | 3 Watts |
| Impedance | 8 Ohms |
| Frequency Response | 100 Hz – 20 kHz |
| Sensitivity | 85 dB ± 3 dB |
| Dimensions | Varies (e.g., 40mm diameter) |
| Connector Type | Bare wire leads |
| Material | Paper cone, metal frame |
Pin Configuration and Descriptions
The 3W 8-Ohm Speaker typically has two terminals for connection:
| Terminal | Description |
|---|---|
| Positive (+) | Connects to the positive output of the audio amplifier or circuit. |
| Negative (-) | Connects to the ground or negative output of the audio amplifier. |
Usage Instructions
How to Use the Component in a Circuit
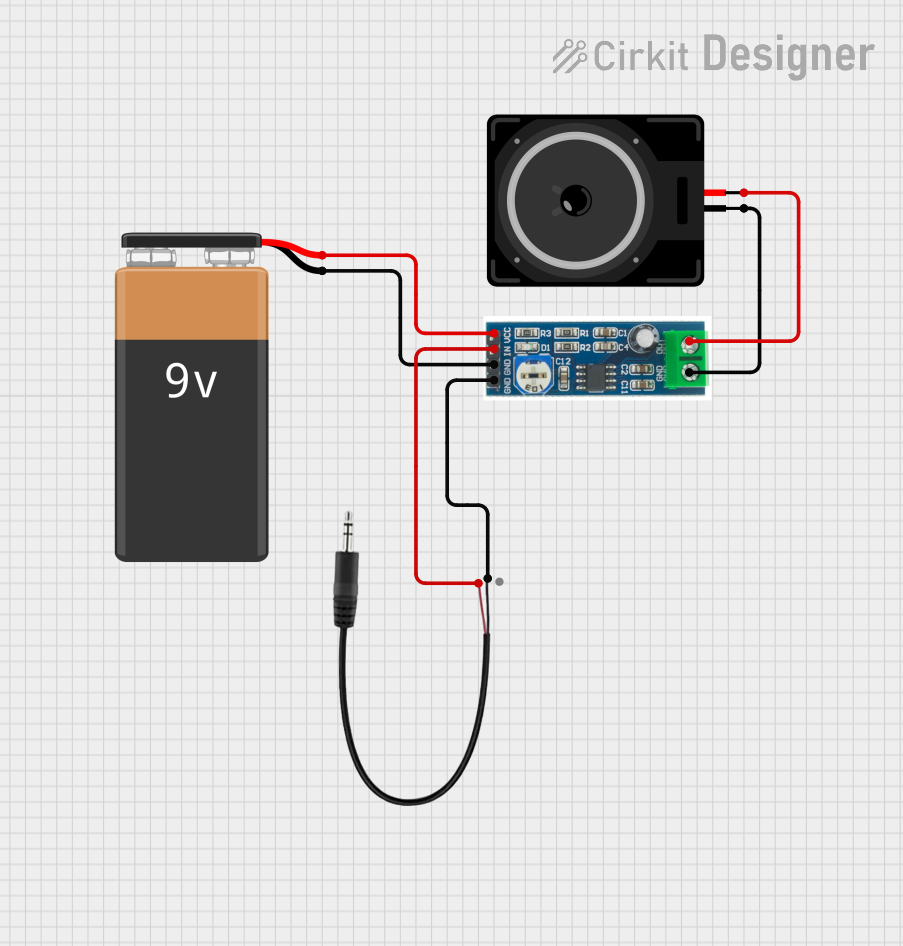
- Connect to an Audio Amplifier: The 3W 8-Ohm Speaker requires an audio amplifier to drive it effectively. Directly connecting it to a microcontroller or low-power source may result in insufficient sound output.
- Polarity Matters: Ensure the positive terminal of the speaker is connected to the positive output of the amplifier, and the negative terminal is connected to the ground or negative output.
- Power Considerations: Use an amplifier that matches the speaker's power rating (3W) and impedance (8 ohms) to avoid damage to the speaker or amplifier.
- Mounting: Secure the speaker in an enclosure or mounting bracket to enhance sound quality and protect it from physical damage.
Important Considerations and Best Practices
- Avoid Overloading: Do not exceed the 3W power rating, as this can damage the speaker.
- Use a Proper Enclosure: Enclosures can significantly improve sound quality by enhancing bass response and reducing distortion.
- Filter Low Frequencies: If the speaker is used for voice or high-frequency sounds, consider adding a capacitor in series to filter out low frequencies that the speaker may not handle well.
- Test Connections: Before powering the circuit, double-check all connections to ensure proper polarity and secure wiring.
Example: Connecting to an Arduino UNO
To use the 3W 8-Ohm Speaker with an Arduino UNO, you will need an audio amplifier module (e.g., PAM8403). Below is an example of generating a simple tone using the Arduino tone() function:
// Example: Generating a tone with Arduino and 3W 8-Ohm Speaker
// Connect the speaker to an amplifier module, and connect the amplifier's input
// to Arduino pin 9. Ensure proper power supply to the amplifier.

#define SPEAKER_PIN 9  // Pin connected to the amplifier input

void setup() {
  // No setup required for tone generation
}

void loop() {
  tone(SPEAKER_PIN, 1000);  // Generate a 1 kHz tone
  delay(1000);              // Play the tone for 1 second
  noTone(SPEAKER_PIN);      // Stop the tone
  delay(1000);              // Wait for 1 second
}
Note: The Arduino cannot directly drive the speaker. Always use an amplifier module to avoid damaging the microcontroller.
Troubleshooting and FAQs
Common Issues and Solutions
No Sound Output
- Cause: Incorrect wiring or insufficient power to the amplifier.
- Solution: Verify all connections, ensure the amplifier is powered correctly, and check the polarity of the speaker terminals.
Distorted Sound
- Cause: Overdriving the speaker or using an amplifier with mismatched impedance.
- Solution: Ensure the amplifier's output power and impedance match the speaker's specifications.
Low Volume
- Cause: Insufficient amplifier power or poor enclosure design.
- Solution: Use an amplifier with adequate power and place the speaker in a properly designed enclosure.
Speaker Overheating
- Cause: Prolonged use at high power levels exceeding the speaker's rating.
- Solution: Reduce the volume or use a speaker with a higher power rating.
FAQs
Q: Can I connect the speaker directly to an Arduino?
A: No, the Arduino cannot provide sufficient power to drive the speaker. Always use an audio amplifier.
Q: What type of amplifier should I use?
A: Use an amplifier with a power output of 3W and an impedance of 8 ohms, such as the PAM8403 module.
Q: How can I improve sound quality?
A: Use a well-designed enclosure and ensure the amplifier and speaker are properly matched.
Q: Can I use this speaker for bass-heavy audio?
A: This speaker is not ideal for deep bass frequencies. Consider using a larger speaker or a subwoofer for bass-heavy applications.