How to Use Pi Camera v3 w/ NoIR: Examples, Pinouts, and Specs
Introduction
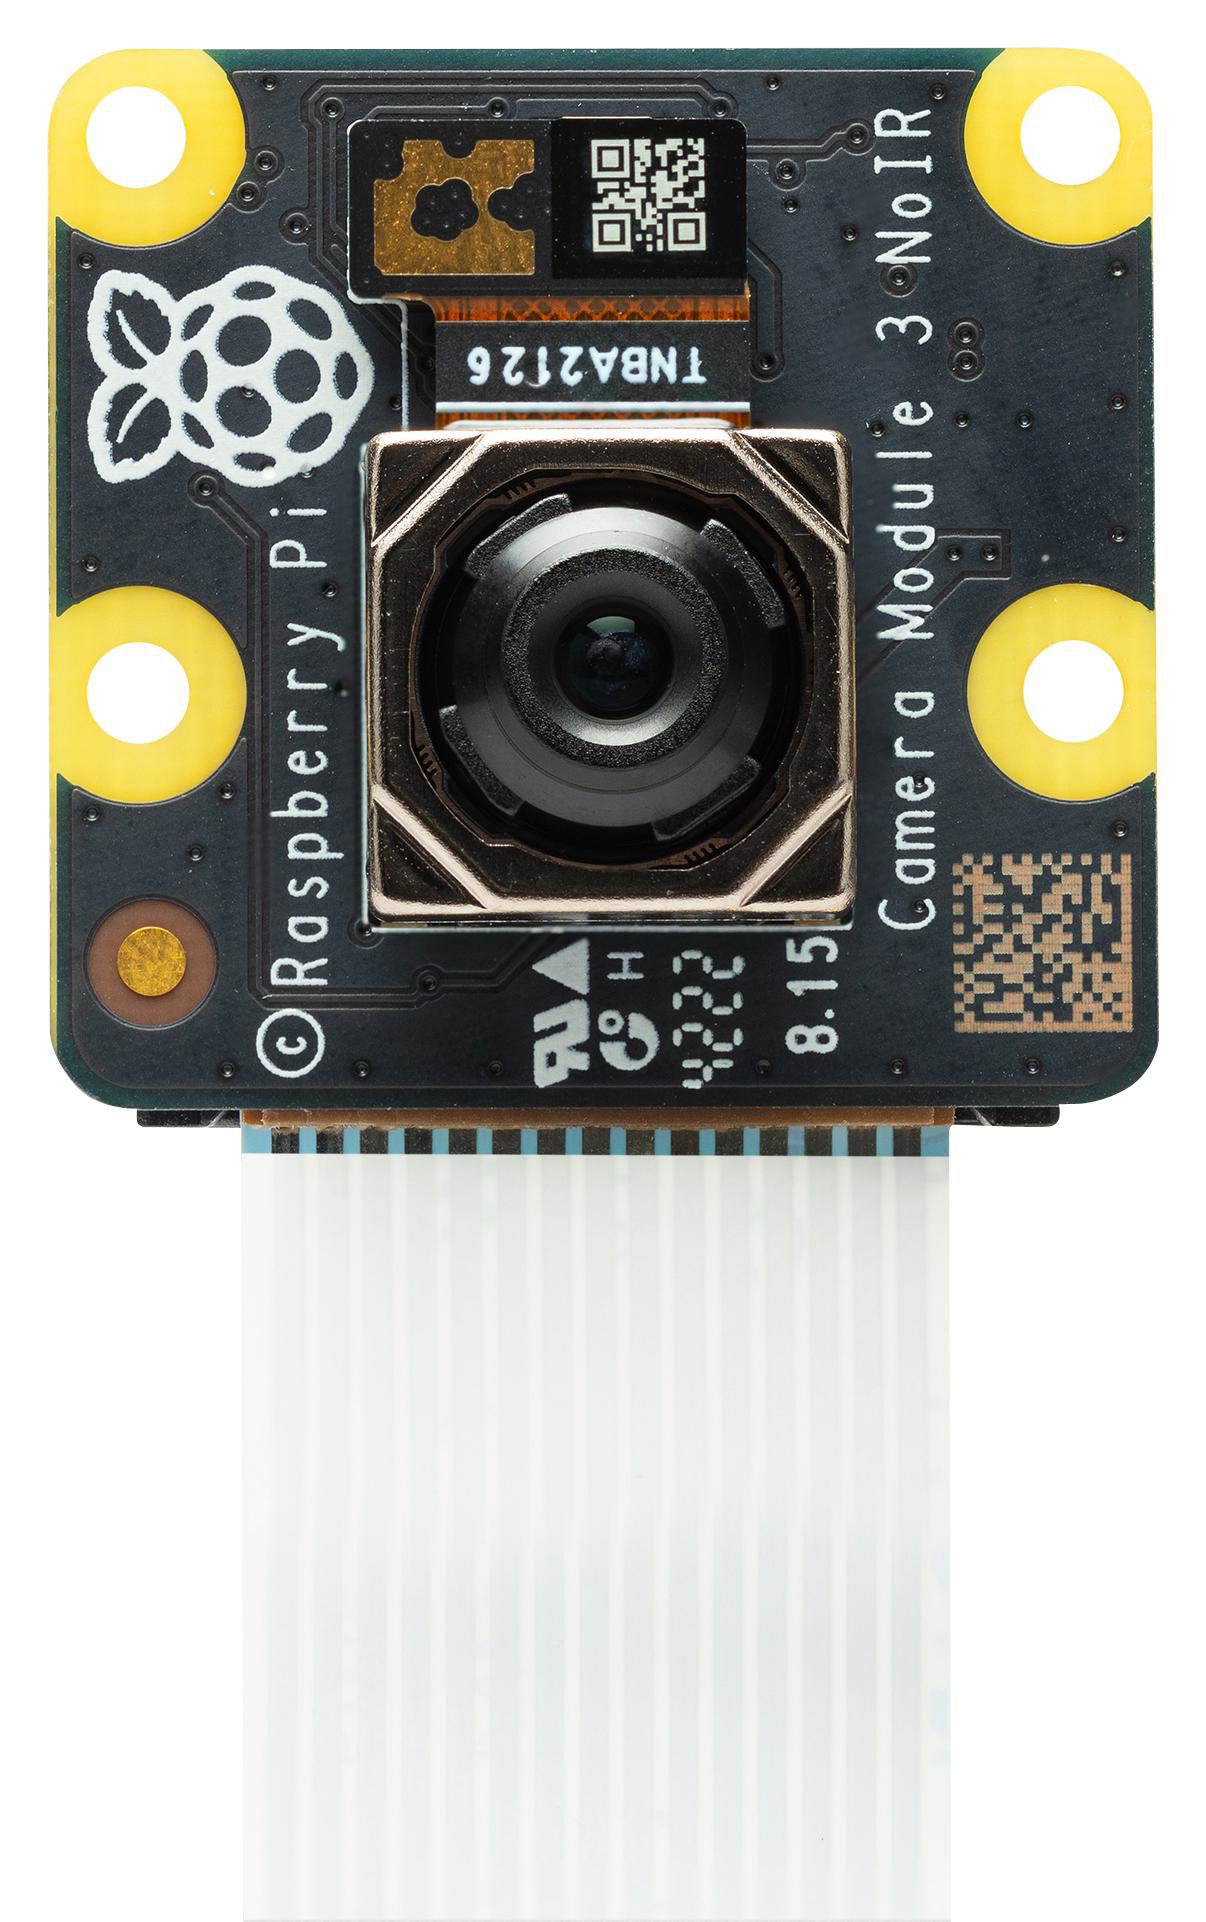
The Pi Camera v3 w/ NoIR is a high-quality camera module designed specifically for Raspberry Pi boards. It features a 12.3 MP Sony IMX708 sensor, capable of capturing high-resolution images and video. The "NoIR" variant lacks an infrared filter, making it ideal for low-light and infrared photography, such as night vision applications or scientific imaging. This module is compact, lightweight, and integrates seamlessly with Raspberry Pi systems, making it a versatile choice for hobbyists, educators, and professionals.
Explore Projects Built with Pi Camera v3 w/ NoIR


Explore Projects Built with Pi Camera v3 w/ NoIR
Common Applications and Use Cases
- Night vision photography and videography
- Wildlife monitoring and surveillance
- Scientific imaging and research
- Home automation and security systems
- Time-lapse photography
- Machine vision and AI-based image processing
Technical Specifications
Below are the key technical details of the Pi Camera v3 w/ NoIR:
| Specification | Details |
|---|---|
| Sensor | Sony IMX708 |
| Resolution | 12.3 Megapixels |
| Maximum Image Size | 4608 x 2592 |
| Video Modes | 1080p at 30/60 fps, 720p at 120 fps, etc. |
| Lens Type | Fixed focus |
| Field of View (FoV) | 75° (horizontal) |
| Infrared Filter | None (NoIR variant) |
| Interface | CSI-2 (Camera Serial Interface) |
| Power Supply Voltage | 3.3V (via Raspberry Pi) |
| Dimensions | 25mm x 24mm x 9mm |
| Weight | ~3 grams |
Pin Configuration and Descriptions
The Pi Camera v3 w/ NoIR connects to the Raspberry Pi via the CSI (Camera Serial Interface) port. Below is the pin configuration for the CSI ribbon cable:
| Pin Number | Signal Name | Description |
|---|---|---|
| 1 | GND | Ground |
| 2 | 3.3V | Power supply for the camera module |
| 3 | I2C SDA | I2C data line for camera control |
| 4 | I2C SCL | I2C clock line for camera control |
| 5 | CSI-2 Data+ | Positive differential data signal |
| 6 | CSI-2 Data- | Negative differential data signal |
| 7 | CSI-2 Clock+ | Positive differential clock signal |
| 8 | CSI-2 Clock- | Negative differential clock signal |
Usage Instructions
Connecting the Pi Camera v3 w/ NoIR to a Raspberry Pi
- Power off the Raspberry Pi: Ensure the Raspberry Pi is powered off before connecting the camera module.
- Locate the CSI port: The CSI port is typically located near the GPIO pins on the Raspberry Pi board.
- Insert the ribbon cable:
- Open the CSI port connector by gently lifting the plastic latch.
- Insert the ribbon cable with the metal contacts facing the Raspberry Pi's PCB.
- Close the latch to secure the cable.
- Power on the Raspberry Pi: Once the camera is connected, power on the Raspberry Pi.
Enabling the Camera
- Open a terminal on the Raspberry Pi.
- Run the following command to open the Raspberry Pi configuration tool:
sudo raspi-config - Navigate to Interface Options > Camera and enable the camera interface.
- Reboot the Raspberry Pi to apply the changes:
sudo reboot
Capturing Images and Videos
The libcamera library is used to interact with the Pi Camera v3. Below are examples of capturing images and videos:
Capturing an Image
libcamera-still -o image.jpg
Captures an image and saves it as 'image.jpg' in the current directory.
Recording a Video
libcamera-vid -o video.h264 -t 10000
Records a 10-second video and saves it as 'video.h264'.
The '-t' option specifies the duration in milliseconds.
Using the Camera with Python
The Pi Camera v3 can also be controlled using Python. Below is an example script:
from picamera2 import Picamera2
import time
Initialize the camera
picam2 = Picamera2()
Configure the camera for preview
picam2.start_preview()
Start the camera
picam2.start() print("Camera started. Capturing an image in 5 seconds...")
Wait for 5 seconds
time.sleep(5)
Capture an image
picam2.capture_file("image.jpg") print("Image captured and saved as 'image.jpg'.")
Stop the camera
picam2.stop() print("Camera stopped.")
Important Considerations and Best Practices
- Ensure the ribbon cable is securely connected to avoid communication issues.
- Avoid touching the camera lens to prevent smudges or scratches.
- Use appropriate lighting or infrared illumination for low-light or night vision applications.
- When using the camera for extended periods, ensure proper ventilation to prevent overheating.
Troubleshooting and FAQs
Common Issues and Solutions
Camera not detected:
- Ensure the ribbon cable is properly connected to the CSI port.
- Verify that the camera interface is enabled in the Raspberry Pi configuration tool.
- Check for software updates using:
sudo apt update && sudo apt upgrade
Poor image quality:
- Clean the camera lens with a microfiber cloth.
- Ensure adequate lighting or use an infrared light source for NoIR applications.
Error: "No data received from sensor":
- Double-check the ribbon cable connection.
- Ensure the camera module is compatible with your Raspberry Pi model.
Python script not working:
- Ensure the
picamera2library is installed:pip install picamera2 - Verify that the camera is not being used by another process.
- Ensure the
FAQs
Q: Can the Pi Camera v3 w/ NoIR be used for daylight photography?
A: Yes, but the lack of an infrared filter may result in color distortion under normal lighting conditions.
Q: Is the Pi Camera v3 w/ NoIR compatible with all Raspberry Pi models?
A: It is compatible with most Raspberry Pi models that have a CSI port. However, always check the official documentation for compatibility.
Q: Can I use the Pi Camera v3 w/ NoIR for time-lapse photography?
A: Yes, the camera supports time-lapse photography. You can use tools like libcamera or Python scripts to automate the process.
Q: Does the NoIR variant work in complete darkness?
A: The NoIR variant requires an external infrared light source to capture images in complete darkness.