How to Use 12v Adapter: Examples, Pinouts, and Specs
12V Adapter Documentation
1. Introduction
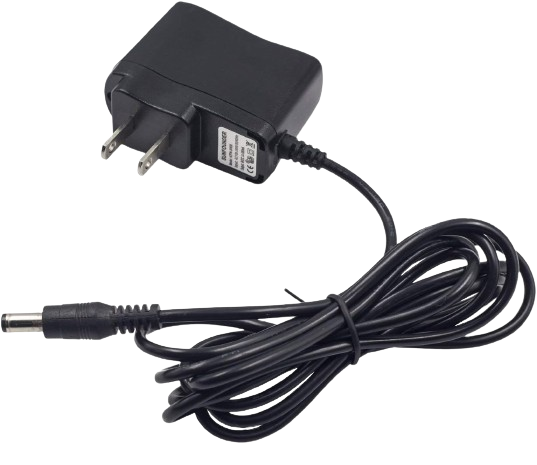
The 12V Adapter is a power supply device designed to convert alternating current (AC) from the mains into a stable 12V direct current (DC) output. This adapter is widely used in powering a variety of electronic devices, including microcontrollers, LED strips, routers, CCTV cameras, and other low-power devices that require a 12V DC input.
Common Applications:
- Powering microcontroller boards (e.g., Arduino, Raspberry Pi with a step-down module)
- Supplying power to LED lighting systems
- Operating small DC motors and actuators
- Providing power to network devices like routers and modems
- Powering surveillance systems (CCTV cameras)
The 12V adapter is a reliable and efficient solution for delivering consistent power to your electronic projects and devices.
2. Technical Specifications
The following table outlines the key technical specifications of a standard 12V adapter:
| Parameter | Specification |
|---|---|
| Input Voltage | 100-240V AC, 50/60Hz |
| Output Voltage | 12V DC |
| Output Current | Typically 1A, 2A, or 5A (varies by model) |
| Power Rating | 12W, 24W, or 60W (depending on current) |
| Connector Type | Barrel jack (5.5mm outer, 2.1mm inner) |
| Polarity | Center positive (+), outer negative (-) |
| Efficiency | ≥ 80% |
| Operating Temperature | 0°C to 40°C |
| Storage Temperature | -20°C to 70°C |
| Cable Length | Typically 1m to 1.5m |
Pin Configuration and Description
The 12V adapter typically uses a barrel jack connector. Below is the pin configuration:
| Pin | Description |
|---|---|
| Center Pin | Positive terminal (+12V DC) |
| Outer Sleeve | Negative terminal (Ground, GND) |
Note: Always verify the polarity of the adapter before connecting it to your device. Incorrect polarity can damage your components.
3. Usage Instructions
Connecting the 12V Adapter to a Circuit
- Verify Voltage and Current Requirements: Ensure the device you are powering requires a 12V DC input and that the adapter's current rating meets or exceeds the device's requirements.
- Check Polarity: Confirm that the adapter's polarity matches the device's input. Most 12V adapters are center-positive.
- Connect the Barrel Jack: Insert the barrel jack into the device's power input port.
- Plug into Mains: Connect the adapter to a mains power outlet (100-240V AC).
Important Considerations:
- Avoid Overloading: Do not connect devices that exceed the adapter's current rating. For example, if the adapter is rated for 2A, ensure the total current draw of connected devices is ≤ 2A.
- Use in a Dry Environment: Avoid exposing the adapter to moisture or liquids to prevent short circuits or damage.
- Ventilation: Ensure proper ventilation around the adapter to prevent overheating.
- Check Compatibility: If using with a microcontroller (e.g., Arduino), ensure the voltage regulator on the board can handle 12V input.
4. Example: Using a 12V Adapter with an Arduino UNO
The Arduino UNO can be powered using a 12V adapter through its DC barrel jack. The onboard voltage regulator steps down the 12V input to 5V for the microcontroller.
Circuit Diagram
Below is a simple connection diagram for powering an Arduino UNO with a 12V adapter:
+-------------------+       +-------------------+
| 12V Adapter       |       | Arduino UNO       |
| (Barrel Jack)     |       | (DC Barrel Jack)  |
|                   |       |                   |
|   +12V (Center)   +------>+   VIN             |
|   GND (Outer)     +------>+   GND             |
+-------------------+       +-------------------+
Sample Code
Here is an example Arduino sketch to blink an LED while the board is powered by a 12V adapter:
/*
  Blink Example
  This code blinks an LED connected to pin 13 of the Arduino UNO.
  The board is powered using a 12V adapter connected to the DC barrel jack.
*/

void setup() {
  pinMode(13, OUTPUT); // Set pin 13 as an output
}

void loop() {
  digitalWrite(13, HIGH); // Turn the LED on
  delay(1000);            // Wait for 1 second
  digitalWrite(13, LOW);  // Turn the LED off
  delay(1000);            // Wait for 1 second
}
Note: Ensure the Arduino UNO's onboard voltage regulator is not overloaded by additional components when using a 12V adapter.
5. Troubleshooting and FAQs
Common Issues and Solutions
| Issue | Possible Cause | Solution |
|---|---|---|
| Device does not power on | Incorrect polarity or loose connection | Verify polarity and ensure a secure connection. |
| Adapter gets too hot | Overloading or poor ventilation | Reduce load or improve ventilation. |
| Output voltage is unstable | Faulty adapter or fluctuating mains input | Replace the adapter or use a voltage stabilizer. |
| Arduino resets frequently | Insufficient current from the adapter | Use an adapter with a higher current rating. |
Frequently Asked Questions
Can I use a 12V adapter with a device that requires 9V?
- No, using a 12V adapter with a 9V device can damage the device. Always match the voltage rating.
What happens if I reverse the polarity?
- Reversing the polarity can damage your device. Always check the polarity before connecting.
Can I use a 12V adapter to power multiple devices?
- Yes, as long as the total current draw of all devices does not exceed the adapter's current rating.
Is it safe to leave the adapter plugged in when not in use?
- While most adapters are designed to be safe, it is recommended to unplug them when not in use to save energy and reduce wear.
6. Safety Precautions
- Always use the adapter within its specified voltage and current ratings.
- Do not open or attempt to repair the adapter yourself.
- Keep the adapter away from water, heat sources, and flammable materials.
- Use only certified and high-quality adapters to ensure safety and reliability.
This documentation provides a comprehensive guide to understanding, using, and troubleshooting a 12V adapter. Whether you're powering an Arduino project or a home device, following these guidelines will ensure safe and efficient operation.
Explore Projects Built with 12v Adapter


Explore Projects Built with 12v Adapter