How to Use Extruder LDO-36STH20: Examples, Pinouts, and Specs
Introduction
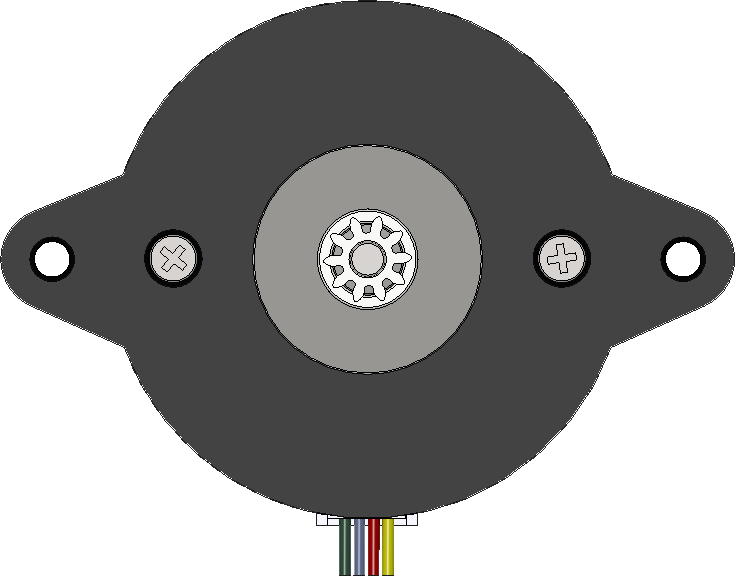
The Extruder LDO-36STH20 stepper motor is a specialized component designed for use in 3D printer extruders. It is engineered to deliver precise control over the extrusion process, which is critical for the quality of 3D printed objects. By converting electrical pulses into controlled mechanical motion, this stepper motor allows for accurate filament feeding and retraction, ensuring consistent extrusion and layer adhesion.
Explore Projects Built with Extruder LDO-36STH20
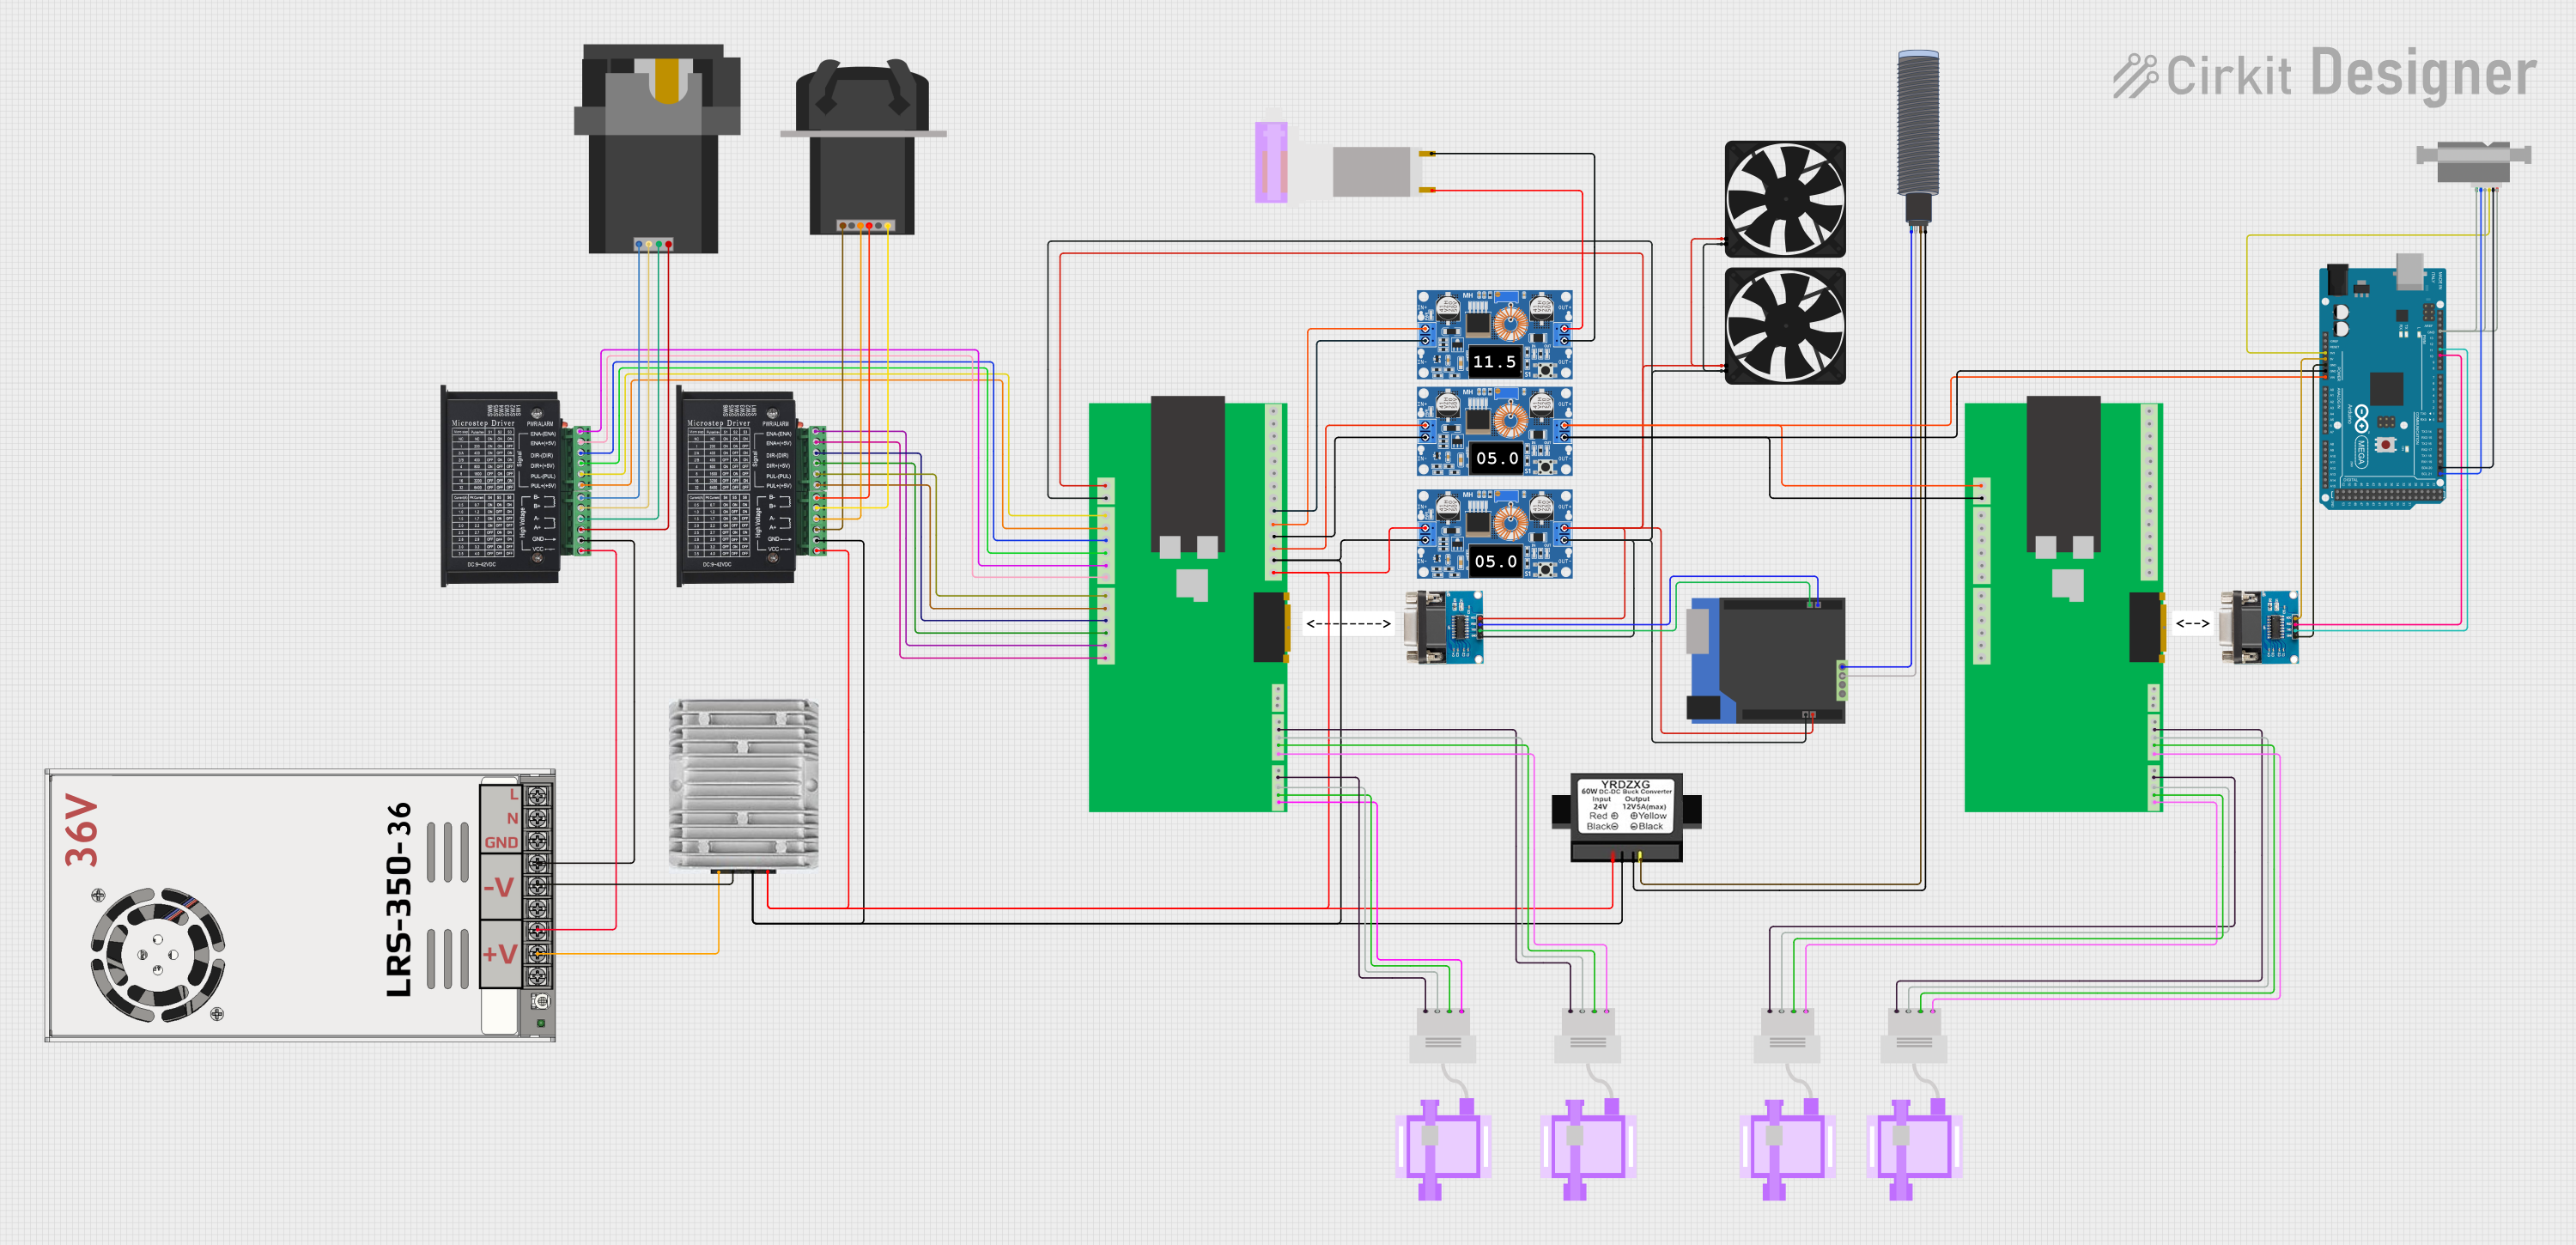
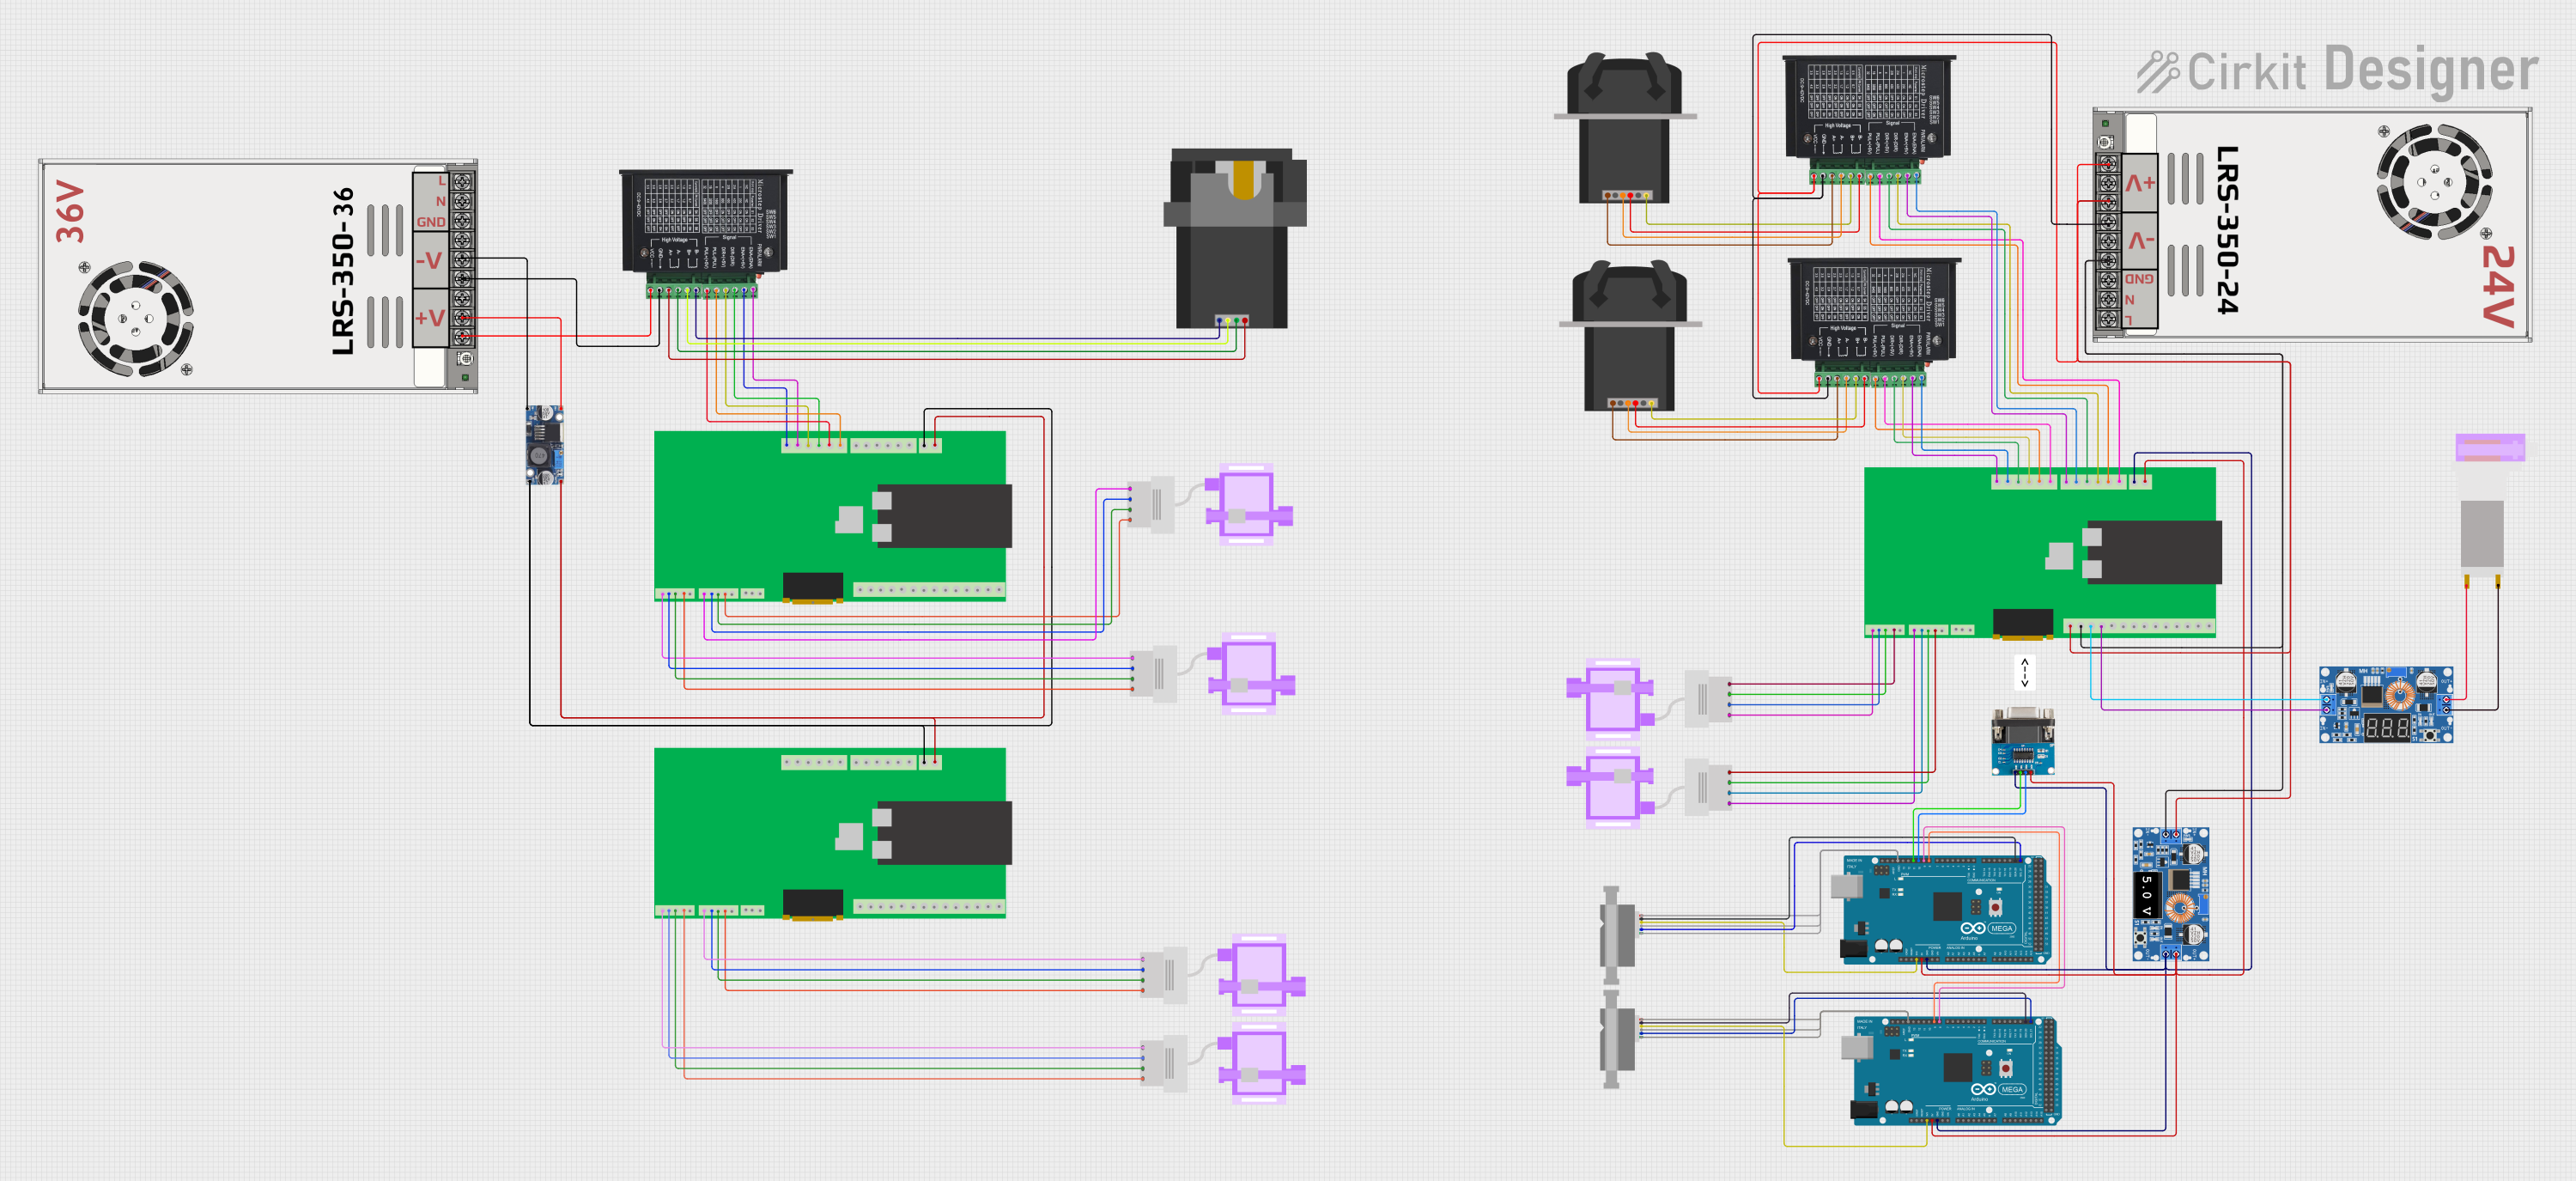
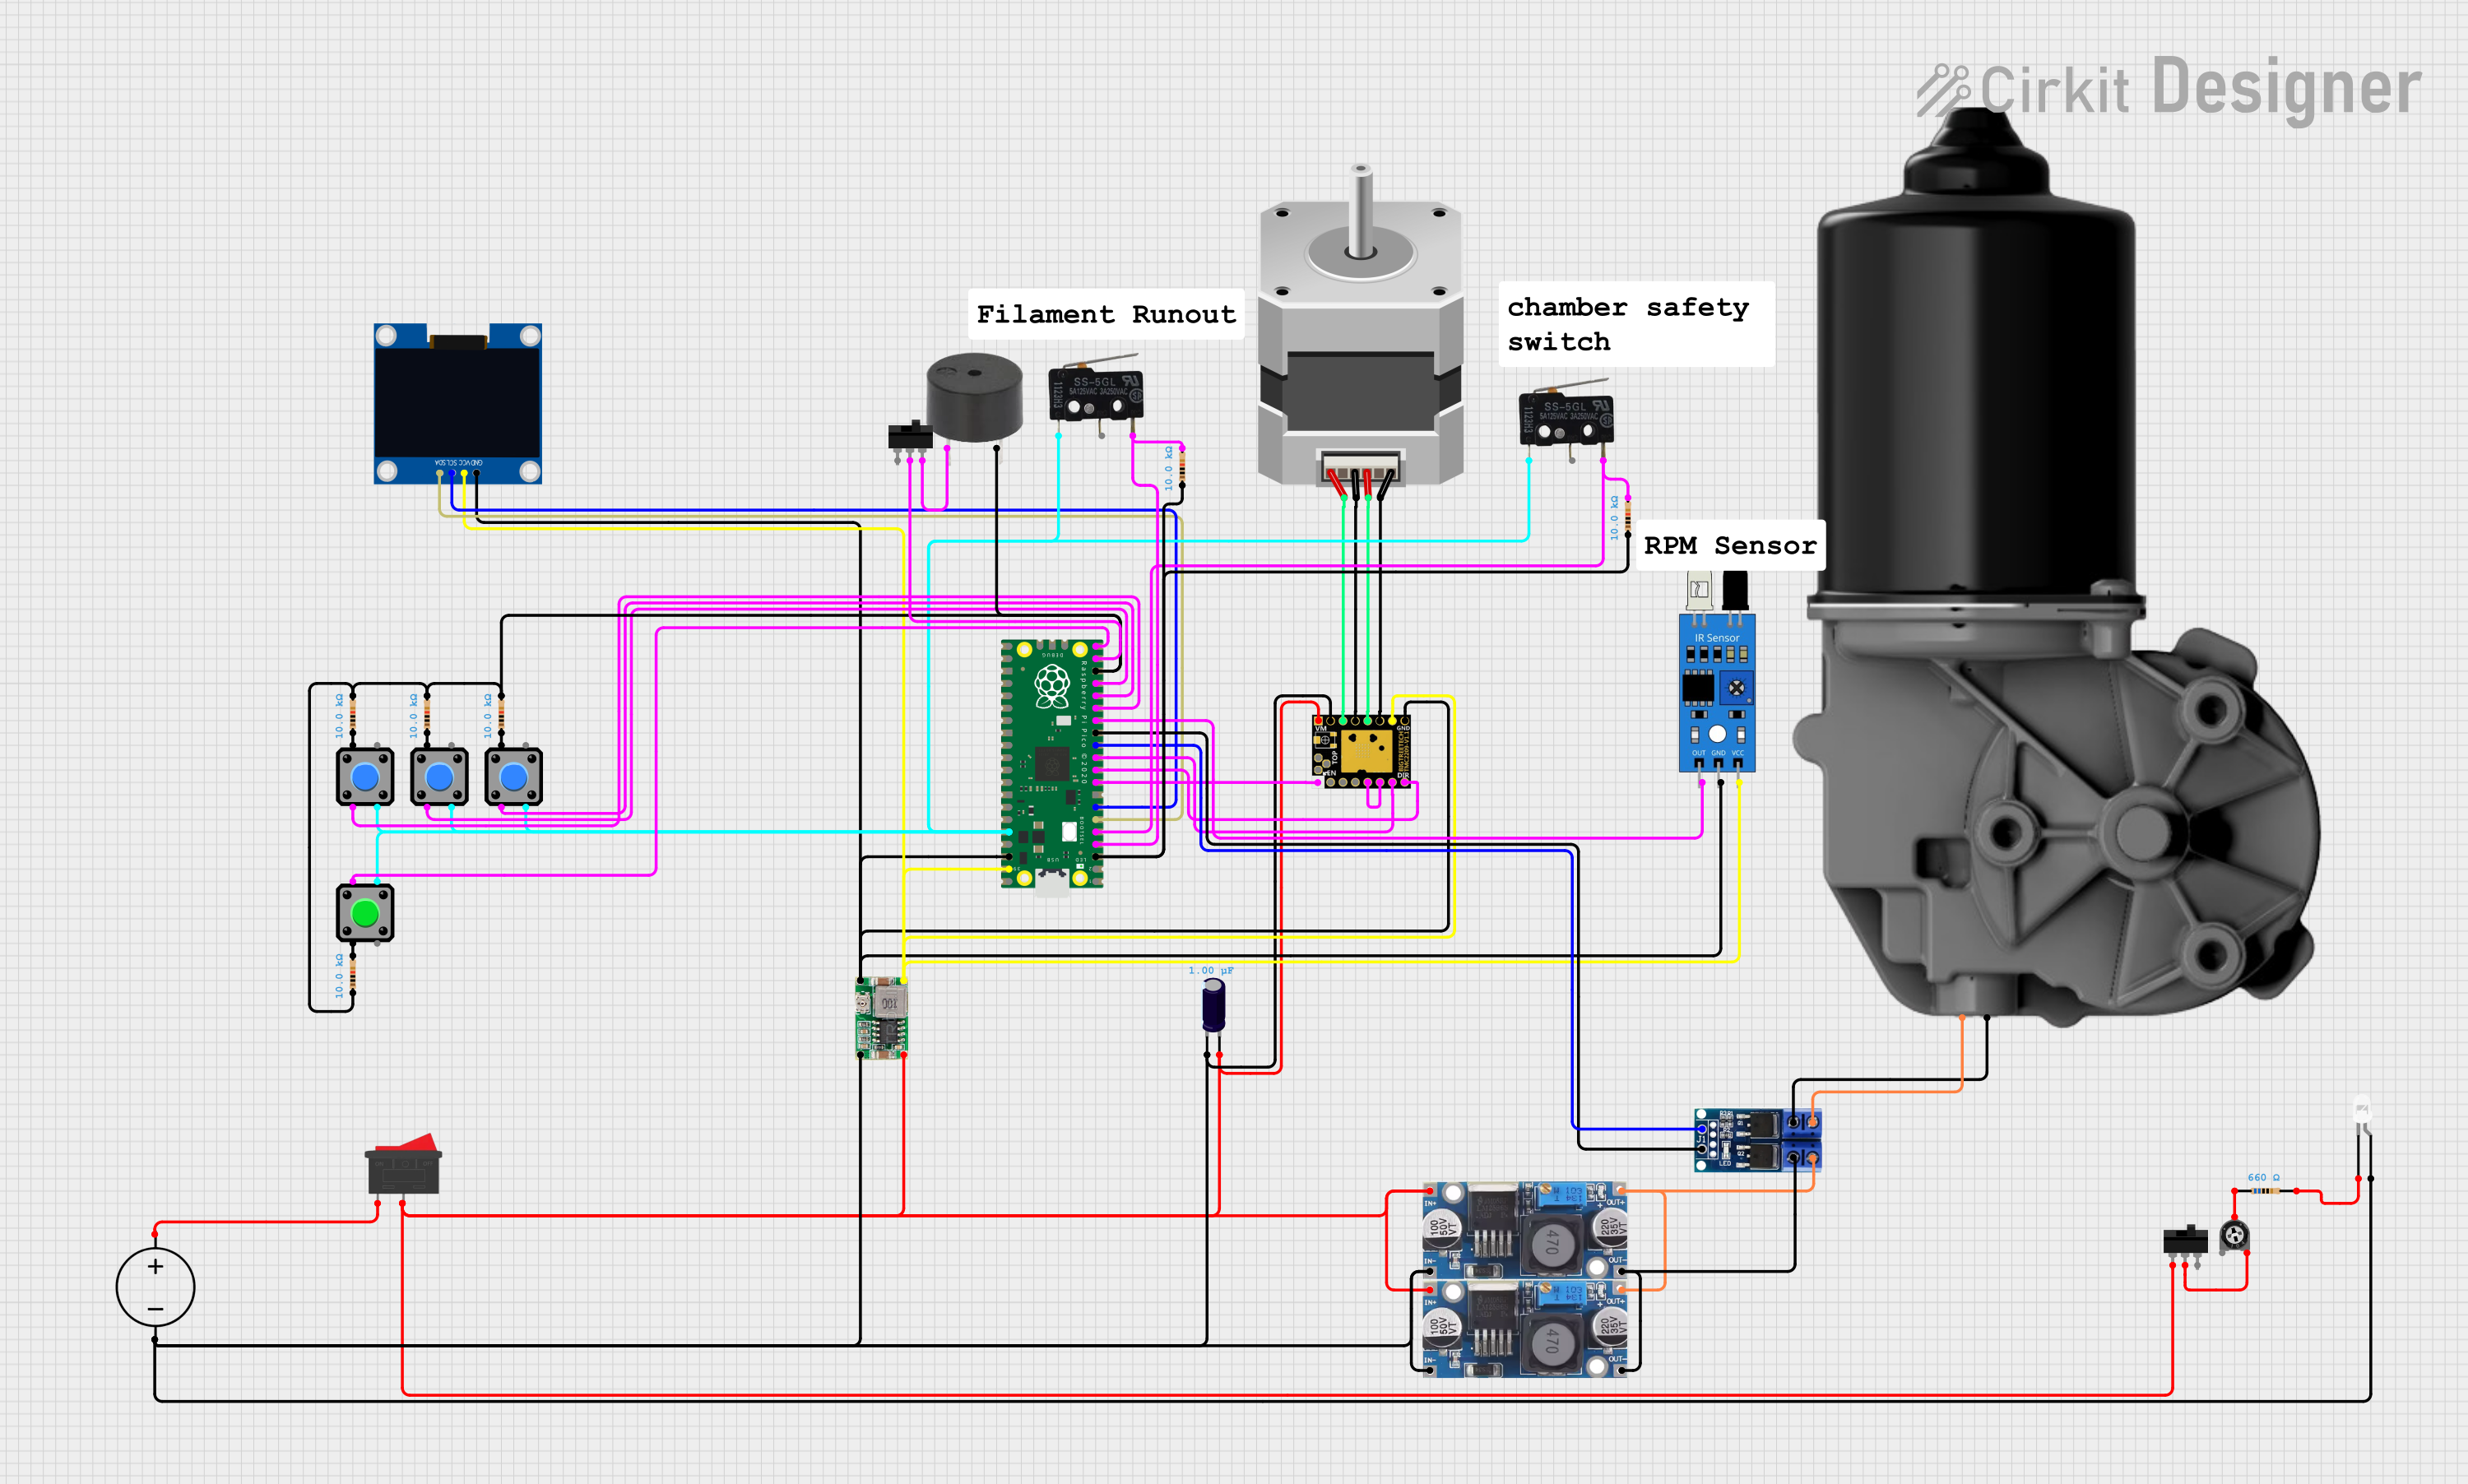

Explore Projects Built with Extruder LDO-36STH20
Common Applications and Use Cases
- 3D printer extruders
- Precision motion control in robotics
- CNC machines for small-scale operations
- Automated equipment requiring precise positioning
Technical Specifications
Key Technical Details
| Parameter | Specification |
|---|---|
| Motor Type | 2 Phase Stepper |
| Step Angle | 1.8° |
| Voltage | 2.8 V |
| Current | 1.0 A/Phase |
| Holding Torque | 0.4 N.m (56.6 oz.in) |
| Resistance | 2.8 Ohm/Phase |
| Inductance | 4.8 mH/Phase |
| Rotor Inertia | 54 g.cm² |
| Detent Torque | 2.2 N.cm |
| Insulation Class | B |
| Insulation Strength | 500VAC for one minute |
Pin Configuration and Descriptions
| Pin Number | Description | Color |
|---|---|---|
| 1 | Coil A+ | Red |
| 2 | Coil A- | Blue |
| 3 | Coil B+ | Green |
| 4 | Coil B- | Black |
Usage Instructions
How to Use the Component in a Circuit
Connecting to a Driver:
- Ensure the motor is connected to a compatible stepper motor driver capable of handling the electrical specifications.
- Connect the motor pins to the driver according to the pin configuration table. Match the coil pairs (A and B) to the driver outputs.
Power Supply:
- Use a power supply that matches the voltage and current requirements of the motor. A supply of 2.8V and sufficient current capacity for 1.0 A/Phase is recommended.
Microstepping:
- For finer control, configure the driver for microstepping. This will allow for smaller steps and smoother motion.
Heat Management:
- Stepper motors can generate heat during operation. Ensure adequate cooling to prevent overheating.
Important Considerations and Best Practices
- Current Limiting: Always set the current limit on your driver to match the motor's rated current to prevent damage.
- Voltage Rating: Do not exceed the voltage rating as it can lead to motor damage.
- Wiring: Ensure secure connections and proper insulation to prevent shorts and potential failures.
- Mounting: Secure the motor firmly to prevent vibrations and ensure accurate motion.
Troubleshooting and FAQs
Common Issues Users Might Face
Motor Does Not Rotate:
- Check connections and wiring for any loose ends or shorts.
- Verify that the power supply and driver settings match the motor specifications.
Motor Vibrates but Does Not Rotate:
- This could be due to incorrect wiring. Double-check the coil connections.
- Ensure that the driver is properly configured for the step angle.
Motor Overheats:
- Reduce the current setting on the driver.
- Improve cooling with additional heatsinks or fans.
Solutions and Tips for Troubleshooting
- Always start with lower current settings and gradually increase to the rated current while monitoring the motor temperature.
- If the motor skips steps, ensure that the mechanical load is within the motor's torque capabilities.
- Use a multimeter to check the resistance of the coils to ensure they are not damaged.
FAQs
Q: Can I run this motor at a higher voltage than rated? A: It is possible to run stepper motors at higher voltages with appropriate current limiting, but this should be done with caution and within the limits of the driver and motor specifications.
Q: How do I reverse the direction of the motor? A: To reverse the direction, you can swap the connections of one coil. For example, swap the connections of Coil A+ and A-.
Q: What is the maximum operating temperature for this motor? A: The maximum operating temperature is typically around 80-90°C, but it's best to keep the temperature as low as possible for optimal performance and longevity.
Q: Can I use this motor with an Arduino UNO? A: Yes, you can use it with an Arduino UNO by connecting it to a stepper motor driver that is compatible with the Arduino.
Example Arduino Code
#include <Stepper.h>

// Number of steps per revolution of the motor
const int stepsPerRevolution = 200;

// Wiring: Arduino pins 8, 9, 10, 11 to driver IN1, IN2, IN3, IN4
Stepper myStepper(stepsPerRevolution, 8, 10, 9, 11);

void setup() {
  // Set the speed of the motor (RPM)
  myStepper.setSpeed(60);
}

void loop() {
  // Step one revolution in one direction:
  myStepper.step(stepsPerRevolution);
  delay(500);

  // Step one revolution in the other direction:
  myStepper.step(-stepsPerRevolution);
  delay(500);
}
Note: The above code is a simple example to control a stepper motor with an Arduino UNO. Ensure you have the appropriate driver between the Arduino and the stepper motor, and adjust the pin numbers and steps per revolution to match your setup.