Cirkit Designer Logo
Cirkit Designer
Your all-in-one circuit design IDE
Home / 
Component Documentation

How to Use F25: Examples, Pinouts, and Specs
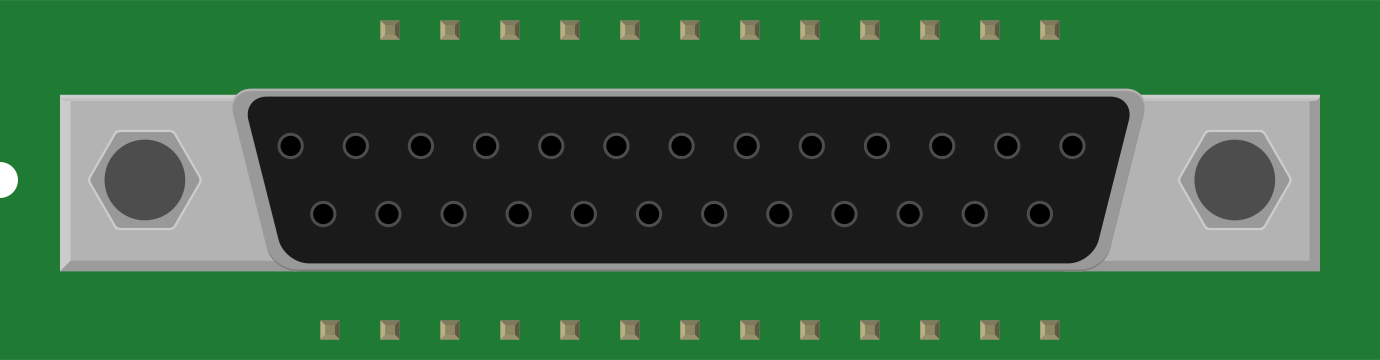

Image of F25
Cirkit Designer LogoDesign with F25 in Cirkit Designer

Introduction

The F25 is a type of fuse designed to protect electrical circuits from overcurrent conditions. It operates by breaking the circuit when the current exceeds a specified limit, thereby preventing damage to components and reducing the risk of fire or other hazards. F25 fuses are widely used in various applications, including consumer electronics, automotive systems, industrial equipment, and power distribution systems.

Explore Projects Built with F25
Use Cirkit Designer to design, explore, and prototype these projects online. Some projects support real-time simulation. Click "Open Project" to start designing instantly!
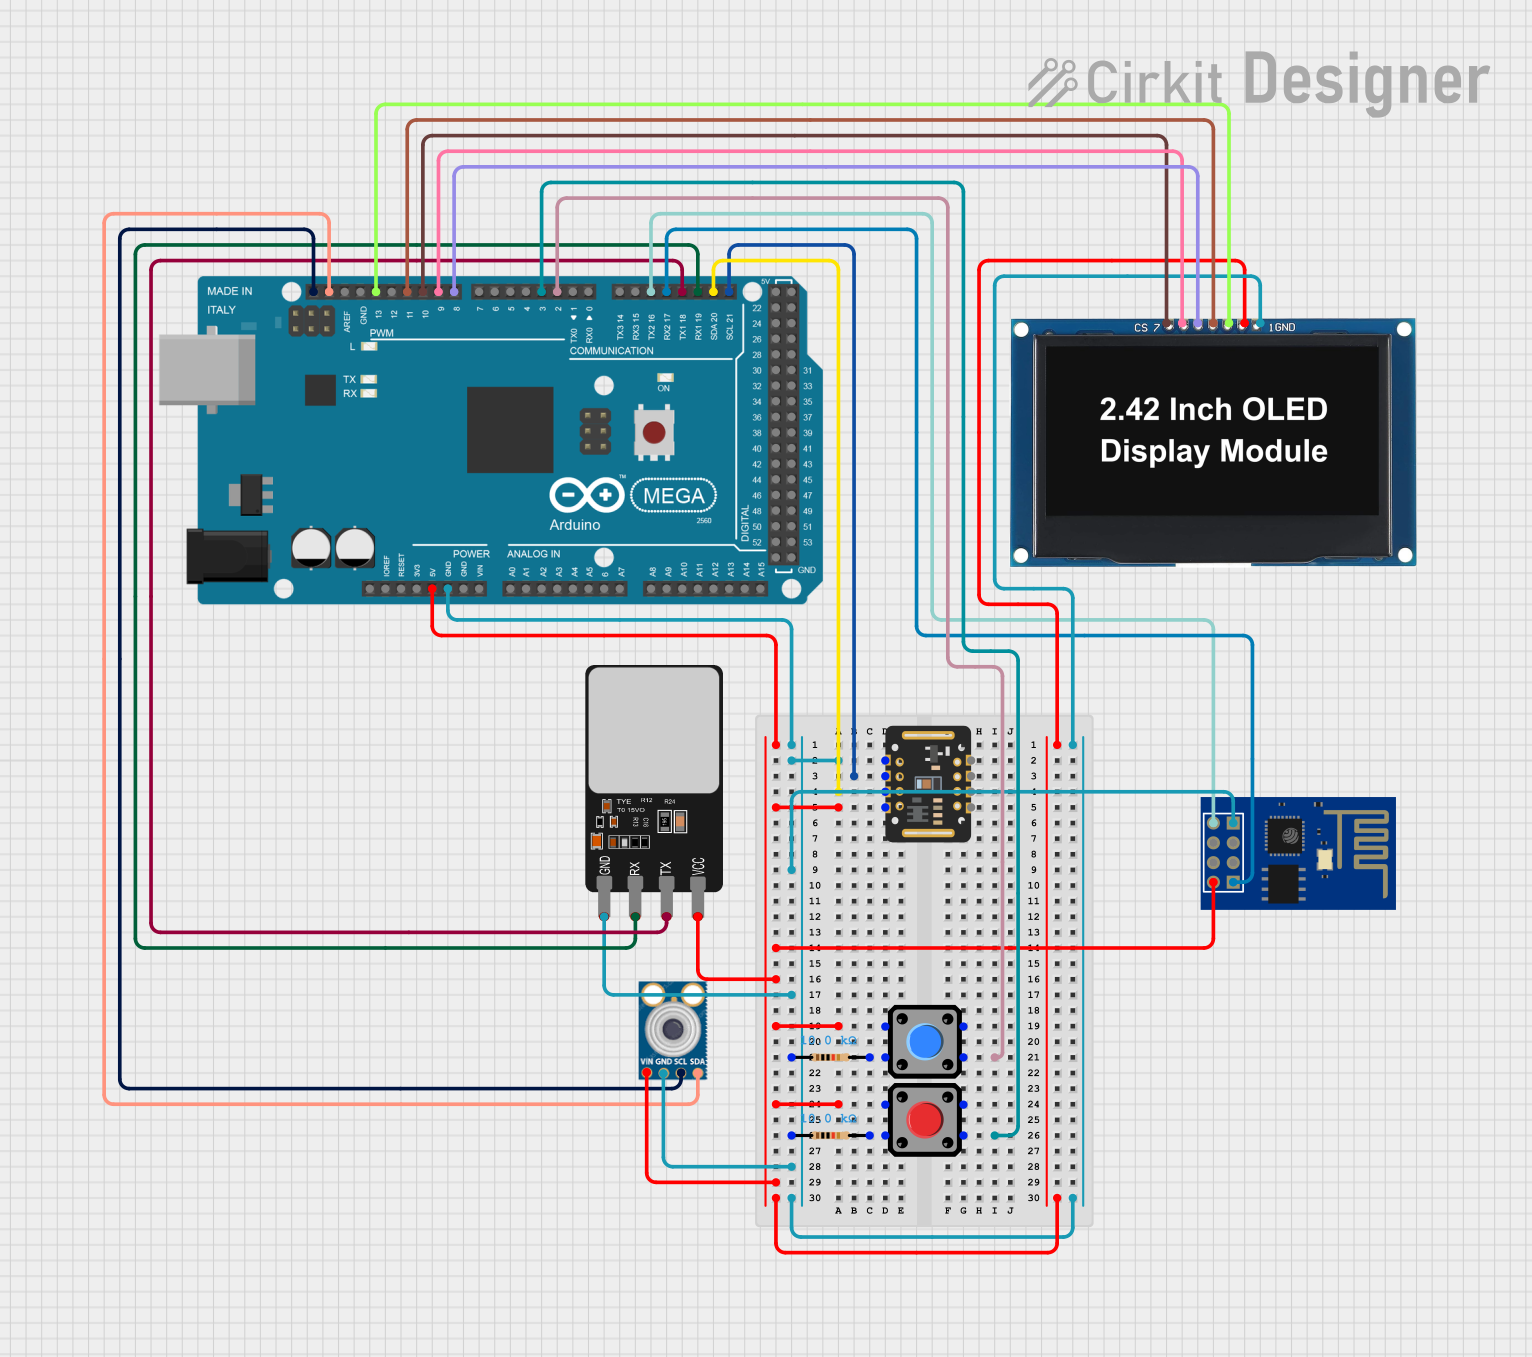
Arduino Mega 2560 Biometric Security System with Wi-Fi Connectivity
Image of Health Monitoring Device (Collab): A project utilizing F25 in a practical application
This is a multi-functional sensor system controlled by an Arduino Mega 2560, designed to read biometric data from a pulse oximeter and an infrared thermometer, authenticate using a fingerprint scanner, display information on an OLED screen, and transmit data wirelessly via an ESP8266 module. User inputs can be received through two pushbuttons, and the system's power distribution is managed through common ground and voltage supply nets.
Cirkit Designer LogoOpen Project in Cirkit Designer
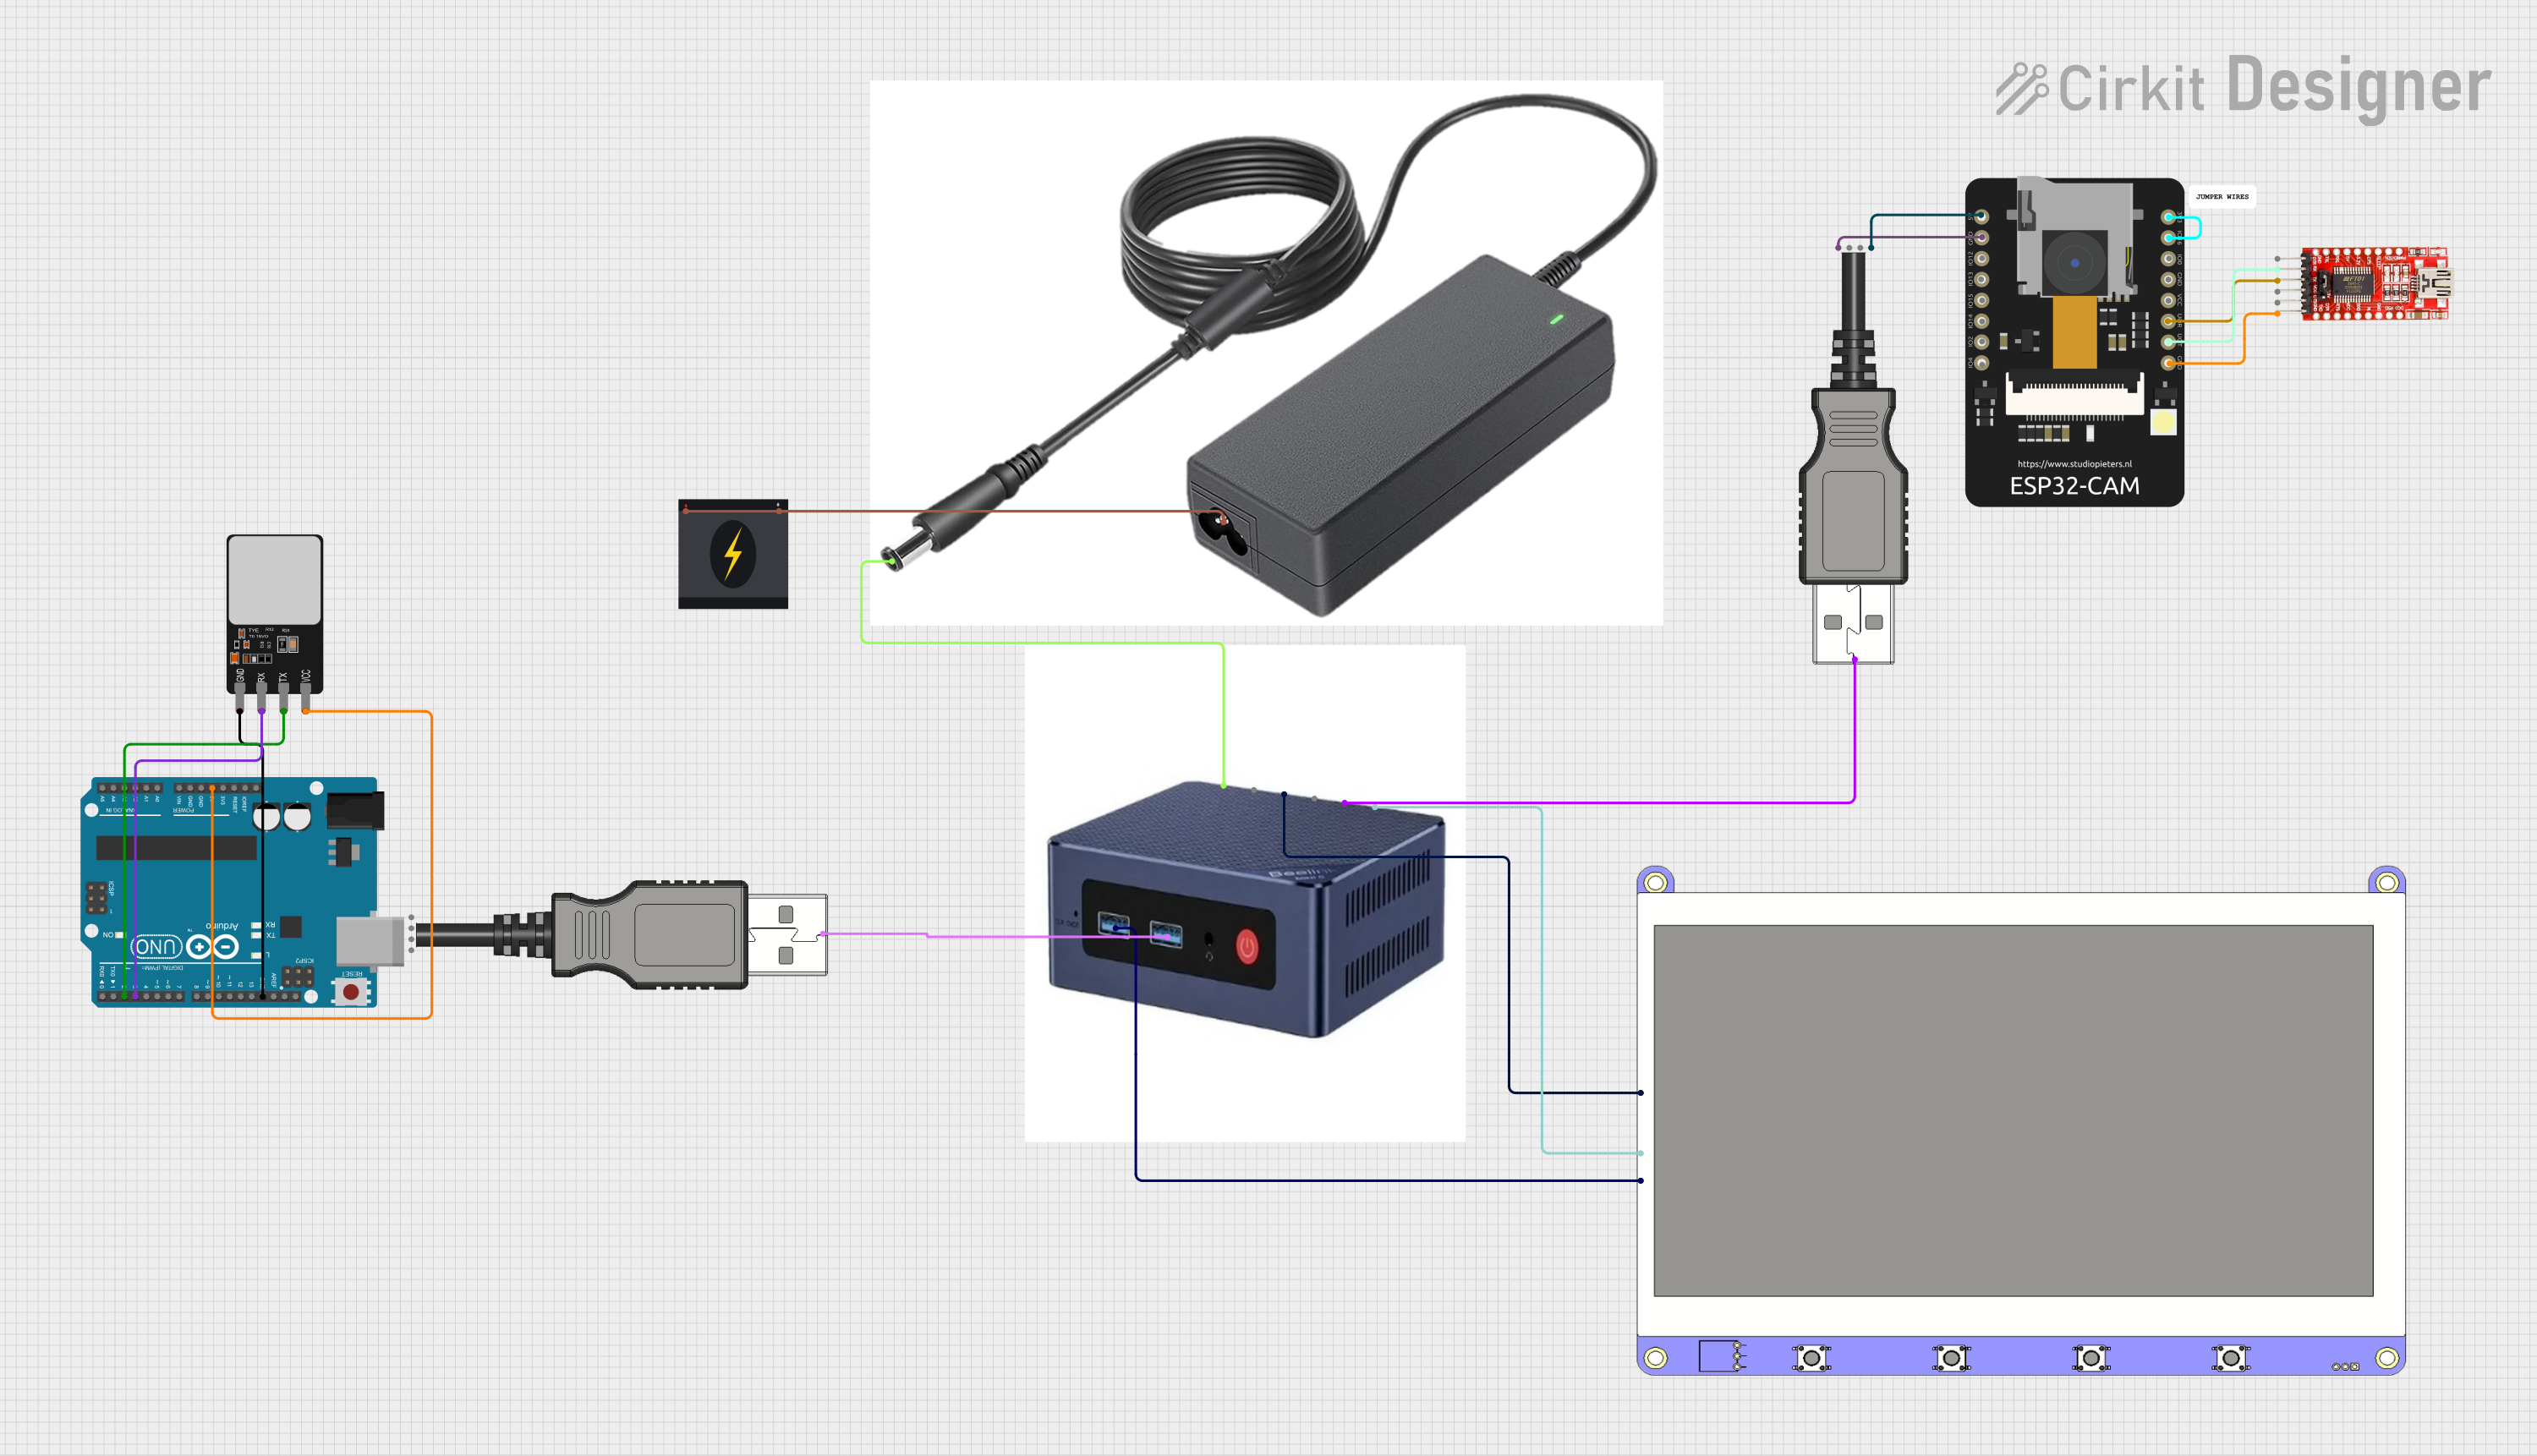
Beelink Mini S12 N95 and Arduino UNO Based Fingerprint Authentication System with ESP32 CAM
Image of design 3: A project utilizing F25 in a practical application
This circuit features a Beelink MINI S12 N95 computer connected to a 7-inch display via HDMI for video output and two USB connections for power and touch screen functionality. An Arduino UNO is interfaced with a fingerprint scanner for biometric input. The Beelink MINI S12 N95 is powered by a PC power supply, which in turn is connected to a 240V power source. Additionally, an ESP32 CAM module is powered and programmed via a USB plug and an FTDI programmer, respectively, for wireless camera capabilities.
Cirkit Designer LogoOpen Project in Cirkit Designer
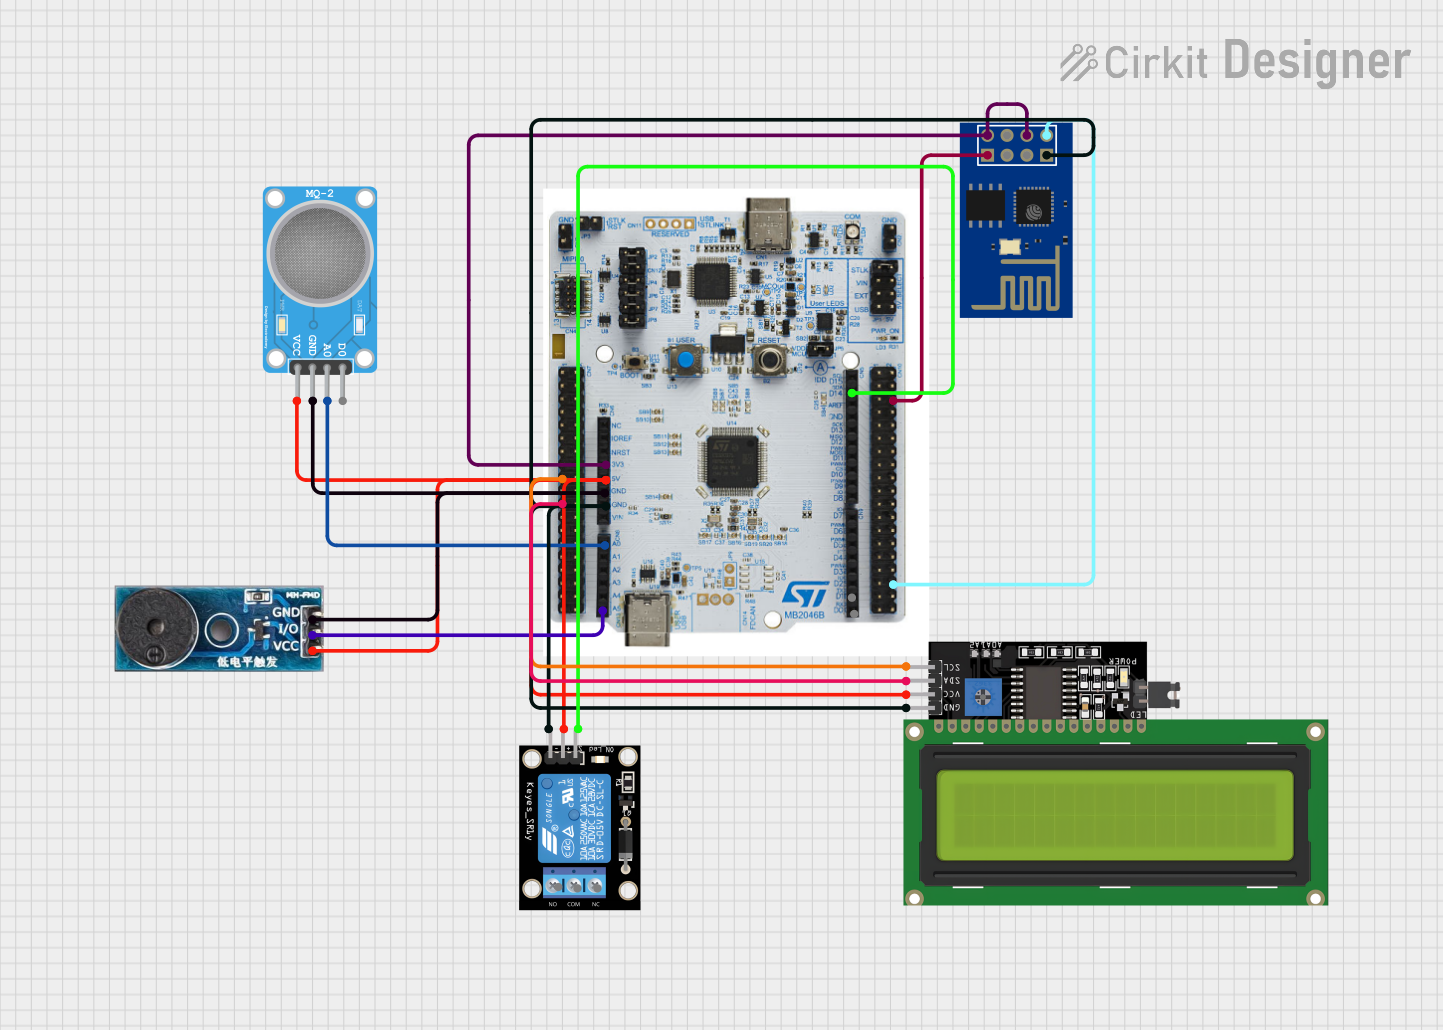
WiFi-Enabled Environmental Monitoring System with Alert Notifications
Image of GAS LEAKAGE DETECTION: A project utilizing F25 in a practical application
This circuit features a NUCLEO-F303RE microcontroller board interfaced with several modules for sensing, actuation, and communication. It uses I2C communication to display data on an LCD screen, UART communication to interface with an ESP8266 WiFi module, and reads an MQ-2 gas sensor via an ADC pin. The microcontroller also controls a buzzer for audible alerts and a relay module for switching higher power loads, possibly in response to sensor readings or remote commands received over WiFi.
Cirkit Designer LogoOpen Project in Cirkit Designer
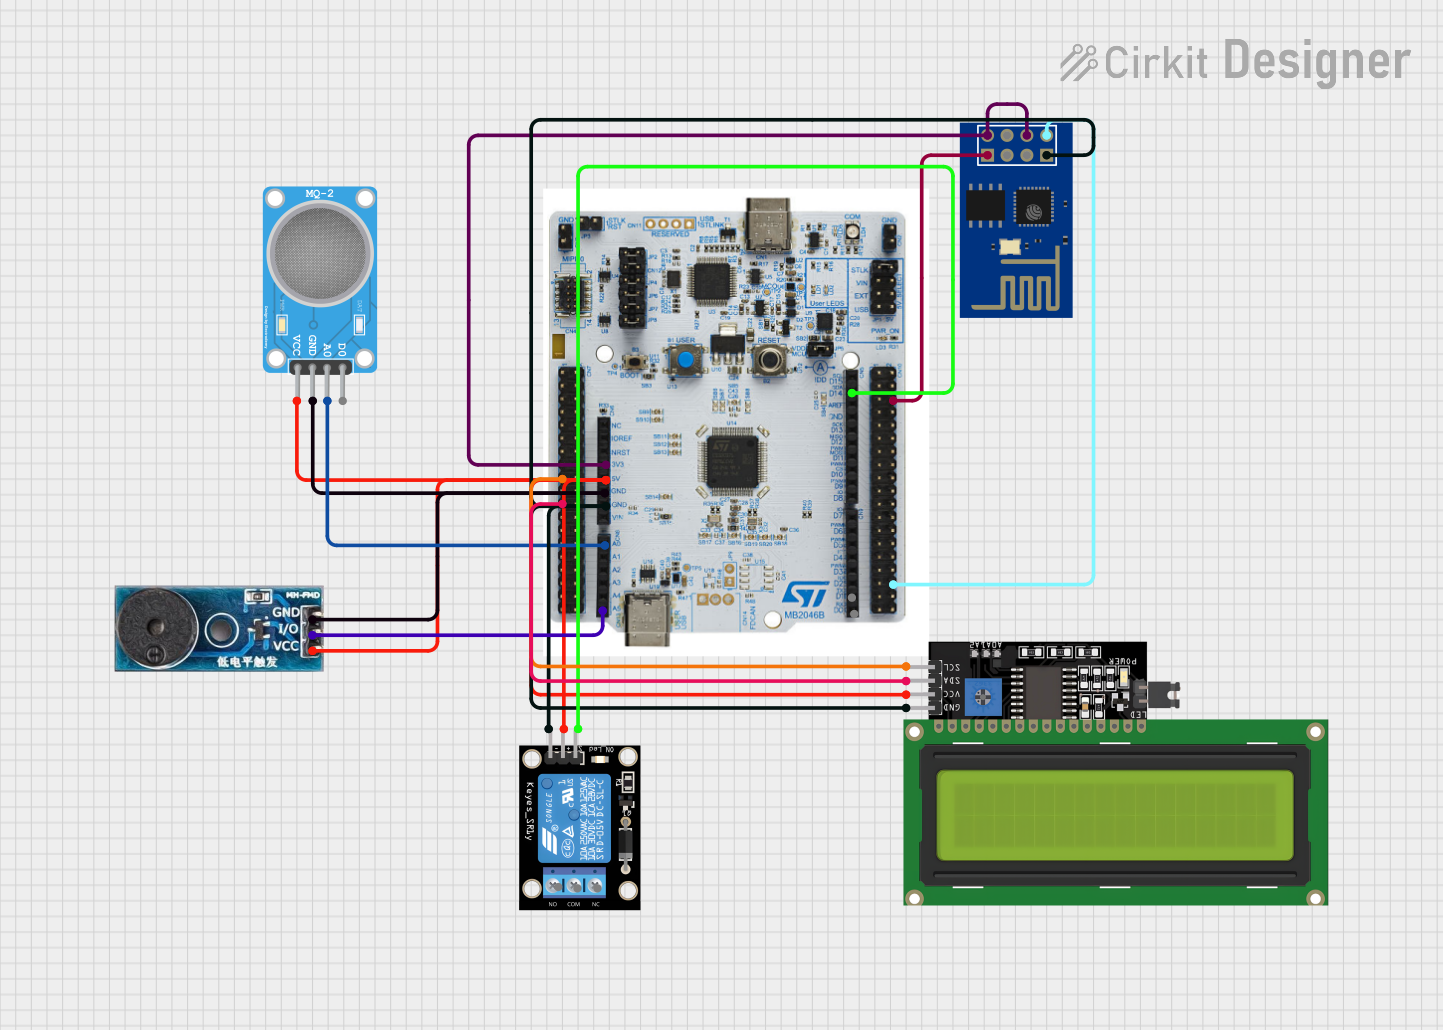
IoT-Enabled Environmental Monitoring System with NUCLEO-F303RE and ESP8266
Image of GAS LEAKAGE DETECTION: A project utilizing F25 in a practical application
This circuit features a NUCLEO-F303RE microcontroller board interfaced with various modules for sensing, actuation, and communication. It includes an MQ-2 gas sensor for detecting combustible gases, a buzzer for audible alerts, and a relay for controlling high-power devices. Additionally, the circuit uses an ESP8266 WiFi module for wireless connectivity and an I2C LCD display for user interface and data display.
Cirkit Designer LogoOpen Project in Cirkit Designer

Explore Projects Built with F25

Use Cirkit Designer to design, explore, and prototype these projects online. Some projects support real-time simulation. Click "Open Project" to start designing instantly!
Image of Health Monitoring Device (Collab): A project utilizing F25 in a practical application
Arduino Mega 2560 Biometric Security System with Wi-Fi Connectivity
This is a multi-functional sensor system controlled by an Arduino Mega 2560, designed to read biometric data from a pulse oximeter and an infrared thermometer, authenticate using a fingerprint scanner, display information on an OLED screen, and transmit data wirelessly via an ESP8266 module. User inputs can be received through two pushbuttons, and the system's power distribution is managed through common ground and voltage supply nets.
Cirkit Designer LogoOpen Project in Cirkit Designer
Image of design 3: A project utilizing F25 in a practical application
Beelink Mini S12 N95 and Arduino UNO Based Fingerprint Authentication System with ESP32 CAM
This circuit features a Beelink MINI S12 N95 computer connected to a 7-inch display via HDMI for video output and two USB connections for power and touch screen functionality. An Arduino UNO is interfaced with a fingerprint scanner for biometric input. The Beelink MINI S12 N95 is powered by a PC power supply, which in turn is connected to a 240V power source. Additionally, an ESP32 CAM module is powered and programmed via a USB plug and an FTDI programmer, respectively, for wireless camera capabilities.
Cirkit Designer LogoOpen Project in Cirkit Designer
Image of GAS LEAKAGE DETECTION: A project utilizing F25 in a practical application
WiFi-Enabled Environmental Monitoring System with Alert Notifications
This circuit features a NUCLEO-F303RE microcontroller board interfaced with several modules for sensing, actuation, and communication. It uses I2C communication to display data on an LCD screen, UART communication to interface with an ESP8266 WiFi module, and reads an MQ-2 gas sensor via an ADC pin. The microcontroller also controls a buzzer for audible alerts and a relay module for switching higher power loads, possibly in response to sensor readings or remote commands received over WiFi.
Cirkit Designer LogoOpen Project in Cirkit Designer
Image of GAS LEAKAGE DETECTION: A project utilizing F25 in a practical application
IoT-Enabled Environmental Monitoring System with NUCLEO-F303RE and ESP8266
This circuit features a NUCLEO-F303RE microcontroller board interfaced with various modules for sensing, actuation, and communication. It includes an MQ-2 gas sensor for detecting combustible gases, a buzzer for audible alerts, and a relay for controlling high-power devices. Additionally, the circuit uses an ESP8266 WiFi module for wireless connectivity and an I2C LCD display for user interface and data display.
Cirkit Designer LogoOpen Project in Cirkit Designer

Common Applications

  • Protection of sensitive electronic devices
  • Automotive electrical systems
  • Industrial machinery and control panels
  • Power supplies and distribution boards

Technical Specifications

Key Technical Details

  • Type: Fast-acting fuse
  • Rated Current: 5A (varies by model; check specific product datasheet)
  • Rated Voltage: 250V AC
  • Breaking Capacity: 1000A at rated voltage
  • Response Time: Fast blow (quick response to overcurrent)
  • Material: Ceramic body with metal end caps
  • Operating Temperature: -55°C to +125°C
  • Mounting Style: Axial lead or cartridge

Pin Configuration and Descriptions

The F25 fuse does not have traditional pins like an IC or transistor. Instead, it has two terminals (leads or end caps) for electrical connection. Below is a description of the terminals:

Terminal Description
Lead 1 Input terminal for current flow
Lead 2 Output terminal for current flow

Usage Instructions

How to Use the F25 Fuse in a Circuit

  1. Determine the Fuse Rating: Select an F25 fuse with a current rating slightly higher than the normal operating current of your circuit. For example, if your circuit operates at 3A, choose a 5A fuse.
  2. Placement in Circuit: Place the fuse in series with the load or circuit you want to protect. This ensures that all current flowing to the load passes through the fuse.
  3. Mounting:
    • For axial lead fuses, solder the leads to the PCB or connect them to terminals.
    • For cartridge fuses, use a compatible fuse holder.
  4. Verify Connections: Ensure that the fuse is securely connected and that there is no risk of short circuits.

Important Considerations

  • Voltage Rating: Never use the F25 fuse in a circuit with a voltage higher than its rated voltage (250V AC).
  • Current Rating: Avoid using a fuse with a current rating too close to the operating current, as it may blow during normal operation.
  • Replacement: Always replace a blown fuse with one of the same type and rating.
  • Testing: Use a multimeter to check the continuity of the fuse before installation.

Example: Using the F25 Fuse with an Arduino UNO

When connecting an Arduino UNO to external components, such as motors or sensors, you can use the F25 fuse to protect the circuit. Below is an example of how to wire the fuse:

// Example: Protecting an Arduino-powered motor with an F25 fuse

/*
  This example demonstrates how to use an F25 fuse to protect a motor
  connected to an Arduino UNO. The fuse is placed in series with the motor
  to prevent overcurrent damage.
*/

// Define motor control pin
const int motorPin = 9;

void setup() {
  pinMode(motorPin, OUTPUT); // Set motor pin as output
}

void loop() {
  digitalWrite(motorPin, HIGH); // Turn motor on
  delay(5000);                  // Run motor for 5 seconds
  digitalWrite(motorPin, LOW);  // Turn motor off
  delay(2000);                  // Wait for 2 seconds
}

/*
  Note: Ensure the F25 fuse is rated for the motor's operating current.
  Place the fuse in series with the motor's power supply line.
*/

Troubleshooting and FAQs

Common Issues

  1. Fuse Blows Frequently

    • Cause: The fuse rating is too low for the circuit's operating current.
    • Solution: Replace the fuse with one that has a higher current rating, but ensure it is still within safe limits for the circuit.
  2. Fuse Does Not Blow During Overcurrent

    • Cause: The fuse rating is too high or the fuse is defective.
    • Solution: Verify the circuit's operating current and replace the fuse with the correct rating.
  3. Fuse Overheats Without Blowing

    • Cause: Poor connections or excessive ambient temperature.
    • Solution: Check and secure all connections. Ensure the fuse is operating within its specified temperature range.

FAQs

  • Q: Can I use the F25 fuse for DC circuits?
    A: Yes, the F25 fuse can be used for DC circuits as long as the voltage and current ratings are not exceeded.

  • Q: How do I test if an F25 fuse is blown?
    A: Use a multimeter in continuity mode. If the fuse is intact, the multimeter will beep or show a low resistance value. If the fuse is blown, there will be no continuity.

  • Q: Can I replace an F25 fuse with a higher-rated fuse?
    A: Only if the circuit can safely handle the higher current. Otherwise, this may compromise the protection and lead to damage.

By following this documentation, you can effectively use the F25 fuse to protect your circuits and ensure reliable operation.