Cirkit Designer Logo
Cirkit Designer
Your all-in-one circuit design IDE
Home / 
Component Documentation

How to Use sensor_fluxo: Examples, Pinouts, and Specs

Image of sensor_fluxo
Cirkit Designer LogoDesign with sensor_fluxo in Cirkit Designer

Introduction

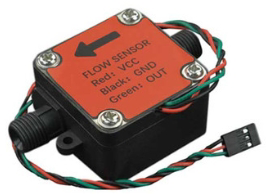
The Sensor Fluxo is a versatile electronic component designed to measure the flow rate of liquids or gases in a system. It is widely used in various applications, including industrial automation, water management systems, HVAC systems, and medical devices. By providing accurate flow rate measurements, the Sensor Fluxo helps in monitoring and controlling fluid dynamics, ensuring efficient and safe operation of systems.

Explore Projects Built with sensor_fluxo

Use Cirkit Designer to design, explore, and prototype these projects online. Some projects support real-time simulation. Click "Open Project" to start designing instantly!
Arduino-Based Water Quality Monitoring System with SIM900A and Multiple Sensors
Image of feito: A project utilizing sensor_fluxo in a practical application
This circuit is a water quality monitoring system that uses an Arduino UNO to collect data from a YF-S201 water flow meter, a turbidity sensor, and a temperature sensor. The collected data is then transmitted via a SIM900A GSM module to a remote server or user through SMS. The system measures water flow rate, temperature, and turbidity, and sends periodic updates.
Cirkit Designer LogoOpen Project in Cirkit Designer
Arduino and ESP8266 Controlled Water Quality Monitoring System with Automated Pumps
Image of swd: A project utilizing sensor_fluxo in a practical application
This circuit is designed for water quality monitoring and control, featuring sensors for pH, dissolved oxygen, and electrical conductivity, interfaced with an Arduino UNO microcontroller. The ESP8266 WiFi module enables remote communication, while two water pumps are controlled via a 2-channel relay module, toggled by the Arduino based on sensor readings. The system likely serves an automated aquatic environment management application, such as a smart aquarium or hydroponics system.
Cirkit Designer LogoOpen Project in Cirkit Designer
Arduino UNO and ESP8266-Based Smart Water Monitoring System with Wi-Fi Connectivity
Image of automatic water leak detection: A project utilizing sensor_fluxo in a practical application
This circuit monitors water pressure and flow using a Gravity Analog Water Pressure Sensor and a water flow sensor, interfaced with an Arduino UNO. The Arduino UNO processes the sensor data and communicates with an ESP8266 module for potential wireless data transmission, all powered by a 5V adapter.
Cirkit Designer LogoOpen Project in Cirkit Designer
ESP32 and Arduino Mega 2560 Controlled Peristaltic Pump System with Pressure and Flow Sensors
Image of Blood & Dialysate Control Bench: A project utilizing sensor_fluxo in a practical application
This circuit is designed for fluid control and monitoring, featuring multiple peristaltic pumps driven by TB6600 micro-stepping motor drivers, and pressure sensors interfaced with custom PCBs containing ESP32 microcontrollers. It also includes flow meters connected to Arduino Mega 2560 boards for precise flow rate measurement, with power management handled by DC-DC converters and power supplies.
Cirkit Designer LogoOpen Project in Cirkit Designer

Explore Projects Built with sensor_fluxo

Use Cirkit Designer to design, explore, and prototype these projects online. Some projects support real-time simulation. Click "Open Project" to start designing instantly!
Image of feito: A project utilizing sensor_fluxo in a practical application
Arduino-Based Water Quality Monitoring System with SIM900A and Multiple Sensors
This circuit is a water quality monitoring system that uses an Arduino UNO to collect data from a YF-S201 water flow meter, a turbidity sensor, and a temperature sensor. The collected data is then transmitted via a SIM900A GSM module to a remote server or user through SMS. The system measures water flow rate, temperature, and turbidity, and sends periodic updates.
Cirkit Designer LogoOpen Project in Cirkit Designer
Image of swd: A project utilizing sensor_fluxo in a practical application
Arduino and ESP8266 Controlled Water Quality Monitoring System with Automated Pumps
This circuit is designed for water quality monitoring and control, featuring sensors for pH, dissolved oxygen, and electrical conductivity, interfaced with an Arduino UNO microcontroller. The ESP8266 WiFi module enables remote communication, while two water pumps are controlled via a 2-channel relay module, toggled by the Arduino based on sensor readings. The system likely serves an automated aquatic environment management application, such as a smart aquarium or hydroponics system.
Cirkit Designer LogoOpen Project in Cirkit Designer
Image of automatic water leak detection: A project utilizing sensor_fluxo in a practical application
Arduino UNO and ESP8266-Based Smart Water Monitoring System with Wi-Fi Connectivity
This circuit monitors water pressure and flow using a Gravity Analog Water Pressure Sensor and a water flow sensor, interfaced with an Arduino UNO. The Arduino UNO processes the sensor data and communicates with an ESP8266 module for potential wireless data transmission, all powered by a 5V adapter.
Cirkit Designer LogoOpen Project in Cirkit Designer
Image of Blood & Dialysate Control Bench: A project utilizing sensor_fluxo in a practical application
ESP32 and Arduino Mega 2560 Controlled Peristaltic Pump System with Pressure and Flow Sensors
This circuit is designed for fluid control and monitoring, featuring multiple peristaltic pumps driven by TB6600 micro-stepping motor drivers, and pressure sensors interfaced with custom PCBs containing ESP32 microcontrollers. It also includes flow meters connected to Arduino Mega 2560 boards for precise flow rate measurement, with power management handled by DC-DC converters and power supplies.
Cirkit Designer LogoOpen Project in Cirkit Designer

Technical Specifications

Key Technical Details

Parameter Value
Operating Voltage 5V DC
Operating Current 10-15 mA
Flow Rate Range 1-30 L/min
Output Type Pulse signal
Pulse Frequency 45 Hz (at 1 L/min)
Accuracy ±1.5%
Operating Temperature -25°C to 80°C
Material Plastic (food-grade)
Connector Type 3-pin (VCC, GND, Signal)

Pin Configuration and Descriptions

Pin Number Pin Name Description
1 VCC Power supply (5V DC)
2 GND Ground
3 Signal Pulse output signal proportional to flow rate

Usage Instructions

How to Use the Sensor Fluxo in a Circuit

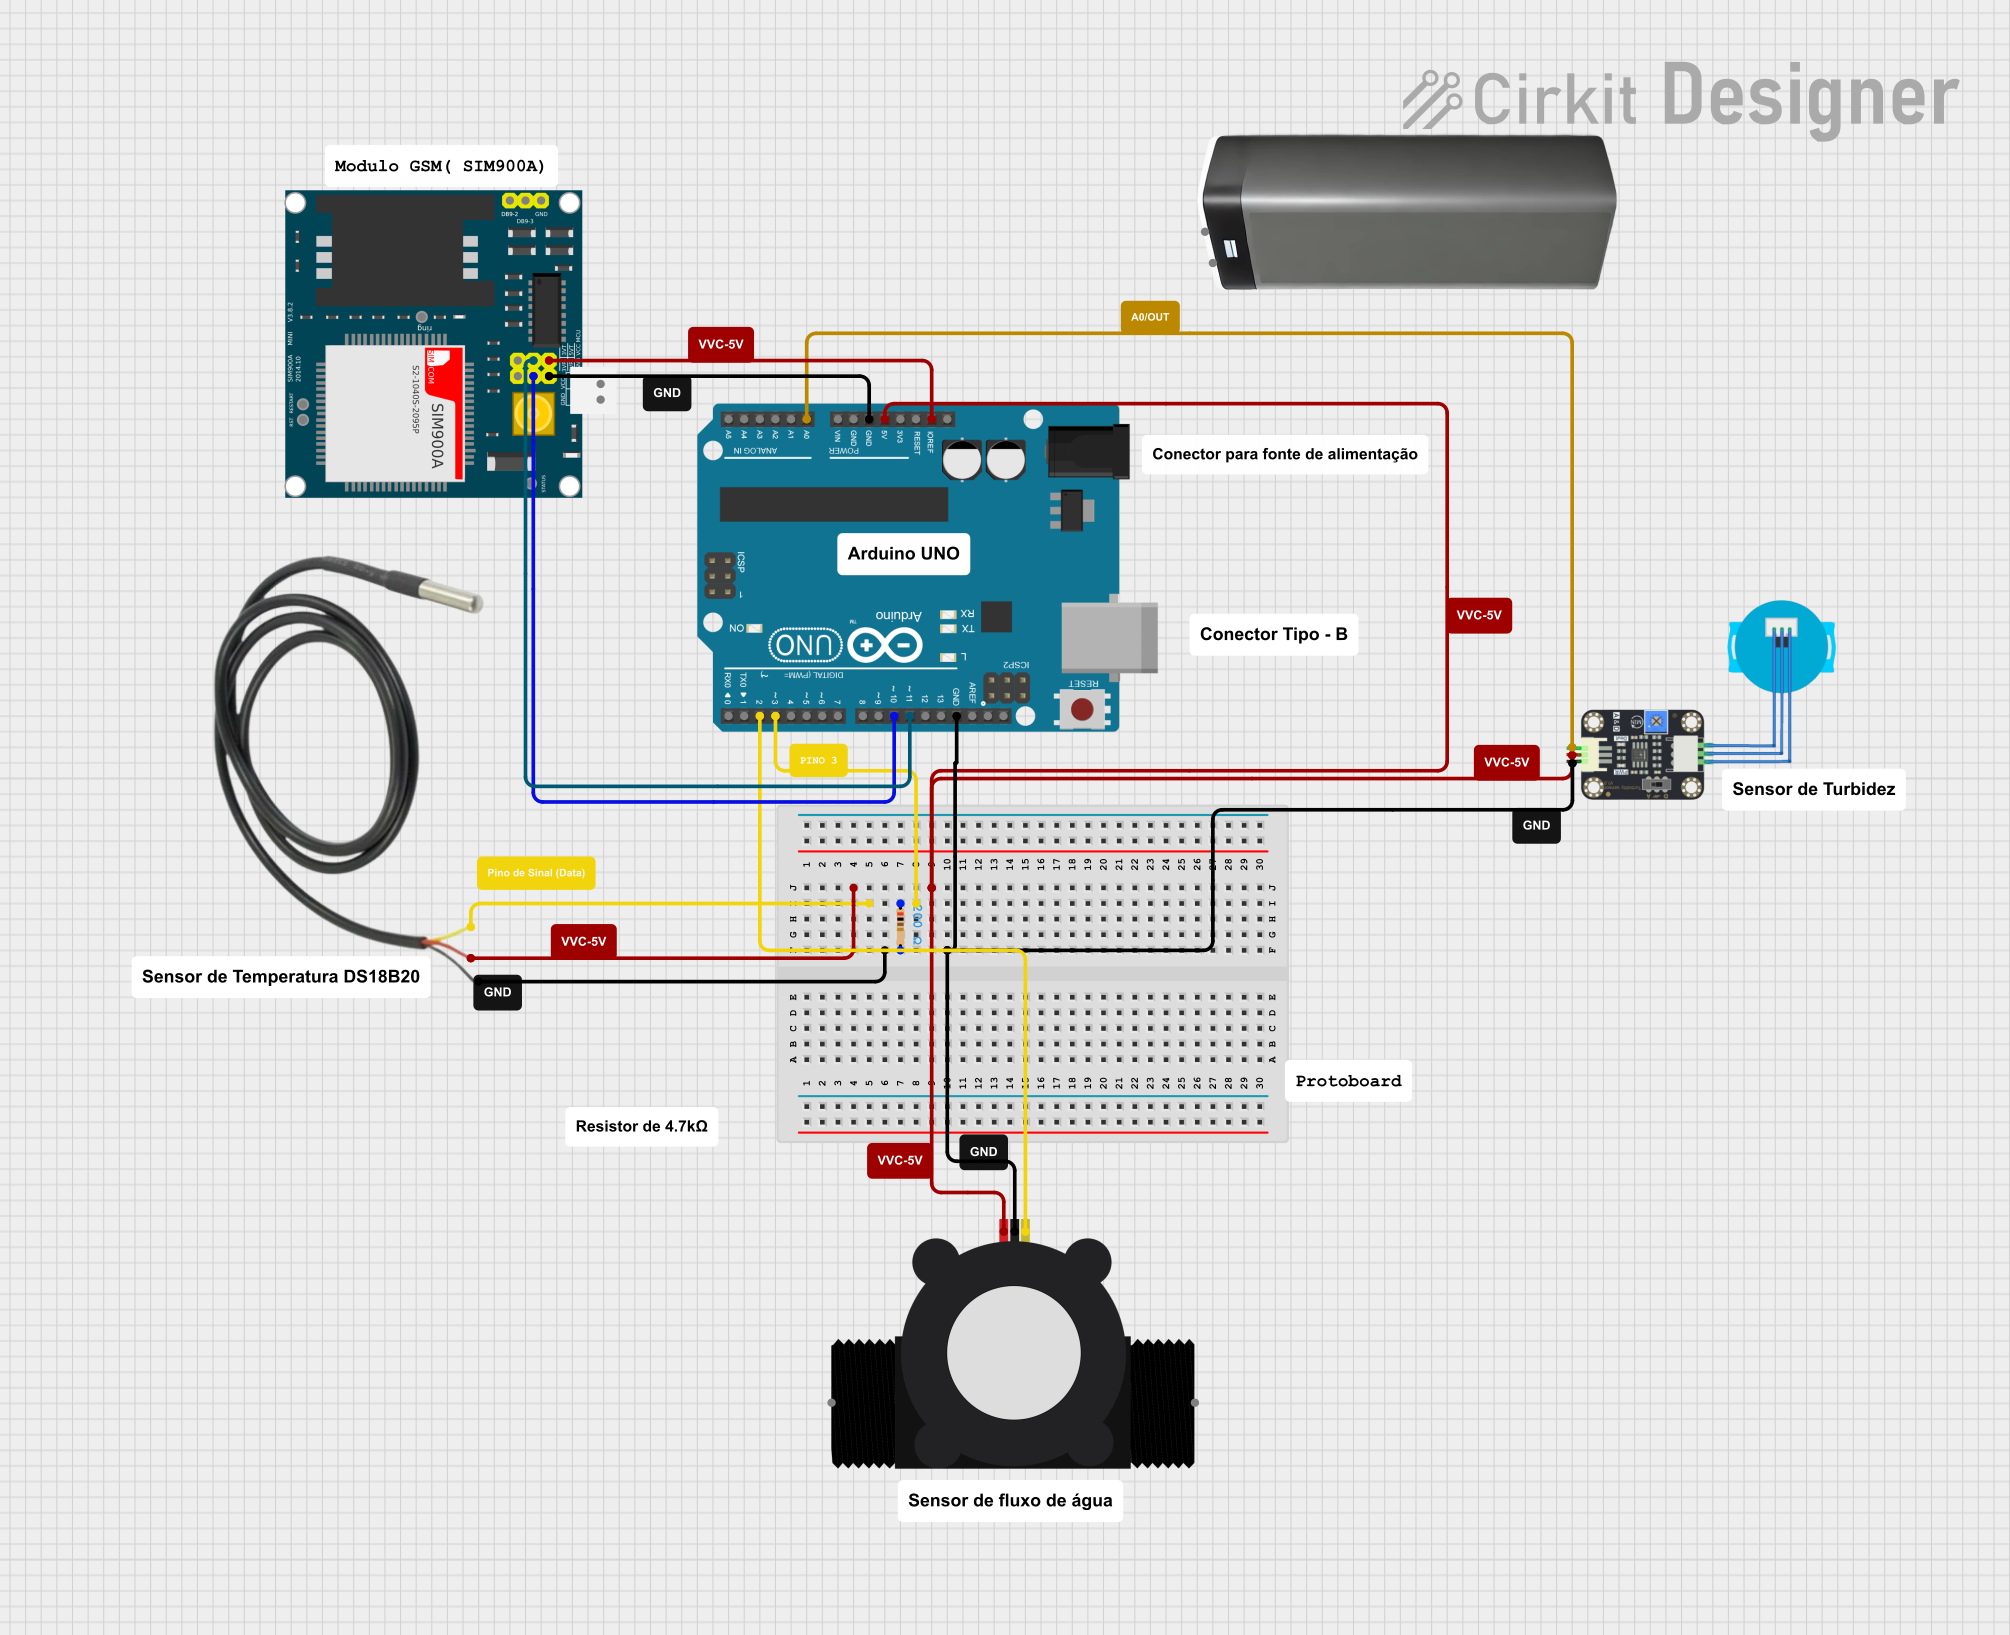
  1. Power Supply: Connect the VCC pin to a 5V DC power supply.
  2. Ground Connection: Connect the GND pin to the ground of the circuit.
  3. Signal Output: Connect the Signal pin to a digital input pin of a microcontroller (e.g., Arduino UNO).

Example Circuit Diagram

+5V (Arduino) ----> VCC (Sensor Fluxo)
GND (Arduino) ----> GND (Sensor Fluxo)
Digital Pin 2 (Arduino) ----> Signal (Sensor Fluxo)

Arduino UNO Example Code

// Define the pin where the sensor is connected
const int sensorPin = 2;

// Variables to store pulse count and flow rate
volatile int pulseCount = 0;
float flowRate = 0.0;

void setup() {
  // Initialize serial communication
  Serial.begin(9600);
  
  // Set the sensor pin as input
  pinMode(sensorPin, INPUT);
  
  // Attach an interrupt to the sensor pin
  attachInterrupt(digitalPinToInterrupt(sensorPin), pulseCounter, RISING);
}

void loop() {
  // Calculate flow rate (L/min)
  flowRate = (pulseCount / 45.0); // 45 pulses per liter
  
  // Print the flow rate to the serial monitor
  Serial.print("Flow Rate: ");
  Serial.print(flowRate);
  Serial.println(" L/min");
  
  // Reset pulse count for the next measurement
  pulseCount = 0;
  
  // Wait for 1 second before the next measurement
  delay(1000);
}

// Interrupt service routine to count pulses
void pulseCounter() {
  pulseCount++;
}

Important Considerations and Best Practices

  • Power Supply: Ensure a stable 5V DC power supply to avoid inaccurate readings.
  • Mounting: Install the sensor in a straight section of the pipe to minimize turbulence.
  • Orientation: Follow the manufacturer's guidelines for the correct orientation of the sensor.
  • Calibration: Periodically calibrate the sensor to maintain accuracy.

Troubleshooting and FAQs

Common Issues and Solutions

  1. No Output Signal:

    • Check Connections: Ensure all connections are secure and correct.
    • Power Supply: Verify that the sensor is receiving the correct voltage.
  2. Inaccurate Readings:

    • Calibration: Recalibrate the sensor.
    • Flow Disturbances: Ensure the sensor is installed in a straight section of the pipe.
  3. Intermittent Signal:

    • Electrical Noise: Use shielded cables to reduce electrical noise.
    • Loose Connections: Check for any loose or corroded connections.

FAQs

Q1: Can the Sensor Fluxo be used with liquids other than water? A1: Yes, the Sensor Fluxo can measure the flow rate of various liquids and gases, but ensure the material compatibility with the fluid.

Q2: How often should the sensor be calibrated? A2: Calibration frequency depends on the application and usage. For critical applications, calibrate the sensor every 6 months.

Q3: Can the sensor be used in high-pressure systems? A3: The Sensor Fluxo is designed for standard pressure systems. For high-pressure applications, consult the manufacturer for suitable models.

By following this documentation, users can effectively integrate and utilize the Sensor Fluxo in their projects, ensuring accurate and reliable flow rate measurements.