How to Use Bill Acceptor TP70: Examples, Pinouts, and Specs
Introduction
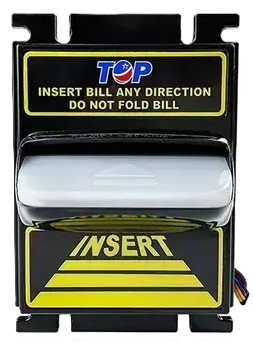
The Bill Acceptor TP70 is a reliable and efficient device designed for accepting and validating paper currency in automated systems. It is commonly used in vending machines, kiosks, arcade machines, and other self-service payment systems. Equipped with advanced sensors, the TP70 ensures accurate detection of counterfeit bills and supports multiple currency types. Its robust design and ease of integration make it a popular choice for businesses requiring secure and automated cash handling.
Explore Projects Built with Bill Acceptor TP70
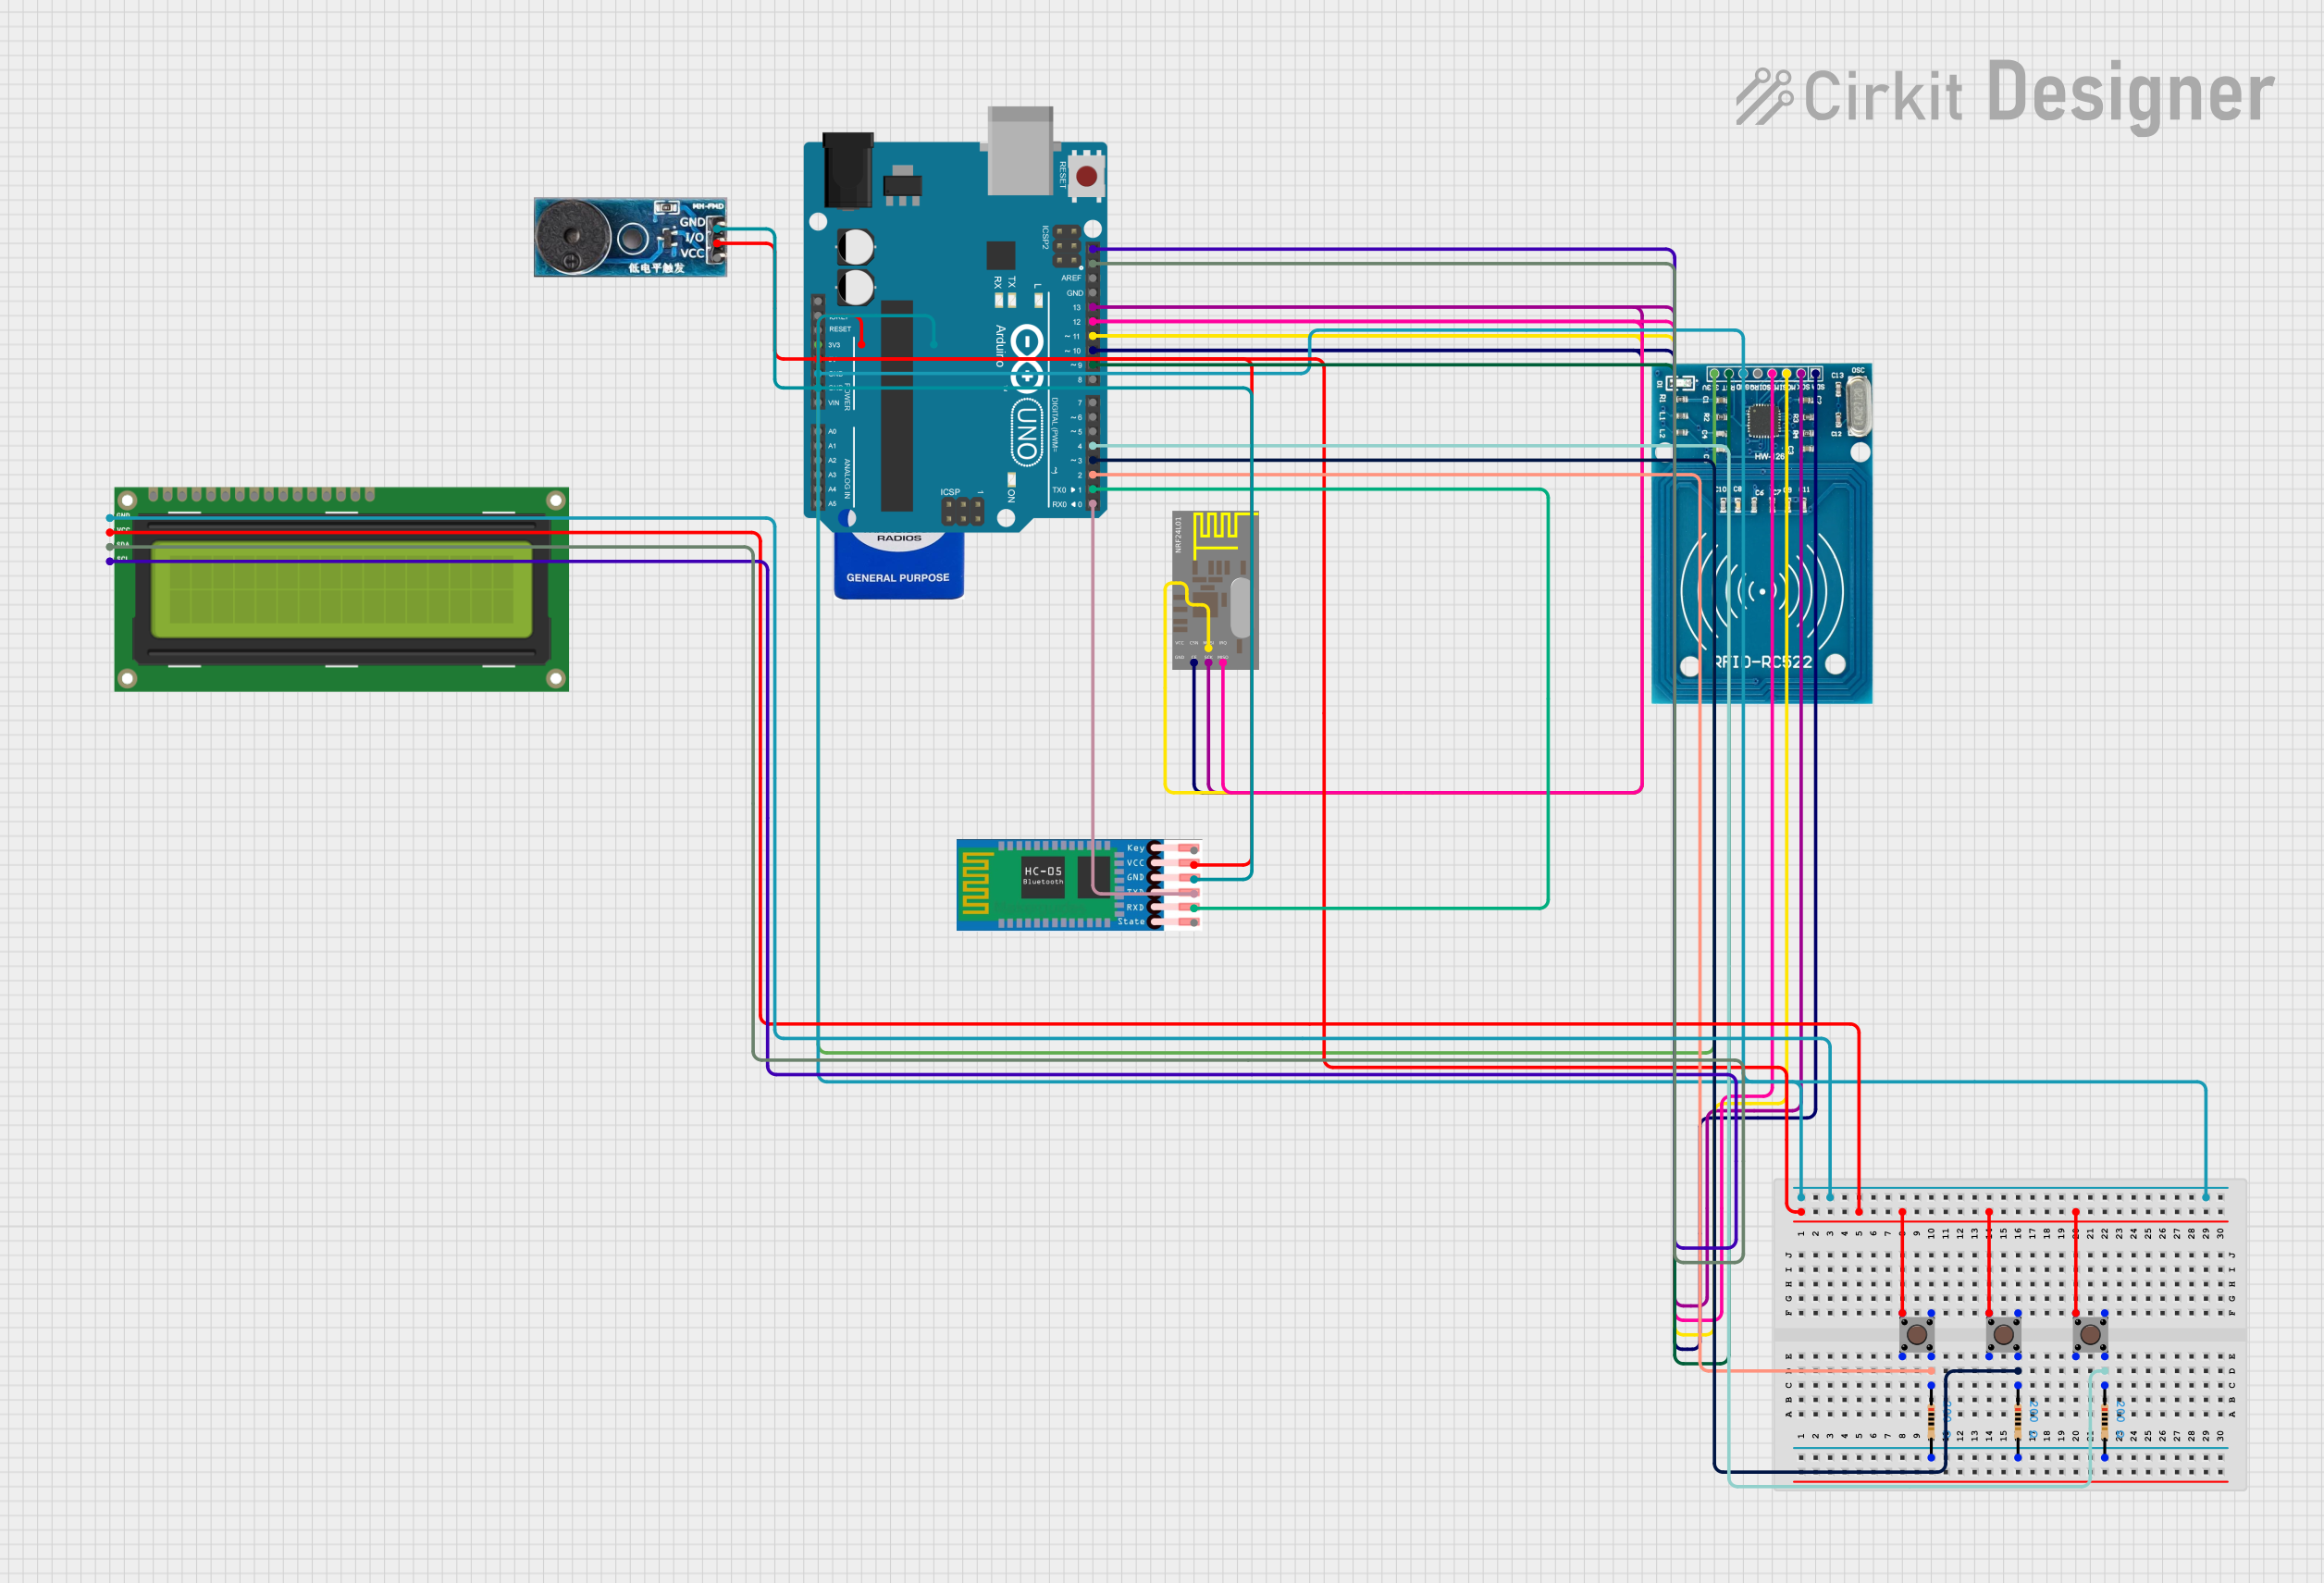
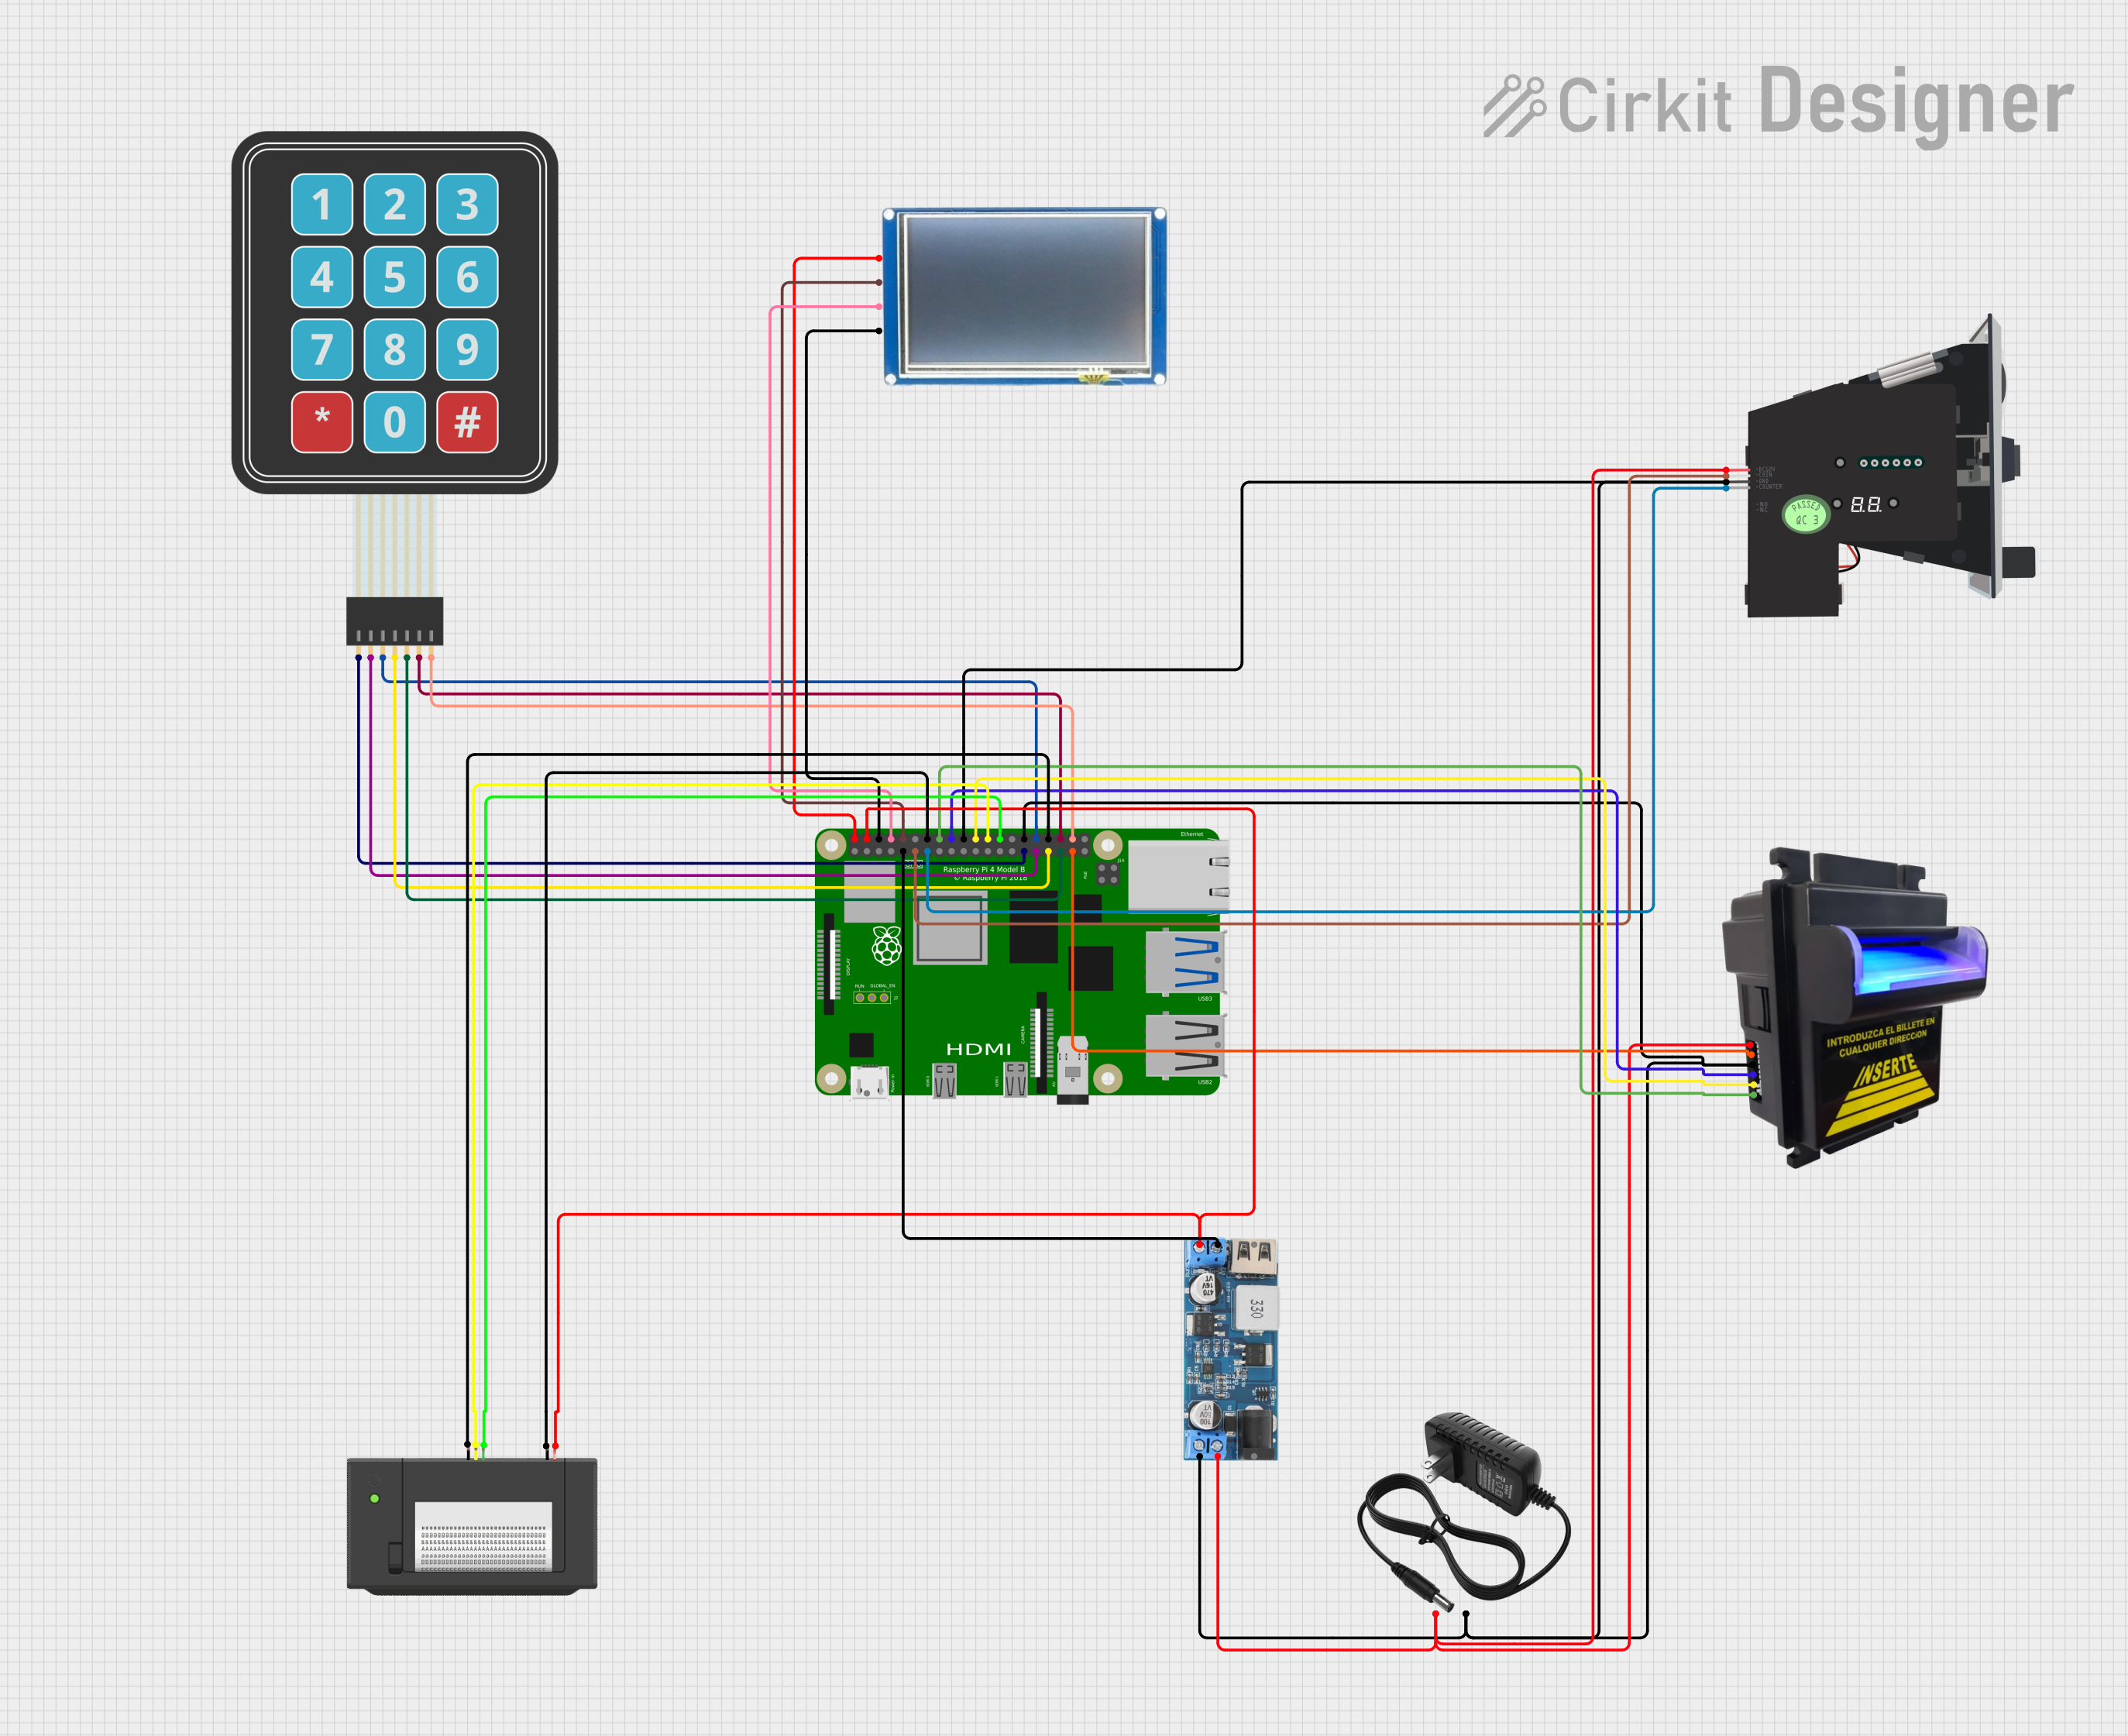
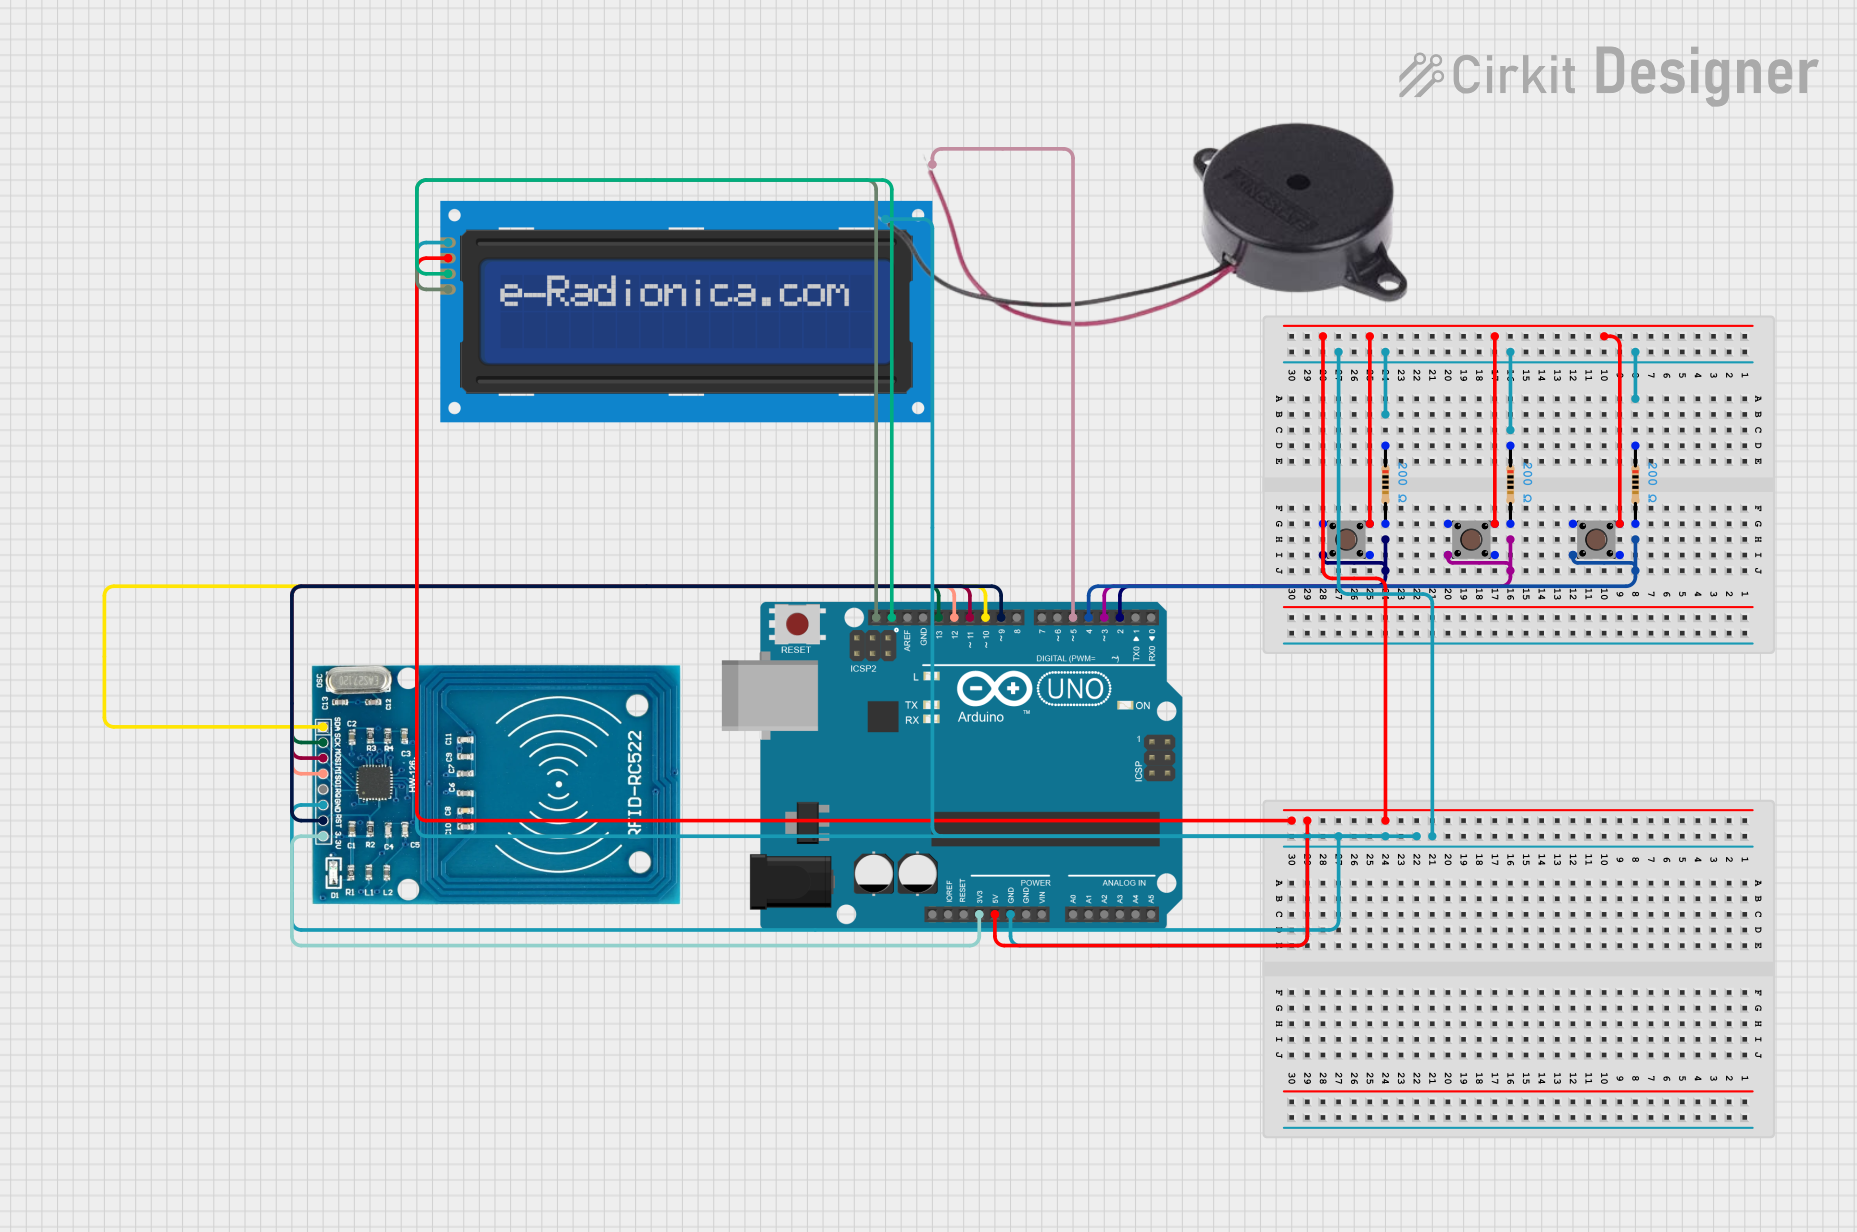

Explore Projects Built with Bill Acceptor TP70
Technical Specifications
The following table outlines the key technical details of the Bill Acceptor TP70:
| Specification | Details |
|---|---|
| Model Number | TP70 |
| Input Voltage | 12V DC ± 10% |
| Operating Current | 1.5A (typical) |
| Standby Current | < 100mA |
| Supported Bill Width | 62mm to 72mm |
| Validation Speed | ~3 seconds per bill |
| Accepted Denominations | Configurable (varies by region) |
| Communication Interface | RS232, Pulse, or MDB |
| Operating Temperature | 0°C to 50°C |
| Storage Temperature | -20°C to 70°C |
| Dimensions | 240mm x 120mm x 100mm |
| Weight | 1.2kg |
Pin Configuration and Descriptions
The TP70 features a standard connector for power and communication. Below is the pinout for the RS232 interface:
| Pin Number | Signal Name | Description |
|---|---|---|
| 1 | VCC (+12V) | Power supply input |
| 2 | GND | Ground |
| 3 | TXD | Transmit data (to host device) |
| 4 | RXD | Receive data (from host device) |
| 5 | INHIBIT | Inhibit signal (disable acceptance) |
| 6 | STATUS | Status output (e.g., error codes) |
Usage Instructions
How to Use the TP70 in a Circuit
- Power Connection: Connect the VCC pin to a regulated 12V DC power supply and the GND pin to the ground of your system.
- Communication Setup: Use the RS232 interface to connect the TXD and RXD pins to the corresponding pins on your microcontroller or host device.
- Bill Validation:
- Ensure the device is properly configured for the currency and denominations you wish to accept.
- Insert bills into the acceptance slot. The TP70 will validate the bill and send a signal to the host device indicating acceptance or rejection.
- Inhibit Function: Use the INHIBIT pin to disable or enable bill acceptance as needed. Pulling this pin low will disable the device.
Important Considerations and Best Practices
- Power Supply: Use a stable and regulated 12V DC power source to avoid malfunctions.
- Mounting: Securely mount the TP70 in your system to prevent vibrations or misalignment.
- Firmware Updates: Check for firmware updates from the manufacturer to ensure compatibility with new currency designs.
- Cleaning: Periodically clean the bill path and sensors to maintain optimal performance.
Example: Connecting TP70 to an Arduino UNO
Below is an example of how to interface the TP70 with an Arduino UNO using the RS232 interface:
Circuit Diagram
- Connect the TP70's TXD pin to Arduino's RX (pin 0).
- Connect the TP70's RXD pin to Arduino's TX (pin 1) through a level shifter (if required).
- Connect the VCC and GND pins to a 12V power supply and ground, respectively.
Arduino Code
#include <SoftwareSerial.h>

// Define RX and TX pins for communication with TP70
SoftwareSerial tp70Serial(10, 11); // RX = pin 10, TX = pin 11

void setup() {
  Serial.begin(9600); // Initialize serial monitor
  tp70Serial.begin(9600); // Initialize TP70 communication

  Serial.println("Bill Acceptor TP70 Initialized");
}

void loop() {
  // Check if data is available from the TP70
  if (tp70Serial.available()) {
    String data = "";
    while (tp70Serial.available()) {
      char c = tp70Serial.read();
      data += c;
    }
    Serial.print("Received from TP70: ");
    Serial.println(data); // Print received data to serial monitor
  }

  // Example: Send a command to TP70 (replace with actual command)
  if (Serial.available()) {
    char command = Serial.read();
    tp70Serial.write(command); // Send command to TP70
  }
}
Troubleshooting and FAQs
Common Issues and Solutions
The TP70 does not power on:
- Verify that the power supply is providing 12V DC.
- Check the wiring for loose or incorrect connections.
Bills are not being accepted:
- Ensure the INHIBIT pin is not pulled low.
- Confirm that the device is configured for the correct currency and denominations.
- Clean the bill path and sensors to remove dust or debris.
Communication issues with the host device:
- Verify the baud rate and communication settings (default is 9600 baud for RS232).
- Check the TXD and RXD connections for proper wiring.
Frequent rejection of valid bills:
- Update the firmware to the latest version.
- Inspect the bill path for obstructions or misalignment.
FAQs
Q: Can the TP70 accept multiple currencies simultaneously?
A: Yes, the TP70 can be configured to accept multiple currencies, but this depends on the firmware and regional settings.
Q: How do I update the firmware?
A: Firmware updates can be performed using the manufacturer's software and a compatible programming cable. Refer to the manufacturer's documentation for detailed instructions.
Q: What is the maximum bill length the TP70 can handle?
A: The TP70 is designed to accept bills with a width of 62mm to 72mm. The length is typically not a limiting factor as long as the bill fits within the acceptance slot.
Q: Is the TP70 compatible with MDB protocol?
A: Yes, the TP70 supports MDB protocol, making it suitable for integration with vending machines and other MDB-compliant systems.