How to Use Water Pump: Examples, Pinouts, and Specs

Introduction
A water pump is an electromechanical device designed to move water from one location to another. It is commonly used in applications such as irrigation systems, drainage solutions, water supply systems, aquariums, and cooling systems. Water pumps are available in various types, including submersible pumps, centrifugal pumps, and diaphragm pumps, each suited for specific use cases.
Water pumps are essential in both residential and industrial settings, providing efficient water transfer and circulation. They are often integrated into automated systems, including those controlled by microcontrollers like Arduino, for precise operation.
Explore Projects Built with Water Pump
Explore Projects Built with Water Pump
Technical Specifications
Below are the general technical specifications for a typical DC-powered water pump. Specifications may vary depending on the model and manufacturer.
General Specifications
- Operating Voltage: 3V to 12V DC
- Operating Current: 0.1A to 0.5A (depending on load)
- Flow Rate: 80 to 300 liters per hour (L/h)
- Maximum Lift: 1 to 3 meters
- Power Consumption: 1W to 5W
- Pump Type: Submersible or non-submersible
- Material: Plastic or metal housing (waterproof for submersible models)
Pin Configuration and Descriptions
The water pump typically has two wires for electrical connection. Below is the description:
| Wire Color | Function | Description |
|---|---|---|
| Red | Positive (+) Terminal | Connect to the positive terminal of the power supply or motor driver. |
| Black | Negative (-) Terminal | Connect to the ground (GND) of the power supply or motor driver. |
Note: Some advanced pumps may include additional wires for speed control or feedback, but this is uncommon in basic models.
Usage Instructions
How to Use the Water Pump in a Circuit
- Power Supply: Ensure the pump is powered by a DC voltage source within its operating range (e.g., 5V or 12V). Exceeding the voltage rating can damage the pump.
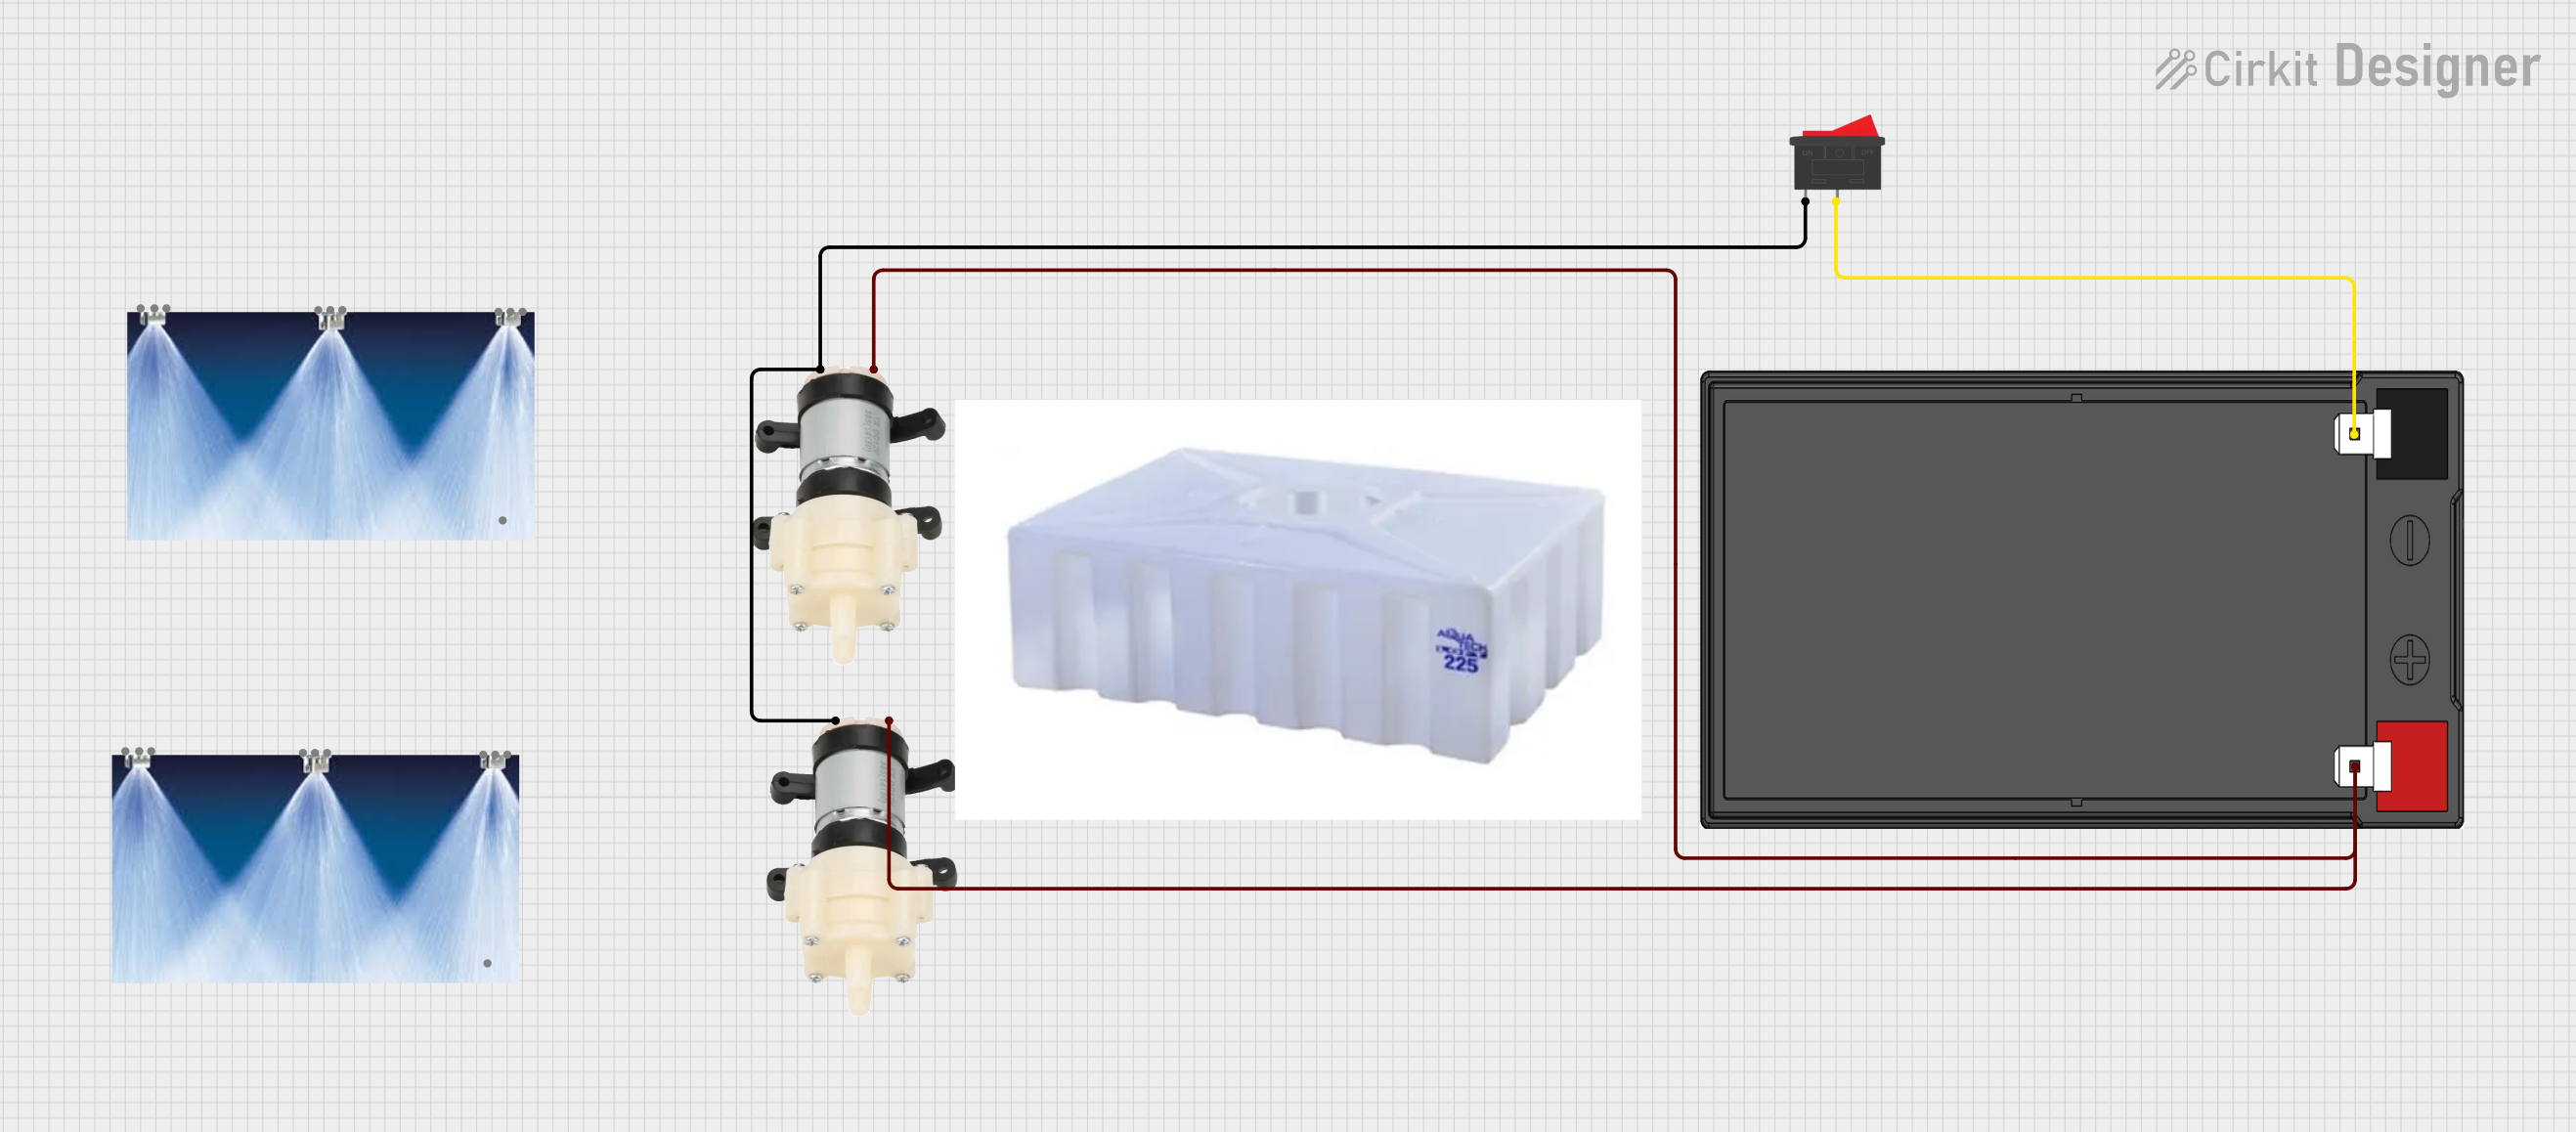
- Connection: Connect the red wire to the positive terminal of the power supply and the black wire to the ground terminal.
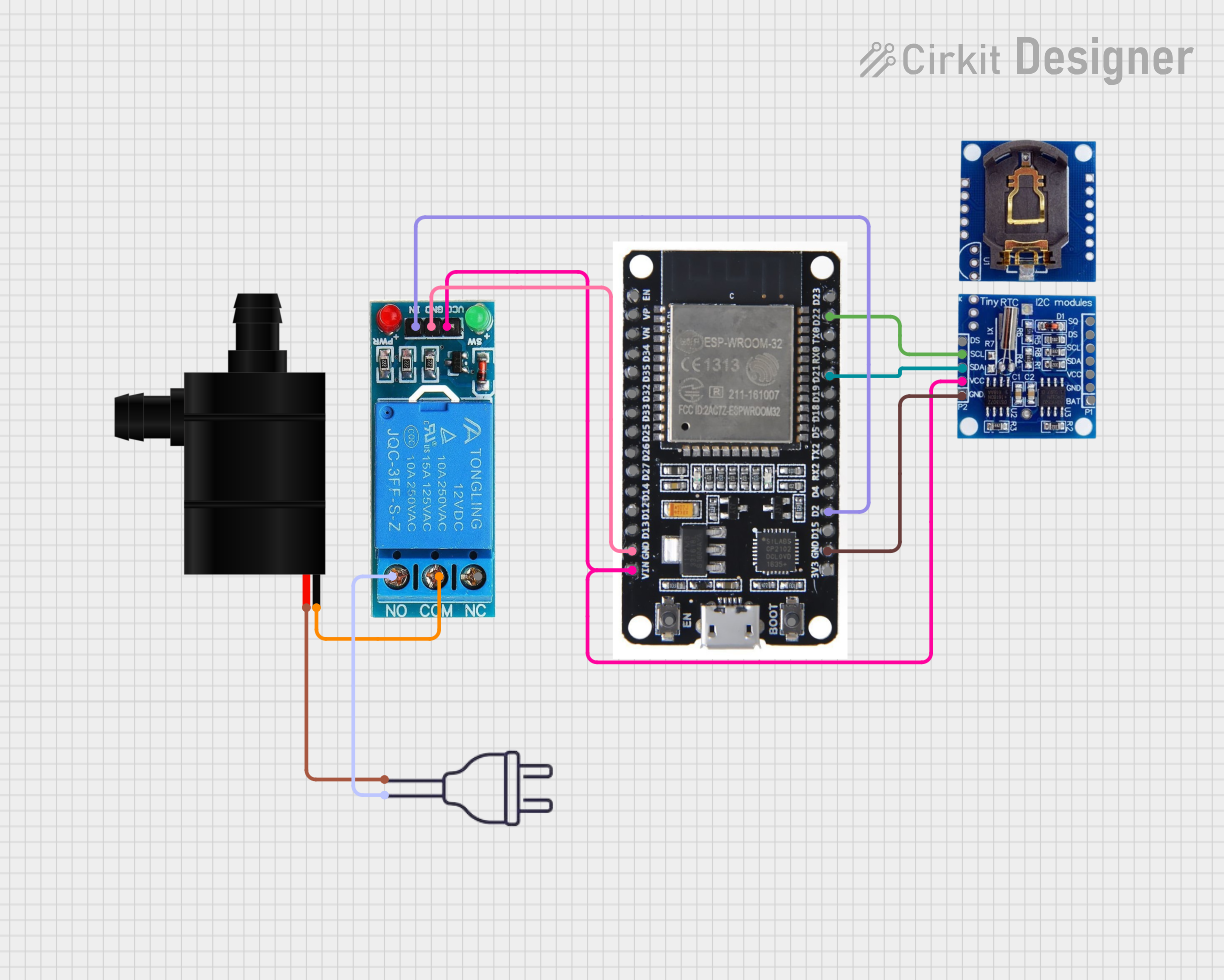
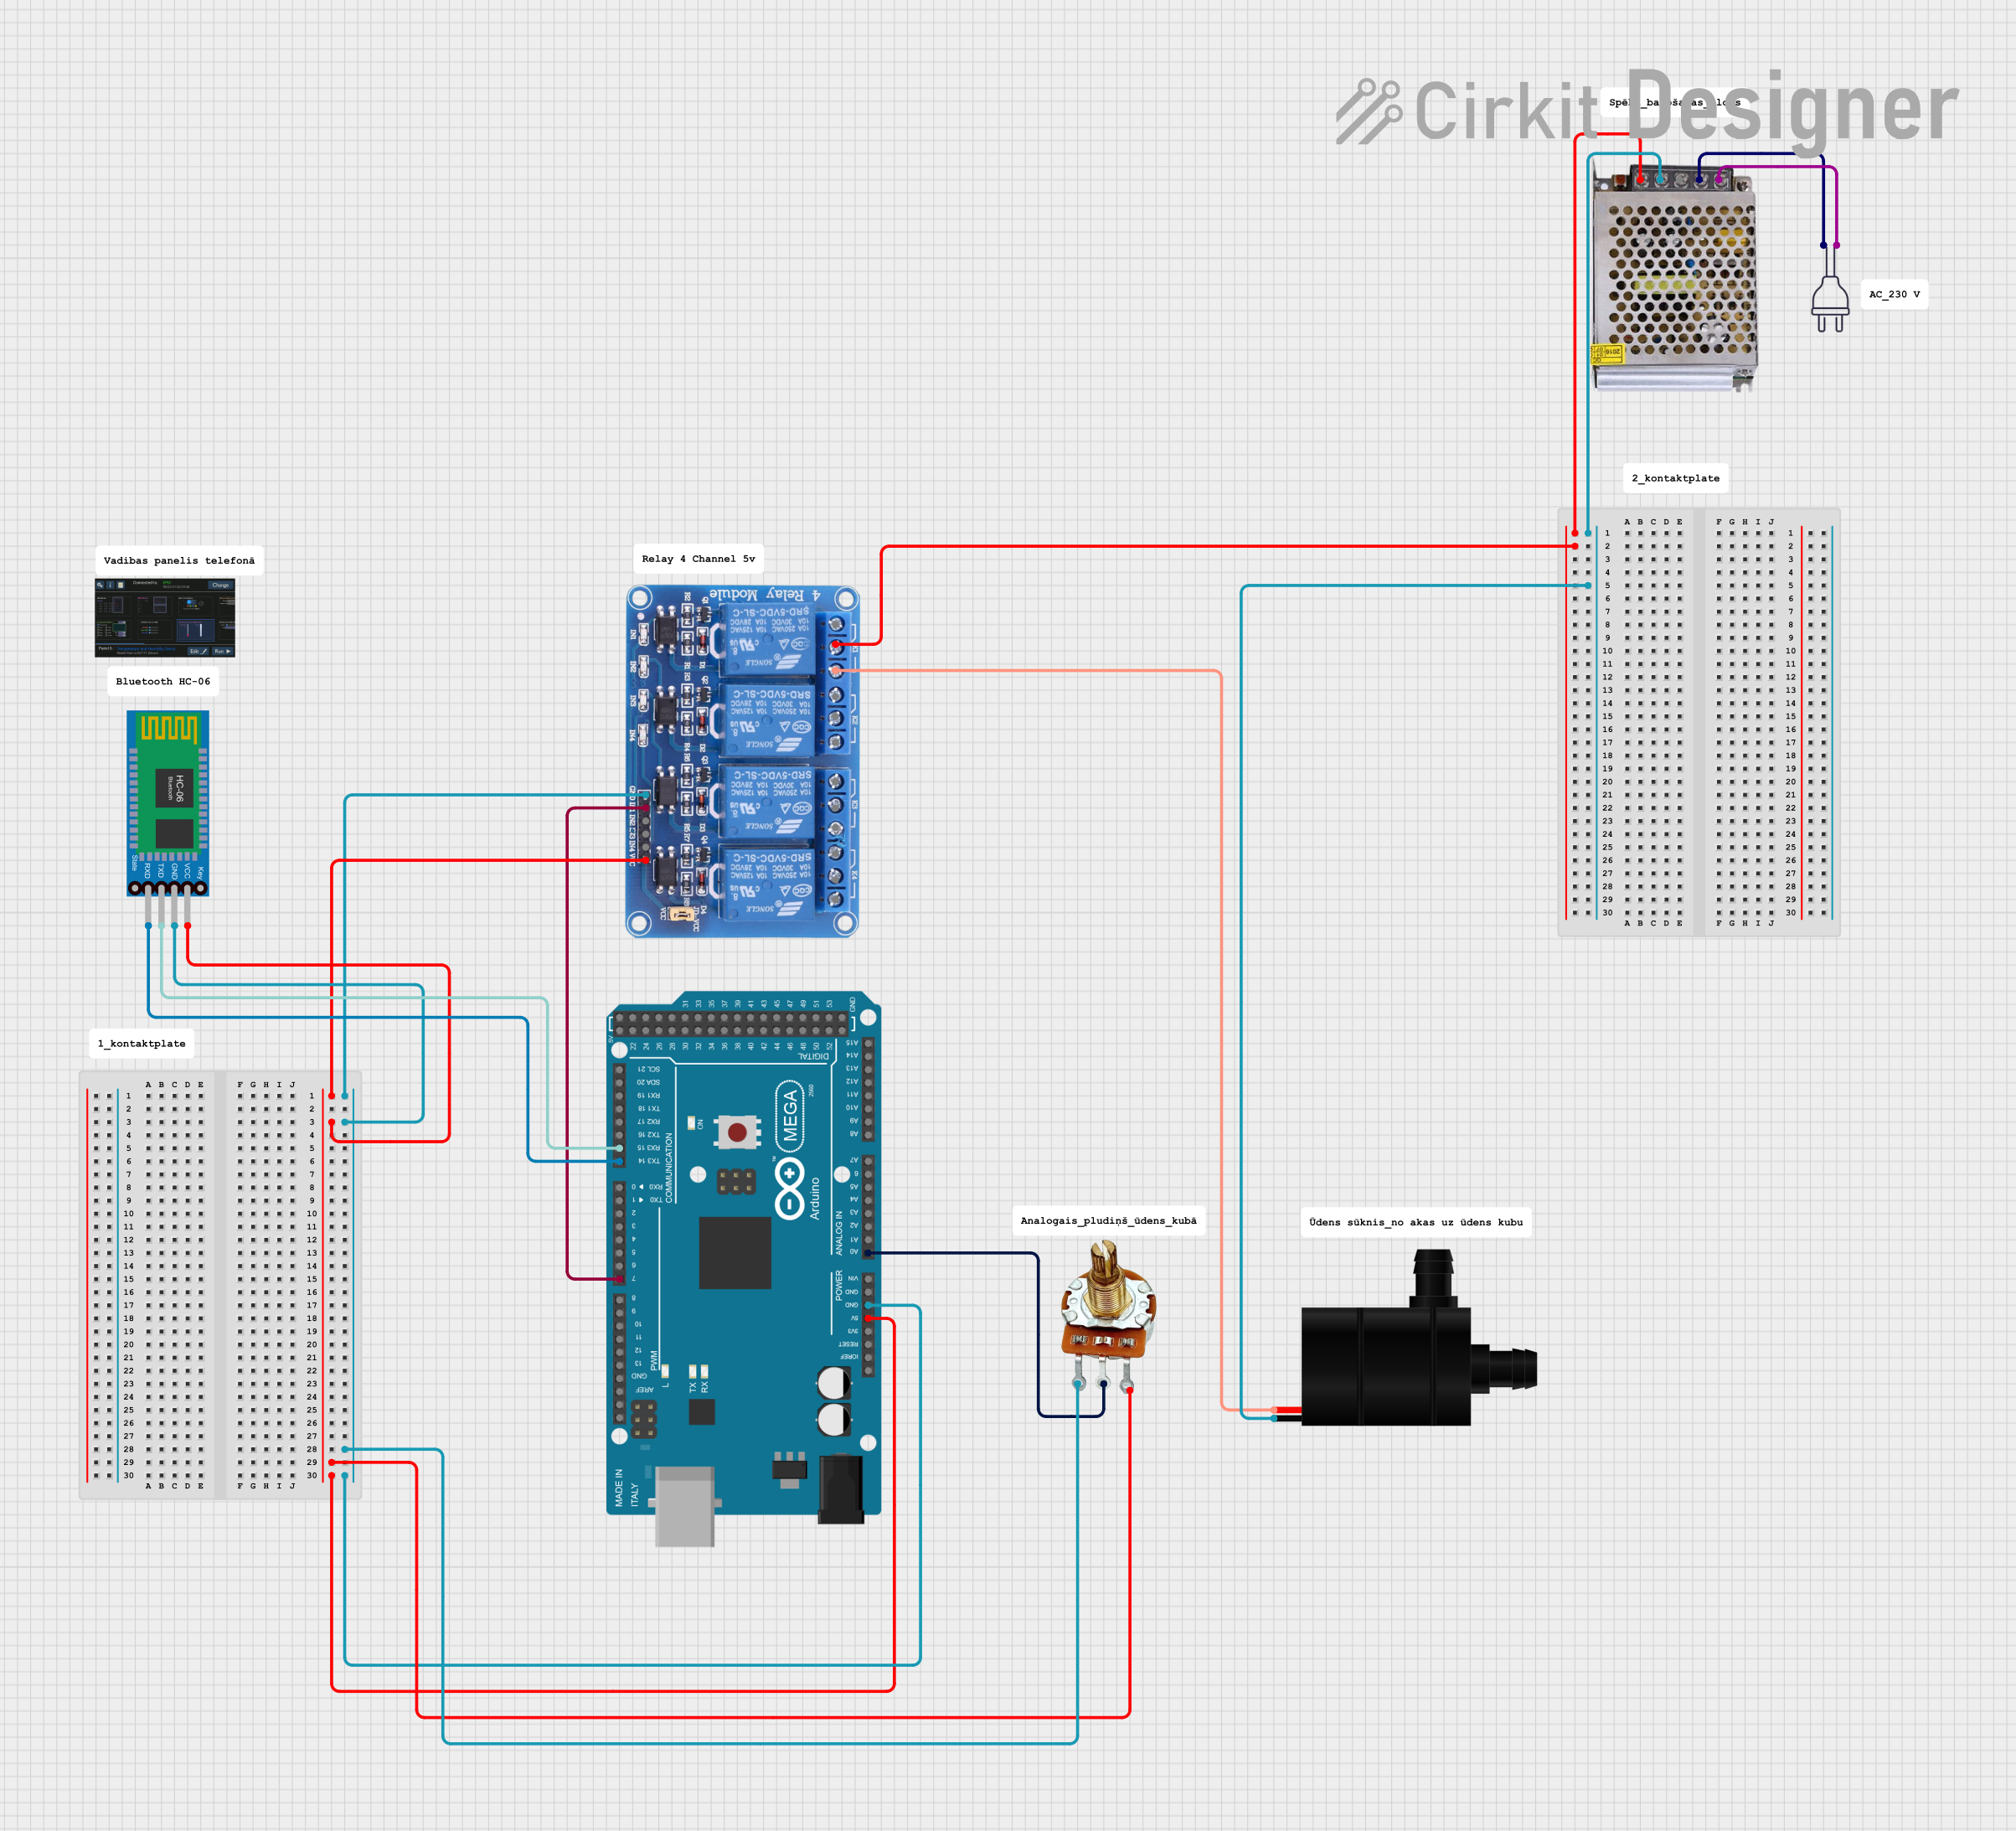
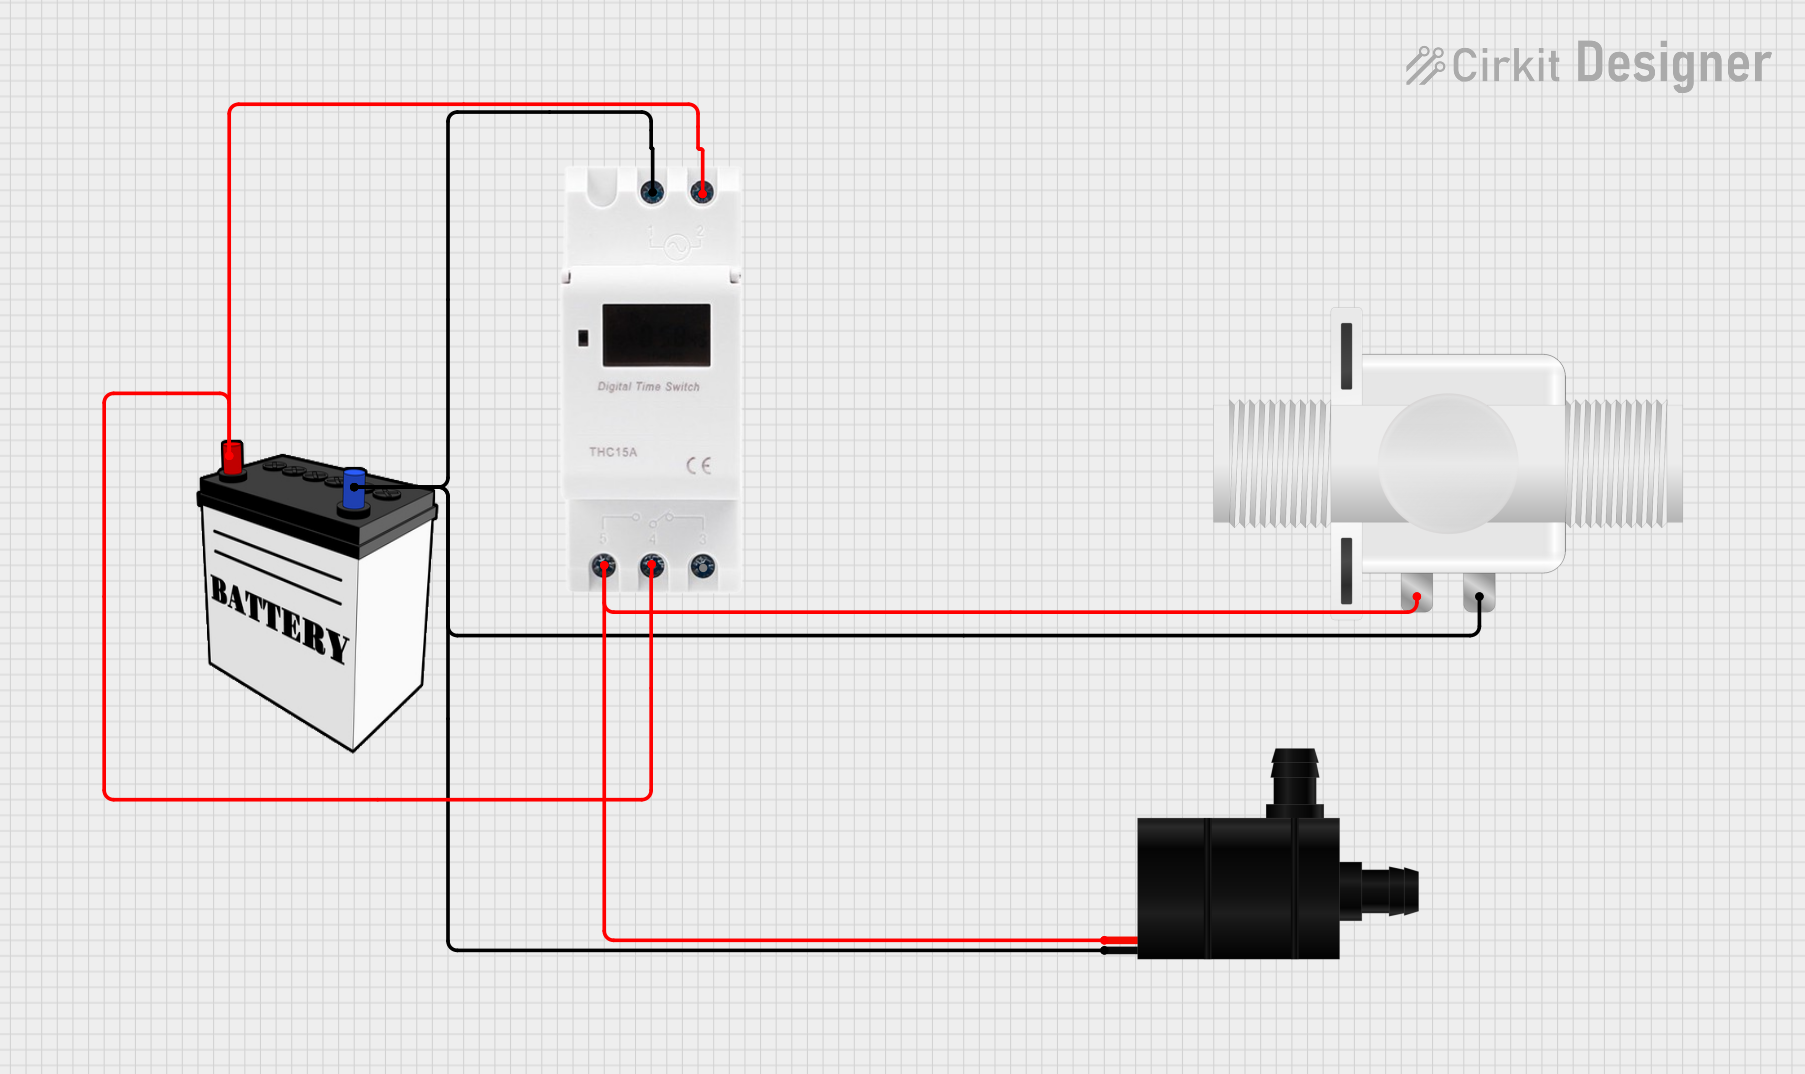
- Control: For automated control, use a motor driver or relay module to switch the pump on and off. This is especially useful when integrating the pump with a microcontroller like an Arduino.
- Water Source: Submerge the pump (if submersible) or place the inlet hose in the water source. Ensure the pump is primed (filled with water) before operation to prevent damage.
Important Considerations and Best Practices
- Priming: Always ensure the pump is primed before use. Running the pump dry can cause overheating and damage.
- Voltage Regulation: Use a regulated power supply to avoid voltage spikes that could harm the pump.
- Filtration: Use a filter at the water inlet to prevent debris from clogging the pump.
- Cooling: Avoid prolonged operation in high-temperature environments to prevent overheating.
- Mounting: Secure the pump to minimize vibration and noise during operation.
Example: Controlling a Water Pump with Arduino UNO
Below is an example of how to control a water pump using an Arduino UNO and a relay module.
// Example: Controlling a water pump with Arduino and a relay module
// Ensure the relay module is connected to the Arduino and the pump is powered
// by an external power source within its voltage range.

const int relayPin = 7; // Pin connected to the relay module

void setup() {
  pinMode(relayPin, OUTPUT); // Set the relay pin as an output
  digitalWrite(relayPin, LOW); // Ensure the relay is off at startup
}

void loop() {
  // Turn the pump on
  digitalWrite(relayPin, HIGH); // Activate the relay
  delay(5000); // Keep the pump on for 5 seconds

  // Turn the pump off
  digitalWrite(relayPin, LOW); // Deactivate the relay
  delay(5000); // Keep the pump off for 5 seconds
}
Note: Always use a separate power supply for the pump to avoid overloading the Arduino's power regulator.
Troubleshooting and FAQs
Common Issues and Solutions
Pump Not Running
- Cause: No power supply or incorrect wiring.
- Solution: Check the power supply voltage and ensure proper wiring (red to positive, black to ground).
Low Water Flow
- Cause: Clogged inlet or insufficient power.
- Solution: Clean the inlet filter and verify the power supply voltage.
Pump Overheating
- Cause: Running the pump dry or operating in a high-temperature environment.
- Solution: Ensure the pump is primed and avoid prolonged operation in hot conditions.
Excessive Noise
- Cause: Loose mounting or debris in the pump.
- Solution: Secure the pump and clean any debris from the impeller.
FAQs
Q: Can I use the pump with AC power?
- A: No, this pump is designed for DC power only. Use a DC power supply or battery.
Q: Is the pump waterproof?
- A: Submersible pumps are waterproof and can be fully submerged. Non-submersible pumps should not be exposed to water.
Q: Can I control the pump speed?
- A: Basic pumps do not support speed control. For variable speed, use a pump with a built-in speed controller or a compatible motor driver.
Q: How do I prevent the pump from running dry?
- A: Use a water level sensor to monitor the water source and automatically turn off the pump when the water level is low.
This documentation provides a comprehensive guide to understanding, using, and troubleshooting a water pump. Always refer to the manufacturer's datasheet for model-specific details.