How to Use CN3065 Solar Charge: Examples, Pinouts, and Specs
Introduction
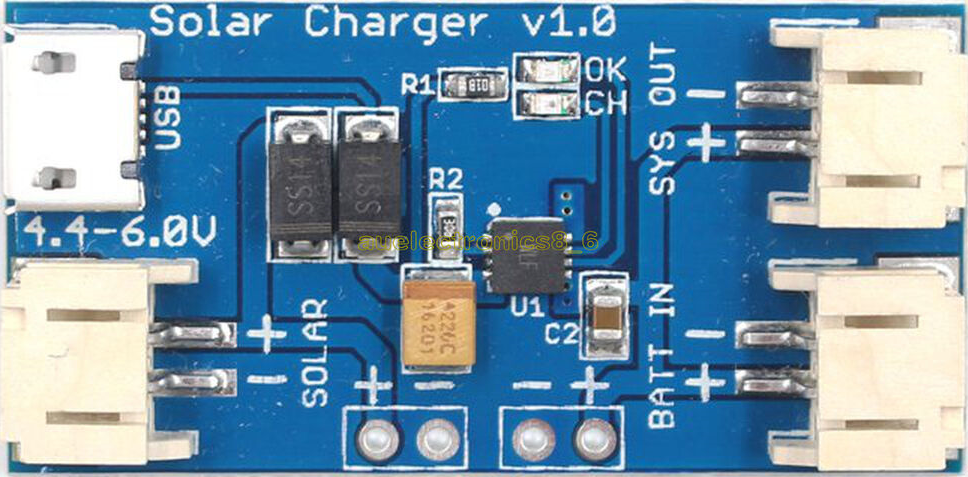
The CN3065 Solar Charge Controller is a monolithic integrated circuit that optimizes the charging of lithium-ion batteries from solar panels. It is designed to be simple to use, efficient, and safe, incorporating multiple protection features. This component is commonly used in portable solar power systems, solar-powered IoT devices, and other applications where efficient solar charging of lithium-ion batteries is required.
Explore Projects Built with CN3065 Solar Charge
Explore Projects Built with CN3065 Solar Charge
Technical Specifications
Key Technical Details
- Input Voltage Range: 4.4V to 6V
- Maximum Charge Current: Adjustable up to 500mA
- Battery Voltage: 4.2V (fixed)
- Charge Accuracy: ±1%
- Operating Temperature Range: -40°C to +85°C
Pin Configuration and Descriptions
| Pin Number | Name | Description |
|---|---|---|
| 1 | VBAT | Battery connection pin. Connect to the positive terminal of the Li-ion battery. |
| 2 | GND | Ground pin. Connect to the system ground and negative terminal of the battery. |
| 3 | VSS | Solar panel negative connection. Connect to the negative terminal of the solar panel. |
| 4 | VIN | Solar panel positive input. Connect to the positive terminal of the solar panel. |
| 5 | SET | Charge current setting pin. Connect to a resistor to set the desired charge current. |
| 6 | TEMP | Temperature sense pin. Connect to an NTC thermistor for temperature compensation. |
| 7 | STAT | Status indication pin. Outputs the charging status which can be used to drive an LED or connect to a microcontroller. |
| 8 | CE | Chip enable pin. Drive high to enable charging, low to disable. |
Usage Instructions
How to Use the CN3065 in a Circuit
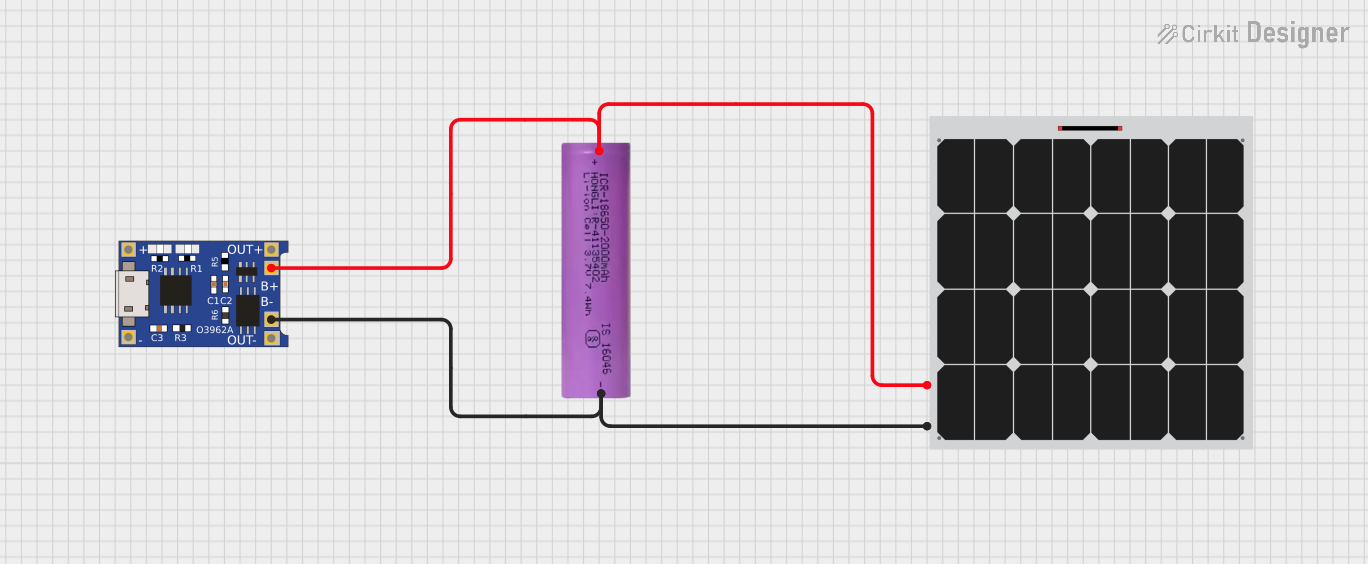
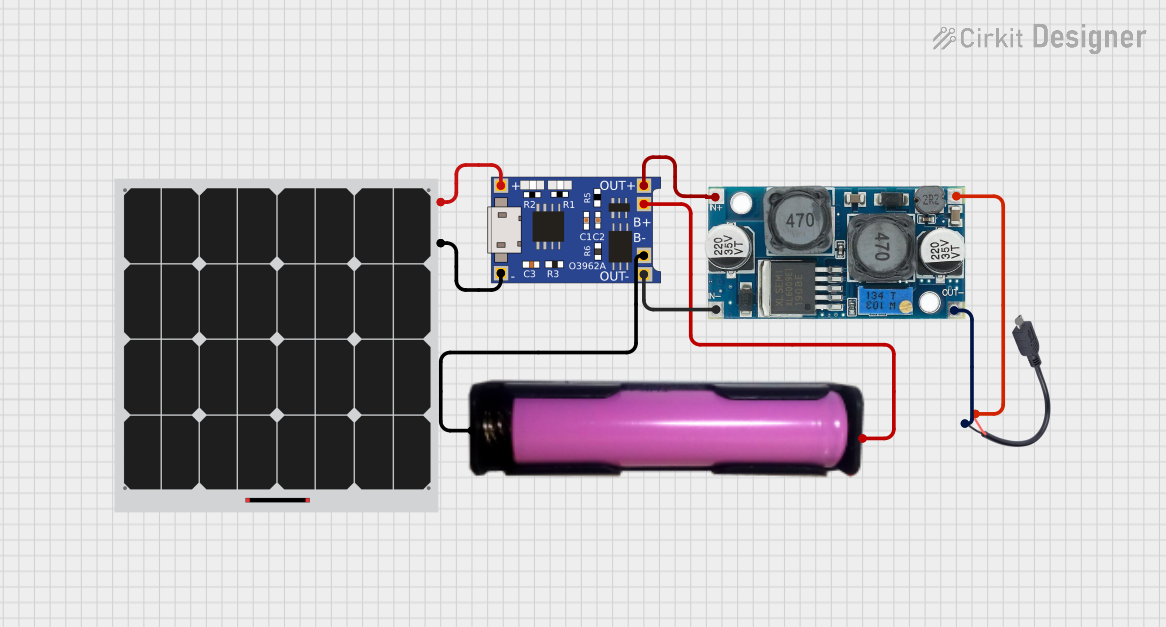
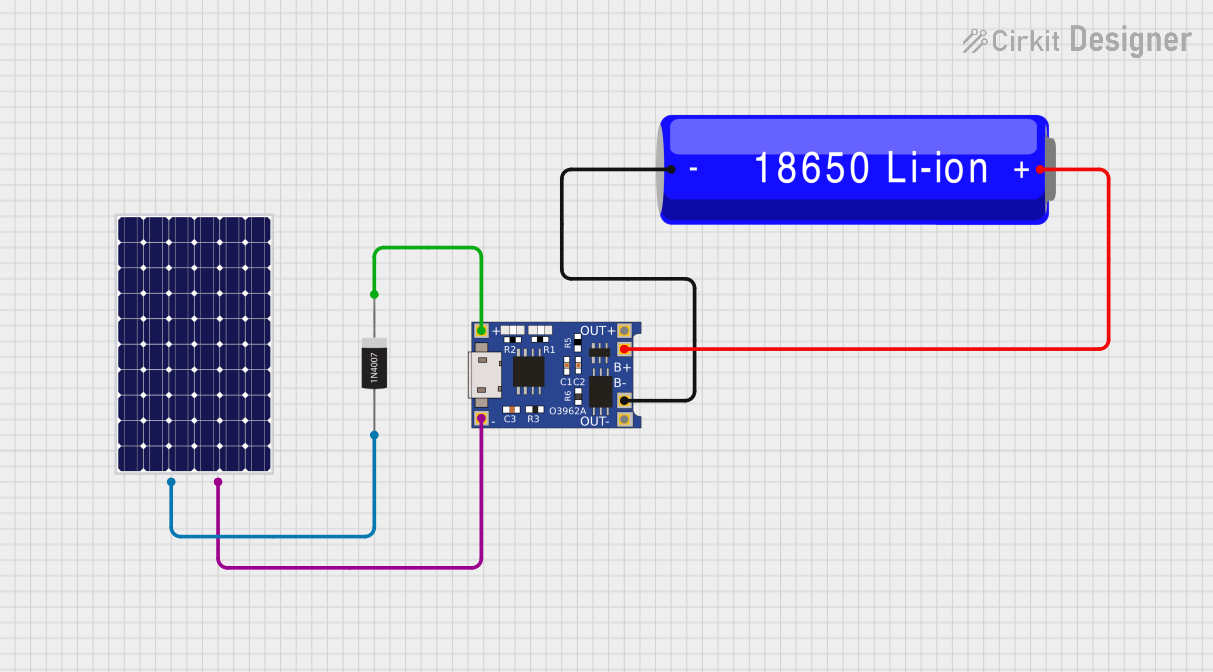
Connecting the Solar Panel:
- Connect the positive terminal of the solar panel to the VIN pin.
- Connect the negative terminal of the solar panel to the VSS pin.
Connecting the Battery:
- Connect the positive terminal of the Li-ion battery to the VBAT pin.
- Connect the negative terminal of the Li-ion battery to the GND pin.
Setting the Charge Current:
- Connect a resistor between the SET pin and GND to set the desired charge current according to the datasheet's recommendations.
Temperature Compensation (Optional):
- Connect an NTC thermistor to the TEMP pin for temperature compensation.
Status Indication:
- Connect an LED and a current-limiting resistor to the STAT pin to indicate the charging status.
Enabling the Chip:
- Drive the CE pin high to enable charging.
Important Considerations and Best Practices
- Ensure that the solar panel's open-circuit voltage does not exceed the maximum input voltage rating of the CN3065.
- Use a current-limiting resistor with the STAT pin if an LED is used for status indication.
- Always provide proper heat dissipation for the CN3065, especially when charging at higher currents.
- Use a multimeter to verify all connections and voltages before powering the circuit.
Troubleshooting and FAQs
Common Issues
- No Charging: Ensure the CE pin is driven high and that all connections are secure.
- Overheating: Check if the charge current is set too high or if there is inadequate heat sinking.
- Fluctuating Charge Current: Ensure that the solar panel receives consistent sunlight and is not shaded.
Solutions and Tips
- No Charging: Verify the input voltage from the solar panel and the battery connection.
- Overheating: Reduce the charge current or improve heat dissipation.
- Fluctuating Charge Current: Use a solar panel with a higher power rating to provide a more stable input.
FAQs
Q: Can the CN3065 charge other types of batteries? A: The CN3065 is specifically designed for charging single-cell lithium-ion batteries.
Q: What size resistor do I need to set the charge current? A: Refer to the datasheet for the resistor value calculation based on the desired charge current.
Q: How do I know if the CN3065 is charging the battery? A: The STAT pin can be used to drive an LED or connect to a microcontroller to indicate the charging status.
Q: Can I use multiple CN3065 controllers to charge multiple batteries from one solar panel? A: Yes, but ensure each CN3065 is properly configured and that the solar panel can provide sufficient current for all connected batteries.
Example Arduino Code
// Define the Arduino pin connected to the STAT pin of the CN3065
const int statusPin = 2;

void setup() {
  pinMode(statusPin, INPUT);
  Serial.begin(9600);
}

void loop() {
  // Read the charging status from the CN3065
  bool isCharging = digitalRead(statusPin);

  // Output the charging status to the Serial Monitor
  if (isCharging) {
    Serial.println("Charging...");
  } else {
    Serial.println("Not Charging or Charge Complete");
  }

  // Wait for a second before reading the status again
  delay(1000);
}
This example code sets up an Arduino to read the charging status from the CN3065's STAT pin and print the status to the Serial Monitor. The statusPin should be connected to the STAT pin of the CN3065, and the Arduino's ground should be connected to the CN3065's GND pin.