Cirkit Designer LogoCirkit DesignerYour all-in-one circuit design IDE Launch Cirkit Designer App

How to Use PLUG: Examples, Pinouts, and Specs

Image of PLUGDesign with PLUG in Cirkit Designer

Introduction

A plug is a device that connects an electrical appliance to a power source, allowing electricity to flow into the appliance. It is an essential component in electrical systems, enabling the safe and efficient transfer of power. Plugs are commonly used in household appliances, industrial equipment, and portable devices. They come in various types and configurations to suit different power standards and regions.

Explore Projects Built with PLUG

Use Cirkit Designer to design, explore, and prototype these projects online. Some projects support real-time simulation. Click "Open Project" to start designing instantly!
Image of Pushbutton Interface with General Purpose I/O Plug: A project utilizing PLUG in a practical application

Pushbutton Interface with General Purpose I/O Plug

This circuit consists of a General Purpose Input/Output (GPIO) plug connected to four pushbuttons. Each pushbutton is wired to a unique input pin on the GPIO plug, allowing the state of each button (pressed or not pressed) to be detected individually. The common terminals of the pushbuttons are interconnected and likely serve as a ground or reference voltage connection.

Open Project in Cirkit Designer
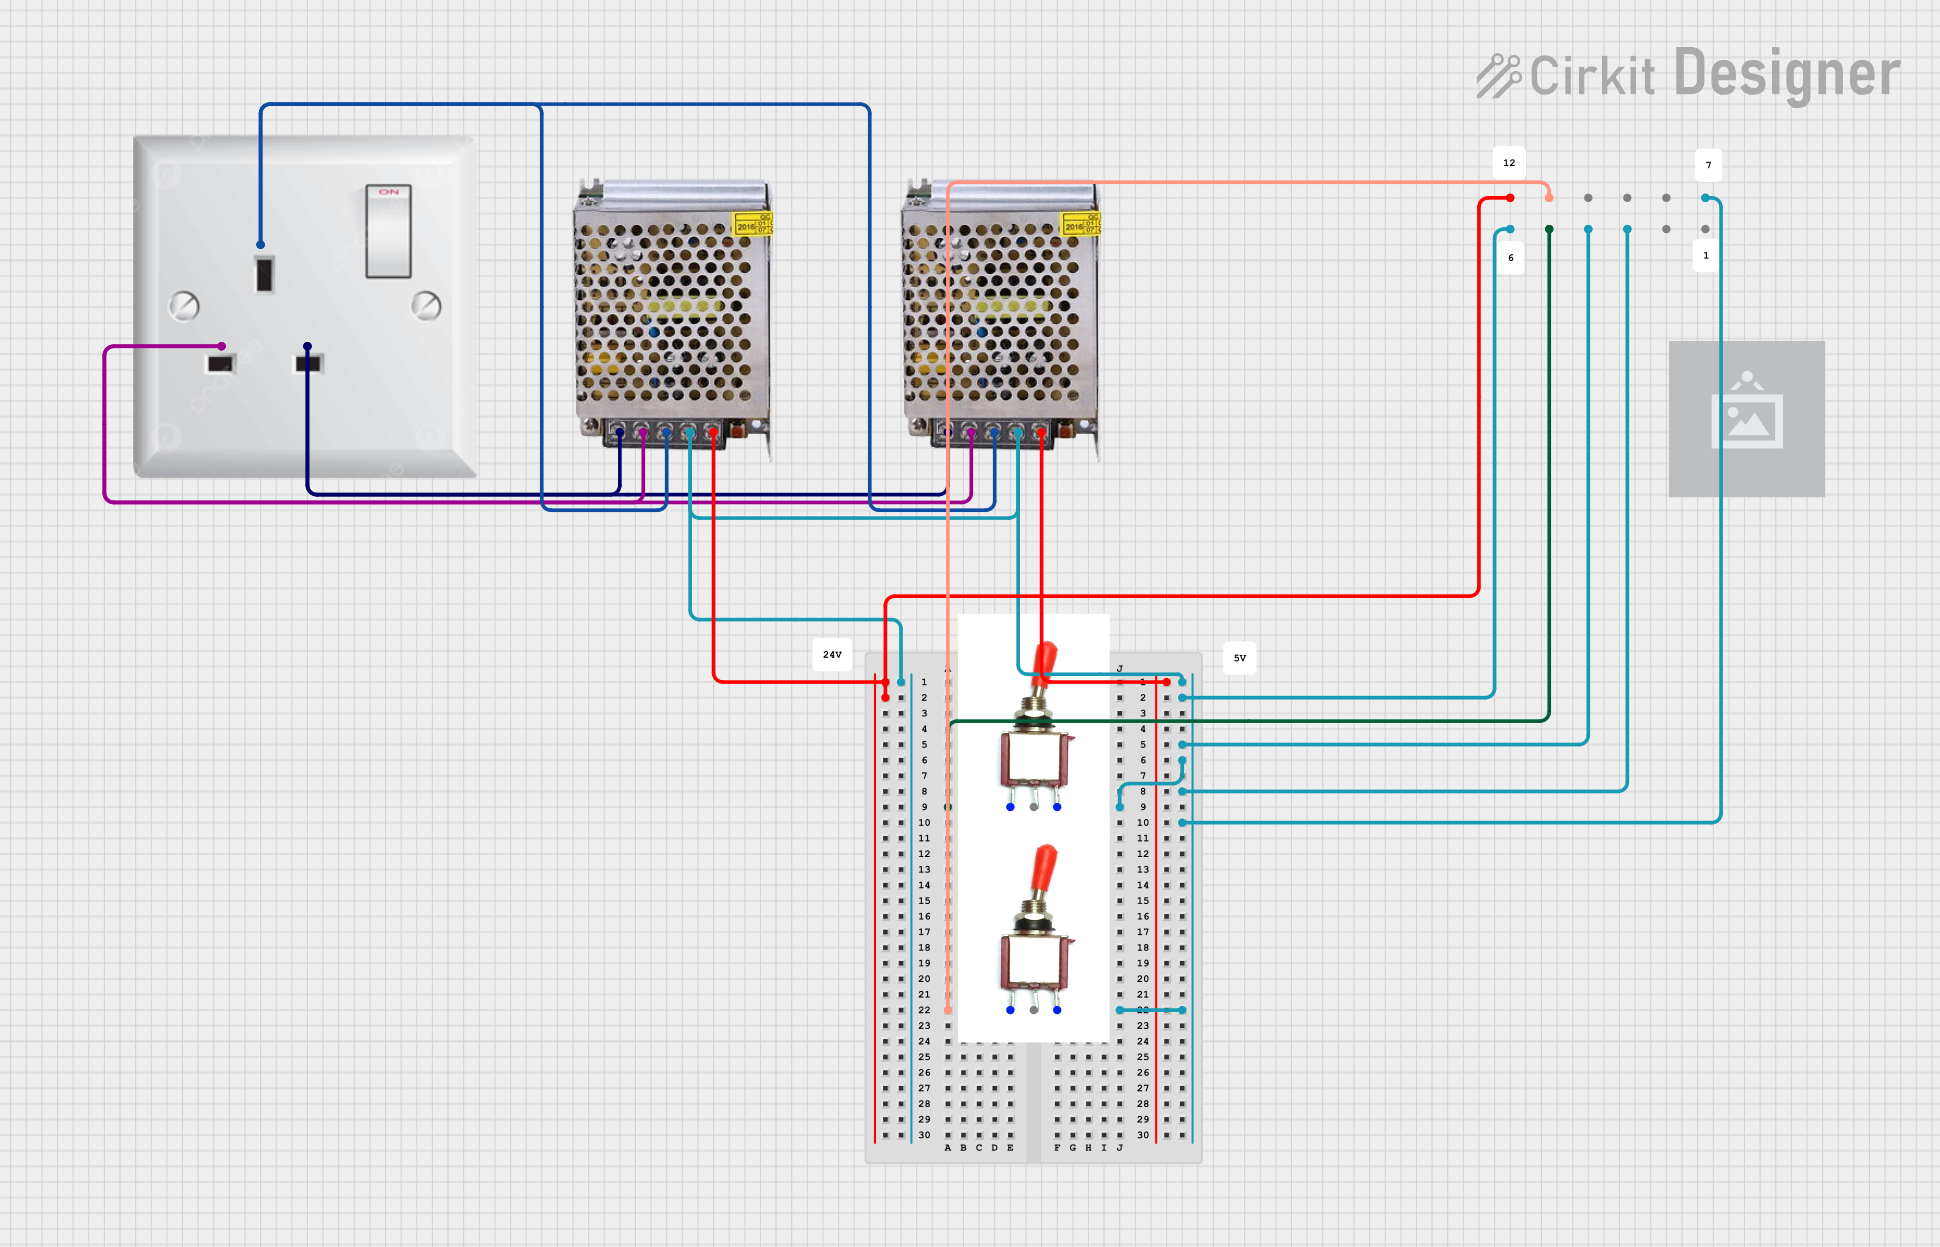
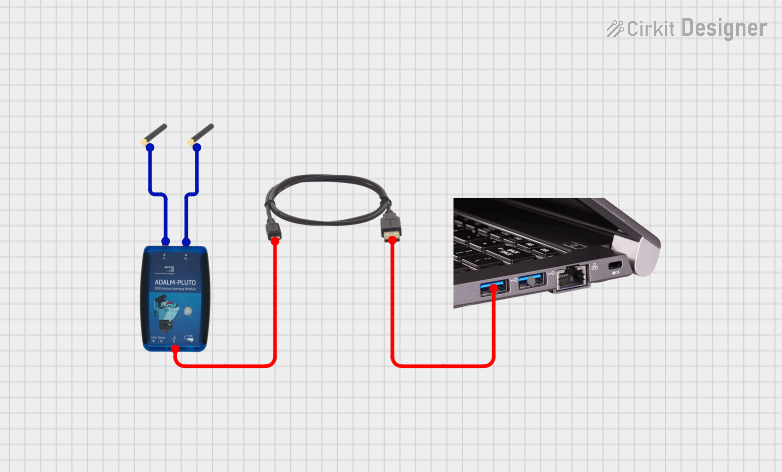
Image of Dual 5V Power Supply Distribution Circuit with Toggle Switch Control: A project utilizing PLUG in a practical application
Dual 5V Power Supply Distribution Circuit with Toggle Switch Control

This circuit consists of two 5V 5A power supplies connected to an AC wall plug point, providing DC output through a 12-way connector. The ground connections from both power supplies are interconnected and also connected to the ground pins of two toggle switches. The DC outputs from the power supplies are separately connected to different pins on the 12-way connector, with each power supply output being switchable via one of the toggle switches.

Open Project in Cirkit Designer
Image of Laptop-Connected Adalm Pluto SDR with Dual Antennas: A project utilizing PLUG in a practical application
Laptop-Connected Adalm Pluto SDR with Dual Antennas

This circuit connects an Adalm Pluto Software Defined Radio (SDR) to a laptop via a Type-B to USB cable, allowing the laptop to control the SDR and process signals. Additionally, two antennas are connected to the Adalm Pluto SDR, which are likely used for transmitting and receiving radio signals as part of the SDR's functionality.

Open Project in Cirkit Designer
Image of Heater Control Circuit with Power Socket Integration: A project utilizing PLUG in a practical application
Heater Control Circuit with Power Socket Integration

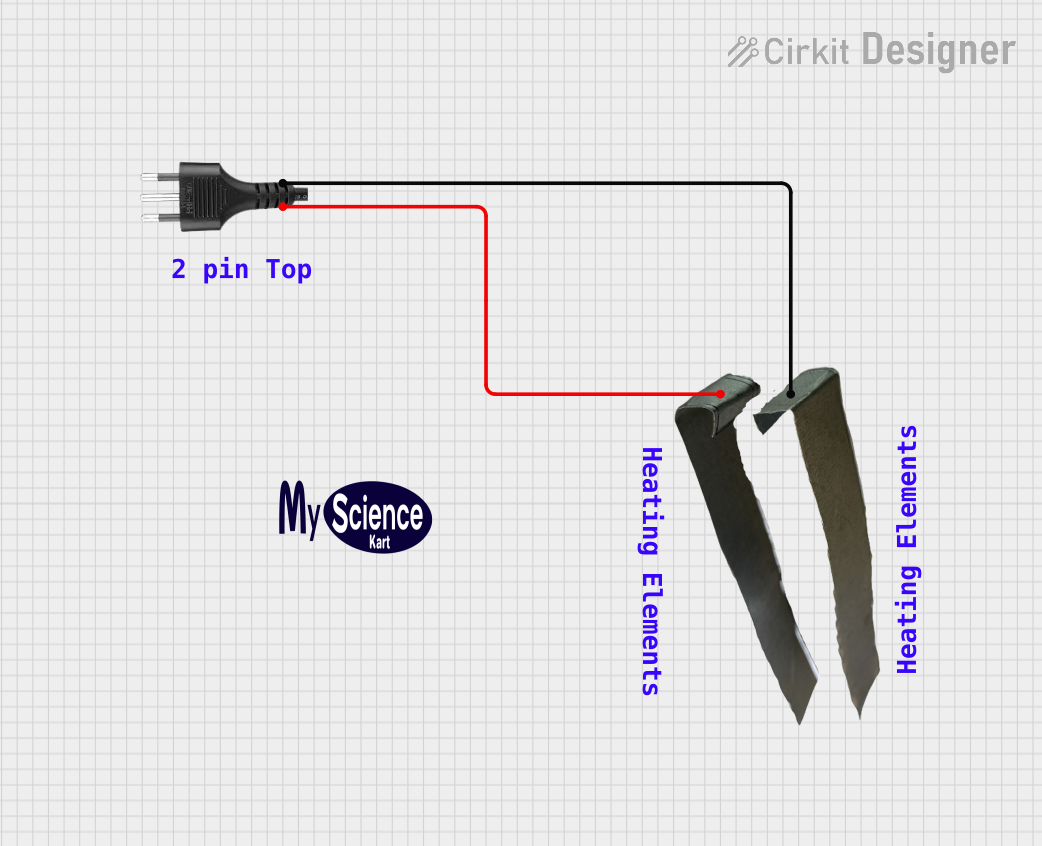
The circuit connects a heater to a power source via a socket. The heater is likely to be powered directly from the socket, with the positive and negative terminals of the socket providing the necessary voltage and ground connections to the heater. There are no control elements or sensors present in the circuit, indicating that the heater operates at a constant power level when connected.

Open Project in Cirkit Designer

Common Applications and Use Cases

Technical Specifications

The technical specifications of a plug vary depending on its type and regional standards. Below are general specifications for a standard plug:

General Specifications

Parameter Value/Description
Voltage Rating 110V - 240V AC (varies by region)
Current Rating 6A - 16A (depending on plug type)
Frequency 50Hz or 60Hz
Material Thermoplastic or thermoset for insulation
Contact Material Brass or copper alloy
Safety Features Grounding pin, insulated pins, shutters

Pin Configuration and Descriptions

The pin configuration of a plug depends on its type. Below is an example of a standard three-pin plug:

Pin Name Description
Live (L) Carries the current from the power source.
Neutral (N) Completes the circuit back to the power source.
Ground (G) Provides a safety path for fault currents.

Usage Instructions

How to Use the Plug in a Circuit

  1. Inspect the Plug: Ensure the plug is in good condition, with no visible damage to the pins or casing.
  2. Connect to Appliance: Attach the plug to the appliance's power cord securely.
  3. Insert into Outlet: Insert the plug into a compatible power outlet, ensuring a snug fit.
  4. Turn On Power: Switch on the power supply to energize the appliance.

Important Considerations and Best Practices

Example: Connecting a Plug to an Arduino UNO

If you are using a plug to power an Arduino UNO via an adapter, follow these steps:

  1. Use a plug with a compatible adapter that outputs 5V DC.
  2. Connect the adapter's output to the Arduino's power jack.
  3. Ensure the plug is securely connected to a power outlet.
// Example Arduino code to blink an LED
// Ensure the Arduino is powered via the plug and adapter

void setup() {
  pinMode(13, OUTPUT); // Set pin 13 as an output for the LED
}

void loop() {
  digitalWrite(13, HIGH); // Turn the LED on
  delay(1000);            // Wait for 1 second
  digitalWrite(13, LOW);  // Turn the LED off
  delay(1000);            // Wait for 1 second
}

Troubleshooting and FAQs

Common Issues Users Might Face

  1. Plug Does Not Fit Outlet:

    • Cause: Incorrect plug type for the region.
    • Solution: Use a plug adapter or replace the plug with a compatible type.
  2. Appliance Does Not Power On:

    • Cause: Loose connection or damaged plug.
    • Solution: Ensure the plug is securely inserted and inspect for damage.
  3. Overheating Plug:

    • Cause: Overloading or poor contact.
    • Solution: Reduce the load or replace the plug if the pins are worn.
  4. Sparks When Plugging In:

    • Cause: Faulty outlet or plug.
    • Solution: Inspect both the plug and outlet for damage and replace as needed.

Solutions and Tips for Troubleshooting