How to Use Waveshare 2.8 Inch TFT: Examples, Pinouts, and Specs
Introduction
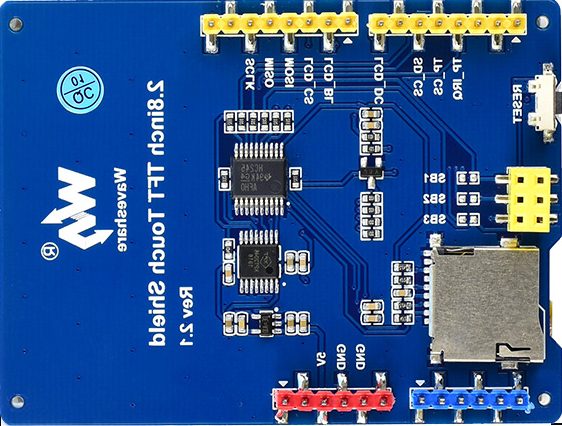
The Waveshare 2.8 Inch TFT display module is a compact and versatile display screen that measures 2.8 inches diagonally. It is designed for use in a wide range of electronic projects, providing a high-quality visual output that can display images, text, and graphics. Common applications include handheld instruments, touch-enabled control panels, and user interfaces for various embedded systems.
Explore Projects Built with Waveshare 2.8 Inch TFT


Explore Projects Built with Waveshare 2.8 Inch TFT
Technical Specifications
General Features
- Display Size: 2.8 inches
- Display Resolution: 320 x 240 pixels
- Color Depth: 65K colors
- Interface: SPI
- Touch Screen: Resistive touch panel
- Onboard Controller: ILI9341
Electrical Characteristics
- Operating Voltage: 3.3V
- Logic Level Voltage: 3.3V / 5V compatible
- Current Consumption: TBD (depends on backlight brightness and usage)
Pin Configuration and Descriptions
| Pin Number | Pin Name | Description |
|---|---|---|
| 1 | VCC | Power supply (3.3V) |
| 2 | GND | Ground |
| 3 | CS | Chip select, active low |
| 4 | RESET | Reset signal, active low |
| 5 | D/C | Data/Command control |
| 6 | MOSI | Master Out Slave In, SPI data input |
| 7 | SCK | Serial Clock, SPI clock input |
| 8 | LED | Backlight control, active high |
| 9 | MISO | Master In Slave Out, SPI data output |
| 10 | T_CLK | Touch panel SPI clock |
| 11 | T_CS | Touch panel chip select, active low |
| 12 | T_DIN | Touch panel SPI data input |
| 13 | T_DO | Touch panel SPI data output |
| 14 | T_IRQ | Touch panel interrupt, active low |
Usage Instructions
Connecting to a Circuit
To use the Waveshare 2.8 Inch TFT display with an Arduino UNO, follow these steps:
- Connect the display module's VCC pin to the Arduino's 3.3V output.
- Connect the GND pin to the Arduino's ground.
- Connect the CS, RESET, D/C, MOSI, SCK, and LED pins to digital pins on the Arduino as per your design. The LED pin can be connected to a PWM-capable pin for backlight control.
- If using the touch functionality, connect T_CLK, T_CS, T_DIN, T_DO, and T_IRQ to additional digital pins on the Arduino.
Programming the Display
To control the display, you will need to include libraries that support the ILI9341 controller and SPI communication. The Adafruit_ILI9341 and Adafruit_GFX libraries are commonly used for this purpose.
Here is a basic example of initializing the display and drawing some text:
#include <Adafruit_GFX.h>    // Core graphics library
#include <Adafruit_ILI9341.h> // Hardware-specific library

// Pin definitions
#define TFT_CS     10
#define TFT_RST    9
#define TFT_DC     8

// Initialize the display
Adafruit_ILI9341 tft = Adafruit_ILI9341(TFT_CS, TFT_DC, TFT_RST);

void setup() {
  tft.begin(); // Initialize the display
  tft.setRotation(1); // Set the orientation

  // Fill the screen with black color
  tft.fillScreen(ILI9341_BLACK);

  // Set the text color to white with black background
  tft.setTextColor(ILI9341_WHITE, ILI9341_BLACK);
  tft.setTextSize(1); // Set the text size

  // Set the cursor position and print a message
  tft.setCursor(0, 0);
  tft.println("Hello, World!");
}

void loop() {
  // Main loop body (if needed)
}
Important Considerations and Best Practices
- Always ensure that the power supply voltage and logic levels are compatible with the display module to prevent damage.
- Use a level shifter if you are interfacing with a 5V microcontroller.
- When using the touch functionality, calibrate the touch screen for accurate touch detection.
- Avoid exposing the display to direct sunlight or high temperatures to prevent damage to the screen.
Troubleshooting and FAQs
Common Issues
- Display not powering on: Check the connections to VCC and GND, and ensure that the power supply is at the correct voltage.
- No display output: Verify that the SPI connections are correct and that the correct pins are being used in your code.
- Touch not responsive: Ensure that the touch panel pins are correctly connected and that the touch controller is properly initialized in your code.
Solutions and Tips
- Double-check all wiring against the pin configuration table.
- Use serial debugging to check if the display is initialized correctly.
- Make sure to use the correct libraries and that they are up to date.
FAQs
Q: Can I use this display with a 5V microcontroller? A: Yes, but you will need to use a level shifter to convert the 5V logic levels to 3.3V to avoid damaging the display.
Q: How can I control the backlight brightness? A: You can control the backlight brightness by connecting the LED pin to a PWM-capable pin on your microcontroller and adjusting the duty cycle.
Q: Is the touch panel calibrated out of the box? A: The touch panel may require calibration for accurate touch detection. This can typically be done through software using a calibration sketch.
This documentation provides a starting point for integrating the Waveshare 2.8 Inch TFT display module into your projects. For more detailed information, consult the datasheet and additional resources provided by Waveshare.