How to Use Adafruit AHT20 Temperature and Humidity Sensor: Examples, Pinouts, and Specs
Introduction
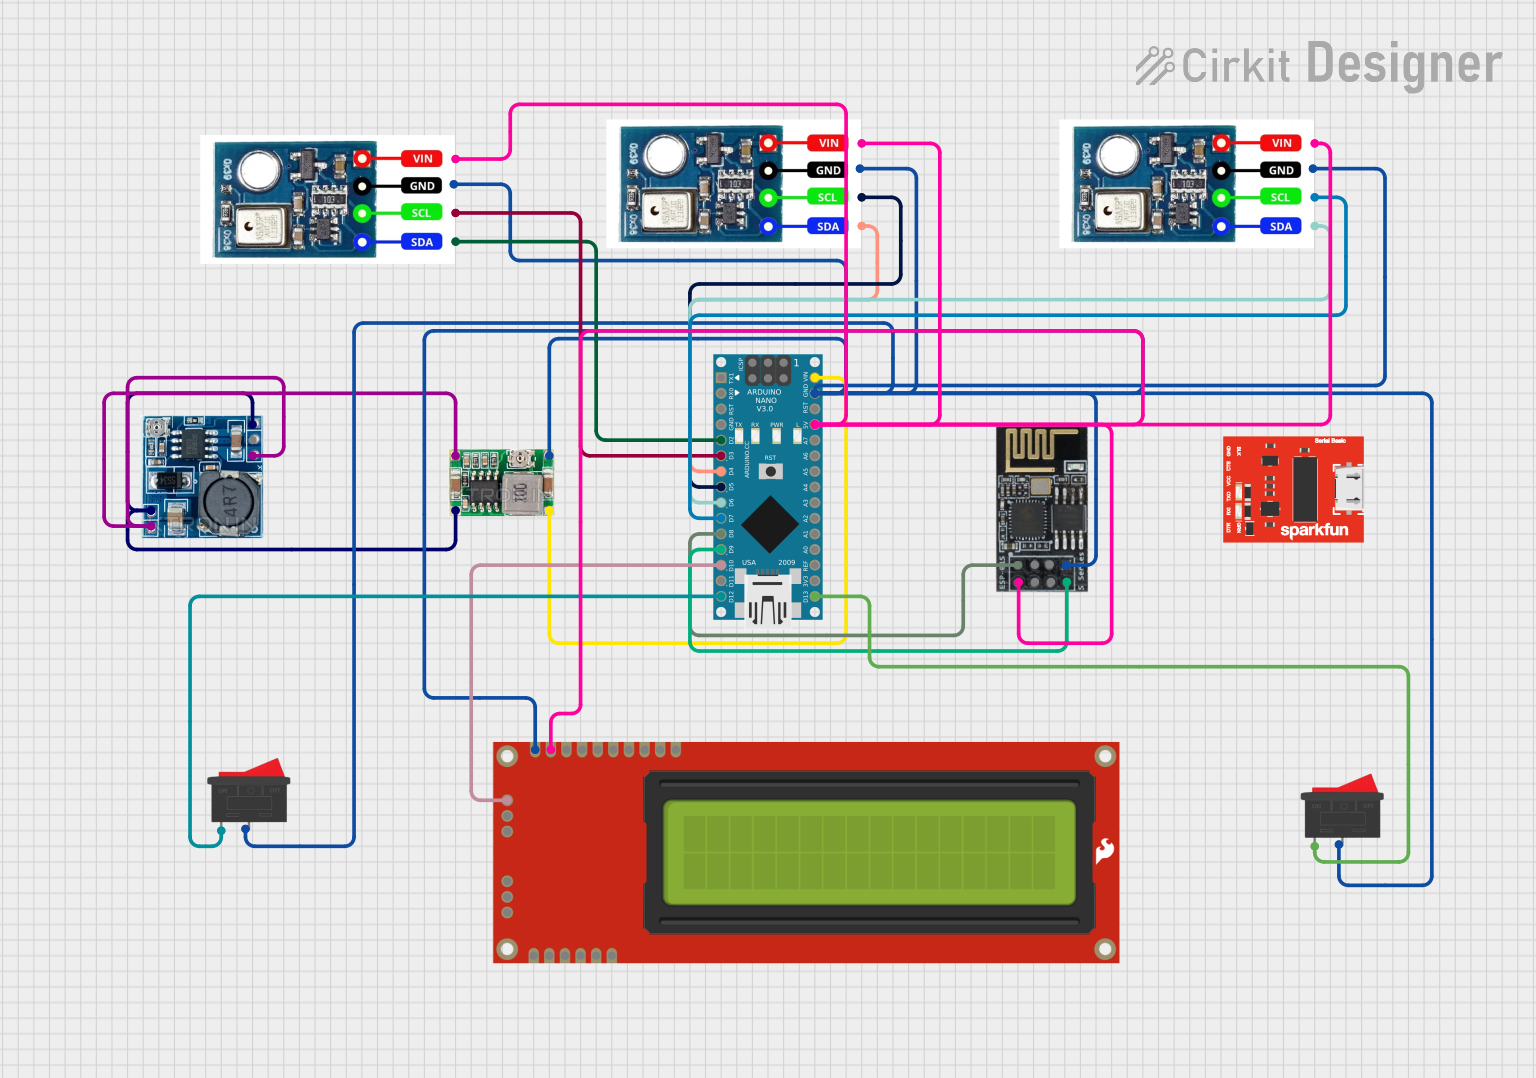
The Adafruit AHT20 is a high-accuracy temperature and humidity sensor that communicates over an I2C interface. It is designed to provide reliable and precise measurements of temperature and humidity, making it an ideal choice for environmental monitoring systems, HVAC systems, and other applications where environmental data is crucial.
Explore Projects Built with Adafruit AHT20 Temperature and Humidity Sensor
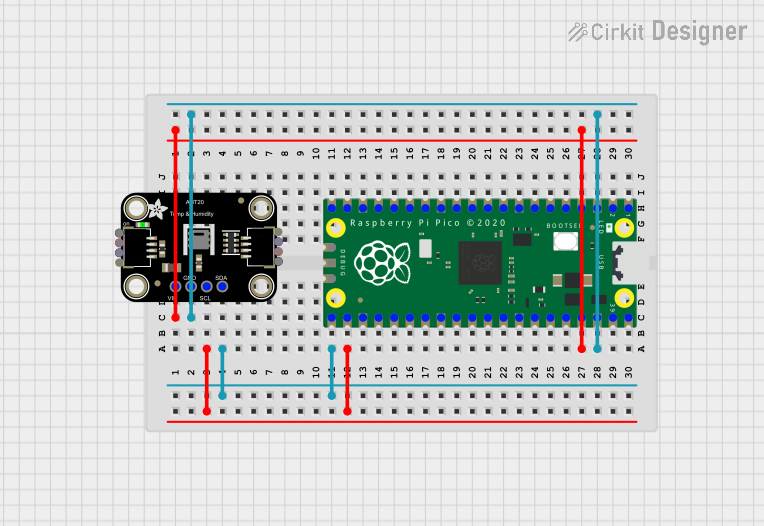
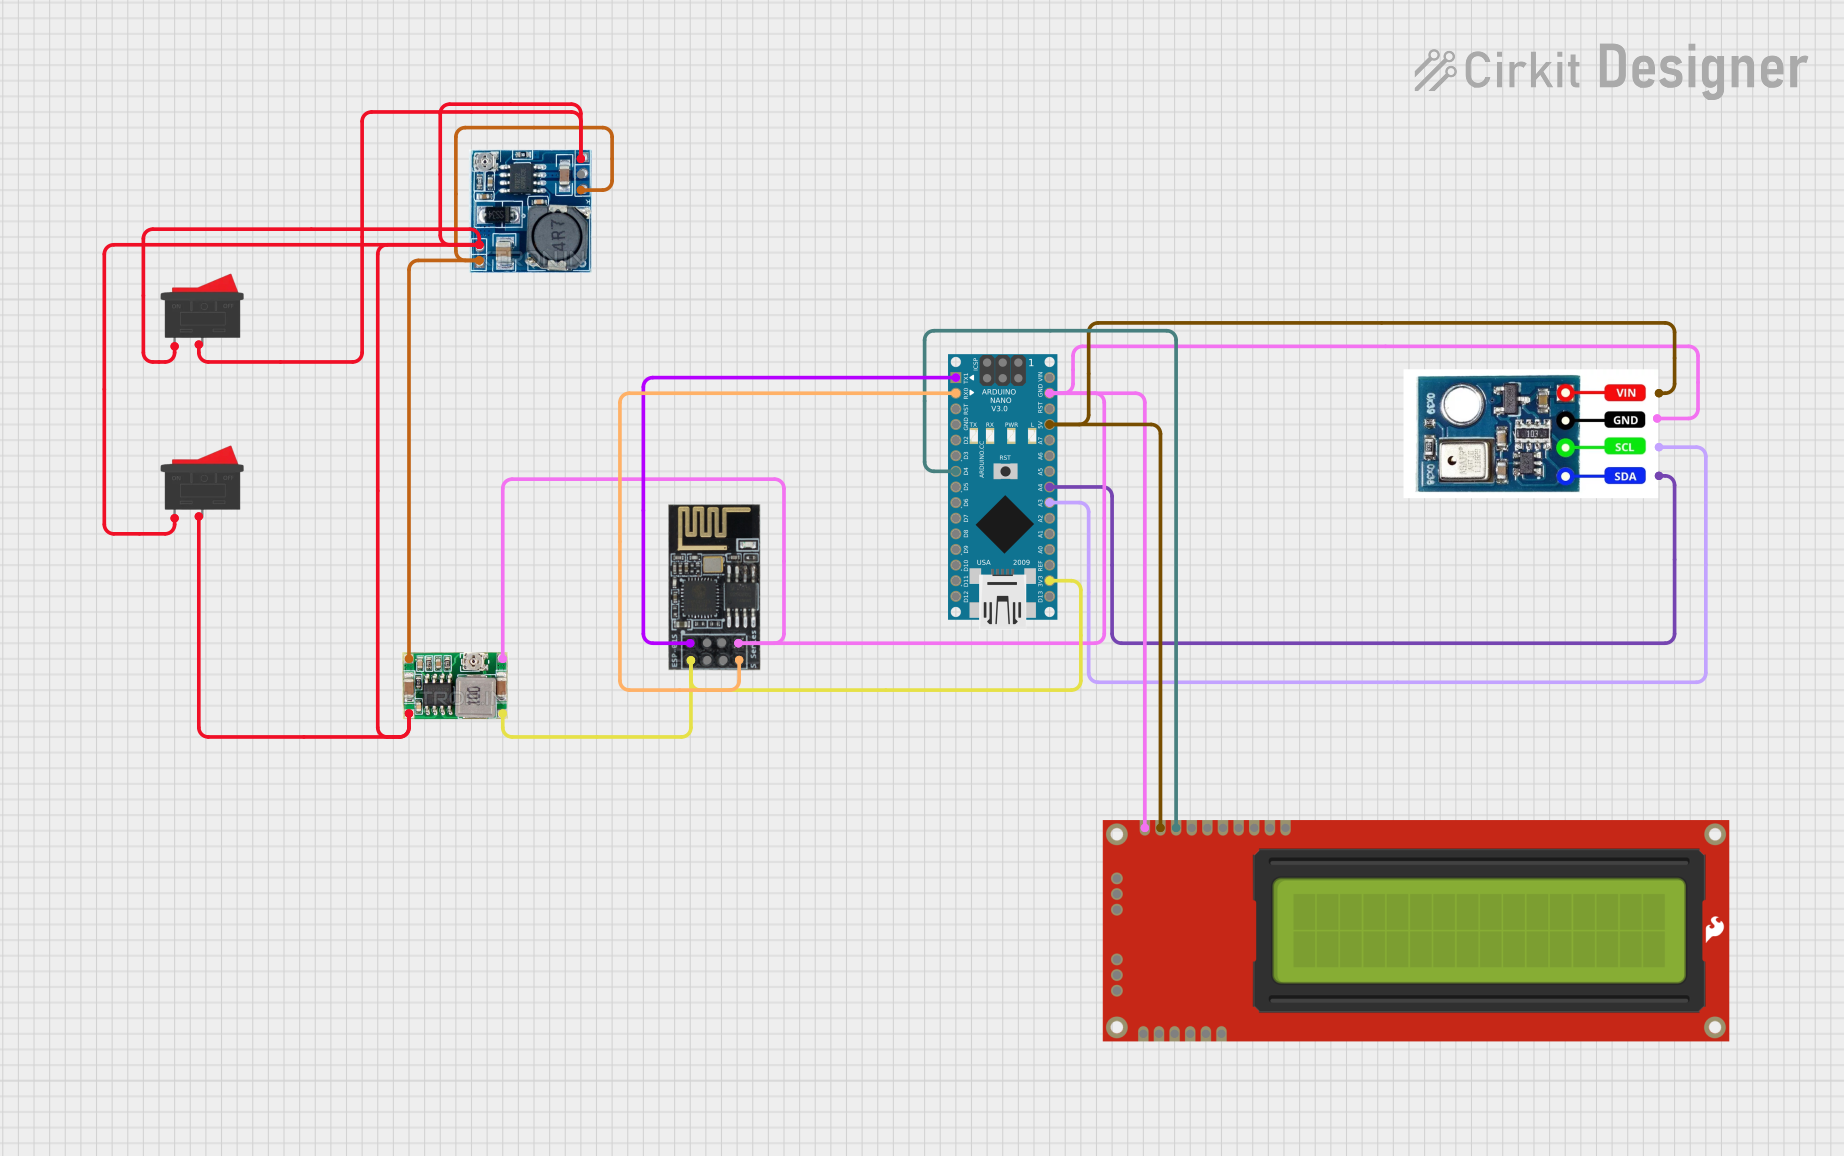
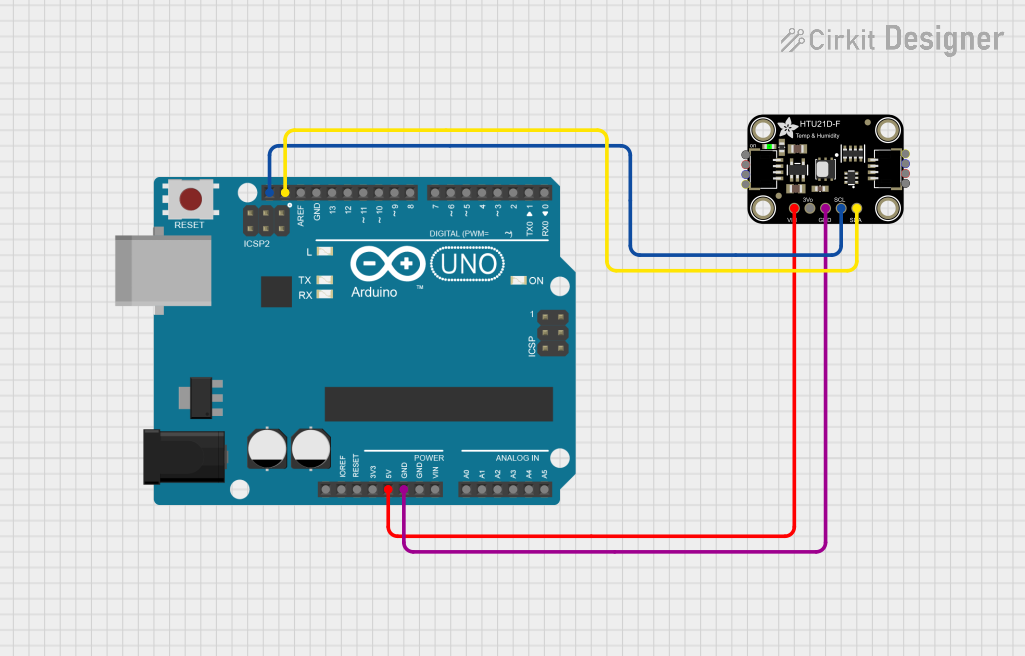
Explore Projects Built with Adafruit AHT20 Temperature and Humidity Sensor
Common Applications and Use Cases
- Home and building automation for climate control
- Weather stations
- Data logging for environmental research
- Smart agriculture and soil monitoring
- Industrial systems monitoring
Technical Specifications
Key Technical Details
- Supply Voltage (VDD): 2.2V to 5.5V
- Measuring Range (Humidity): 0% to 100% RH
- Measuring Range (Temperature): -40°C to 85°C
- Humidity Accuracy: ±2% RH
- Temperature Accuracy: ±0.3°C
- I2C Address: 0x38 (fixed)
- Resolution: 0.01% RH, 0.01°C
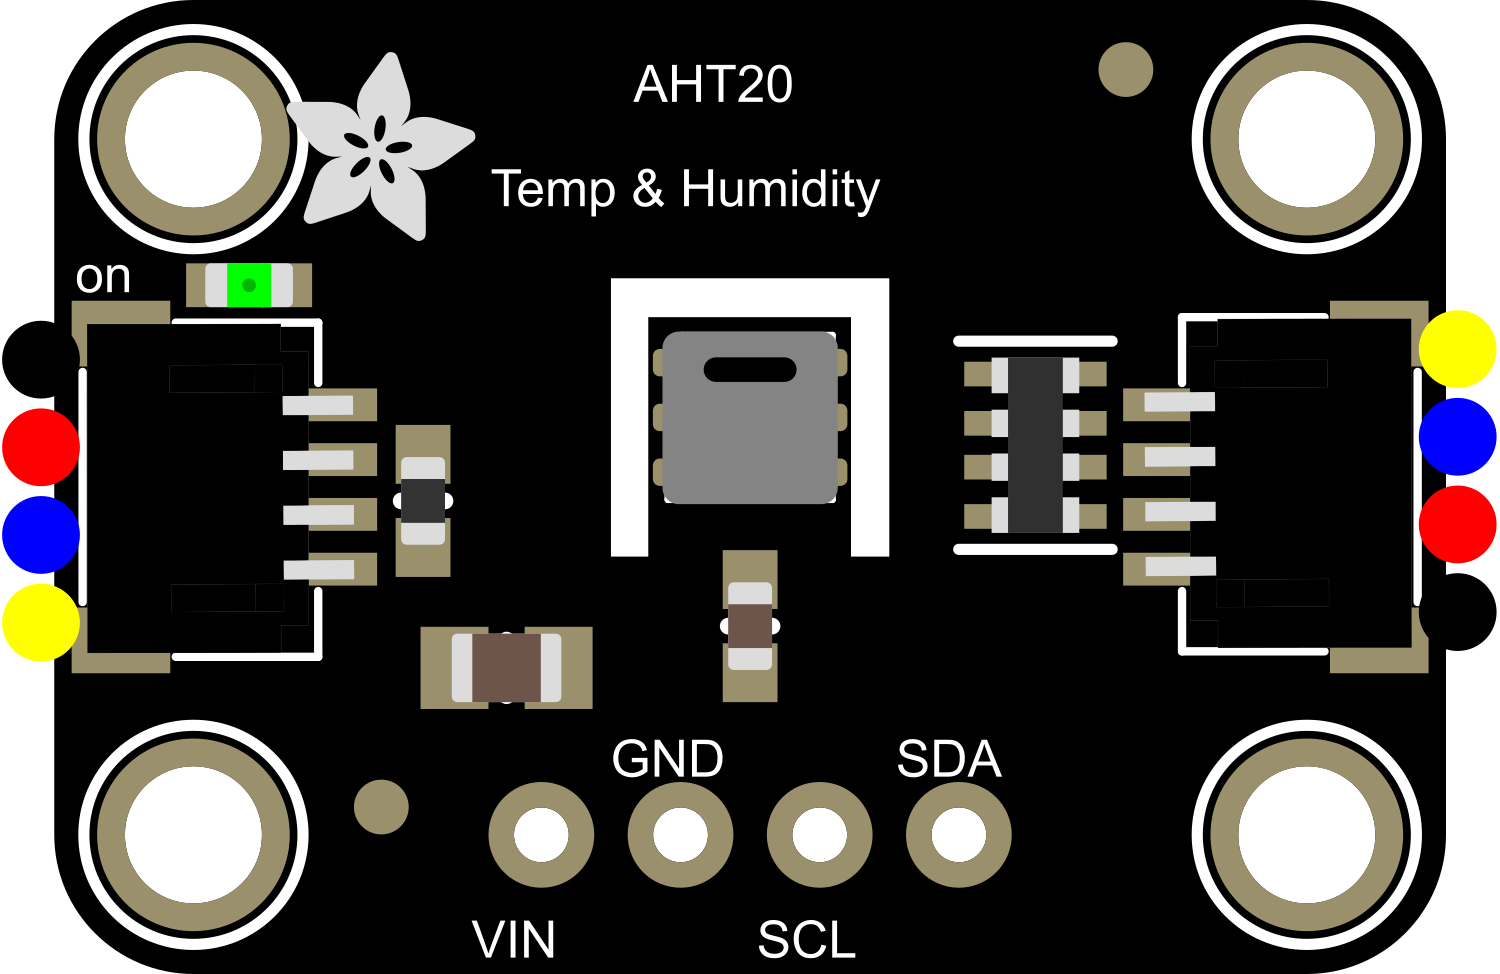
Pin Configuration and Descriptions
| Pin Number | Name | Description |
|---|---|---|
| 1 | VDD | Power supply (2.2V to 5.5V) |
| 2 | GND | Ground |
| 3 | SDA | I2C Data Line |
| 4 | SCL | I2C Clock Line |
Usage Instructions
How to Use the Component in a Circuit
- Power Connections: Connect the VDD pin to a 2.2V to 5.5V power supply and the GND pin to the ground.
- I2C Connections: Connect the SDA and SCL pins to the I2C data and clock lines, respectively. If using an Arduino UNO, connect SDA to A4 and SCL to A5.
- Pull-up Resistors: It is recommended to use pull-up resistors on the SDA and SCL lines if they are not already present on the microcontroller board.
Important Considerations and Best Practices
- Ensure that the power supply voltage is within the specified range to prevent damage to the sensor.
- Avoid placing the sensor in environments with condensing humidity or in direct contact with water.
- For accurate readings, allow the sensor to acclimatize to the environment before taking measurements.
- Use proper ESD precautions when handling the sensor to avoid electrostatic damage.
Example Code for Arduino UNO
#include <Wire.h>
#include <Adafruit_AHTX0.h>

Adafruit_AHTX0 aht;

void setup() {
  Serial.begin(9600);
  Serial.println("AHT20 test");

  if (!aht.begin()) {
    Serial.println("Could not find AHT20 sensor!");
    while (1) delay(10);
  }
}

void loop() {
  sensors_event_t humidity, temp;
  aht.getEvent(&humidity, &temp); // Get new data

  Serial.print("Temperature: ");
  Serial.print(temp.temperature);
  Serial.println(" degrees C");

  Serial.print("Humidity: ");
  Serial.print(humidity.relative_humidity);
  Serial.println("% rH");

  delay(500);
}
Troubleshooting and FAQs
Common Issues Users Might Face
- Sensor Not Detected: Ensure that the I2C connections are correct and secure. Check that the correct I2C address is being used in the code.
- Inaccurate Readings: Make sure the sensor is not exposed to direct sunlight or other heat sources. Allow it to acclimatize to the environment.
- No Data on Serial Monitor: Confirm that the correct baud rate is set in the Serial Monitor to match the
Serial.begin(9600)in the code.
Solutions and Tips for Troubleshooting
- Double-check wiring connections and solder joints for any loose connections or shorts.
- Use I2C scanner code to confirm the sensor's address and that it is communicating on the bus.
- Reset the power to the sensor and microcontroller to ensure a fresh start.
- Ensure that the sensor is not placed near devices that generate high electromagnetic interference.
FAQs
Q: Can the AHT20 sensor be used outdoors? A: Yes, but it should be protected from direct exposure to water and sunlight.
Q: What is the default I2C address of the AHT20 sensor? A: The default I2C address is 0x38 and it is fixed.
Q: How long does the sensor need to acclimatize to the environment? A: It is recommended to allow the sensor to acclimatize for at least 30 minutes for accurate readings.
Q: Can I use multiple AHT20 sensors on the same I2C bus? A: No, since the AHT20 has a fixed I2C address, you cannot use multiple AHT20 sensors on the same I2C bus without additional hardware such as an I2C multiplexer.