How to Use Micro SD card module: Examples, Pinouts, and Specs
Introduction
The Micro SD Card Module is a versatile component used to interface with a micro SD card, enabling data storage and retrieval in various electronic projects. This module is particularly useful in applications where large amounts of data need to be logged, such as in data logging systems, audio recording devices, and portable data storage solutions. It is commonly used with microcontrollers like the Arduino UNO, making it a popular choice for hobbyists and professionals alike.
Explore Projects Built with Micro SD card module
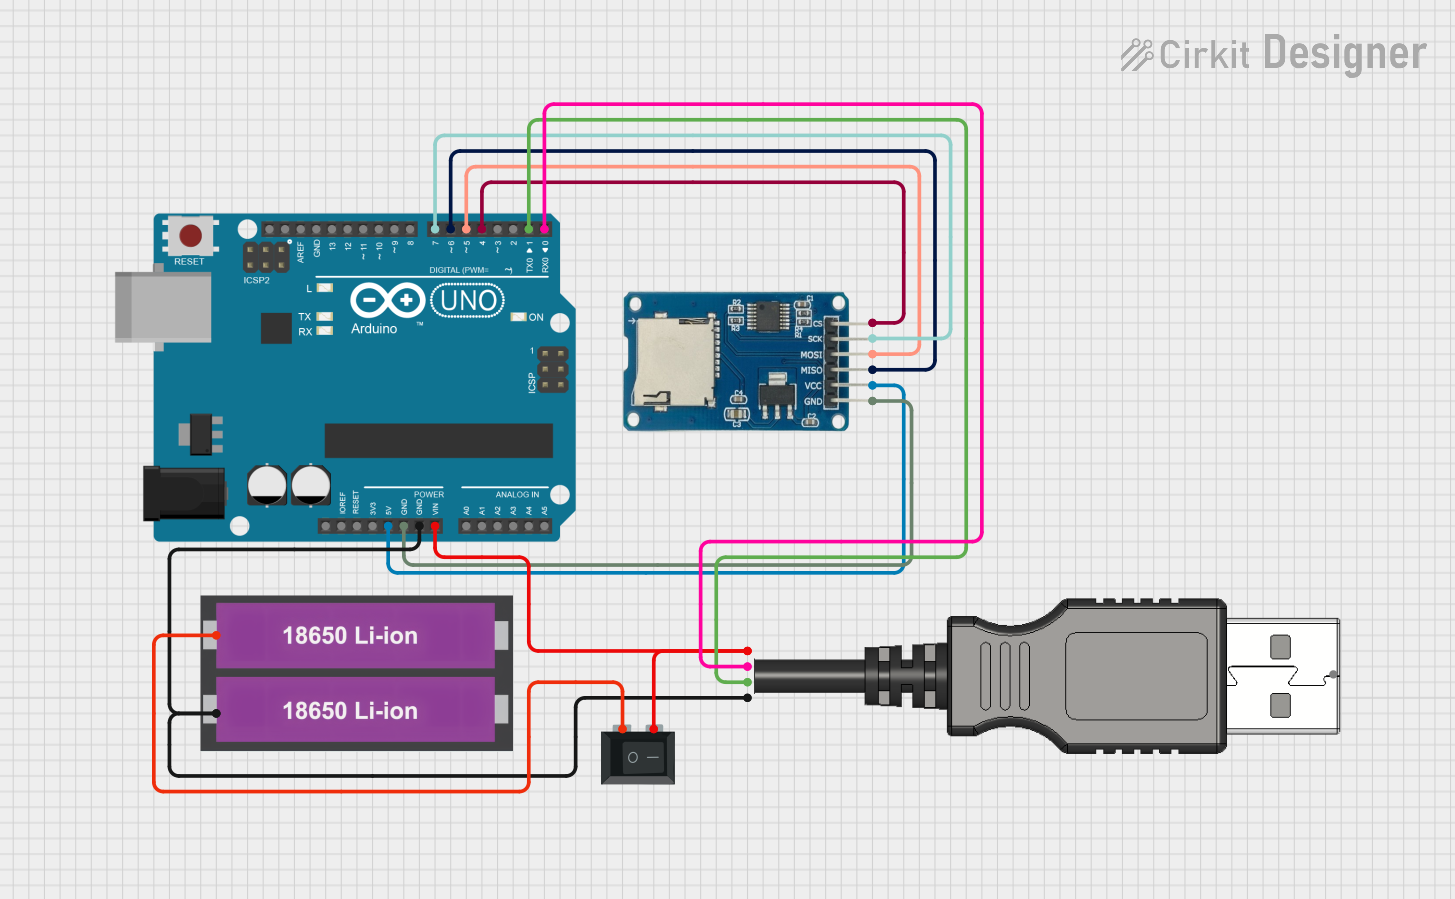

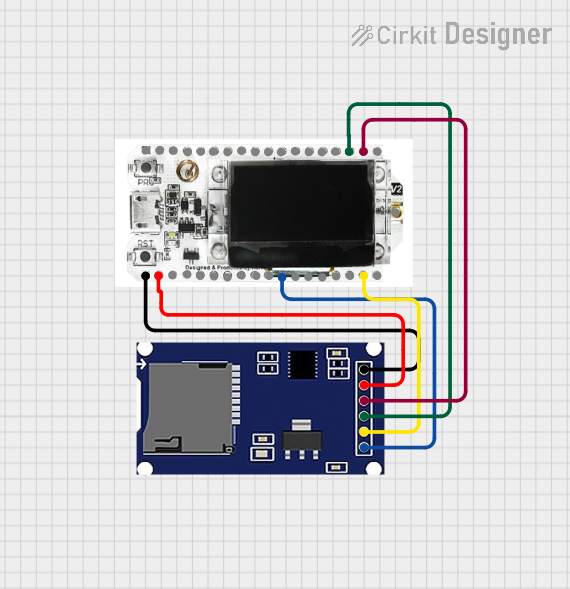
Explore Projects Built with Micro SD card module
Technical Specifications
Key Technical Details
| Specification | Value |
|---|---|
| Operating Voltage | 3.3V |
| Interface | SPI (Serial Peripheral Interface) |
| Card Type Supported | Micro SD, Micro SDHC |
| Current Consumption | 100mA (max) |
| Operating Temperature | -25°C to 85°C |
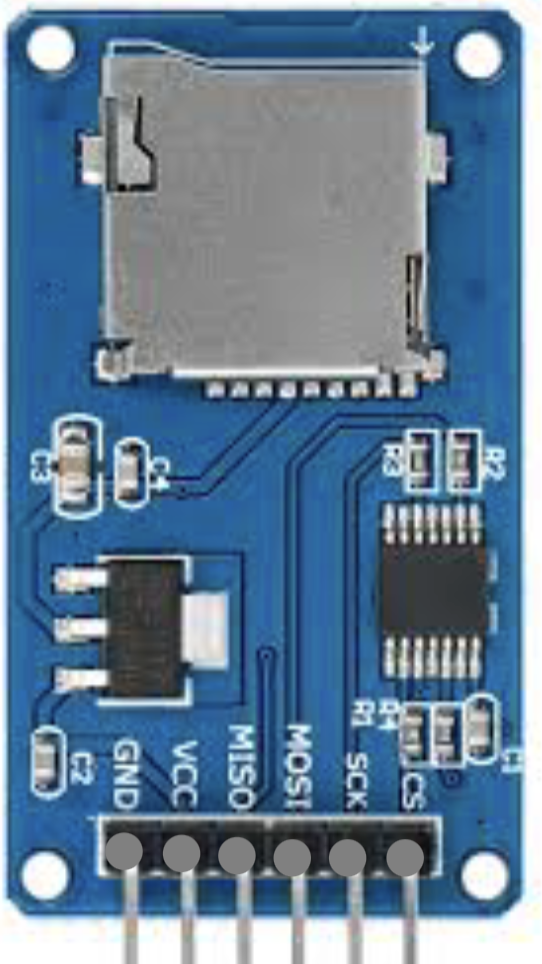
Pin Configuration and Descriptions
| Pin Number | Pin Name | Description |
|---|---|---|
| 1 | GND | Ground |
| 2 | VCC | Power Supply (3.3V) |
| 3 | MISO | Master In Slave Out (SPI Data Output) |
| 4 | MOSI | Master Out Slave In (SPI Data Input) |
| 5 | SCK | Serial Clock (SPI Clock) |
| 6 | CS | Chip Select (Active Low) |
| 7 | CD | Card Detect (Optional, indicates card presence) |
| 8 | WP | Write Protect (Optional, indicates write status) |
Usage Instructions
How to Use the Component in a Circuit
- Power Supply: Connect the VCC pin to a 3.3V power supply and the GND pin to the ground.
- SPI Interface: Connect the SPI pins (MISO, MOSI, SCK, and CS) to the corresponding SPI pins on your microcontroller.
- Optional Pins: If needed, connect the CD and WP pins to monitor card presence and write protection status.
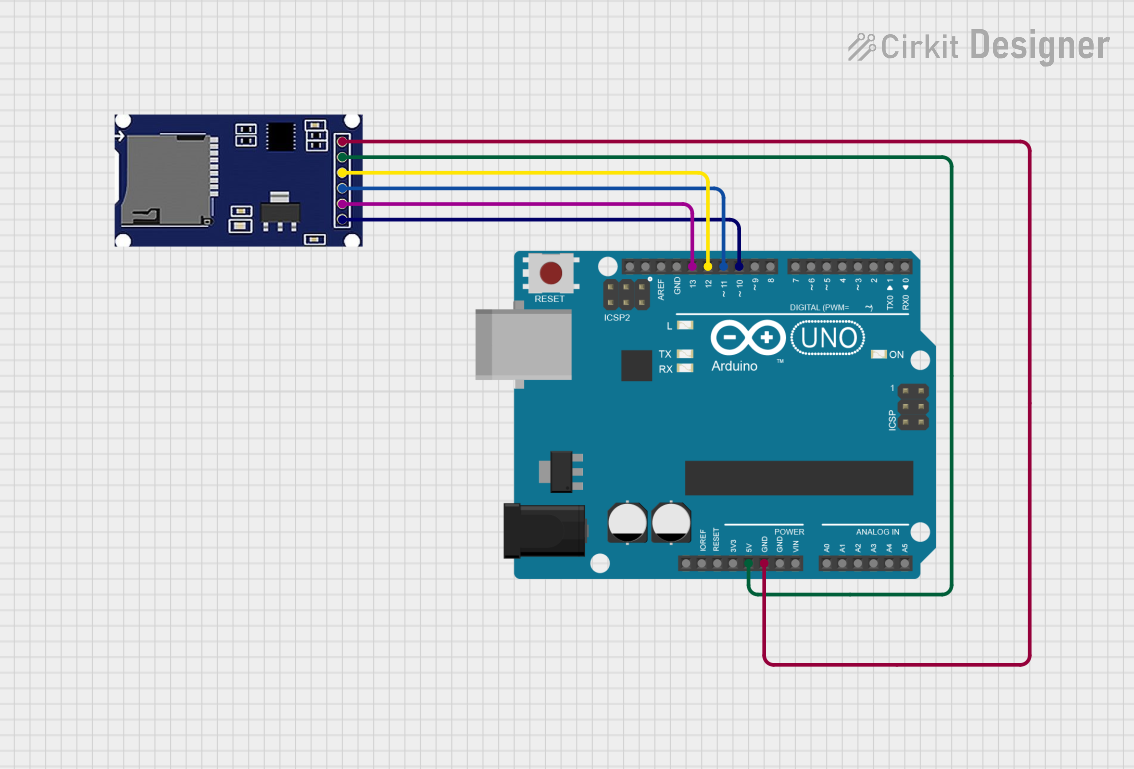
Example Circuit with Arduino UNO
| Micro SD Card Module Pin | Arduino UNO Pin |
|---|---|
| GND | GND |
| VCC | 3.3V |
| MISO | Pin 12 |
| MOSI | Pin 11 |
| SCK | Pin 13 |
| CS | Pin 10 |
Important Considerations and Best Practices
- Voltage Levels: Ensure that the module is powered with 3.3V. Using 5V can damage the module.
- SPI Speed: Configure the SPI speed appropriately. Too high a speed can cause communication errors.
- Card Formatting: Format the micro SD card to FAT16 or FAT32 before use.
- Library: Use the
SDlibrary in Arduino IDE for easy interfacing.
Sample Arduino Code
#include <SPI.h>
#include <SD.h>

const int chipSelect = 10;

void setup() {
  Serial.begin(9600);
  // Initialize the SD card
  if (!SD.begin(chipSelect)) {
    Serial.println("Card failed, or not present");
    return;
  }
  Serial.println("Card initialized.");

  // Open a file for writing
  File dataFile = SD.open("datalog.txt", FILE_WRITE);
  if (dataFile) {
    dataFile.println("Hello, world!");
    dataFile.close();
    Serial.println("Data written to file.");
  } else {
    Serial.println("Error opening datalog.txt");
  }
}

void loop() {
  // Nothing to do here
}
Troubleshooting and FAQs
Common Issues Users Might Face
- Card Initialization Failure: The SD card fails to initialize.
- Data Corruption: Data written to the card is corrupted or incomplete.
- Communication Errors: SPI communication errors between the module and the microcontroller.
Solutions and Tips for Troubleshooting
Card Initialization Failure:
- Ensure the card is properly inserted.
- Check the wiring connections.
- Format the card to FAT16 or FAT32.
Data Corruption:
- Ensure the card is not removed while writing data.
- Use proper file handling functions to close files after writing.
Communication Errors:
- Verify the SPI connections and pin configurations.
- Reduce the SPI clock speed if necessary.
- Ensure the module is powered with 3.3V.
FAQs
Q1: Can I use a 5V power supply for the module? A1: No, the module requires a 3.3V power supply. Using 5V can damage the module.
Q2: What types of micro SD cards are supported? A2: The module supports micro SD and micro SDHC cards.
Q3: How do I format the micro SD card? A3: Use a computer to format the card to FAT16 or FAT32 file system.
Q4: Can I use the module with other microcontrollers? A4: Yes, the module can be used with any microcontroller that supports SPI communication.
By following this documentation, users can effectively integrate the Micro SD Card Module into their projects, ensuring reliable data storage and retrieval.