How to Use Fingerprint Reader: Examples, Pinouts, and Specs
Introduction
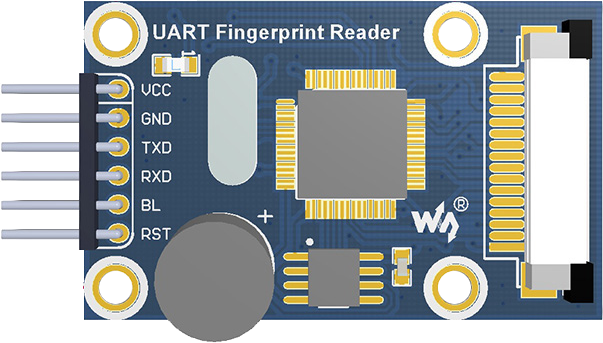
The Waveshare Fingerprint Reader (Part ID: 8552) is a biometric device designed to capture and analyze the unique patterns of a person's fingerprint. It is widely used for identification and authentication purposes in security systems, access control, and embedded applications. This compact and reliable module simplifies the integration of fingerprint recognition into various projects, offering high accuracy and fast processing.
Explore Projects Built with Fingerprint Reader
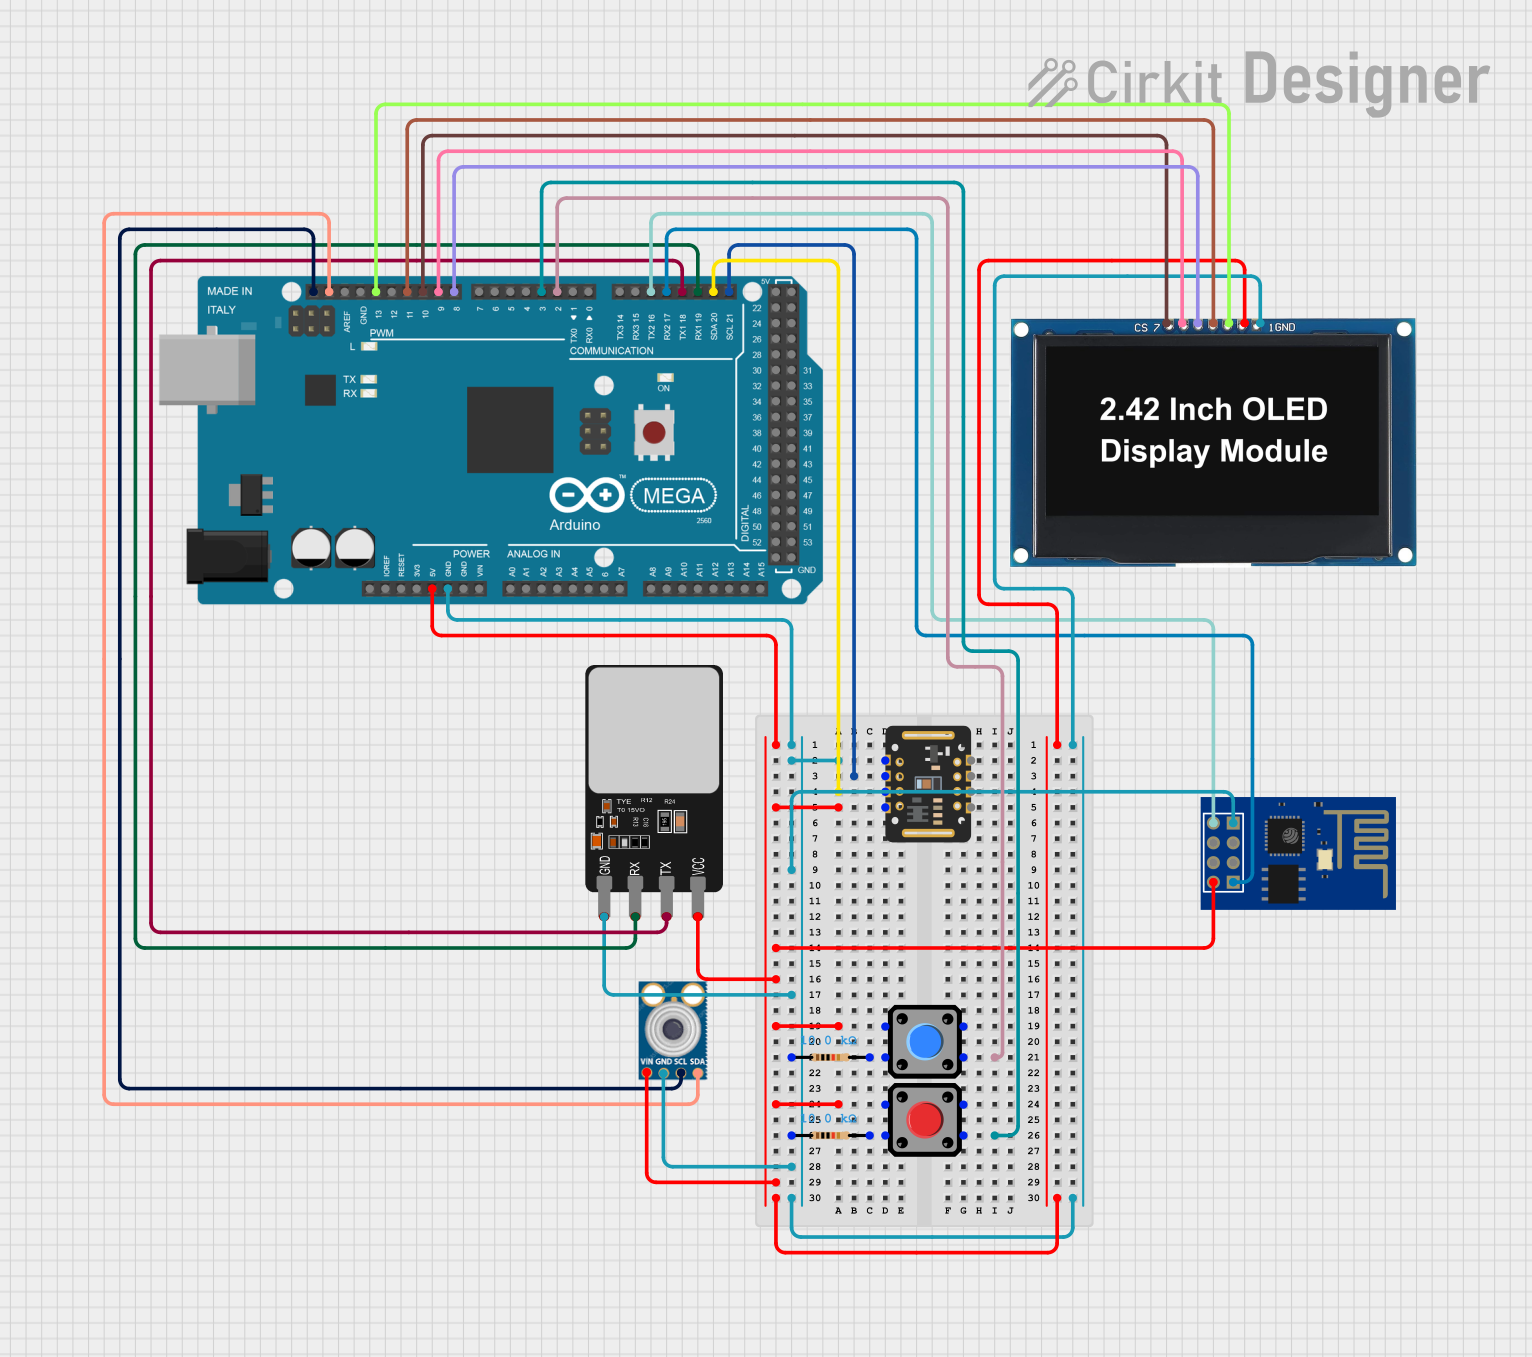
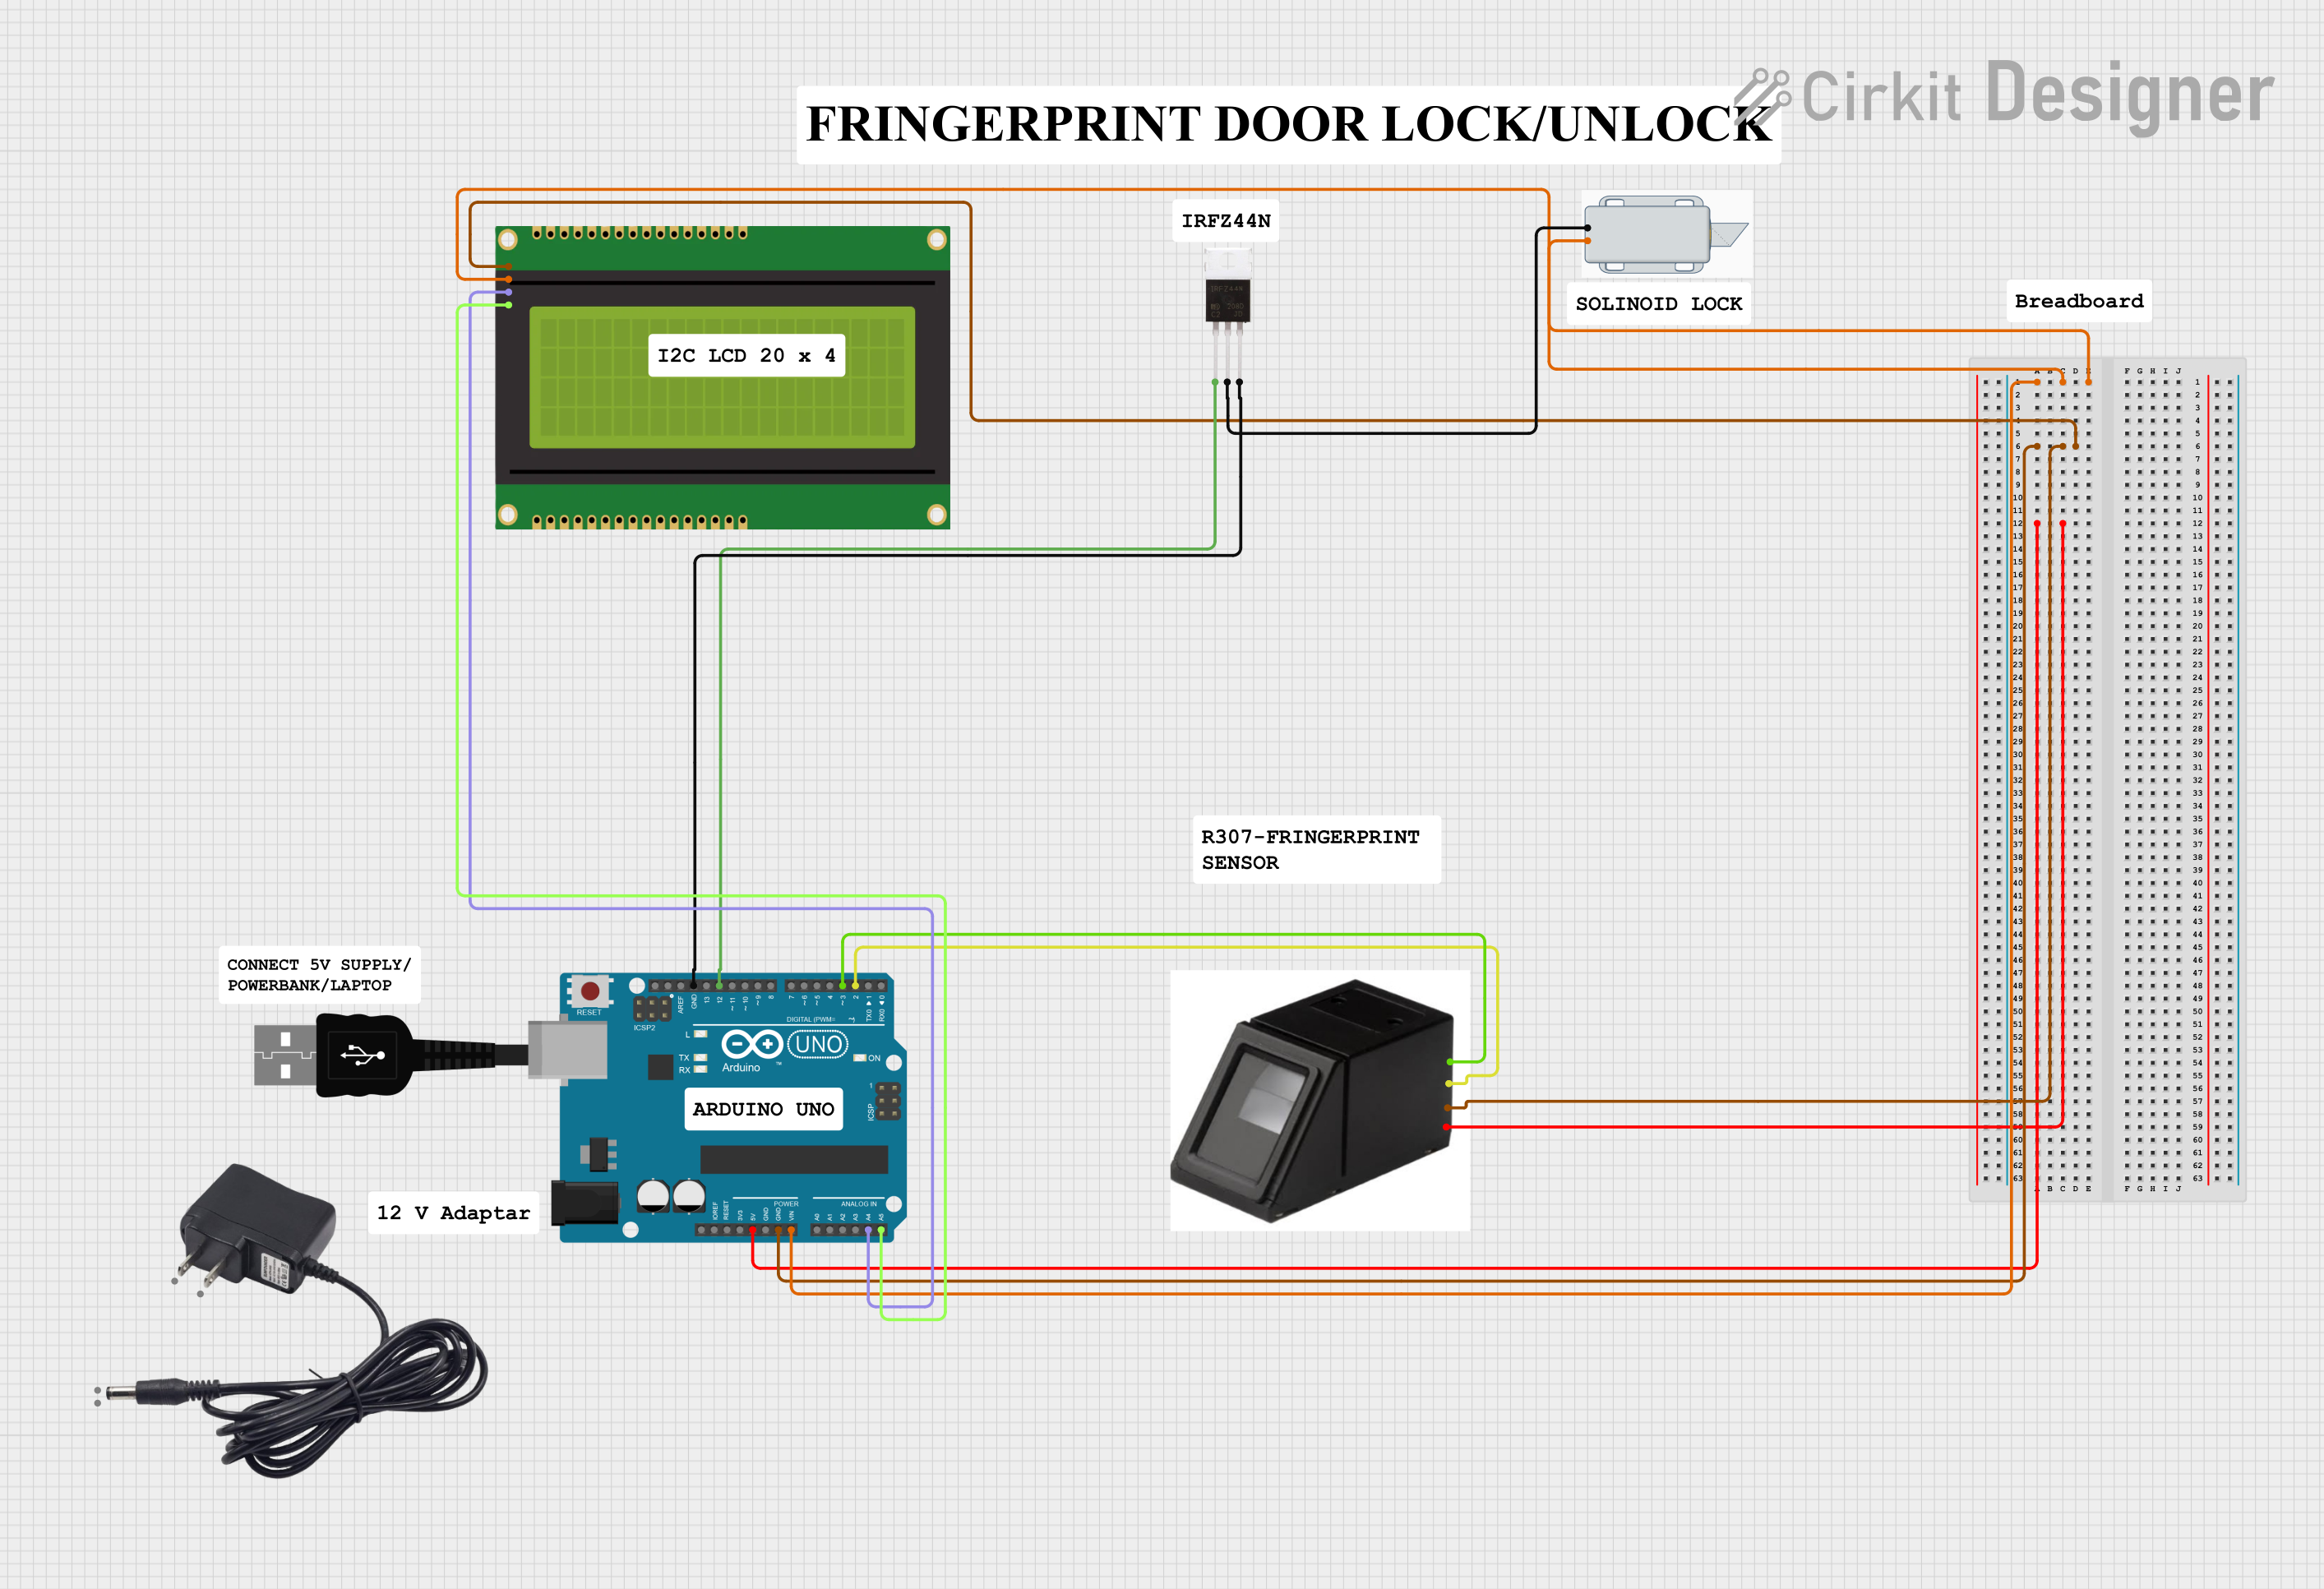
Explore Projects Built with Fingerprint Reader
Common Applications and Use Cases
- Access Control Systems: Secure doors, safes, and lockers.
- Time Attendance Systems: Employee attendance tracking.
- Embedded Systems: Integration with microcontrollers like Arduino, Raspberry Pi, etc.
- Personal Projects: DIY security systems and smart home applications.
Technical Specifications
The following table outlines the key technical details of the Waveshare Fingerprint Reader:
| Parameter | Specification |
|---|---|
| Operating Voltage | 3.3V to 6V |
| Operating Current | 50mA (typical), 80mA (peak) |
| Communication Protocol | UART (TTL) |
| Baud Rate | Configurable (default: 57600 bps) |
| Fingerprint Capacity | 1000 templates |
| Image Resolution | 508 DPI |
| Scanning Area | 14mm x 18mm |
| Response Time | <1 second |
| Operating Temperature | -20°C to 50°C |
| Dimensions | 56mm x 20mm x 21.5mm |
Pin Configuration and Descriptions
The module has a 4-pin interface for communication and power. The pinout is as follows:
| Pin | Name | Description |
|---|---|---|
| 1 | VCC | Power supply input (3.3V to 6V) |
| 2 | GND | Ground |
| 3 | TX | UART Transmit (data output from module) |
| 4 | RX | UART Receive (data input to module) |
Usage Instructions
How to Use the Component in a Circuit
- Power the Module: Connect the
VCCpin to a 3.3V-6V power source and theGNDpin to ground. - Connect UART Pins:
- Connect the
TXpin of the module to the RX pin of your microcontroller. - Connect the
RXpin of the module to the TX pin of your microcontroller.
- Connect the
- Initialize Communication: Configure the UART communication on your microcontroller to match the module's baud rate (default: 57600 bps).
- Enroll Fingerprints: Use the module's commands to enroll fingerprints into its memory.
- Verify Fingerprints: Send a scan command to capture a fingerprint and compare it with stored templates.
Important Considerations and Best Practices
- Power Supply: Ensure a stable power supply to avoid communication errors or malfunctions.
- Baud Rate Configuration: If needed, adjust the baud rate to match your system's requirements.
- Avoid Dust and Moisture: Keep the fingerprint sensor clean and dry for optimal performance.
- Template Management: Regularly manage stored templates to avoid exceeding the module's capacity.
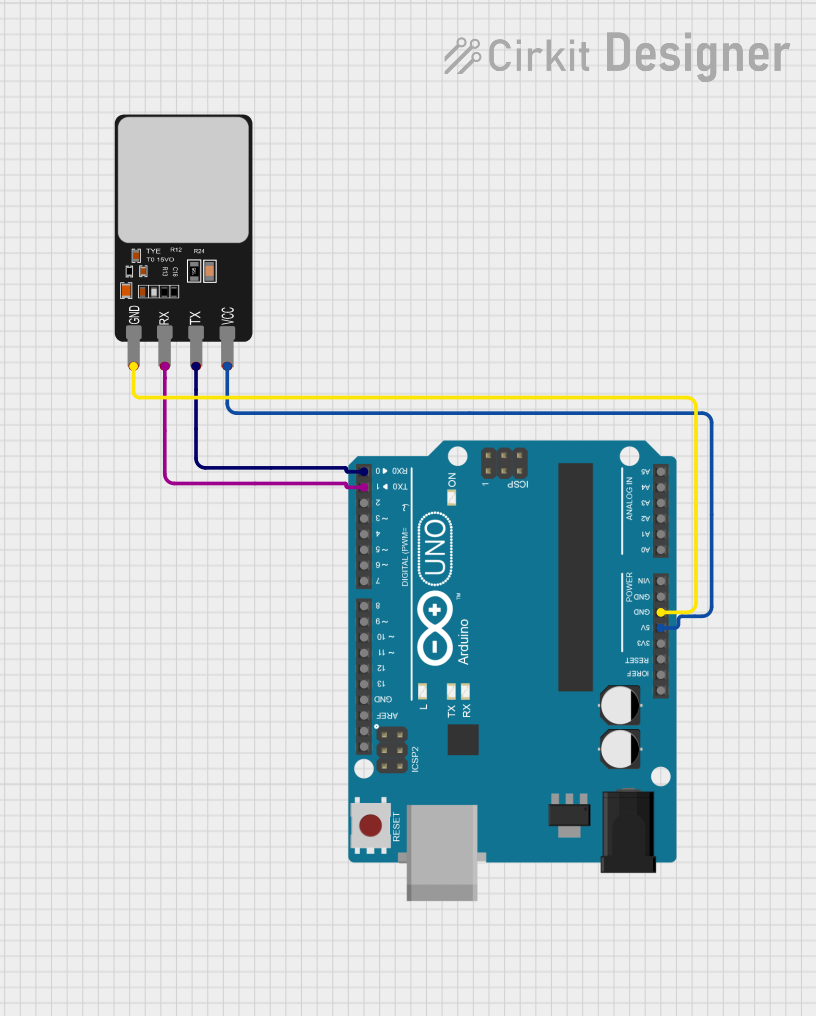
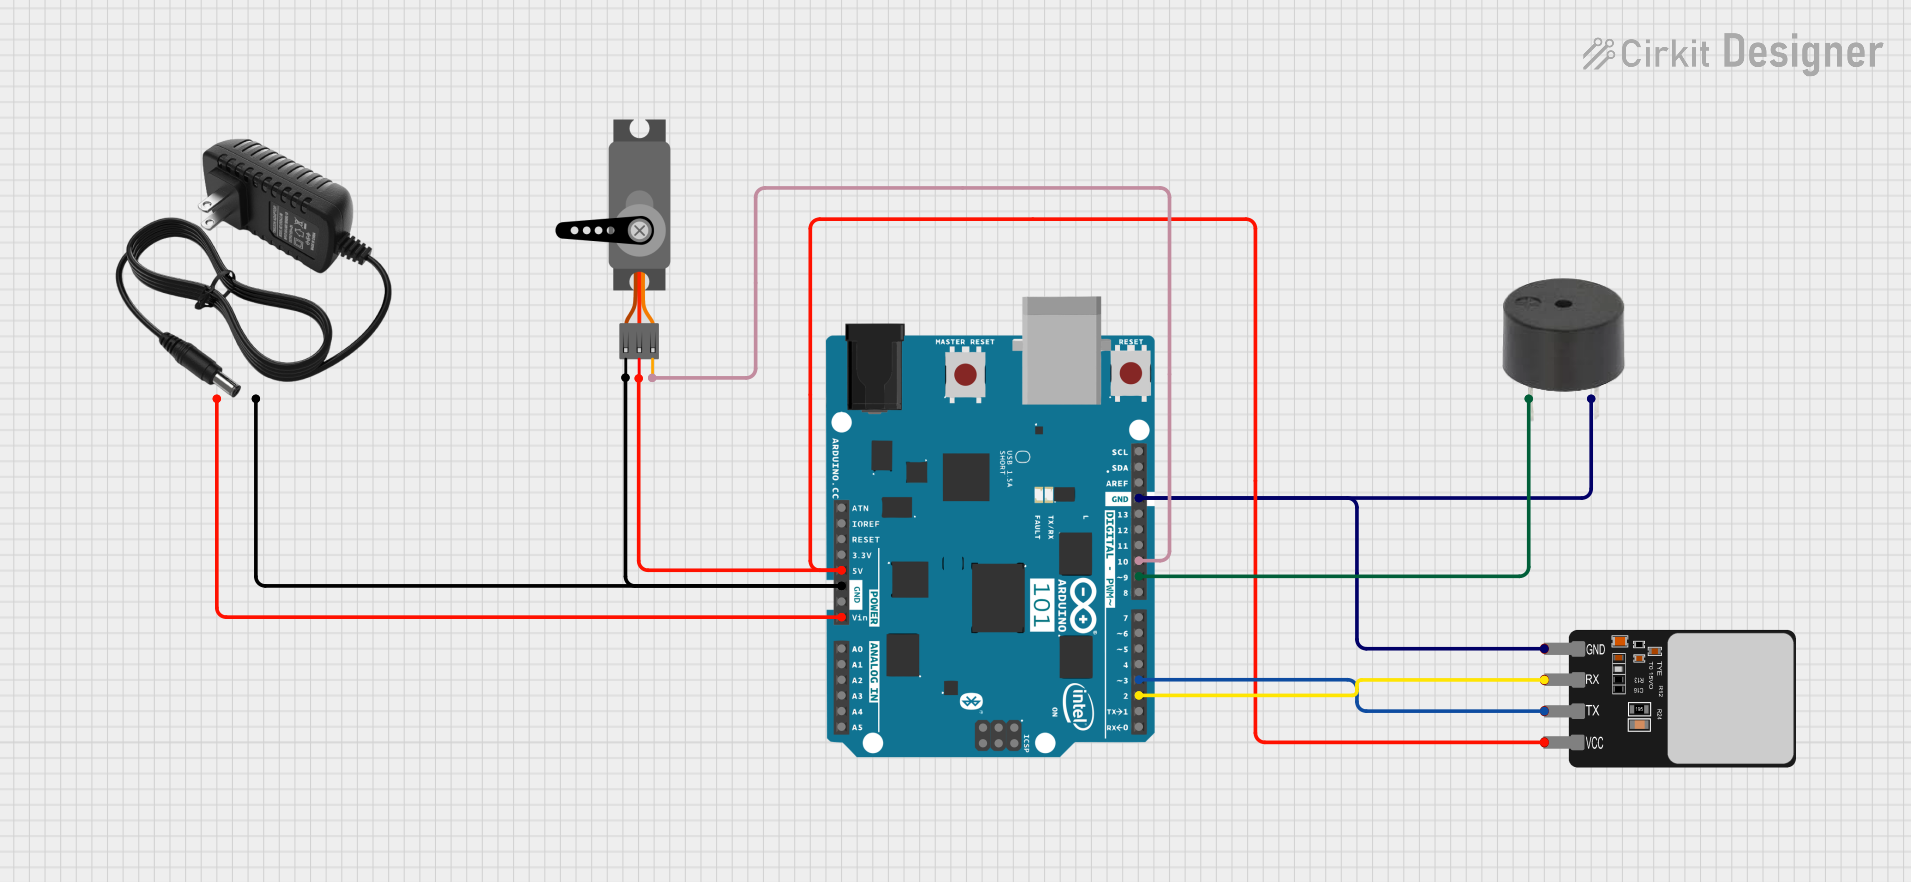
Example: Connecting to an Arduino UNO
Below is an example of how to use the Waveshare Fingerprint Reader with an Arduino UNO:
Circuit Diagram
- Connect
VCCto the Arduino's 5V pin. - Connect
GNDto the Arduino's GND pin. - Connect
TXto Arduino pin 2 (via a voltage divider if using 5V logic). - Connect
RXto Arduino pin 3.
Arduino Code
#include <SoftwareSerial.h>

// Define the RX and TX pins for the fingerprint module
SoftwareSerial fingerprintSerial(2, 3); // RX, TX

void setup() {
  Serial.begin(9600); // Initialize serial monitor
  fingerprintSerial.begin(57600); // Initialize fingerprint module communication

  Serial.println("Initializing Fingerprint Reader...");
  delay(1000);

  // Send a test command to the fingerprint module
  fingerprintSerial.write(0x55); // Example command (replace with actual commands)
  Serial.println("Fingerprint Reader Ready.");
}

void loop() {
  if (fingerprintSerial.available()) {
    // Read data from the fingerprint module
    int data = fingerprintSerial.read();
    Serial.print("Data received: ");
    Serial.println(data, HEX);
  }

  delay(100); // Small delay to avoid flooding the serial monitor
}
Troubleshooting and FAQs
Common Issues and Solutions
No Response from the Module
- Cause: Incorrect wiring or baud rate mismatch.
- Solution: Double-check the connections and ensure the baud rate is set to 57600 bps.
Fingerprint Not Recognized
- Cause: Poor fingerprint quality or sensor contamination.
- Solution: Clean the sensor and ensure the finger is placed properly.
Communication Errors
- Cause: Voltage level mismatch between the module and microcontroller.
- Solution: Use a voltage level shifter or resistor divider for 5V systems.
Module Overheating
- Cause: Prolonged operation or insufficient ventilation.
- Solution: Allow the module to cool down and ensure proper airflow.
FAQs
Q: Can the module store more than 1000 fingerprints?
- A: No, the module has a fixed capacity of 1000 templates.
Q: Can I use this module with a Raspberry Pi?
- A: Yes, the module can be connected to a Raspberry Pi using its UART interface.
Q: How do I reset the module to factory settings?
- A: Use the appropriate reset command from the module's command set (refer to the manufacturer's documentation).
Q: What is the default baud rate of the module?
- A: The default baud rate is 57600 bps.