How to Use Leonardo ICSP: Examples, Pinouts, and Specs
Introduction
The Leonardo ICSP (In-Circuit Serial Programming) is a programming interface designed for Arduino Leonardo boards. It provides a direct connection to the microcontroller via the SPI (Serial Peripheral Interface) protocol, enabling users to upload sketches, program the microcontroller, and establish communication for advanced applications. The ICSP header is particularly useful for bootloader programming, firmware updates, and interfacing with external SPI devices.
Explore Projects Built with Leonardo ICSP
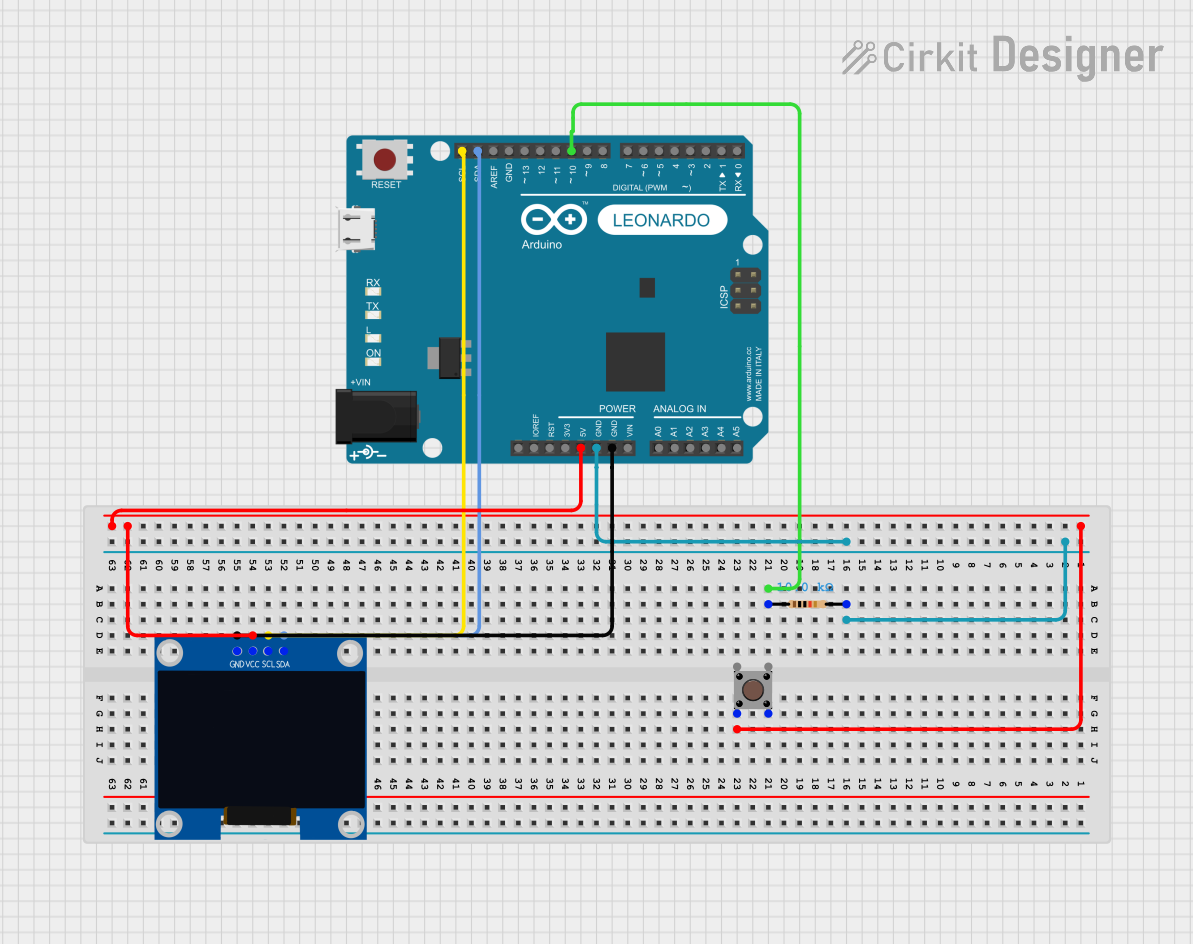
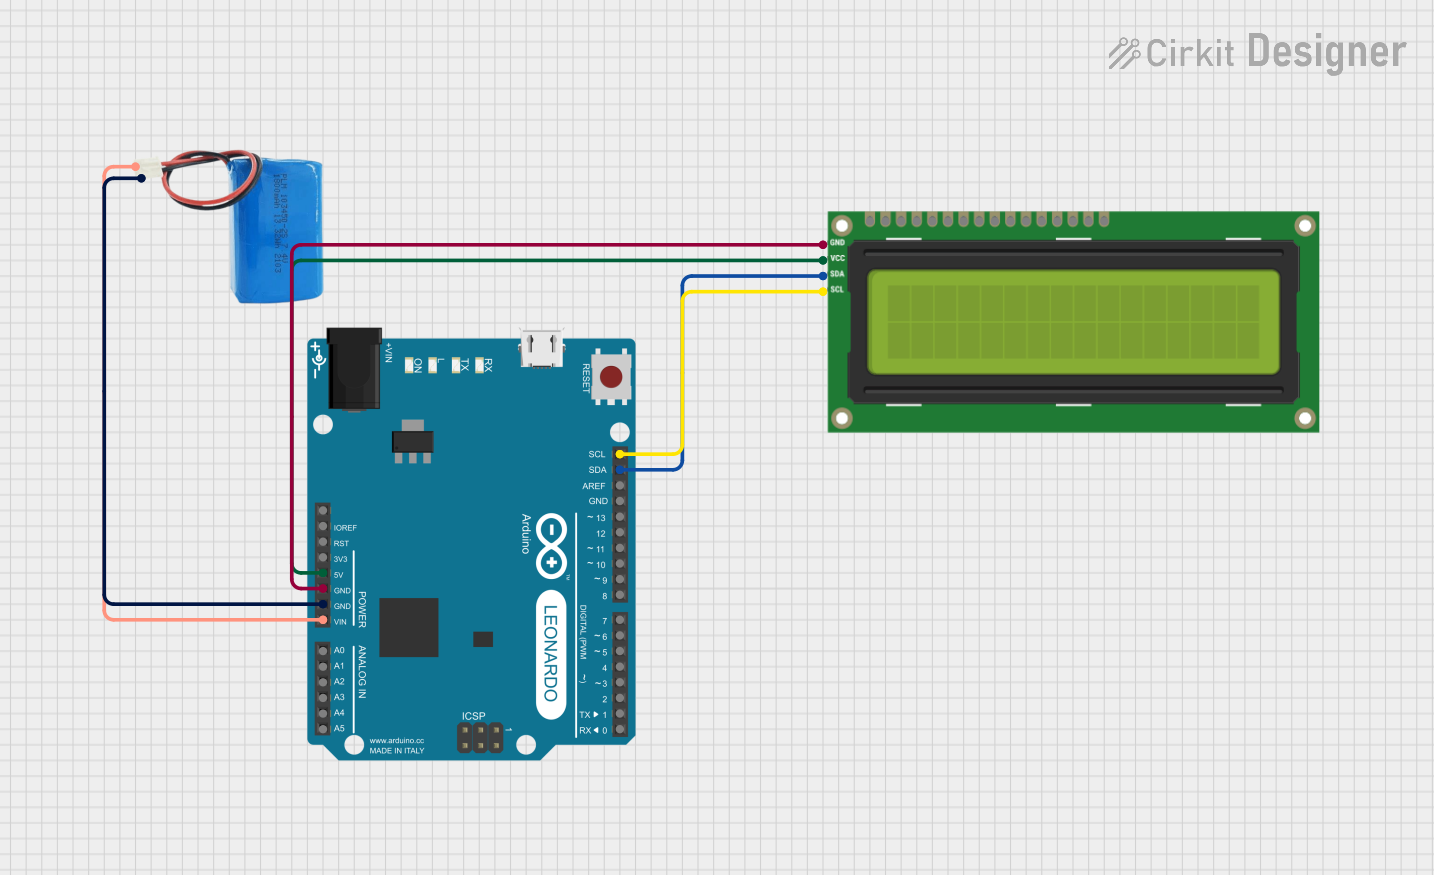
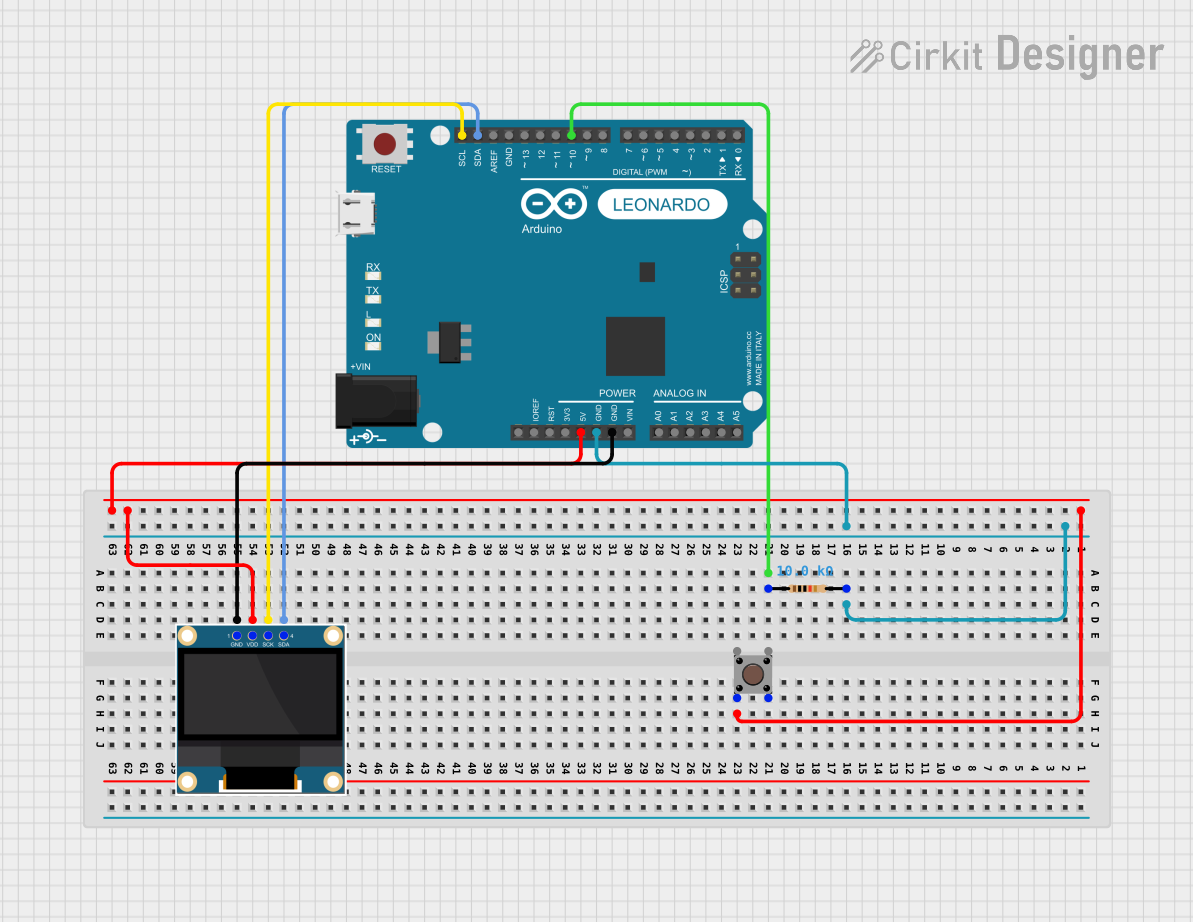
Explore Projects Built with Leonardo ICSP
Common Applications and Use Cases
- Uploading sketches to the Arduino Leonardo without using the USB interface.
- Programming or updating the bootloader on the ATmega32u4 microcontroller.
- Interfacing with SPI-based peripherals such as sensors, displays, and memory modules.
- Debugging and testing custom firmware.
Technical Specifications
Key Technical Details
- Microcontroller Compatibility: ATmega32u4 (used in Arduino Leonardo)
- Interface Protocol: SPI (Serial Peripheral Interface)
- Voltage Levels: 5V logic (compatible with Arduino Leonardo)
- Pin Count: 6 pins
- Pin Spacing: 2.54 mm (standard header spacing)
Pin Configuration and Descriptions
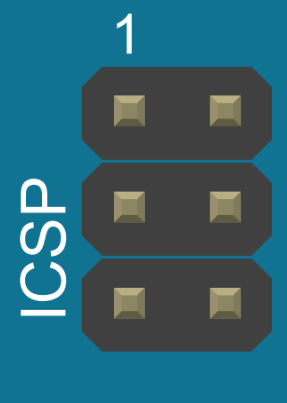
The Leonardo ICSP header consists of 6 pins arranged in a 2x3 configuration. Below is the pinout and description:
| Pin Number | Pin Name | Description |
|---|---|---|
| 1 | MISO | Master In Slave Out - Data sent from the microcontroller to the programmer. |
| 2 | VCC | Power supply for the ICSP interface (5V). |
| 3 | SCK | Serial Clock - Synchronizes data transfer between devices. |
| 4 | MOSI | Master Out Slave In - Data sent from the programmer to the microcontroller. |
| 5 | RESET | Resets the microcontroller for programming or bootloader access. |
| 6 | GND | Ground connection. |
ICSP Header Diagram
  [1] MISO   [2] VCC
  [3] SCK    [4] MOSI
  [5] RESET  [6] GND
Usage Instructions
How to Use the Leonardo ICSP in a Circuit
Connecting the ICSP Header:
- Use a 6-pin ICSP cable or directly connect wires to the ICSP header on the Arduino Leonardo.
- Ensure proper alignment of the pins to avoid incorrect connections.
Programming the Microcontroller:
- Connect an external programmer (e.g., USBasp, AVRISP mkII) to the ICSP header.
- Use the Arduino IDE or other compatible software to upload sketches or update the bootloader.
- Select the correct board (Arduino Leonardo) and programmer in the Arduino IDE.
Interfacing with SPI Devices:
- Connect SPI peripherals (e.g., sensors, displays) to the ICSP header.
- Use the
SPIlibrary in the Arduino IDE to communicate with the connected device.
Important Considerations and Best Practices
- Power Supply: Ensure the Arduino Leonardo is powered either via USB or an external power source when using the ICSP header.
- Pin Alignment: Double-check the orientation of the ICSP connector to avoid damaging the board or programmer.
- Bootloader Updates: Use caution when updating the bootloader, as incorrect programming can render the microcontroller unresponsive.
- SPI Conflicts: Avoid using the ICSP header for SPI communication if the same SPI pins are used elsewhere in the circuit.
Example Code for SPI Communication
Below is an example of using the ICSP header to communicate with an SPI device (e.g., an SPI-based temperature sensor):
#include <SPI.h> // Include the SPI library

const int chipSelectPin = 10; // Define the chip select pin

void setup() {
  // Initialize the SPI bus
  SPI.begin();

  // Set the chip select pin as output
  pinMode(chipSelectPin, OUTPUT);

  // Deselect the SPI device
  digitalWrite(chipSelectPin, HIGH);

  Serial.begin(9600); // Start serial communication for debugging
}

void loop() {
  // Select the SPI device
  digitalWrite(chipSelectPin, LOW);

  // Send a command to the SPI device
  byte response = SPI.transfer(0x01); // Replace 0x01 with your command

  // Deselect the SPI device
  digitalWrite(chipSelectPin, HIGH);

  // Print the response from the SPI device
  Serial.print("Response: ");
  Serial.println(response, HEX);

  delay(1000); // Wait for 1 second before the next communication
}
Troubleshooting and FAQs
Common Issues and Solutions
Issue: The programmer is not detected by the Arduino IDE.
- Solution: Ensure the ICSP header is properly connected to the programmer. Verify that the correct programmer is selected in the Arduino IDE.
Issue: Unable to upload sketches via the ICSP header.
- Solution: Check the power supply to the Arduino Leonardo. Ensure the RESET pin is functioning correctly.
Issue: SPI device not responding.
- Solution: Verify the wiring and ensure the SPI device is powered. Check the chip select pin configuration in the code.
Issue: Bootloader update fails.
- Solution: Double-check the programmer settings and ensure the correct bootloader file is selected.
FAQs
Q: Can I use the ICSP header for both programming and SPI communication simultaneously?
A: It is not recommended, as it may cause conflicts. Use separate SPI pins if possible.Q: What happens if I connect the ICSP header incorrectly?
A: Incorrect connections can damage the microcontroller or the programmer. Always double-check the pin alignment.Q: Is the ICSP header compatible with other Arduino boards?
A: The ICSP header is a standard interface, but the pinout and voltage levels may vary between boards. Always refer to the specific board's documentation.Q: Can I power the Arduino Leonardo through the ICSP header?
A: No, the ICSP header provides power to the programmer but is not intended to power the board. Use the USB or external power jack for powering the board.