Cirkit Designer Logo
Cirkit Designer
Your all-in-one circuit design IDE
Home / 
Component Documentation

How to Use ESC 40 A: Examples, Pinouts, and Specs

Image of ESC 40 A
Cirkit Designer LogoDesign with ESC 40 A in Cirkit Designer

Introduction

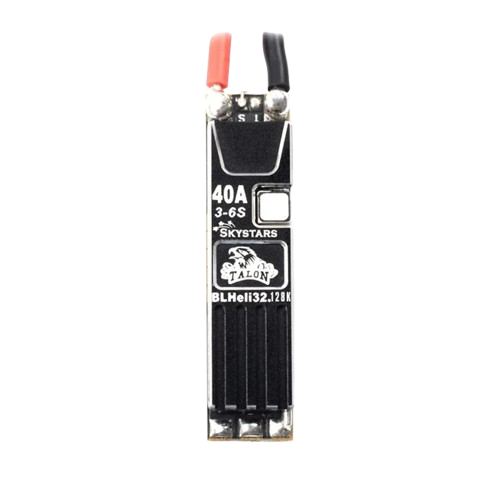
The Skystars Talon 40A Slim ESC is a high-performance Electronic Speed Controller (ESC) designed to regulate and control the speed of brushless motors. With a current rating of 40 Amperes, this ESC is ideal for applications requiring precise motor control, such as remote-controlled (RC) vehicles, drones, and robotics. Its slim design makes it particularly suitable for compact builds where space is a constraint.

Explore Projects Built with ESC 40 A

Use Cirkit Designer to design, explore, and prototype these projects online. Some projects support real-time simulation. Click "Open Project" to start designing instantly!
Raspberry Pi-Controlled Drone with Brushless Motors and Camera Module
Image of ROV: A project utilizing ESC 40 A in a practical application
This circuit is designed for a multi-motor application, likely a drone or a similar vehicle, featuring eight brushless motors controlled by two 4-in-1 electronic speed controllers (ESCs). The ESCs are powered by a 3s2p 18650 battery pack and interfaced with a Pixhawk flight controller for motor management. Additionally, the system includes a Raspberry Pi 4B for advanced processing and control, which is connected to a NoIR camera module and a cooling fan, and a power module to supply and monitor the power to the Pixhawk.
Cirkit Designer LogoOpen Project in Cirkit Designer
Quadcopter BLDC Motor Control System with Radio Receiver
Image of rc car: A project utilizing ESC 40 A in a practical application
This circuit is designed to control four Brushless DC (BLDC) motors using corresponding Electronic Speed Controllers (ESCs). Each ESC receives power from a shared LiPo battery and control signals from an FS-CT6B receiver, which likely receives input from a remote transmitter for wireless control. The ESCs regulate the power supplied to the motors based on the received signals, enabling precise speed and direction control of the motors, typically used in applications such as drones or remote-controlled vehicles.
Cirkit Designer LogoOpen Project in Cirkit Designer
Battery-Powered FPV Drone with Telemetry and Dual Motor Control
Image of Krul': A project utilizing ESC 40 A in a practical application
This circuit appears to be a power distribution and control system for a vehicle with two motorized wheels, possibly a drone or a robot. It includes a lipo battery connected to a Power Distribution Board (PDB) that distributes power to two Electronic Speed Controllers (ESCs) which in turn control the speed and direction of the motors. The system also integrates a flight controller (H743-SLIM V3) for managing various peripherals including GPS, FPV camera system, and a telemetry link (ExpressLRS).
Cirkit Designer LogoOpen Project in Cirkit Designer
Solar-Powered ESP32-Based Remote Control and Communication System
Image of Autonomous Cargo-Ship Project: A project utilizing ESC 40 A in a practical application
This circuit is designed to control a brushless motor via an Electronic Speed Controller (ESC), which receives power from a 12v battery managed by a Charge Controller connected to a solar panel. The ESC is interfaced with an ESP32 Devkit V1 microcontroller for signal control, and the circuit includes a SIM800L GSM module and a LoRa Ra-02 SX1278 module for communication purposes. Additional components include an HC-SR04 Ultrasonic Sensor for distance measurement, an MG996R servo, and a 1 Channel 5V Relay Module for switching applications, all powered by a step-down module that regulates voltage from the charge controller.
Cirkit Designer LogoOpen Project in Cirkit Designer

Explore Projects Built with ESC 40 A

Use Cirkit Designer to design, explore, and prototype these projects online. Some projects support real-time simulation. Click "Open Project" to start designing instantly!
Image of ROV: A project utilizing ESC 40 A in a practical application
Raspberry Pi-Controlled Drone with Brushless Motors and Camera Module
This circuit is designed for a multi-motor application, likely a drone or a similar vehicle, featuring eight brushless motors controlled by two 4-in-1 electronic speed controllers (ESCs). The ESCs are powered by a 3s2p 18650 battery pack and interfaced with a Pixhawk flight controller for motor management. Additionally, the system includes a Raspberry Pi 4B for advanced processing and control, which is connected to a NoIR camera module and a cooling fan, and a power module to supply and monitor the power to the Pixhawk.
Cirkit Designer LogoOpen Project in Cirkit Designer
Image of rc car: A project utilizing ESC 40 A in a practical application
Quadcopter BLDC Motor Control System with Radio Receiver
This circuit is designed to control four Brushless DC (BLDC) motors using corresponding Electronic Speed Controllers (ESCs). Each ESC receives power from a shared LiPo battery and control signals from an FS-CT6B receiver, which likely receives input from a remote transmitter for wireless control. The ESCs regulate the power supplied to the motors based on the received signals, enabling precise speed and direction control of the motors, typically used in applications such as drones or remote-controlled vehicles.
Cirkit Designer LogoOpen Project in Cirkit Designer
Image of Krul': A project utilizing ESC 40 A in a practical application
Battery-Powered FPV Drone with Telemetry and Dual Motor Control
This circuit appears to be a power distribution and control system for a vehicle with two motorized wheels, possibly a drone or a robot. It includes a lipo battery connected to a Power Distribution Board (PDB) that distributes power to two Electronic Speed Controllers (ESCs) which in turn control the speed and direction of the motors. The system also integrates a flight controller (H743-SLIM V3) for managing various peripherals including GPS, FPV camera system, and a telemetry link (ExpressLRS).
Cirkit Designer LogoOpen Project in Cirkit Designer
Image of Autonomous Cargo-Ship Project: A project utilizing ESC 40 A in a practical application
Solar-Powered ESP32-Based Remote Control and Communication System
This circuit is designed to control a brushless motor via an Electronic Speed Controller (ESC), which receives power from a 12v battery managed by a Charge Controller connected to a solar panel. The ESC is interfaced with an ESP32 Devkit V1 microcontroller for signal control, and the circuit includes a SIM800L GSM module and a LoRa Ra-02 SX1278 module for communication purposes. Additional components include an HC-SR04 Ultrasonic Sensor for distance measurement, an MG996R servo, and a 1 Channel 5V Relay Module for switching applications, all powered by a step-down module that regulates voltage from the charge controller.
Cirkit Designer LogoOpen Project in Cirkit Designer

Common Applications and Use Cases

  • RC drones (quadcopters, hexacopters, etc.)
  • RC cars, boats, and planes
  • Robotics projects requiring brushless motor control
  • DIY projects involving high-speed brushless motors

Technical Specifications

The following table outlines the key technical details of the Skystars Talon 40A Slim ESC:

Parameter Value
Manufacturer Skystars
Part ID Talon 40A Slim ESC
Continuous Current 40A
Burst Current (10s) 50A
Input Voltage Range 2S-6S LiPo (7.4V - 25.2V)
BEC Output None
Firmware BLHeli_S
Weight 7.5g
Dimensions 45mm x 12mm x 5mm
Motor Compatibility Brushless motors (3-phase)
Signal Input PWM, DShot150/300/600
Operating Temperature -20°C to 85°C

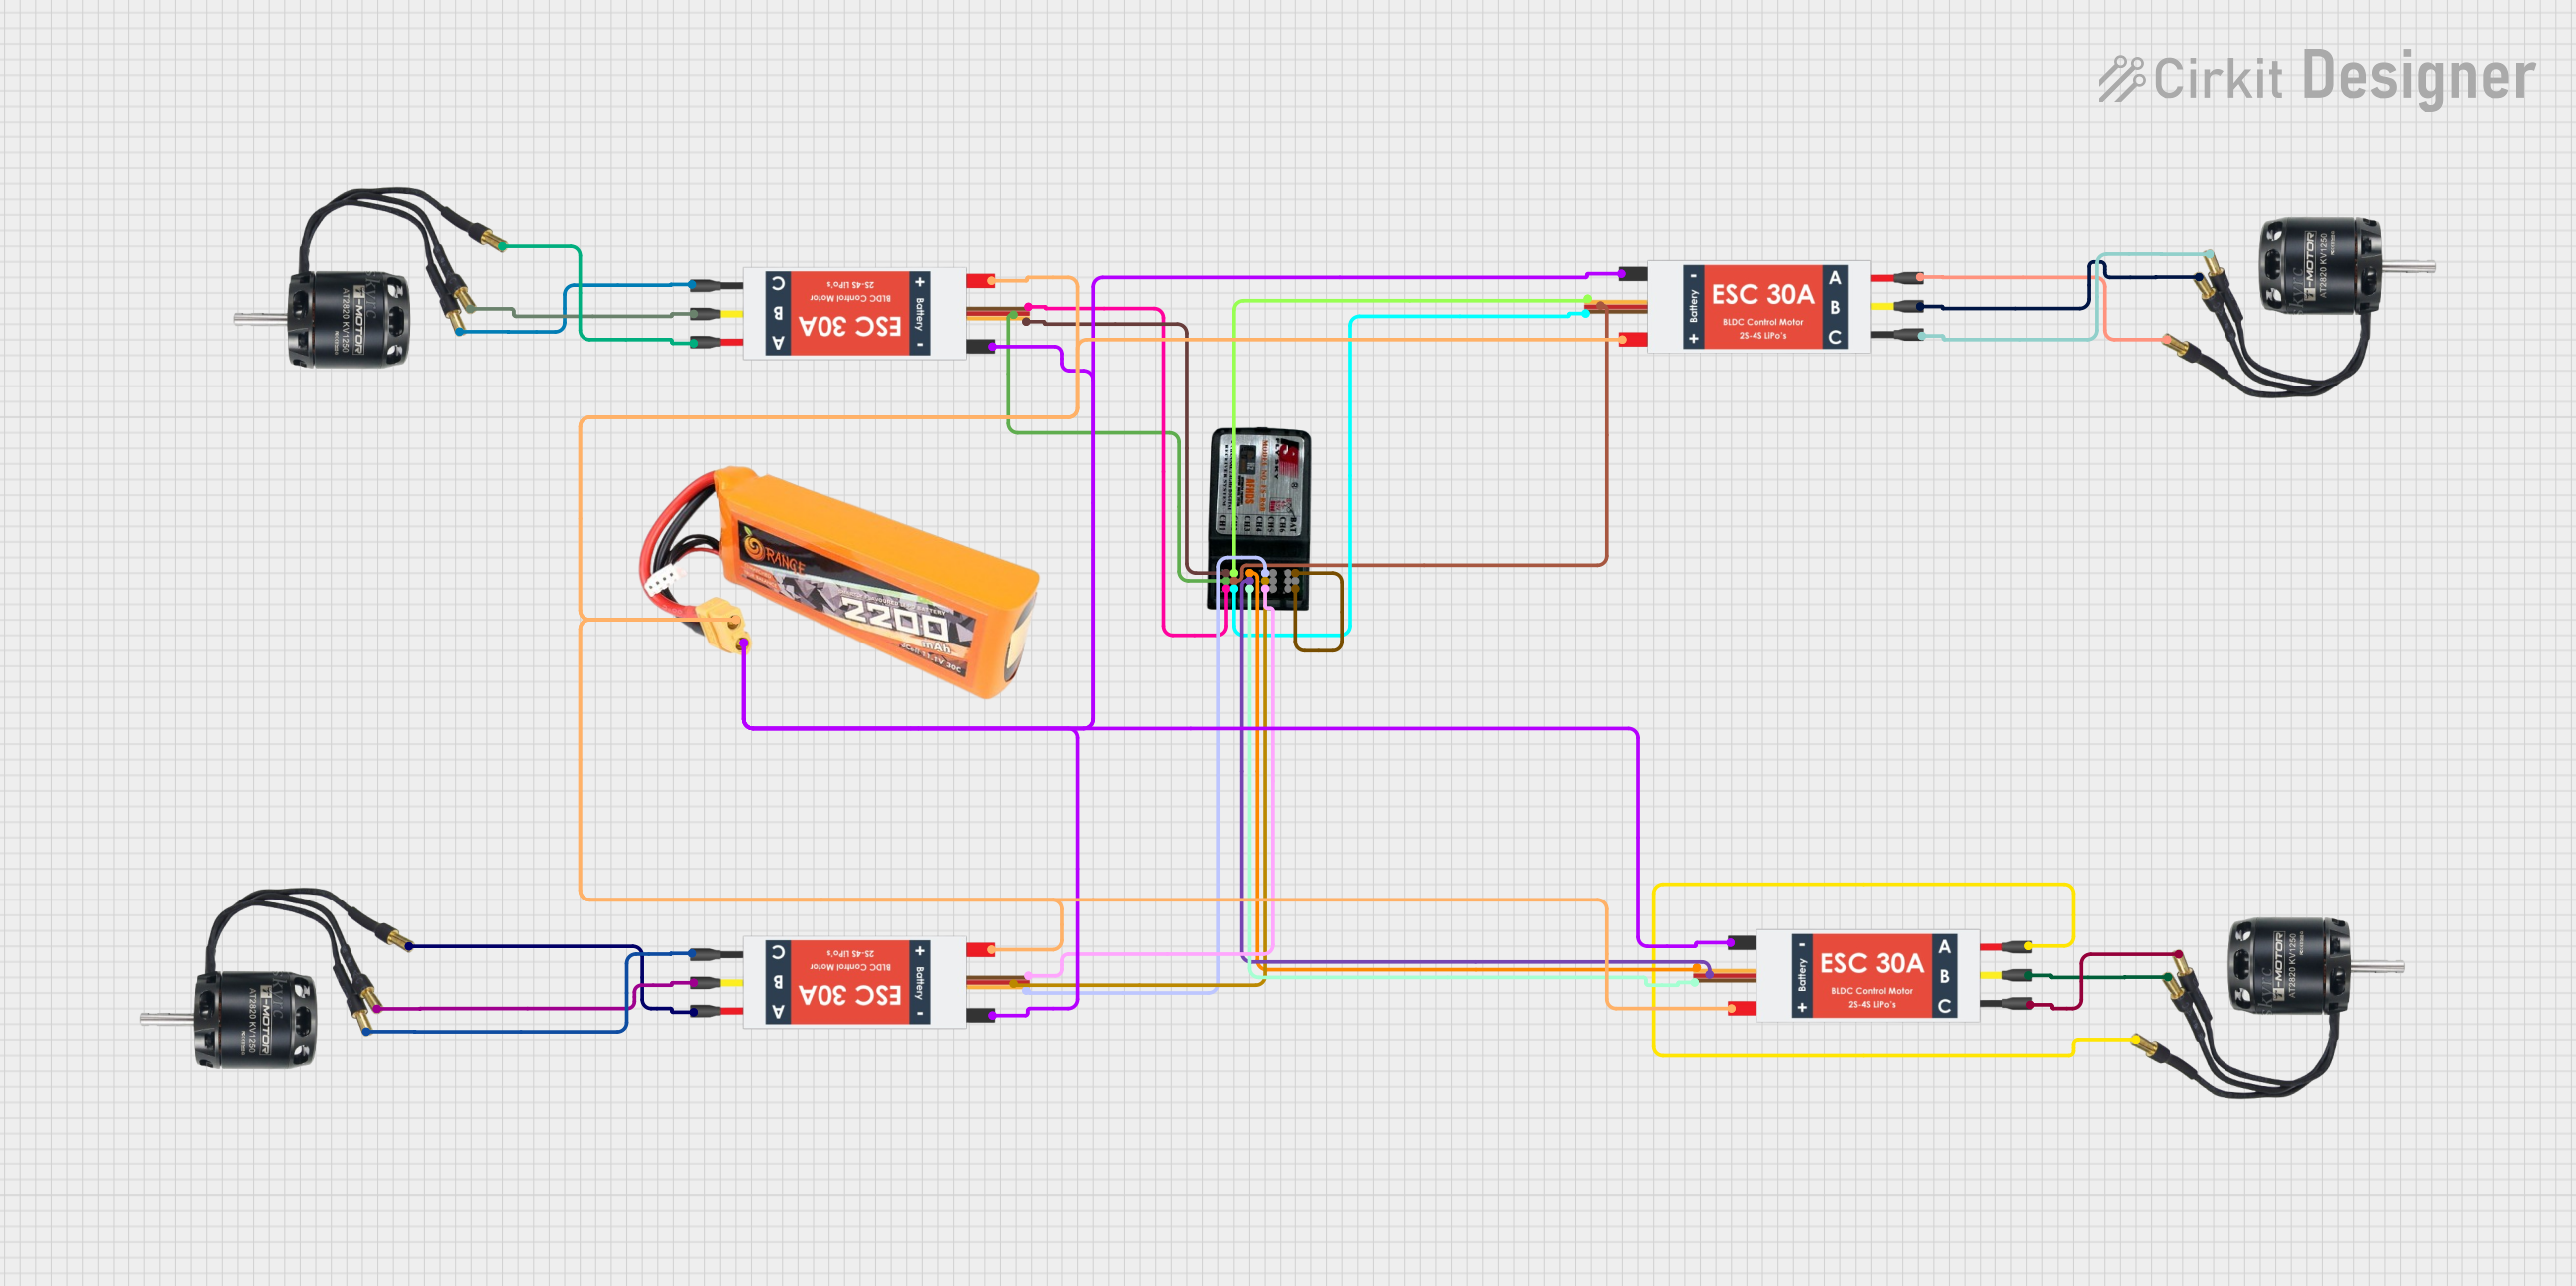
Pin Configuration and Descriptions

The Skystars Talon 40A Slim ESC has the following pin configuration:

Pin Name Description
Signal Receives the control signal (PWM or DShot) from the flight controller or receiver.
+ (VCC) Positive power input terminal (connect to LiPo battery positive terminal).
- (GND) Ground terminal (connect to LiPo battery negative terminal).
Motor Wires Three wires to connect to the brushless motor (A, B, C phases).

Usage Instructions

How to Use the Component in a Circuit

  1. Connect the Power Supply:

    • Connect the positive terminal of your LiPo battery to the + (VCC) pin of the ESC.
    • Connect the negative terminal of your LiPo battery to the - (GND) pin of the ESC.
  2. Connect the Motor:

    • Attach the three motor wires (A, B, C) from the ESC to the corresponding terminals of the brushless motor.
    • If the motor spins in the wrong direction, swap any two of the three motor wires.
  3. Connect the Signal Input:

    • Connect the Signal pin of the ESC to the PWM or DShot output pin of your flight controller or receiver.
  4. Calibrate the ESC (if required):

    • Follow the calibration procedure specific to your flight controller or transmitter to ensure proper throttle range.
  5. Secure the ESC:

    • Mount the ESC securely on your drone or RC vehicle using double-sided tape or zip ties. Ensure proper airflow for cooling.

Important Considerations and Best Practices

  • Power Rating: Ensure the ESC's current rating (40A) matches or exceeds the requirements of your motor and propeller combination.
  • Cooling: Avoid overheating by ensuring adequate airflow around the ESC during operation.
  • Firmware Updates: Use BLHeli_S software to update or configure the ESC for optimal performance.
  • Signal Type: Verify that your flight controller supports the signal type (PWM or DShot) used by the ESC.
  • Battery Voltage: Use a LiPo battery within the supported voltage range (2S-6S).

Example Code for Arduino UNO

If you are using the ESC with an Arduino UNO to control a brushless motor via PWM, you can use the following example code:

#include <Servo.h> // Include the Servo library to generate PWM signals

Servo esc; // Create a Servo object to control the ESC

void setup() {
  esc.attach(9); // Attach the ESC signal wire to pin 9 on the Arduino
  esc.writeMicroseconds(1000); // Send minimum throttle signal (1000 µs)
  delay(2000); // Wait for 2 seconds to allow the ESC to initialize
}

void loop() {
  esc.writeMicroseconds(1500); // Set throttle to 50% (1500 µs)
  delay(5000); // Run the motor at 50% throttle for 5 seconds

  esc.writeMicroseconds(1000); // Set throttle to 0% (1000 µs)
  delay(5000); // Stop the motor for 5 seconds
}

Note: Ensure the ESC is properly calibrated before running the code. Always test the setup in a safe environment.

Troubleshooting and FAQs

Common Issues and Solutions

  1. Motor Does Not Spin:

    • Cause: Incorrect wiring or signal input.
      Solution: Verify the motor wires are connected correctly and the signal wire is properly attached to the flight controller or receiver.
  2. Motor Spins in the Wrong Direction:

    • Cause: Incorrect motor wire connections.
      Solution: Swap any two of the three motor wires to reverse the motor's direction.
  3. ESC Overheats:

    • Cause: Insufficient cooling or overcurrent.
      Solution: Ensure proper airflow around the ESC and verify the motor/propeller combination does not exceed the ESC's current rating.
  4. No Response from ESC:

    • Cause: Incorrect signal type or throttle calibration.
      Solution: Check the signal type (PWM or DShot) and recalibrate the ESC throttle range.

FAQs

  • Q: Can I use this ESC with a brushed motor?
    A: No, this ESC is designed specifically for brushless motors.

  • Q: Does the ESC have a built-in BEC?
    A: No, the Skystars Talon 40A Slim ESC does not include a BEC. Use an external BEC if 5V power is required for other components.

  • Q: How do I update the firmware?
    A: Use the BLHeli_S configurator software and a compatible USB interface to update or configure the ESC firmware.

  • Q: Can I use this ESC with a 7S LiPo battery?
    A: No, the ESC supports a maximum of 6S (25.2V) LiPo batteries. Using a higher voltage may damage the ESC.

By following this documentation, you can effectively integrate and operate the Skystars Talon 40A Slim ESC in your projects.