How to Use Adafruit Motor Bonnet: Examples, Pinouts, and Specs
Introduction
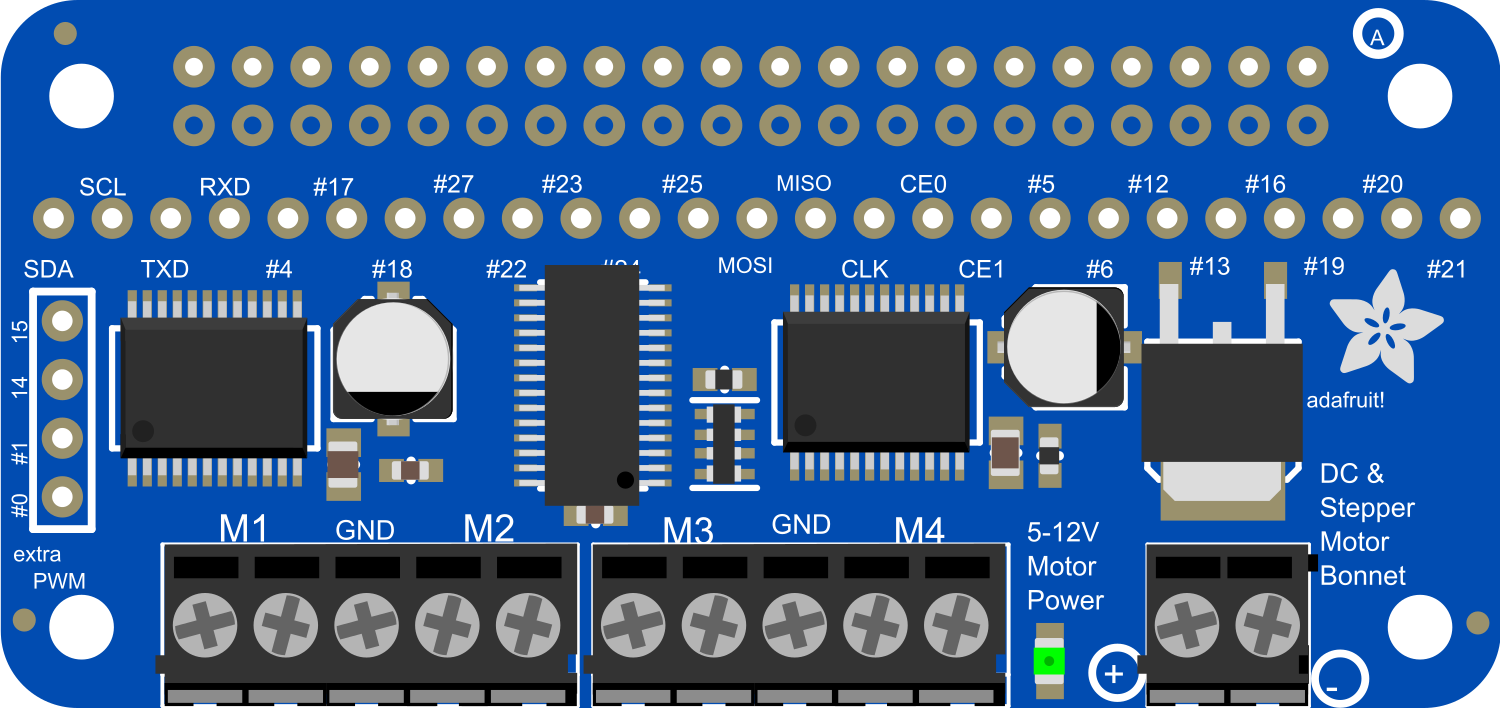
The Adafruit Motor Bonnet is a versatile and compact motor control board designed for the Raspberry Pi. It allows users to easily connect and control up to four DC motors or two stepper motors, making it an ideal choice for a wide range of robotics and automation projects. The bonnet's HAT (Hardware Attached on Top) form factor ensures a seamless integration with the Raspberry Pi, providing a neat and efficient solution for motor control.
Explore Projects Built with Adafruit Motor Bonnet
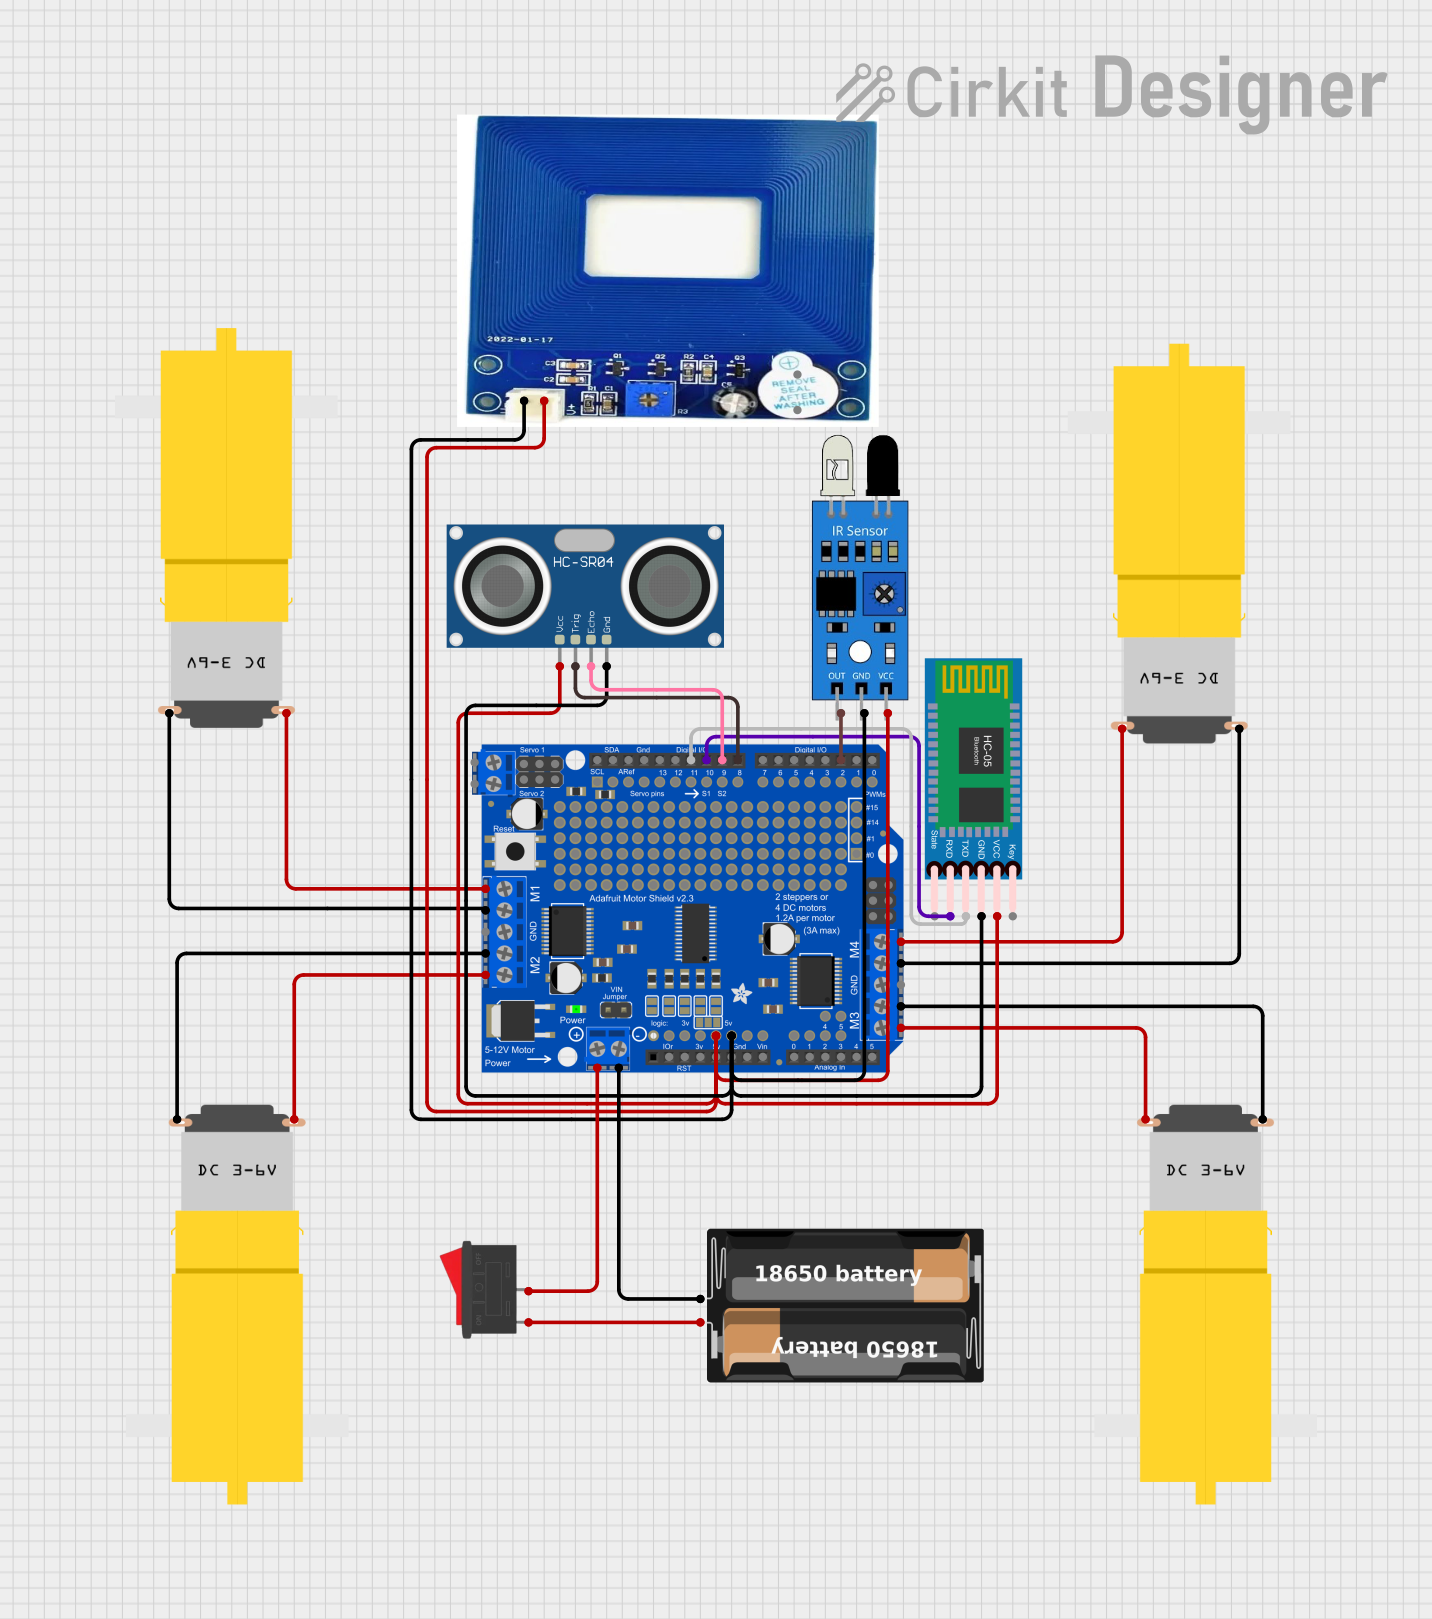
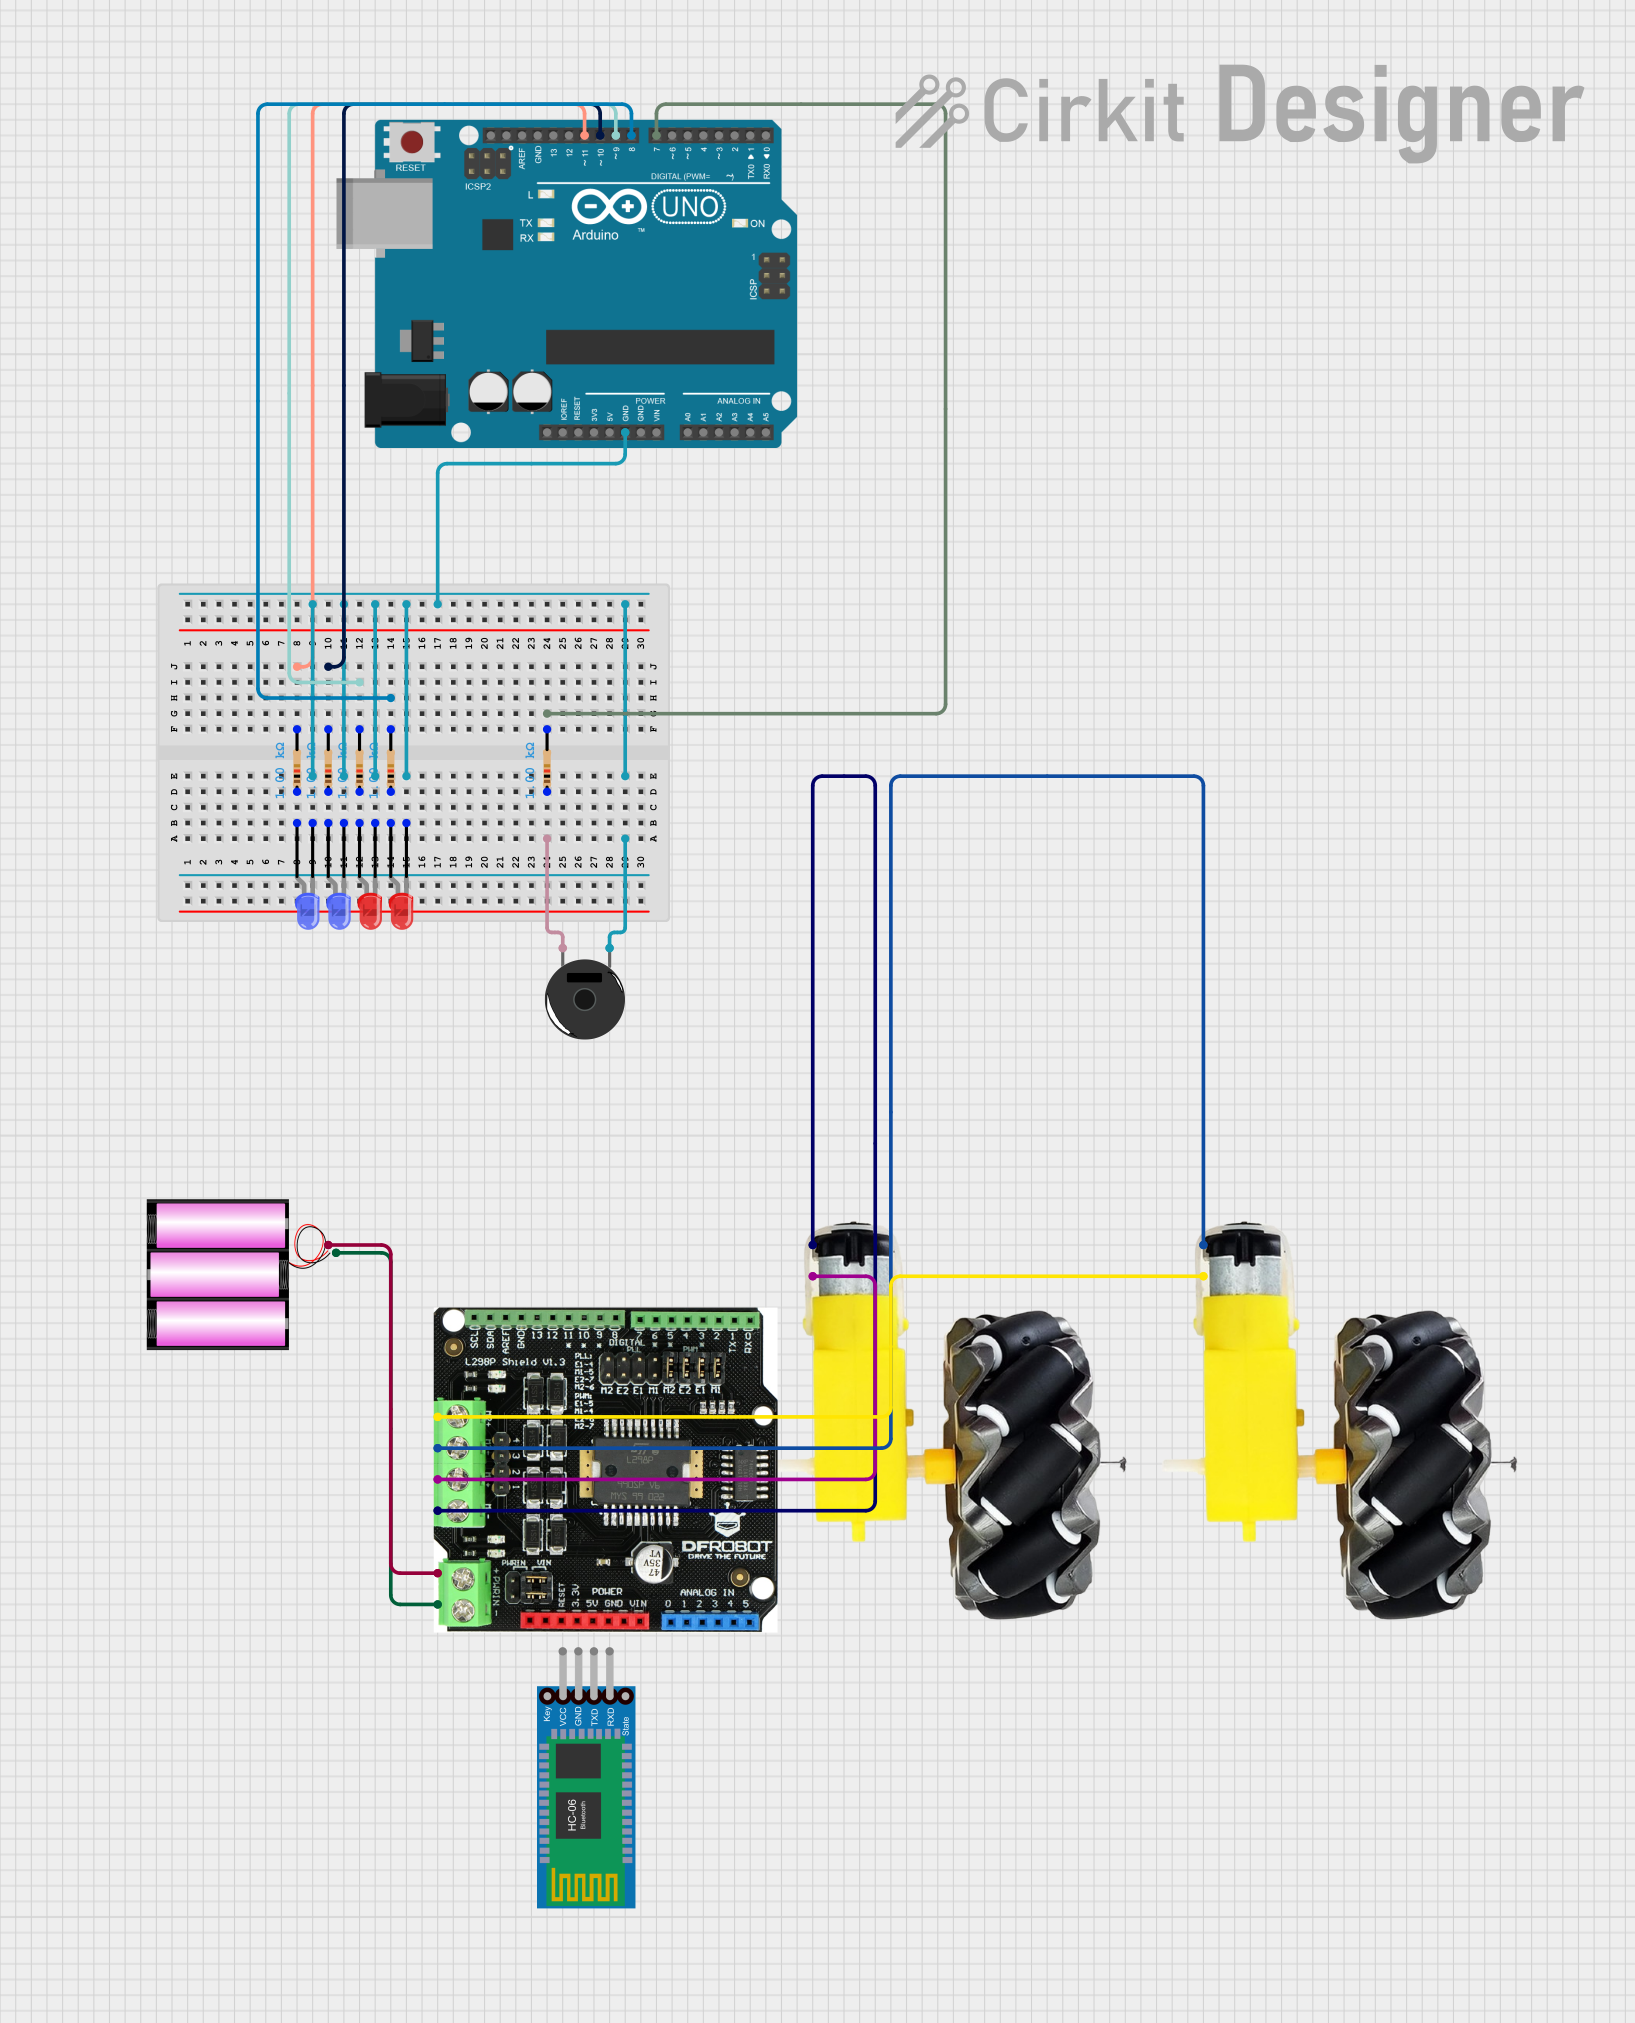
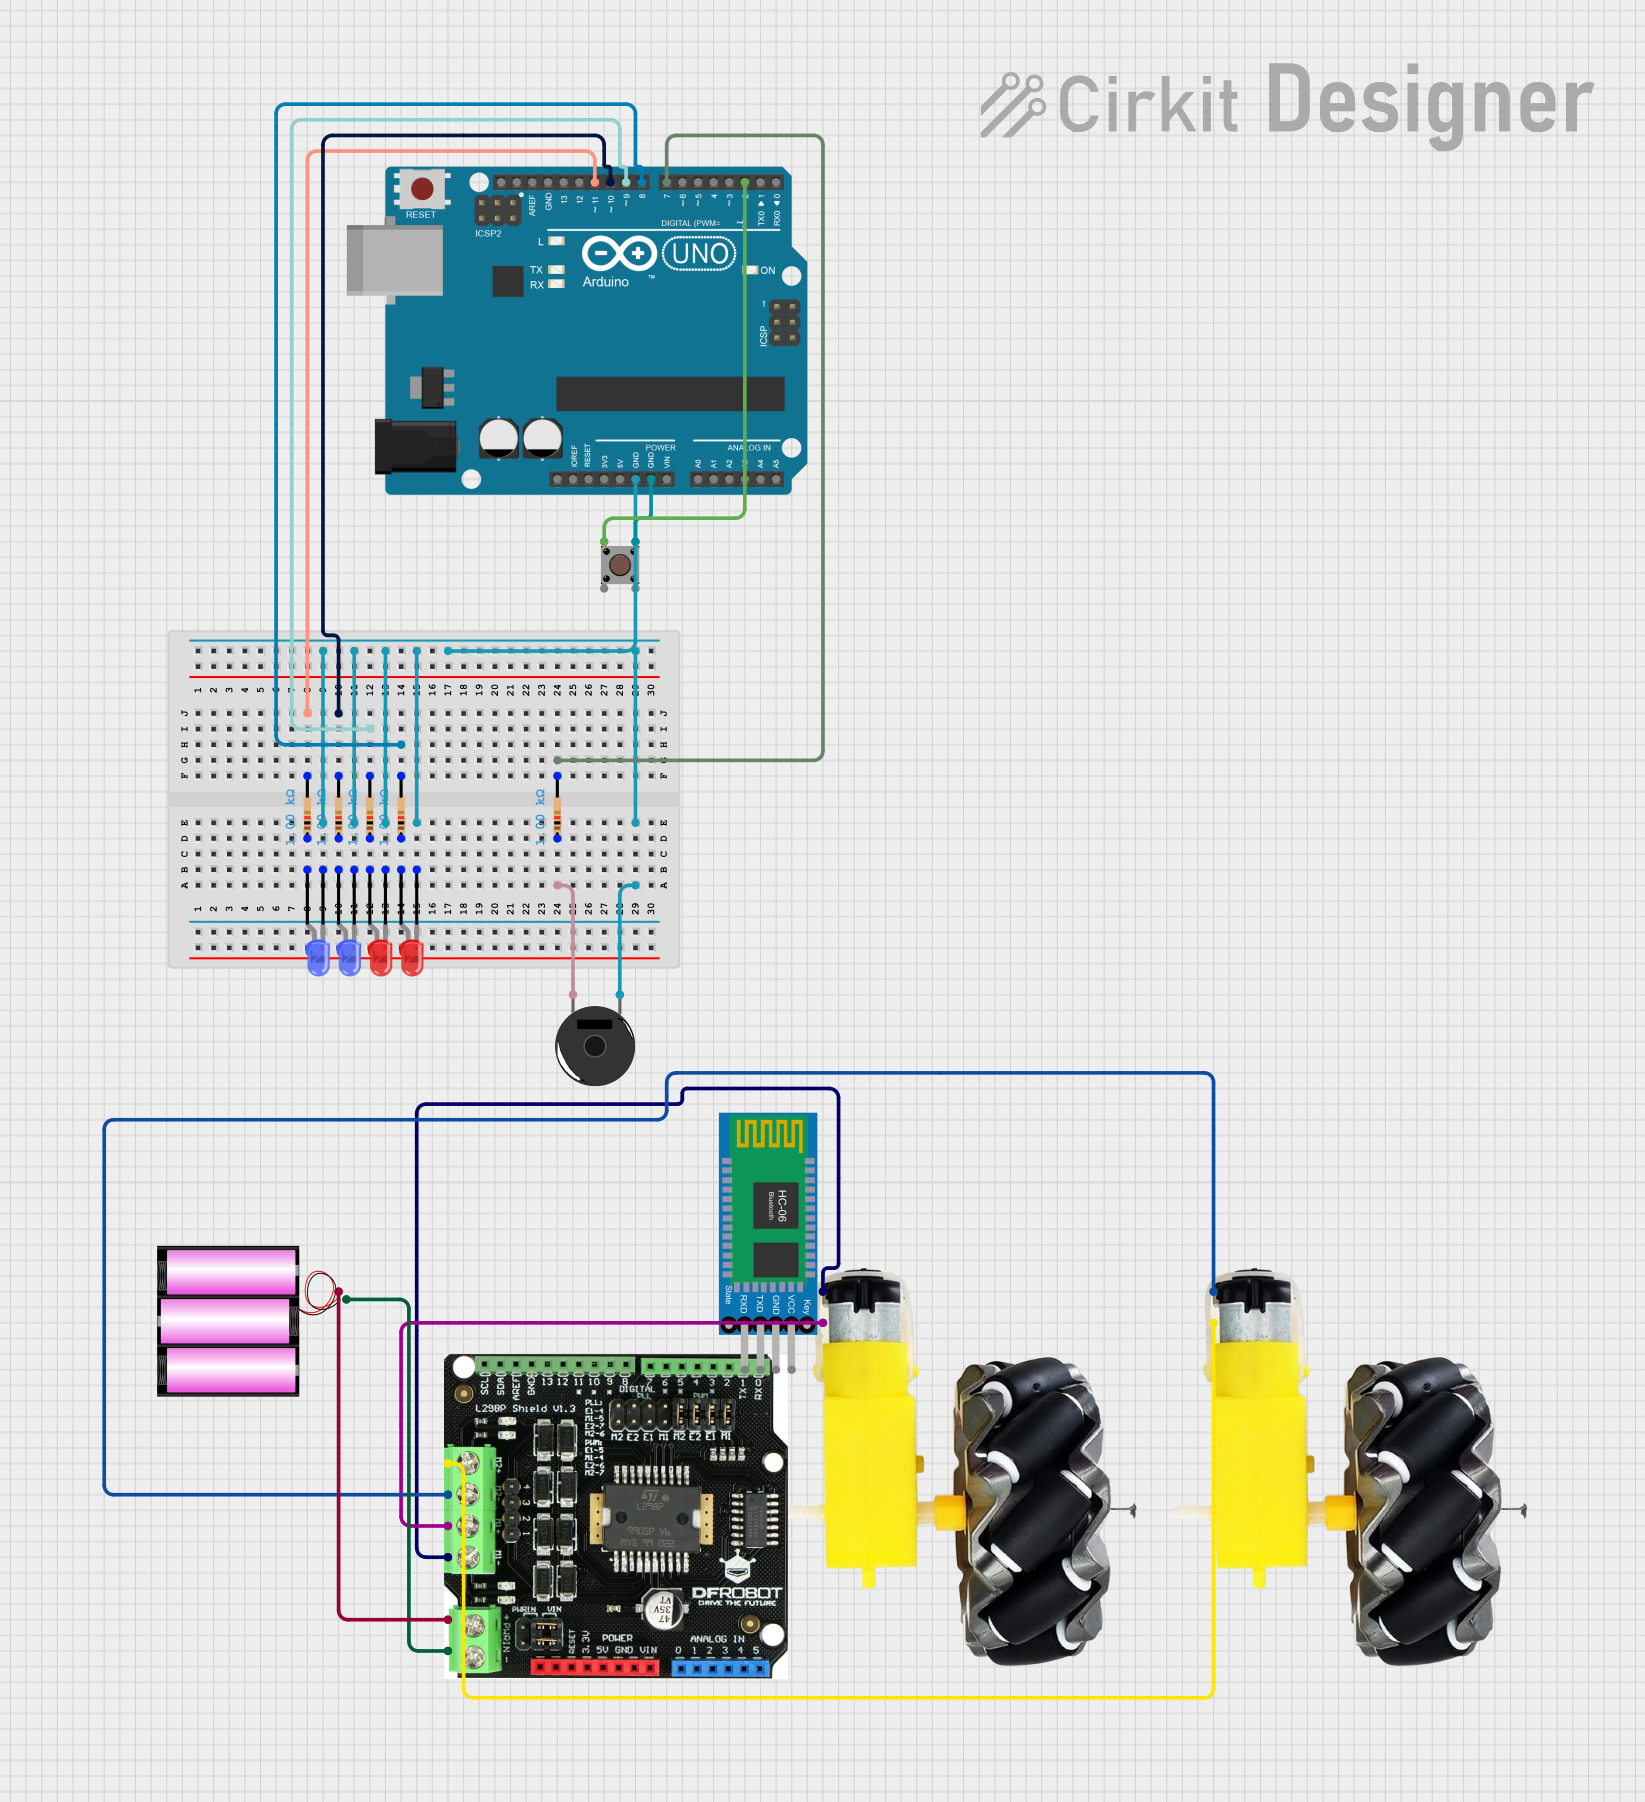

Explore Projects Built with Adafruit Motor Bonnet
Common Applications and Use Cases
- Robotics: Drive wheels or tracks for robots.
- Automation: Control conveyor belts, linear actuators, or other machinery.
- Art installations: Animate moving parts in interactive art pieces.
- Educational projects: Teach students about motor control and robotics.
Technical Specifications
Key Technical Details
- Voltage Range: 4.5V to 13.5V
- Logic Voltage: 3.3V (compatible with Raspberry Pi logic level)
- Continuous Current per Channel: 1.2A
- Peak Current per Channel: 3.0A (for a few seconds)
- PWM Driver: TB6612 chipset
Pin Configuration and Descriptions
| Pin Number | Function | Description |
|---|---|---|
| 1 | Motor 1 A | Output A for Motor 1 |
| 2 | Motor 1 B | Output B for Motor 1 |
| 3 | Motor 2 A | Output A for Motor 2 |
| 4 | Motor 2 B | Output B for Motor 2 |
| 5 | Motor 3 A | Output A for Motor 3 (if using DC motors) |
| 6 | Motor 3 B | Output B for Motor 3 (if using DC motors) |
| 7 | Motor 4 A | Output A for Motor 4 (if using DC motors) |
| 8 | Motor 4 B | Output B for Motor 4 (if using DC motors) |
| 9-12 | Stepper Motor 1 | Outputs for Stepper Motor 1 (if using steppers) |
| 13-16 | Stepper Motor 2 | Outputs for Stepper Motor 2 (if using steppers) |
| 17 | Power (VMotor) | Motor power supply (4.5V to 13.5V) |
| 18 | Ground | Ground connection |
| 19 | I2C SDA | I2C Data line for communication with Raspberry Pi |
| 20 | I2C SCL | I2C Clock line for communication with Raspberry Pi |
Usage Instructions
How to Use the Component in a Circuit
- Power Supply: Connect a suitable power supply (4.5V to 13.5V) to the VMotor and Ground pins.
- Motor Connection: Attach the motors to the appropriate Motor A and Motor B output pins.
- Raspberry Pi Connection: Mount the Motor Bonnet on top of the Raspberry Pi GPIO header.
- Software Setup: Install the Adafruit Motor HAT Python library on the Raspberry Pi to control the motors through software.
Important Considerations and Best Practices
- Ensure the power supply voltage and current are within the specified range for the Motor Bonnet.
- Do not exceed the continuous current rating of 1.2A per channel to prevent damage.
- Use external power for motors; do not power motors from the Raspberry Pi's 5V pin.
- Always disconnect the power before making or changing connections to the Motor Bonnet.
Troubleshooting and FAQs
Common Issues Users Might Face
- Motors not responding: Check power supply connections and ensure the Motor Bonnet is properly seated on the Raspberry Pi.
- Unexpected motor behavior: Verify that the motor wiring is correct and that the software is properly configured.
- Overheating: Ensure that the current draw is within limits and that there is adequate ventilation.
Solutions and Tips for Troubleshooting
- Double-check all connections and wiring.
- Review the code to ensure that the correct pins and commands are being used.
- Use a multimeter to verify power supply voltage and motor resistance.
FAQs
Q: Can I control servo motors with the Motor Bonnet? A: No, the Motor Bonnet is designed for DC and stepper motors. For servo control, consider using a dedicated servo controller.
Q: How do I stack multiple Motor Bonnets? A: You can stack multiple bonnets by assigning unique I2C addresses to each bonnet. Refer to the Adafruit guide on stacking HATs for detailed instructions.
Q: Can I use this with a Raspberry Pi Zero? A: Yes, the Motor Bonnet is compatible with the Raspberry Pi Zero, but you will need a GPIO header soldered onto the Pi Zero.
Q: Is there a software library available for the Motor Bonnet? A: Yes, Adafruit provides a Python library specifically for controlling the Motor Bonnet. It can be installed via pip and used in your projects.
For further assistance, consult the Adafruit Motor Bonnet forums or contact Adafruit support.