How to Use Mtiny ESP8266 ESP-07S: Examples, Pinouts, and Specs
Introduction
The Mtiny ESP8266 ESP-07S is a versatile and compact Wi-Fi module that enables microcontrollers and other electronic devices to connect to a Wi-Fi network. Based on the popular ESP8266 chipset, this module is designed by Makerlabvn for Internet of Things (IoT) applications, smart home devices, and various DIY electronics projects. It offers a powerful on-board processing and storage capability, which allows it to be integrated in a wide range of applications without the need for an additional microcontroller.
Explore Projects Built with Mtiny ESP8266 ESP-07S

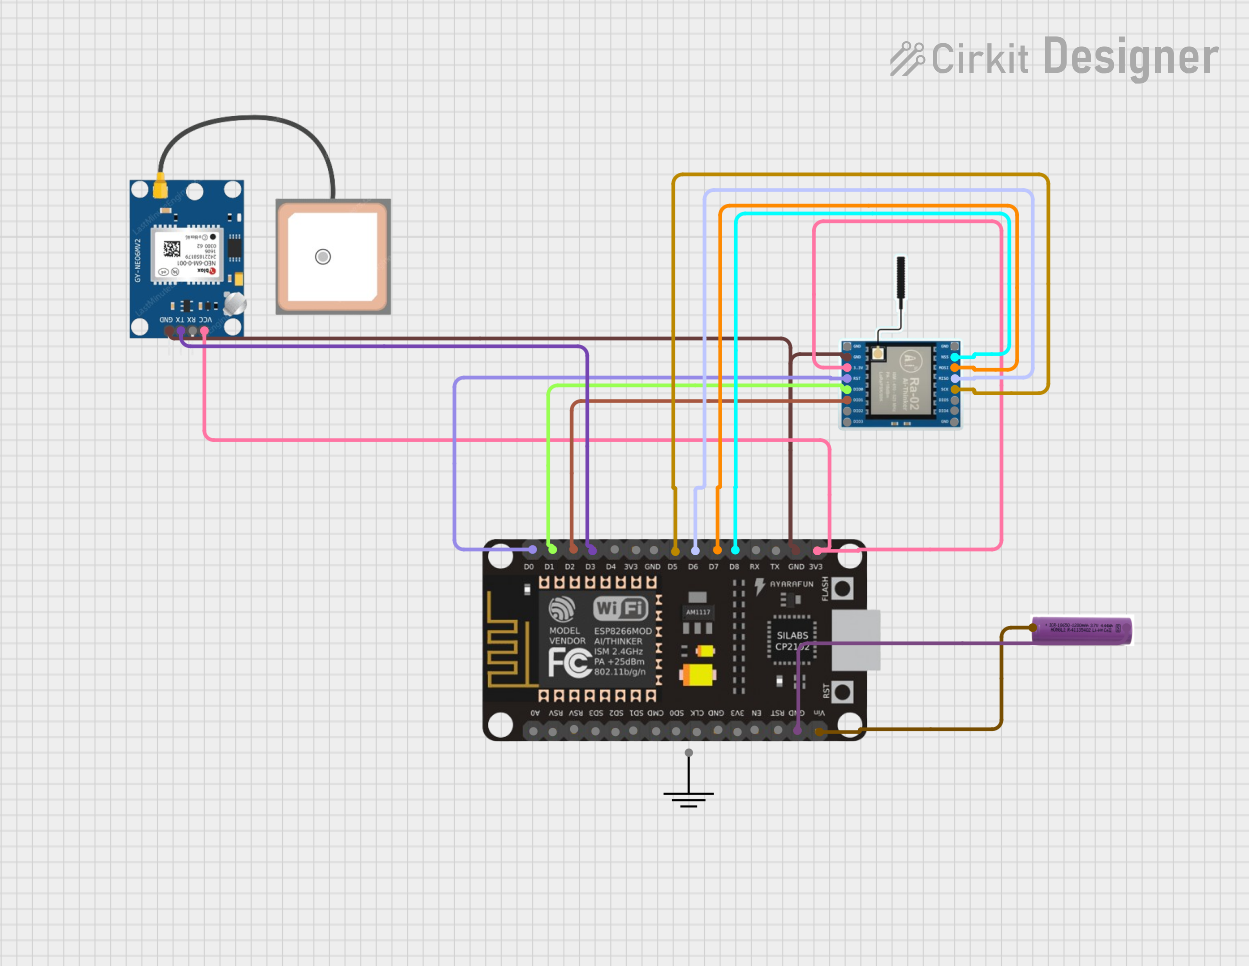
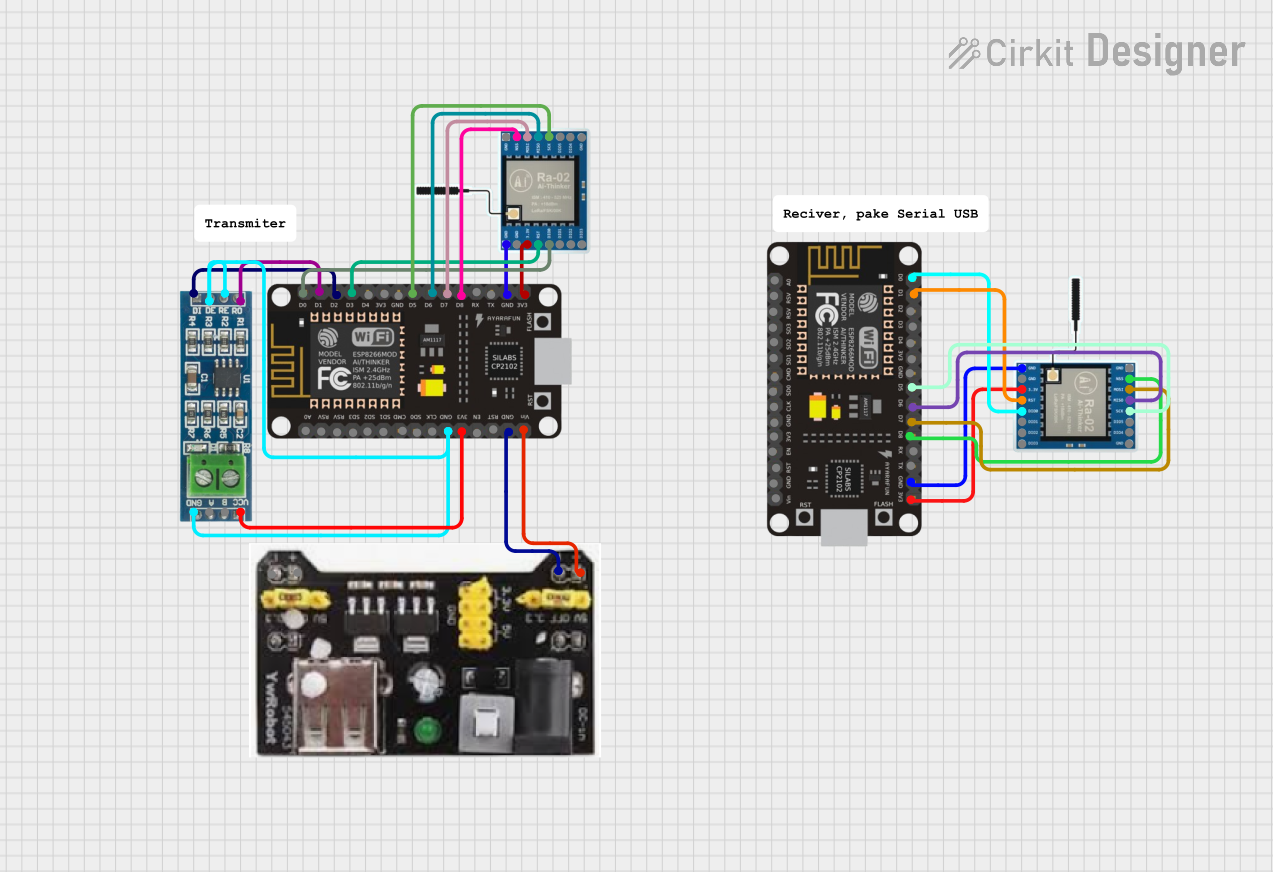
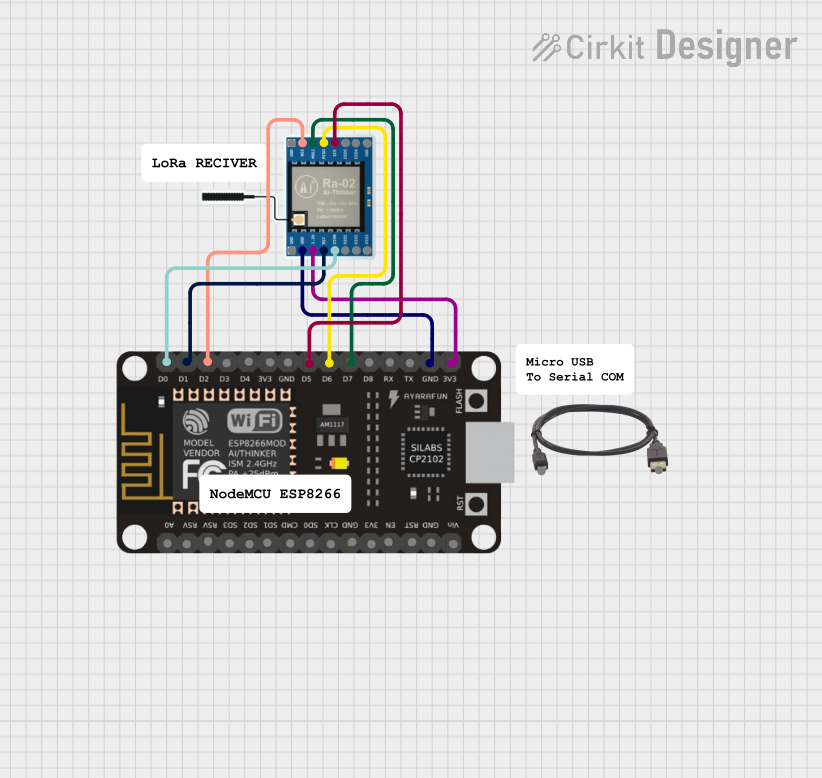
Explore Projects Built with Mtiny ESP8266 ESP-07S
Common Applications and Use Cases
- IoT devices
- Wireless sensor networks
- Smart home automation
- Remote data logging
- Wi-Fi range extenders
- Robotics
Technical Specifications
Key Technical Details
- Operating Voltage: 3.0V to 3.6V
- Recommended Operating Voltage: 3.3V
- Operating Current: Average ~80mA
- Wireless Standard: 802.11 b/g/n
- Frequency Range: 2.4 GHz - 2.5 GHz (2400M - 2483.5M)
- Integrated TCP/IP protocol stack
- Flash Memory: 4MB
- Operating Temperature: -40°C to 125°C
Pin Configuration and Descriptions
| Pin Number | Name | Description |
|---|---|---|
| 1 | GND | Ground |
| 2 | GPIO13 | General Purpose Input/Output |
| 3 | GPIO15 | General Purpose Input/Output, boot from SD card if pulled high |
| 4 | GPIO2 | General Purpose Input/Output, boot from flash if pulled low |
| 5 | GPIO0 | General Purpose Input/Output, must be low during boot for flashing mode |
| 6 | GPIO4 | General Purpose Input/Output |
| 7 | GPIO5 | General Purpose Input/Output |
| 8 | GPIO14 | General Purpose Input/Output |
| 9 | GPIO12 | General Purpose Input/Output |
| 10 | GPIO16 | Deep-sleep wakeup |
| 11 | ADC | Analog to Digital Converter input |
| 12 | EN | Chip Enable, active high |
| 13 | RST | Reset pin, active low |
| 14 | VCC | Power supply (3.3V) |
| 15 | TXD | Transmit Data for UART |
| 16 | RXD | Receive Data for UART |
| 17 | GPIO9 | General Purpose Input/Output, SDIO Data |
| 18 | GPIO10 | General Purpose Input/Output, SDIO Data |
Usage Instructions
How to Use the Component in a Circuit
- Power Supply: Connect the VCC pin to a 3.3V power source and the GND pin to the ground.
- Boot Configuration: Ensure GPIO0 is pulled low if you want to flash a new firmware.
- Serial Communication: Connect TXD and RXD to a USB-to-Serial converter to communicate with the module.
- GPIO Usage: Utilize the GPIO pins for interfacing with sensors, actuators, or other modules.
- Antenna Connection: Connect an external antenna to the antenna pad for improved wireless range.
Important Considerations and Best Practices
- Do not exceed the recommended operating voltage of 3.3V.
- Use a stable power supply to prevent unexpected resets.
- Ensure proper decoupling capacitors are placed close to the module to filter noise.
- Avoid placing the module near metal objects or surfaces that may interfere with Wi-Fi signals.
- For flashing firmware or booting, follow the correct GPIO pin states (e.g., GPIO0 must be low for flashing mode).
Troubleshooting and FAQs
Common Issues Users Might Face
- Module not booting: Check the power supply and boot configuration pins (GPIO0, GPIO2, and GPIO15).
- Wi-Fi not connecting: Ensure the antenna is properly connected and the Wi-Fi credentials are correct.
- Serial communication failure: Verify the baud rate and that TXD/RXD are not swapped.
Solutions and Tips for Troubleshooting
- If the module is unresponsive, try a different power supply or check the voltage at VCC.
- For Wi-Fi issues, try moving the module closer to the router or check for sources of interference.
- Use a logic level converter if interfacing with a 5V system to avoid damaging the module.
FAQs
Q: Can the ESP-07S be used with an Arduino? A: Yes, it can be used with an Arduino by connecting the TX/RX pins and controlling it via AT commands or flashing it with custom firmware.
Q: How do I flash the module? A: To flash the module, connect GPIO0 to GND, reset the module, and use a firmware flashing tool like esptool.py with the correct settings.
Q: What is the default baud rate for the ESP-07S? A: The default baud rate is typically 115200 bps, but it can be changed using AT commands.
Q: How can I extend the Wi-Fi range of the ESP-07S? A: Use an external antenna and ensure it's properly connected to the antenna pad on the module.
Example Code for Arduino UNO
#include <ESP8266WiFi.h>

const char* ssid = "yourSSID"; // Replace with your Wi-Fi SSID
const char* password = "yourPASSWORD"; // Replace with your Wi-Fi password

void setup() {
  Serial.begin(115200);
  WiFi.begin(ssid, password);

  while (WiFi.status() != WL_CONNECTED) {
    delay(500);
    Serial.print(".");
  }

  Serial.println("");
  Serial.println("WiFi connected");
}

void loop() {
  // Your code here
}
Note: This example assumes that the ESP-07S has been flashed with an Arduino-compatible firmware like NodeMCU and is being used as a standalone microcontroller. If you're using the ESP-07S with an Arduino UNO, you would typically communicate with it using AT commands over a serial connection.