How to Use Adafruit 2.13in Monochrome E-Ink Bonnet: Examples, Pinouts, and Specs
Introduction
The Adafruit 2.13in Monochrome E-Ink Bonnet is a high-contrast, low-power display module designed for use with the Raspberry Pi. This E-Ink or electronic paper display (EPD) is ideal for applications where a simple, clear display is needed without the power consumption of a traditional LCD. Common applications include e-readers, signage, shelf labels, and any project where the display content changes infrequently.
Explore Projects Built with Adafruit 2.13in Monochrome E-Ink Bonnet

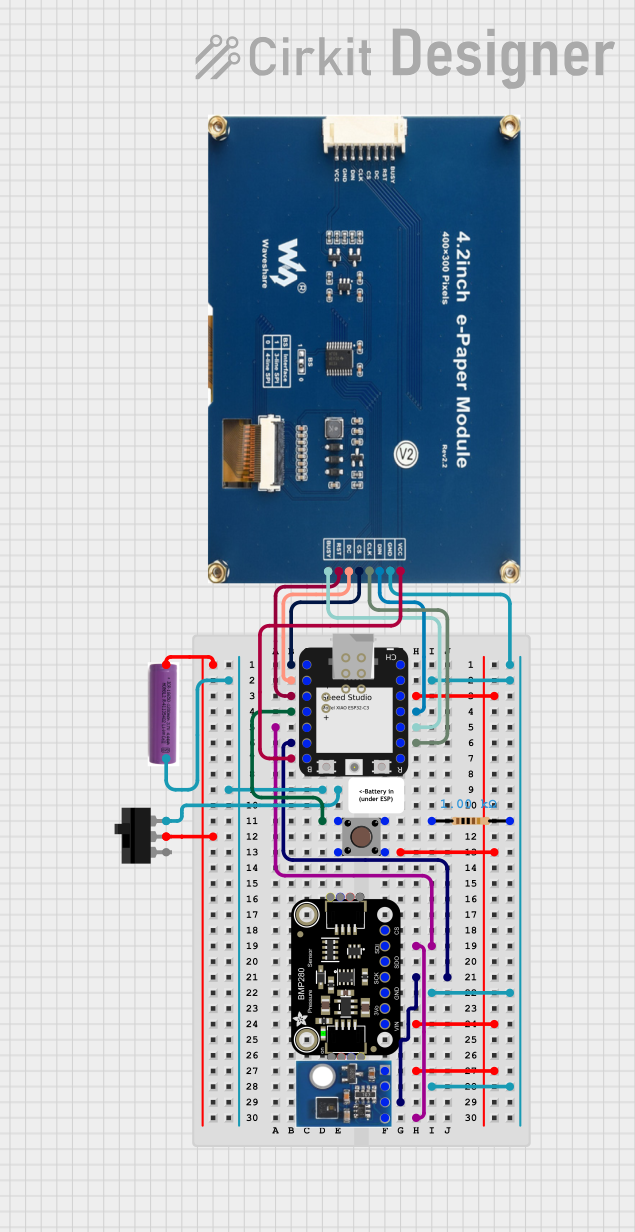

Explore Projects Built with Adafruit 2.13in Monochrome E-Ink Bonnet
Technical Specifications
Key Technical Details
- Display Type: E-Ink monochrome display
- Resolution: 212 x 104 pixels
- Display Size: 2.13 inches diagonal
- Interface: SPI
- Operating Voltage: 3.3V
- Dimensions: 65mm x 30.5mm x 6.8mm
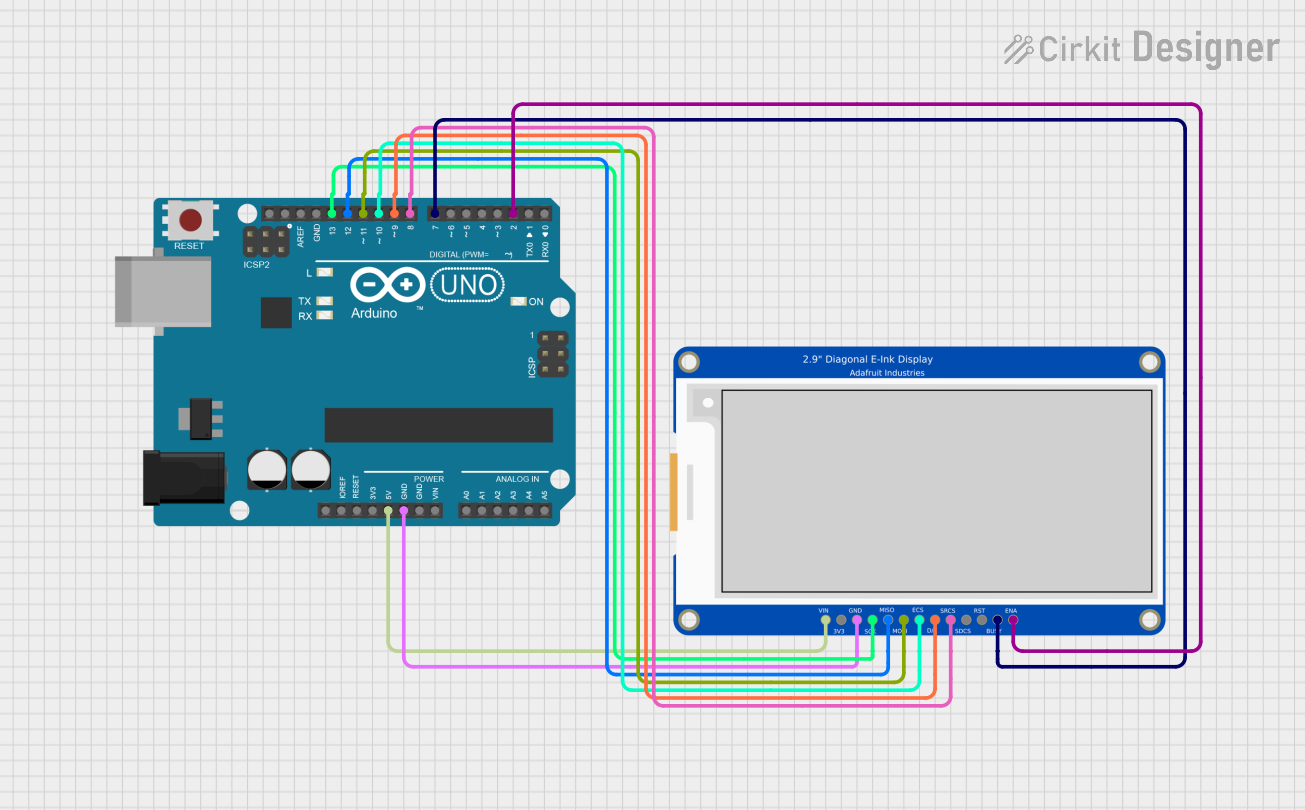
Pin Configuration and Descriptions
| Pin Number | Name | Description |
|---|---|---|
| 1 | GND | Ground |
| 2 | 3V3 | 3.3V Power |
| 3 | SCK | SPI Clock |
| 4 | MOSI | SPI Master Out Slave In |
| 5 | CS | SPI Chip Select |
| 6 | DC | Data/Command control pin |
| 7 | RST | Reset pin |
| 8 | BUSY | Busy state output pin |
Usage Instructions
Integration with Raspberry Pi
Hardware Setup:
- Align the Bonnet's GPIO connector with the Raspberry Pi's GPIO header and press down to connect.
- Ensure the Pi is powered off before connecting the Bonnet to prevent any electrical damage.
Software Configuration:
- Install the necessary libraries for the E-Ink display by running the following commands in the terminal:
sudo pip3 install adafruit-circuitpython-epd sudo apt-get install python3-pil - Enable SPI using
raspi-config:
Navigate tosudo raspi-configInterfacing Options>SPIand enable it.
- Install the necessary libraries for the E-Ink display by running the following commands in the terminal:
Displaying Content:
- Use the Adafruit CircuitPython EPD library to control the display.
- Create a Python script to initialize the display and draw text or images.
Example Python Script
import digitalio
import board
from PIL import Image, ImageDraw, ImageFont
import adafruit_epd.epd as epd
Initialize the display
spi = board.SPI() ecs = digitalio.DigitalInOut(board.CE0) dc = digitalio.DigitalInOut(board.D22) rst = digitalio.DigitalInOut(board.D27) busy = digitalio.DigitalInOut(board.D17)
display = epd.EPD(spi, ecs, dc, rst, busy) display.begin()
Clear the display buffer
display.clear_buffer()
Create a blank image for drawing
width = display.width height = display.height image = Image.new('1', (width, height), 255) draw = ImageDraw.Draw(image)
Draw some text
font = ImageFont.load_default() draw.text((10, 10), 'Hello, E-Ink!', font=font, fill=0)
Display the image
display.image(image) display.display()
Important Considerations and Best Practices
- Power Consumption: The E-Ink display consumes power only when updating the display content. To conserve power, update the display only when necessary.
- Partial Refresh: The display supports partial refresh, which can be used to update only a portion of the screen.
- Image Preparation: When preparing images for the display, ensure they are monochrome (1-bit) and match the display's resolution.
Troubleshooting and FAQs
Common Issues
Display Not Updating:
- Ensure the SPI interface is enabled on the Raspberry Pi.
- Check the wiring and pin connections.
- Verify that the correct GPIO pins are being used in the script.
Image Quality Issues:
- Confirm that images are in the correct format (monochrome) and resolution.
- Use dithering to improve the appearance of grayscale images.
Solutions and Tips for Troubleshooting
SPI Communication Errors:
- Run
ls /dev/spi*to check if SPI devices are available. - If not, reconfigure SPI settings using
raspi-config.
- Run
Display is Blank:
- Ensure the display is properly initialized in the script.
- Check that the power supply is adequate and stable.
FAQs
Q: Can the display show grayscale images? A: No, the display is monochrome and can only show black and white pixels.
Q: How do I update only part of the display? A: Use the partial update functions provided by the Adafruit CircuitPython EPD library.
Q: Is the E-Ink Bonnet compatible with all Raspberry Pi models? A: It is compatible with any Raspberry Pi model that has a 40-pin GPIO header.
Q: How long does the display content remain visible after power is removed? A: The E-Ink display will retain the last image shown indefinitely without power.
For further assistance, consult the Adafruit support forums or the CircuitPython EPD library documentation.