How to Use Battery Vector: Examples, Pinouts, and Specs

Introduction
A Battery Vector is a type of power source designed to provide electrical energy to a circuit. It typically consists of multiple cells arranged in series or parallel configurations to deliver a specific voltage and current. Battery Vectors are widely used in electronic devices and systems, ranging from small portable gadgets to large industrial equipment. Their versatility and reliability make them an essential component in modern electronics.
Explore Projects Built with Battery Vector

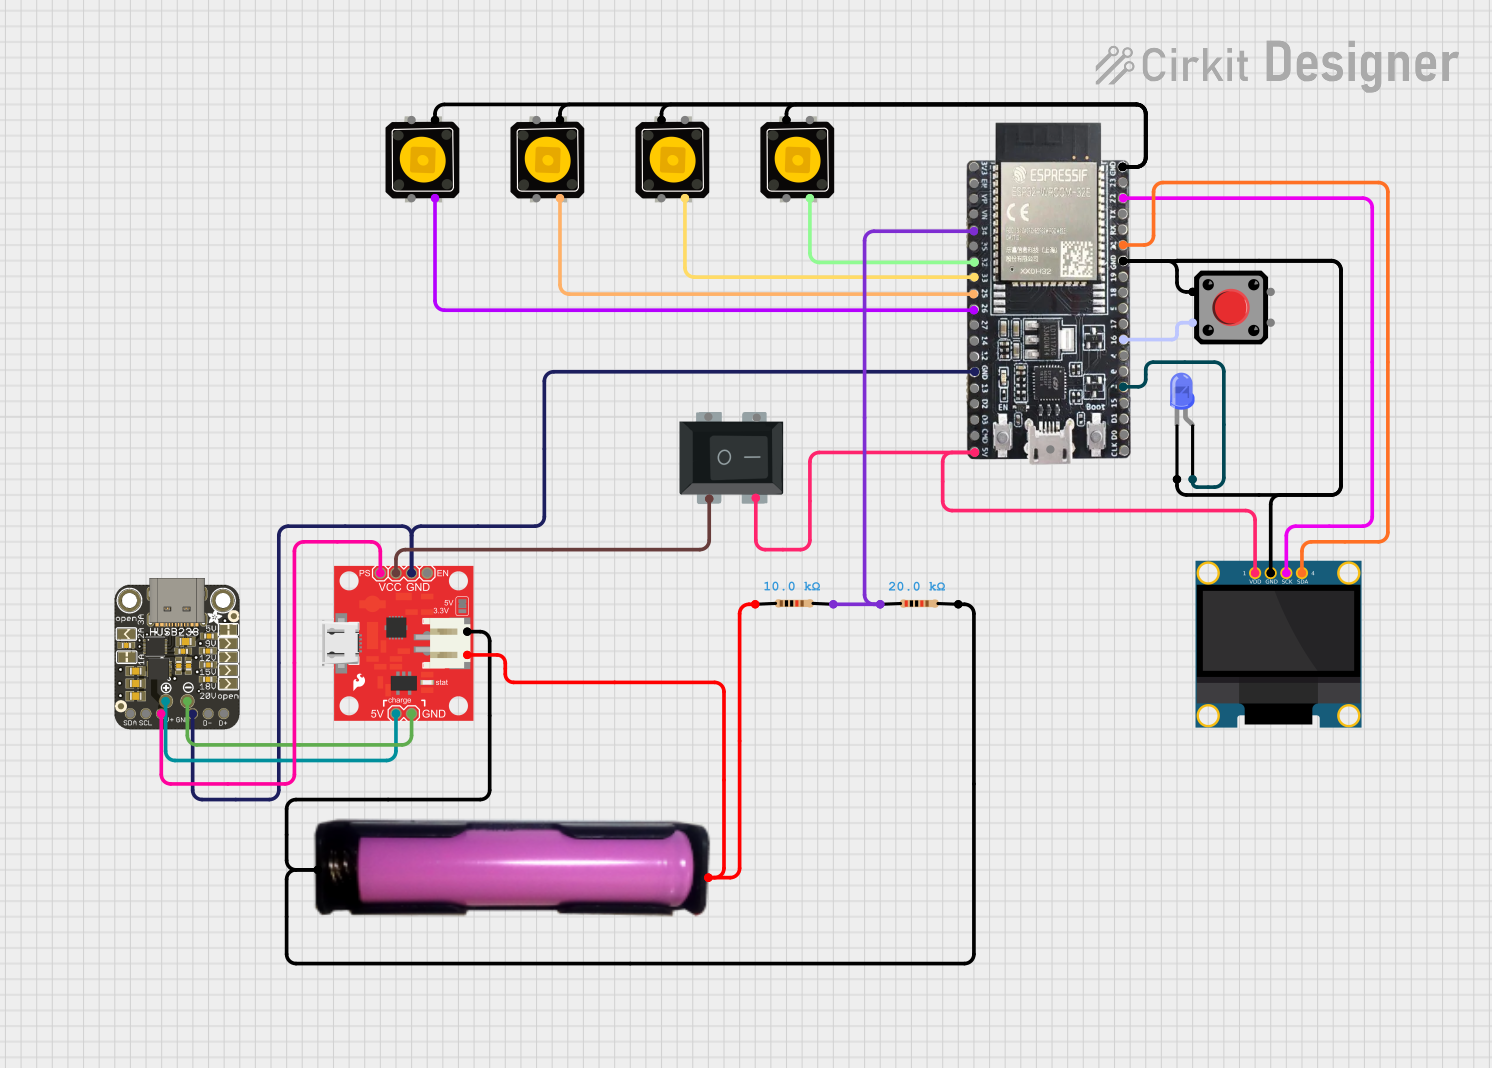
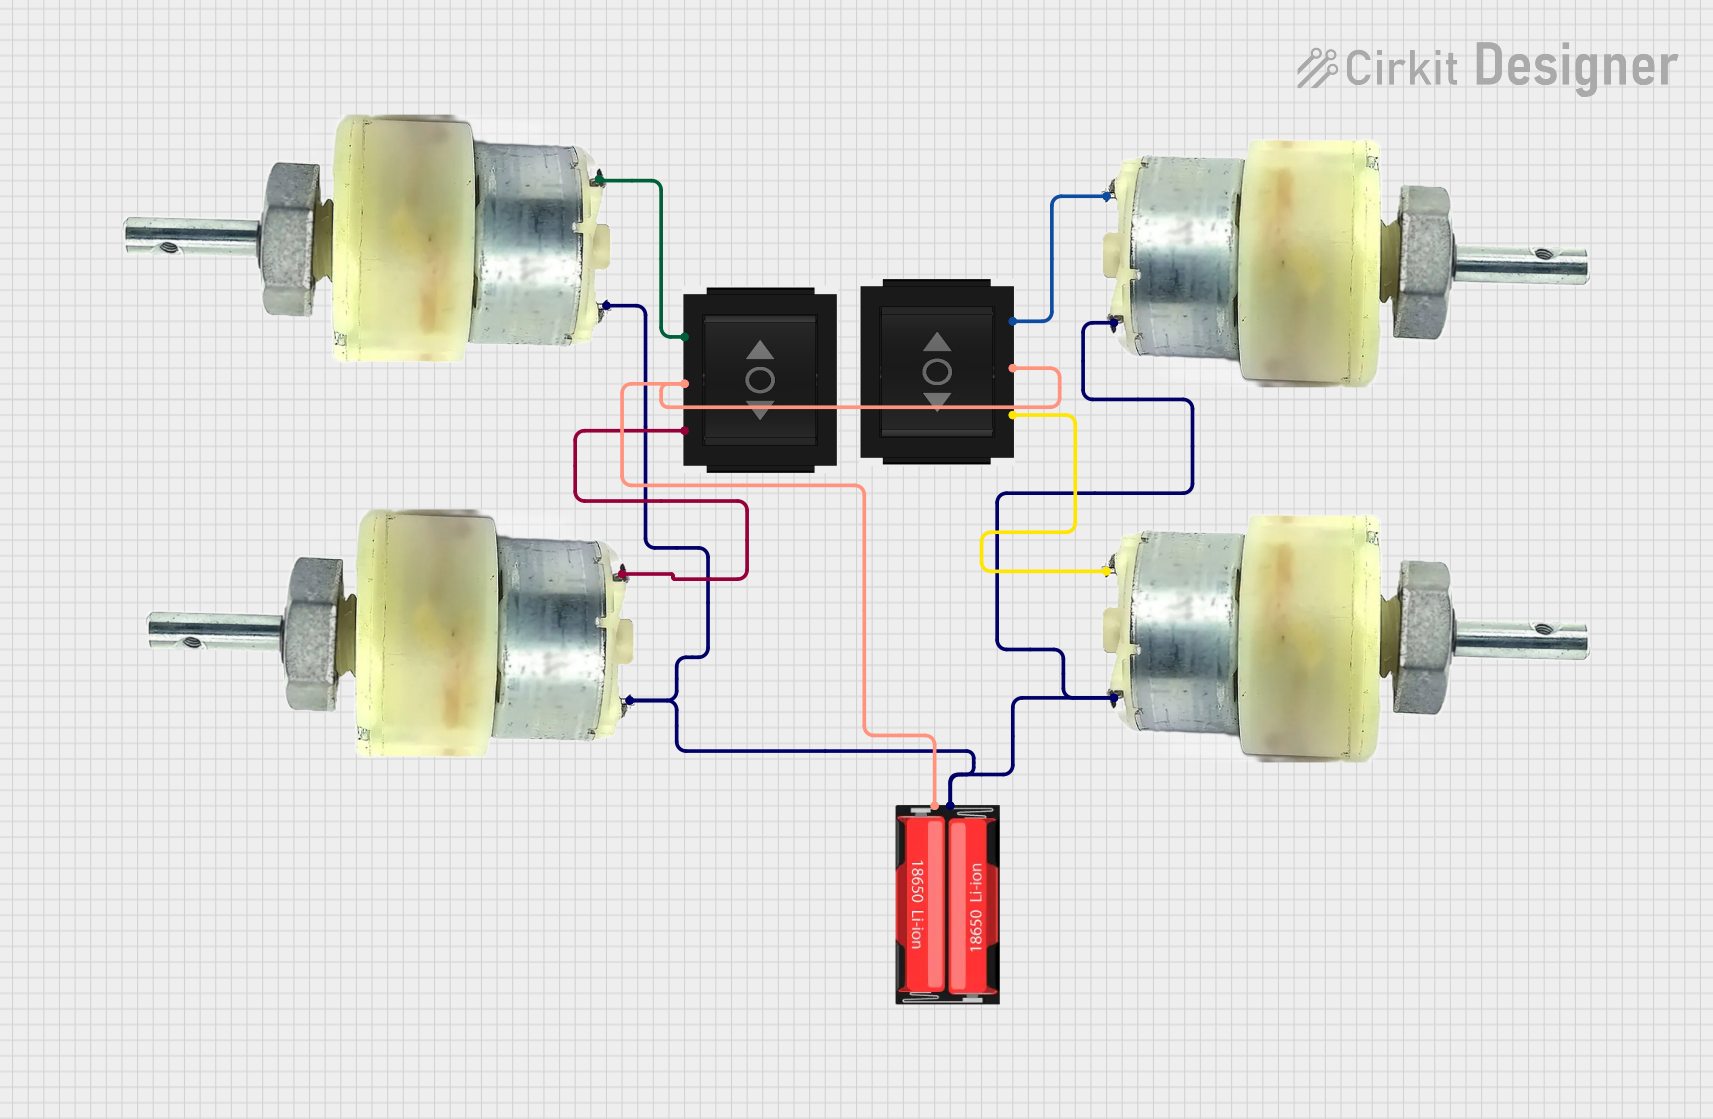

Explore Projects Built with Battery Vector
Common Applications and Use Cases
- Powering portable electronic devices (e.g., remote controls, flashlights, and toys)
- Backup power supplies for critical systems (e.g., UPS systems and emergency lighting)
- Energy storage in renewable energy systems (e.g., solar panels and wind turbines)
- Powering robotics, drones, and other autonomous systems
- Use in electric vehicles and battery-powered tools
Technical Specifications
Below are the general technical specifications for a typical Battery Vector. Note that actual specifications may vary depending on the specific model or manufacturer.
Key Technical Details
- Nominal Voltage: 3.7V to 12V (depending on the configuration)
- Capacity: 500mAh to 5000mAh (or higher for larger systems)
- Maximum Discharge Current: 1A to 20A (varies by design)
- Charging Voltage: Typically 4.2V per cell (for lithium-based cells)
- Operating Temperature: -20°C to 60°C
- Chemistry: Lithium-ion, Nickel-Metal Hydride (NiMH), or Lead-Acid
- Cycle Life: 300 to 1000 charge/discharge cycles
Pin Configuration and Descriptions
Battery Vectors typically have two or more terminals for electrical connections. Below is a table describing the standard pin configuration:
| Pin Name | Description |
|---|---|
| Positive (+) | The positive terminal of the battery. |
| Negative (-) | The negative terminal of the battery. |
| BMS (optional) | Battery Management System connection for monitoring and protection. |
For advanced Battery Vectors with integrated Battery Management Systems (BMS), additional pins may be present for features like temperature sensing, overcharge protection, and communication.
Usage Instructions
How to Use the Component in a Circuit
- Determine Voltage and Current Requirements: Ensure the Battery Vector's voltage and current ratings match the requirements of your circuit.
- Connect the Terminals:
- Connect the positive terminal of the Battery Vector to the positive rail of your circuit.
- Connect the negative terminal to the ground (GND) of your circuit.
- Use a Battery Holder or Connector: For safety and convenience, use a battery holder or connector to secure the Battery Vector in place.
- Add Protection Circuits: Include a fuse or a diode to prevent overcurrent or reverse polarity damage.
- Charge Safely: Use a compatible charger designed for the specific chemistry of the Battery Vector (e.g., lithium-ion chargers for lithium-based batteries).
Important Considerations and Best Practices
- Avoid Overcharging or Deep Discharging: Overcharging or discharging the battery below its minimum voltage can damage the cells and reduce their lifespan.
- Monitor Temperature: Ensure the battery operates within its specified temperature range to prevent overheating or thermal runaway.
- Store Properly: Store the Battery Vector in a cool, dry place when not in use. For long-term storage, maintain a charge level of around 40-60%.
- Use a Battery Management System (BMS): For advanced applications, integrate a BMS to monitor voltage, current, and temperature, and to provide protection against overcharge, over-discharge, and short circuits.
Example: Connecting a Battery Vector to an Arduino UNO
Below is an example of how to connect a 9V Battery Vector to an Arduino UNO:
- Connect the positive terminal of the Battery Vector to the VIN pin of the Arduino UNO.
- Connect the negative terminal to the GND pin of the Arduino UNO.
Sample Code for Monitoring Battery Voltage
// This code reads the battery voltage using an analog pin on the Arduino UNO.
// Ensure the battery voltage does not exceed the Arduino's input voltage limit (5V).

const int batteryPin = A0; // Analog pin connected to the battery
float batteryVoltage = 0.0;

void setup() {
  Serial.begin(9600); // Initialize serial communication
}

void loop() {
  int sensorValue = analogRead(batteryPin); // Read the analog value
  batteryVoltage = sensorValue * (5.0 / 1023.0); // Convert to voltage
  Serial.print("Battery Voltage: ");
  Serial.print(batteryVoltage);
  Serial.println(" V");
  delay(1000); // Wait for 1 second before the next reading
}
Troubleshooting and FAQs
Common Issues Users Might Face
Battery Not Powering the Circuit:
- Cause: Incorrect connection or insufficient charge.
- Solution: Verify the polarity and ensure the battery is charged.
Overheating During Use:
- Cause: Excessive current draw or short circuit.
- Solution: Check the circuit for shorts and ensure the load does not exceed the battery's maximum discharge current.
Battery Drains Quickly:
- Cause: High standby current in the circuit or aging battery.
- Solution: Reduce the circuit's power consumption or replace the battery if it has degraded.
Battery Not Charging:
- Cause: Faulty charger or damaged battery.
- Solution: Test the charger with another battery and inspect the battery for physical damage.
Solutions and Tips for Troubleshooting
- Use a multimeter to measure the battery's voltage and verify its state of charge.
- Inspect the terminals for corrosion or loose connections.
- If using a BMS, check for error codes or status indicators to diagnose issues.
- Replace the Battery Vector if it shows signs of swelling, leakage, or physical damage.
By following these guidelines and best practices, you can ensure the safe and efficient use of a Battery Vector in your electronic projects.