Cirkit Designer
Your all-in-one circuit design IDE
Home /
Component Documentation
How to Use PH Meter: Examples, Pinouts, and Specs

Introduction
A pH meter is an electronic device used to measure the acidity or alkalinity of a liquid, indicated by its pH level. The pH scale ranges from 0 to 14, with 7 being neutral. Values below 7 indicate acidity, while values above 7 indicate alkalinity. pH meters are essential tools in chemistry, biology, environmental science, food industry, and many other fields where pH plays a critical role in processes or quality control.
Explore Projects Built with PH Meter
Arduino UNO Based pH Monitoring System with Bluetooth Connectivity
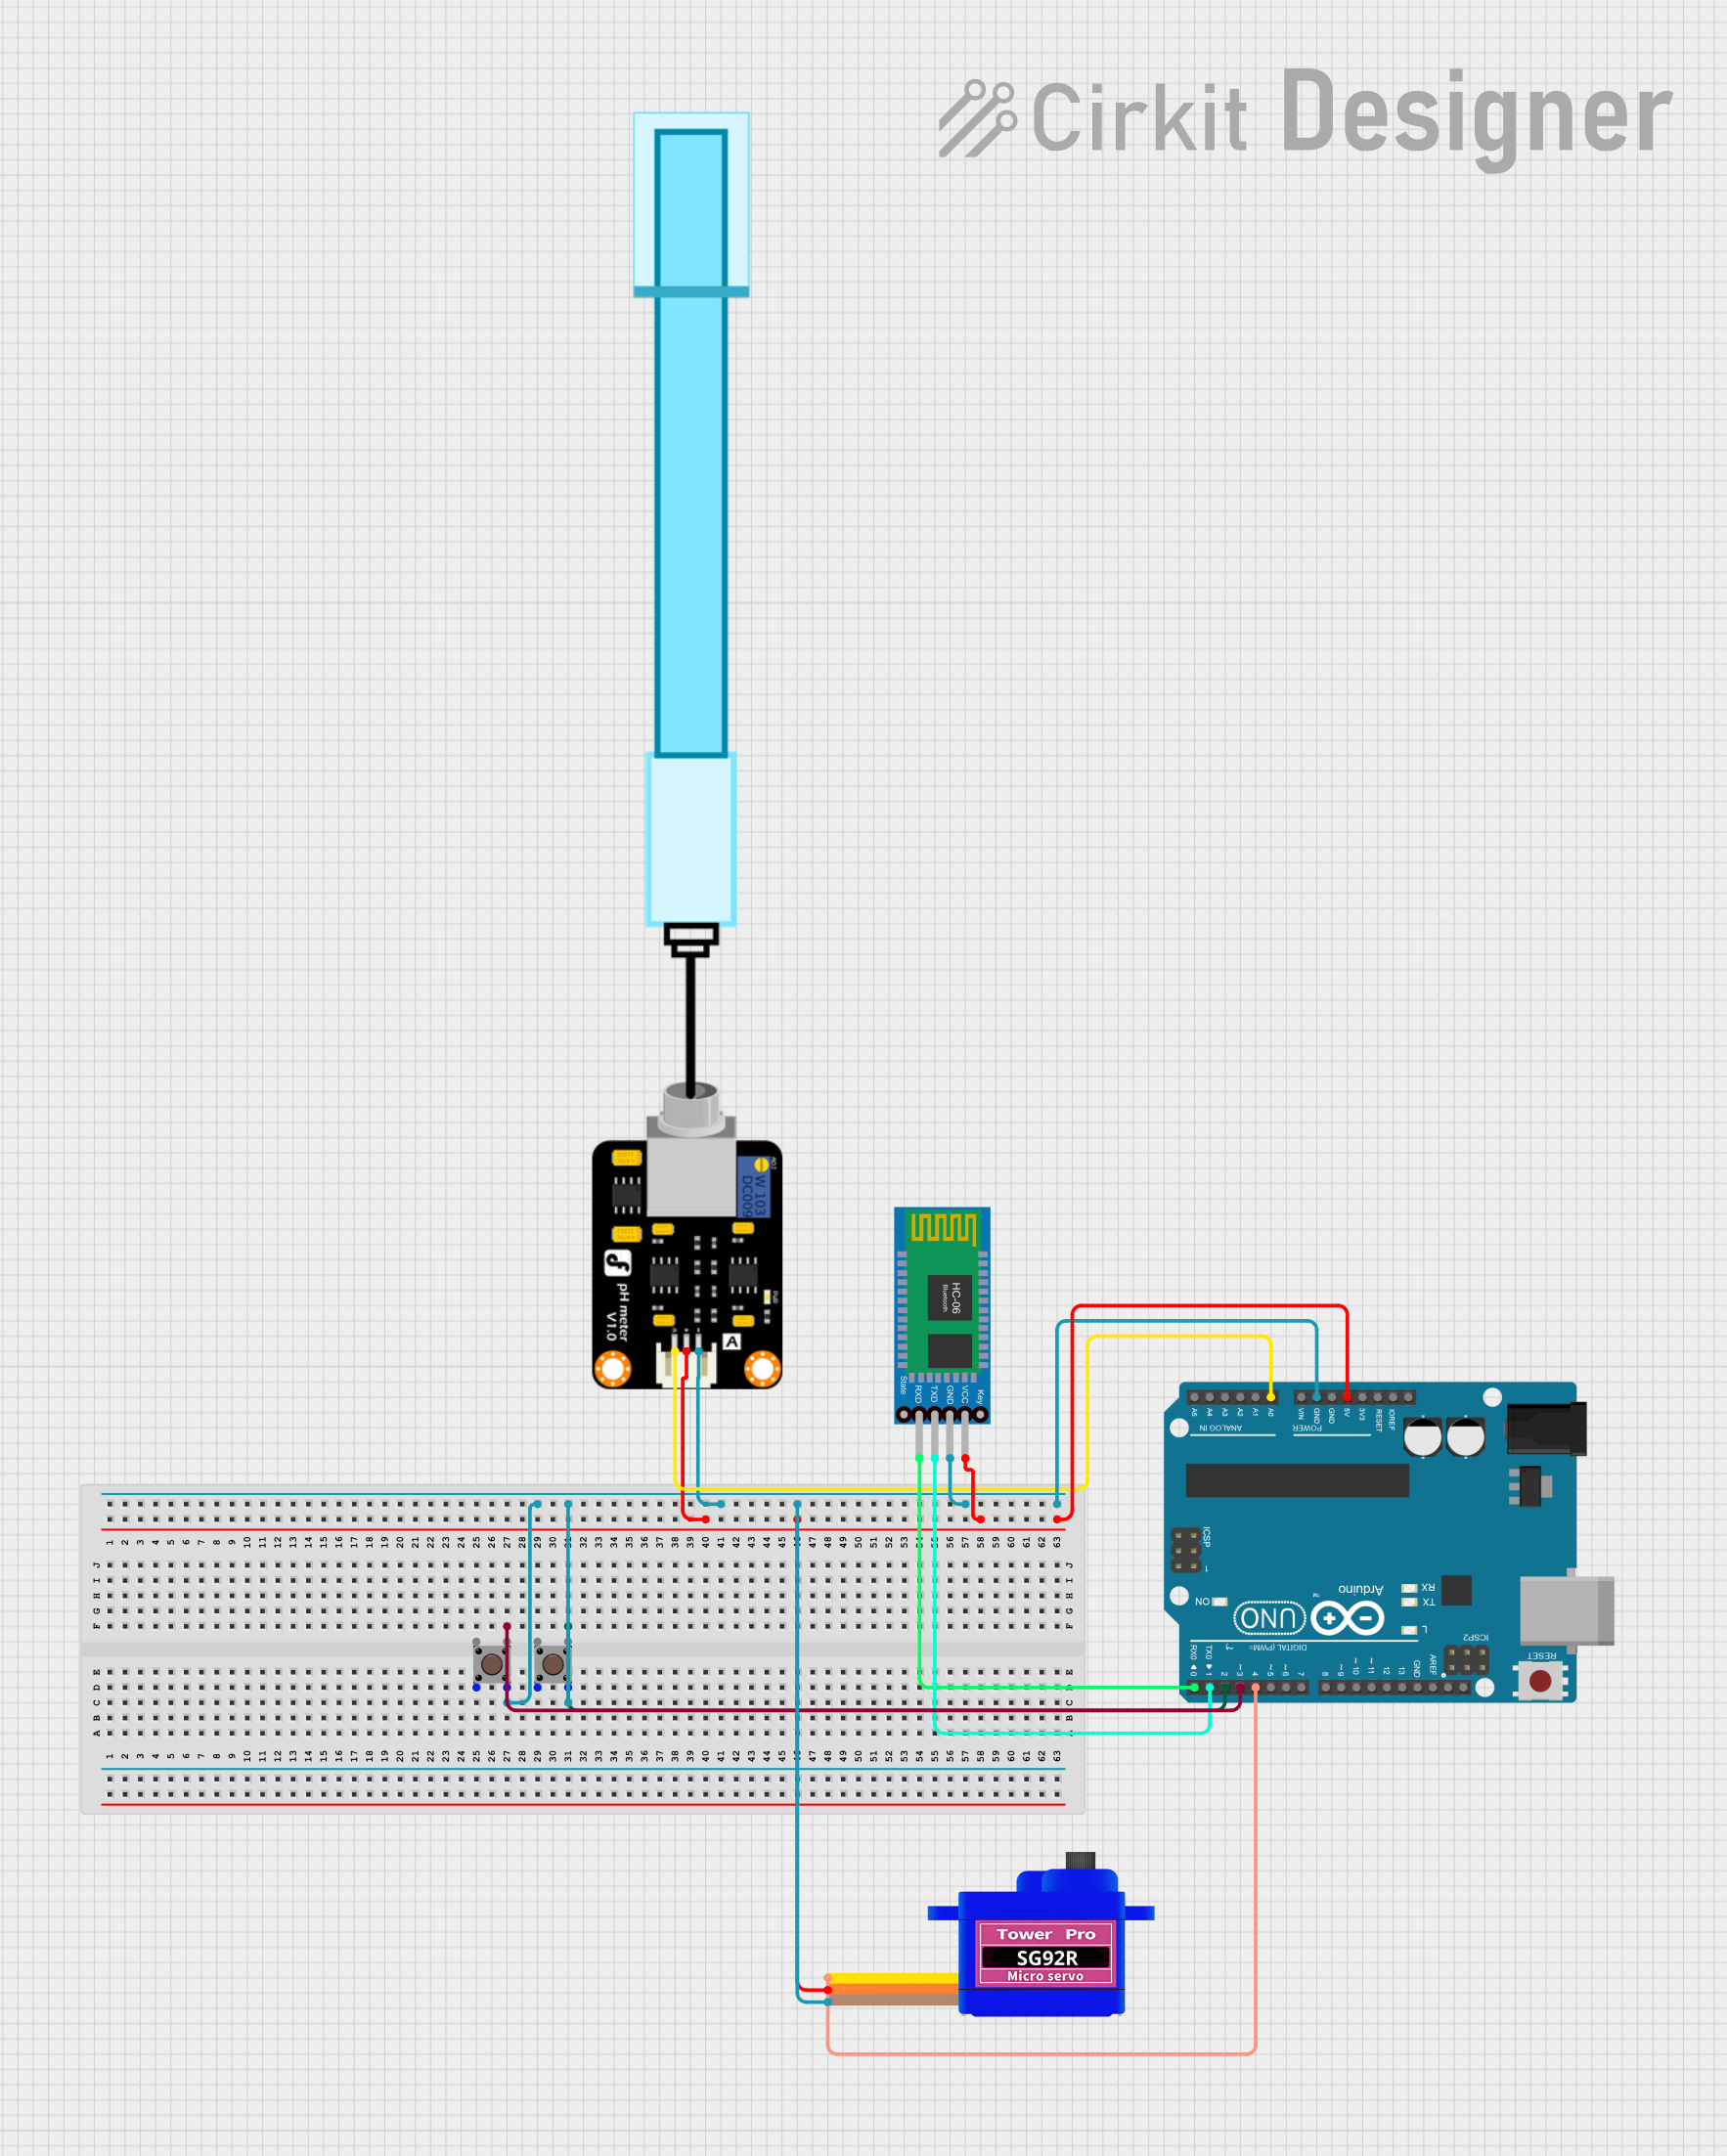
This circuit is designed to measure pH levels using a pH meter connected to an Arduino UNO, which processes the sensor data and controls a servomotor based on the readings. The Arduino also interfaces with a Bluetooth HC-06 module for wireless communication, potentially to send pH data to a remote device. Two pushbuttons are included in the circuit, likely for user input, and the servomotor's operation is presumably linked to the pH readings, although the specific functionality is not detailed in the provided code.
Arduino UNO Based pH Meter Interface
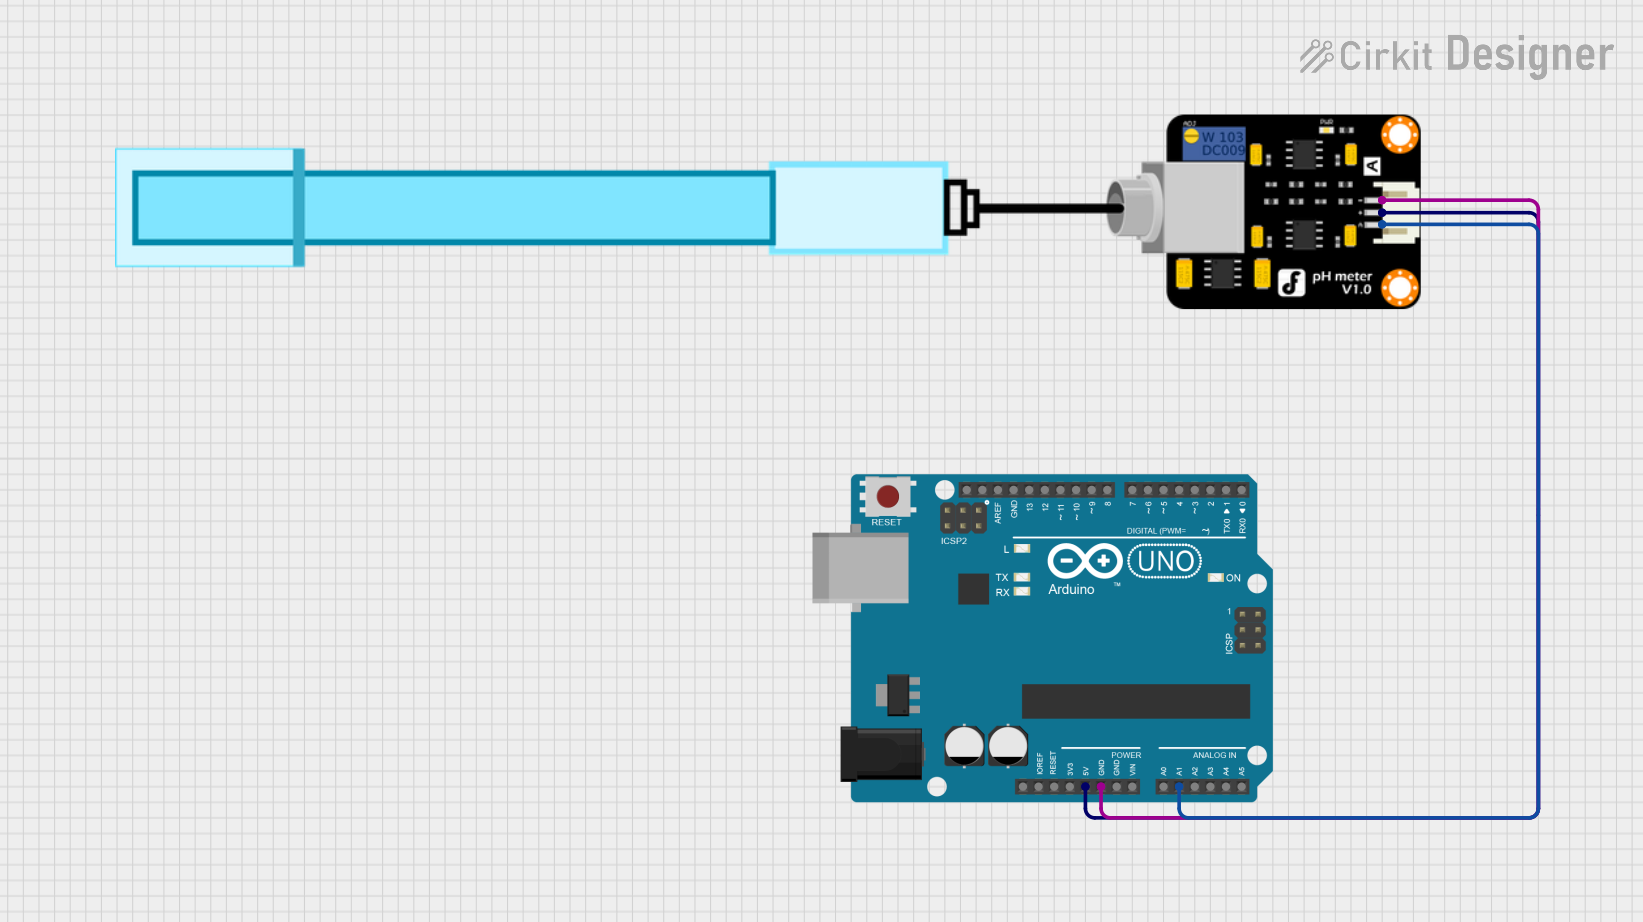
This circuit is designed to measure the pH level of a solution using a pH meter connected to an Arduino UNO. The Arduino reads the analog signal from the pH meter, processes the readings to calculate the pH value, and outputs the result to the serial monitor. It also blinks the onboard LED at pin 13 with each measurement cycle.
ESP32-Based Water Quality Monitoring System with LCD Display
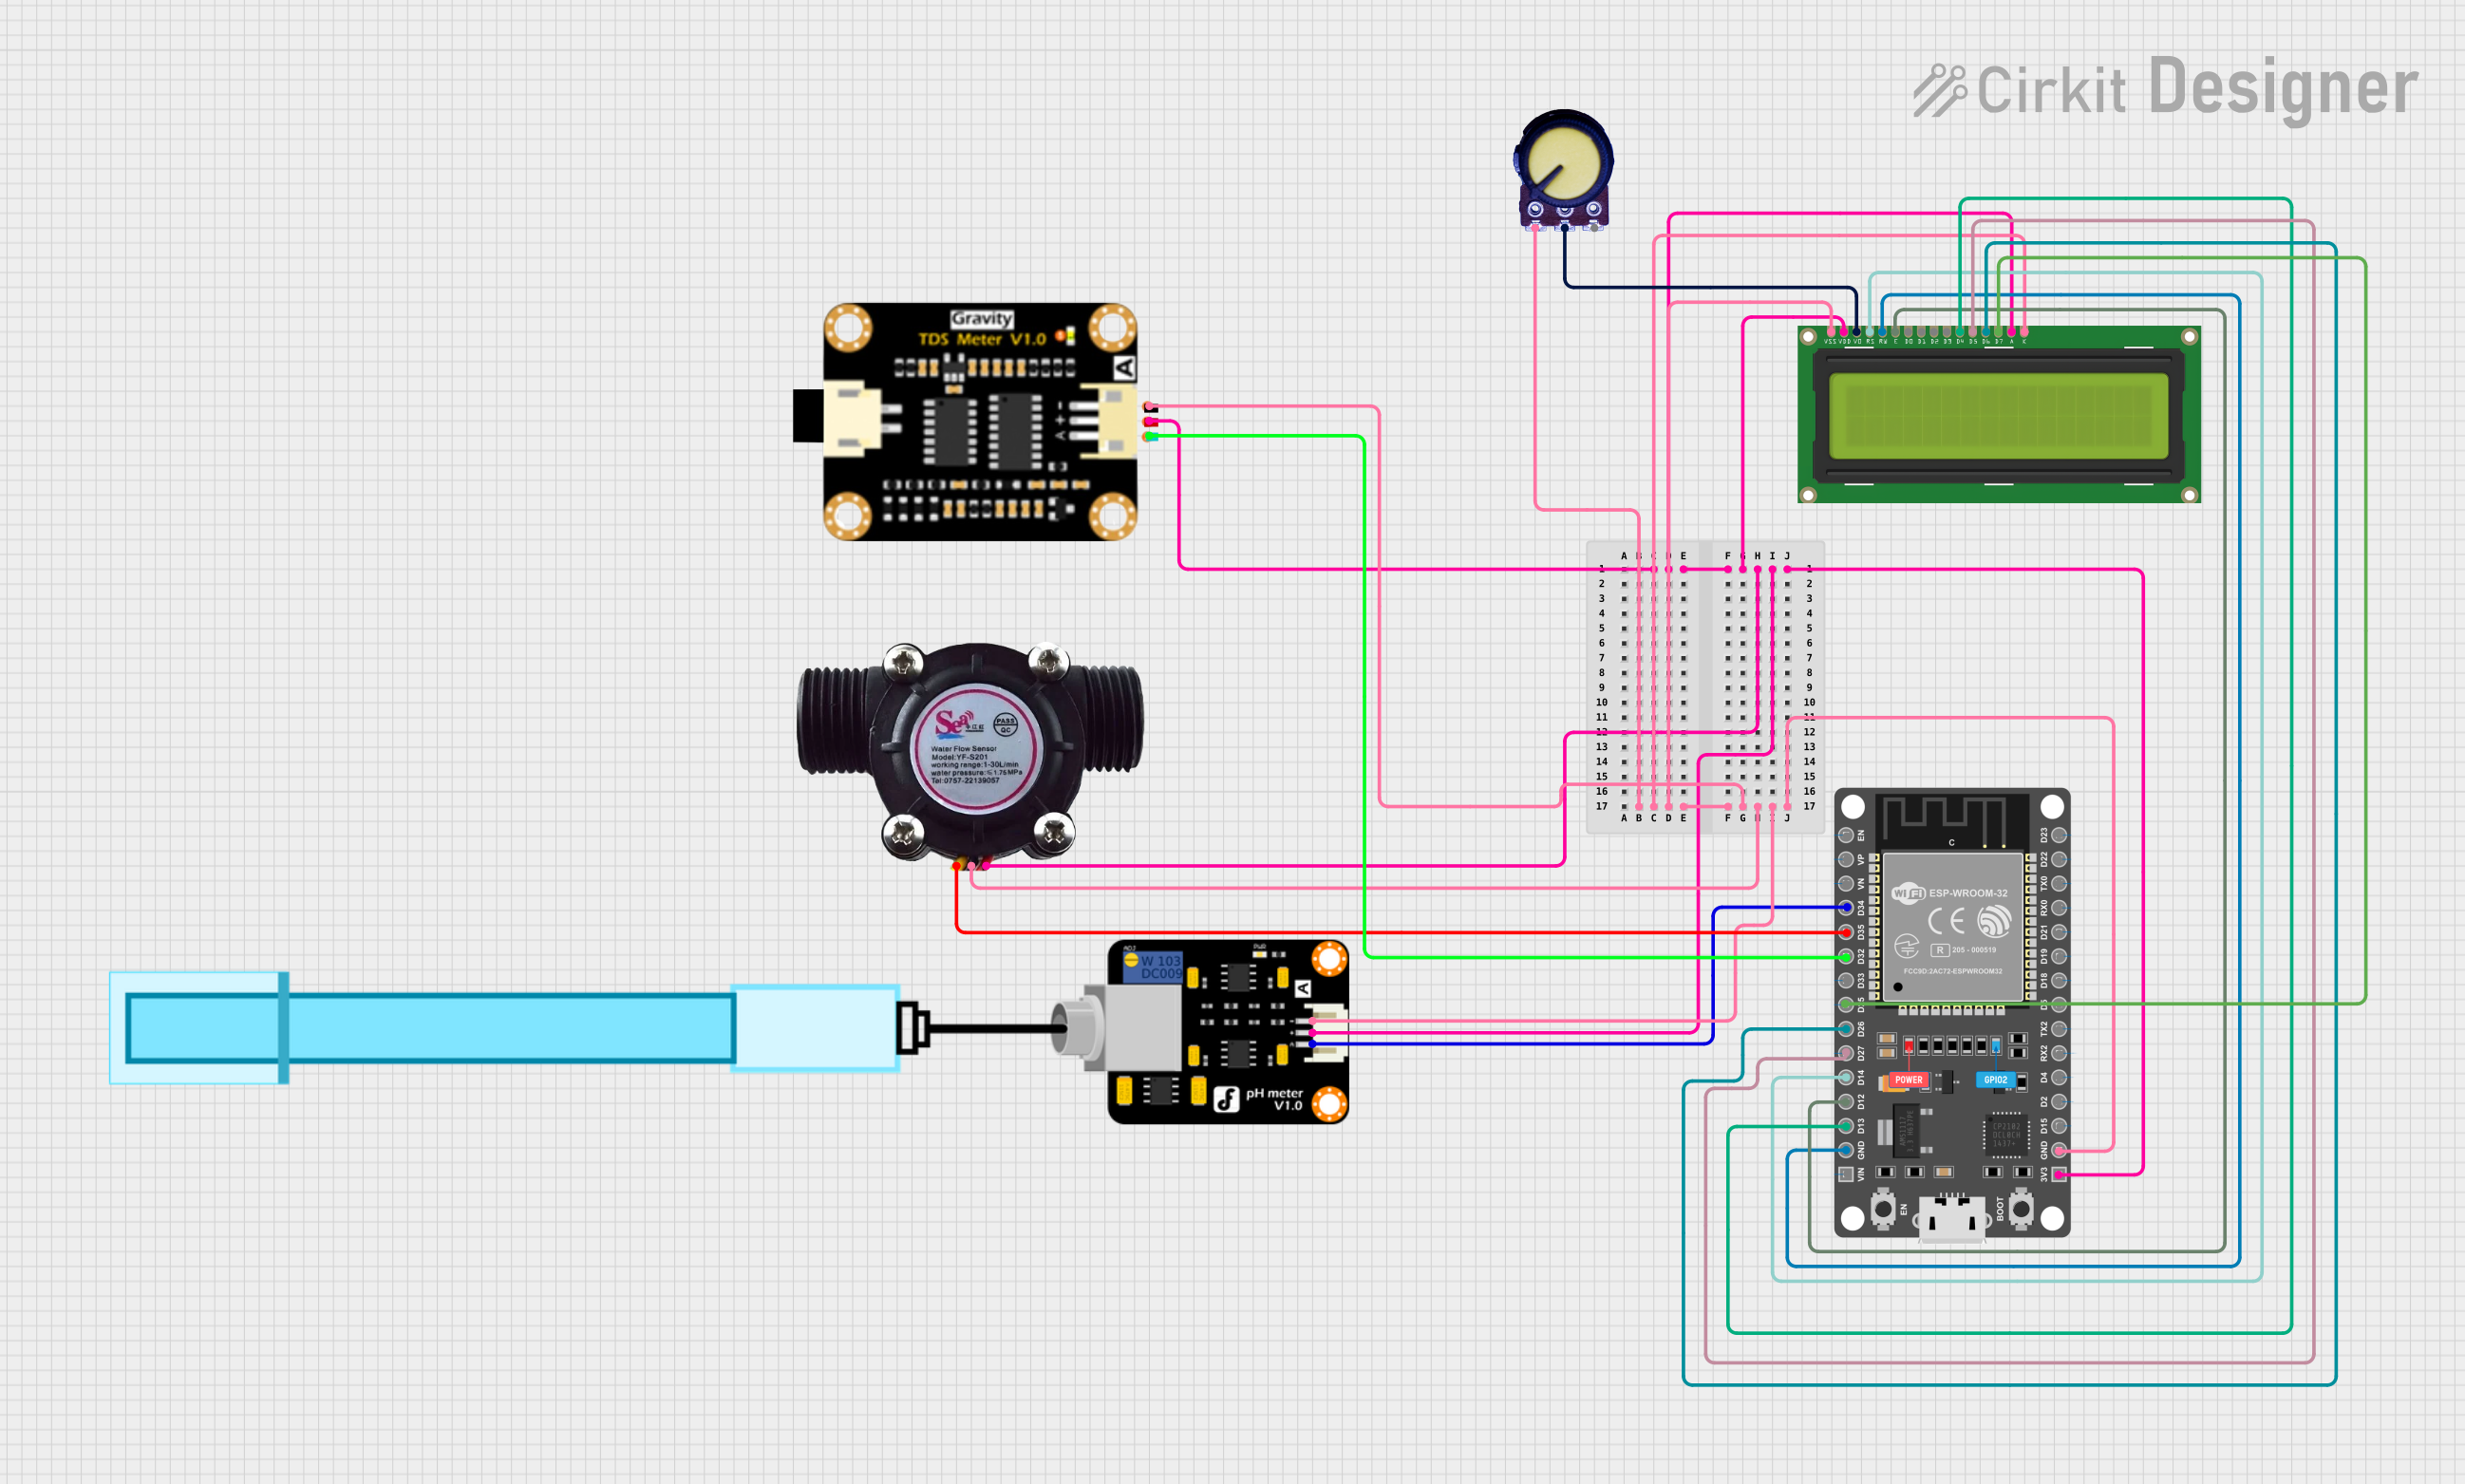
This circuit features an ESP32 microcontroller connected to a PH Meter, a water flow sensor, and a TDS (Total Dissolved Solids) sensor module for monitoring water quality. The ESP32 reads the sensor outputs and displays relevant data on a 16x2 LCD display. A potentiometer is used to adjust the contrast of the LCD, and all components are powered by the ESP32's 3.3V output, with common ground connections.
Arduino UNO pH Meter with LCD Display
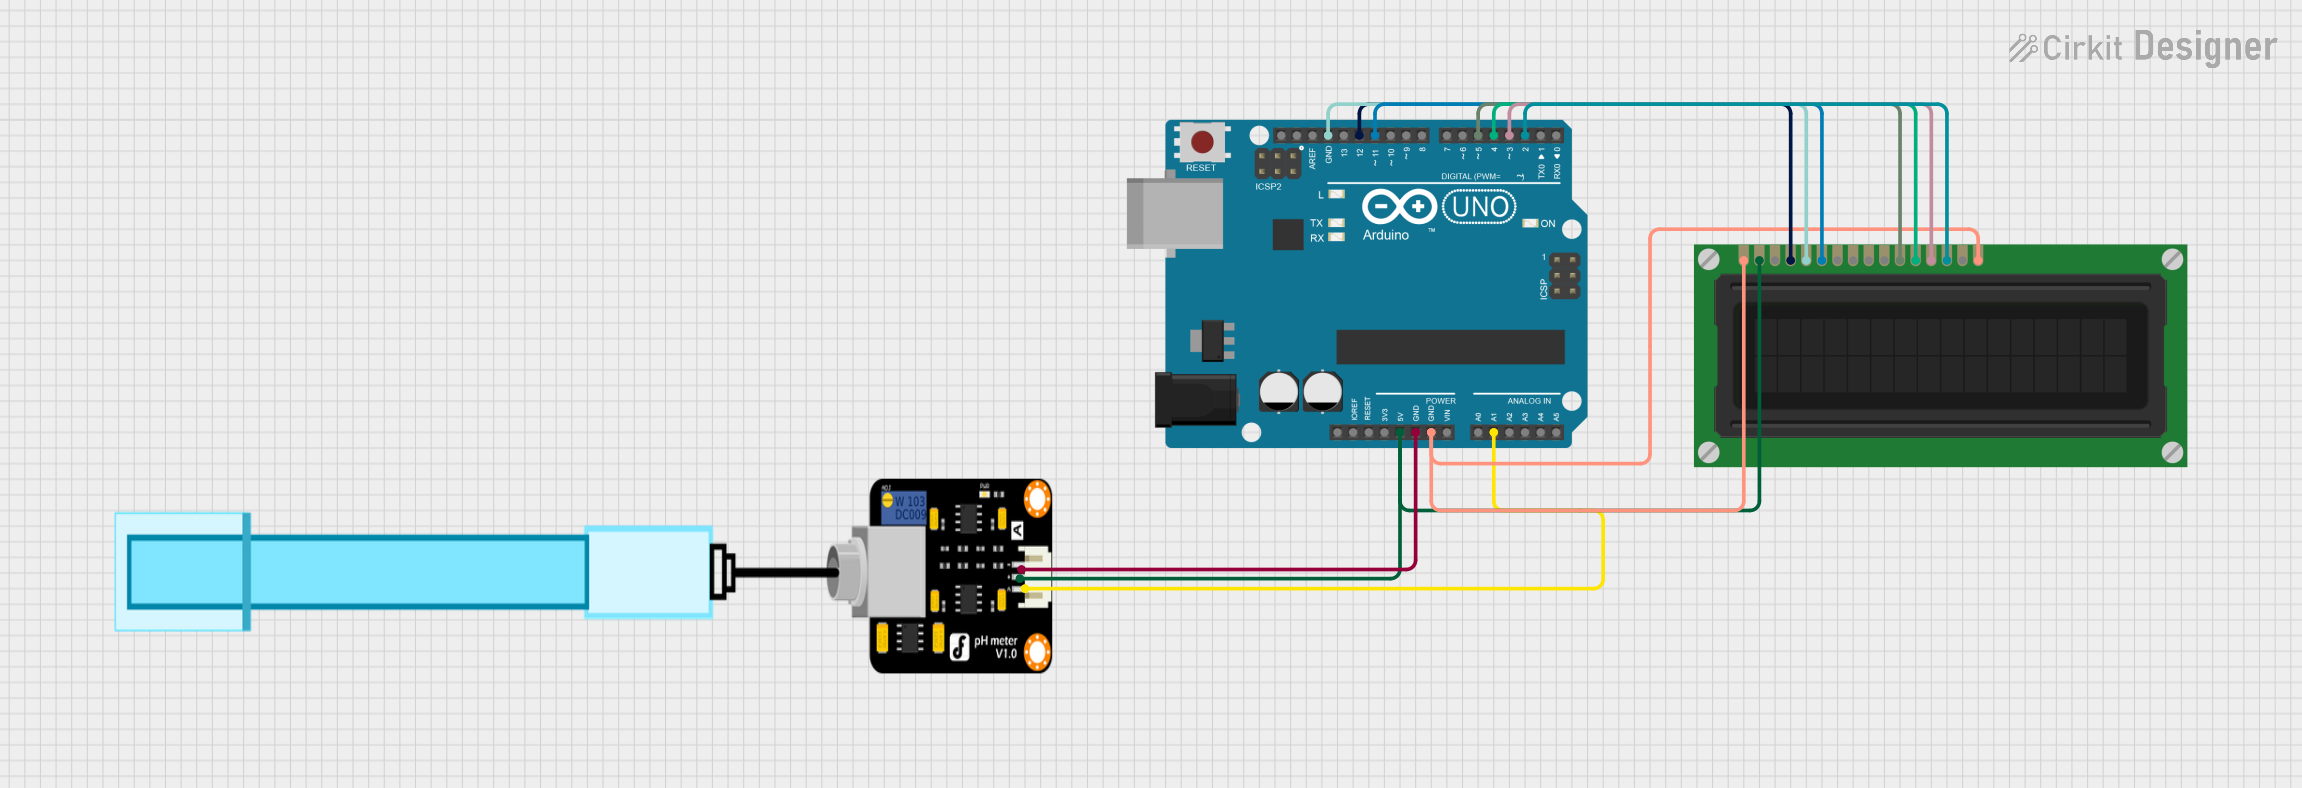
This circuit is designed to measure pH levels using a pH meter and display the readings on an LCD screen. An Arduino UNO microcontroller reads the pH sensor data through its analog input pin A1 and controls the LCD display via its digital pins to show the pH value.
Explore Projects Built with PH Meter
Arduino UNO Based pH Monitoring System with Bluetooth Connectivity
This circuit is designed to measure pH levels using a pH meter connected to an Arduino UNO, which processes the sensor data and controls a servomotor based on the readings. The Arduino also interfaces with a Bluetooth HC-06 module for wireless communication, potentially to send pH data to a remote device. Two pushbuttons are included in the circuit, likely for user input, and the servomotor's operation is presumably linked to the pH readings, although the specific functionality is not detailed in the provided code.
Arduino UNO Based pH Meter Interface
This circuit is designed to measure the pH level of a solution using a pH meter connected to an Arduino UNO. The Arduino reads the analog signal from the pH meter, processes the readings to calculate the pH value, and outputs the result to the serial monitor. It also blinks the onboard LED at pin 13 with each measurement cycle.
ESP32-Based Water Quality Monitoring System with LCD Display
This circuit features an ESP32 microcontroller connected to a PH Meter, a water flow sensor, and a TDS (Total Dissolved Solids) sensor module for monitoring water quality. The ESP32 reads the sensor outputs and displays relevant data on a 16x2 LCD display. A potentiometer is used to adjust the contrast of the LCD, and all components are powered by the ESP32's 3.3V output, with common ground connections.
Arduino UNO pH Meter with LCD Display
This circuit is designed to measure pH levels using a pH meter and display the readings on an LCD screen. An Arduino UNO microcontroller reads the pH sensor data through its analog input pin A1 and controls the LCD display via its digital pins to show the pH value.
Common Applications and Use Cases
- Water quality testing for environmental monitoring
- Soil pH measurement for agriculture
- Quality control in the food and beverage industry
- Laboratory research and academic studies
- Aquarium and pool maintenance
Technical Specifications
Key Technical Details
- Measurement Range: 0-14 pH
- Resolution: 0.01 pH
- Accuracy: ±0.05 pH
- Operating Temperature: 0-60°C
- Calibration: Automatic or manual calibration options
Pin Configuration and Descriptions
| Pin Number | Description | Notes |
|---|---|---|
| 1 | Signal Output | Analog voltage proportional to pH |
| 2 | Temperature Sensor | Optional for temperature compensation |
| 3 | Reference Ground | Connect to system ground |
| 4 | Power Supply (+) | Typically +5V DC |
| 5 | Power Supply (-) | Ground |
Usage Instructions
How to Use the Component in a Circuit
- Connect the power supply pins (4 and 5) to a +5V DC source and ground, respectively.
- Connect the signal output pin (1) to an analog input on your microcontroller.
- If available, connect the temperature sensor pin (2) to another analog input for temperature compensation.
- Ensure that the reference ground pin (3) is connected to the common ground in your system.
Important Considerations and Best Practices
- Always calibrate the pH meter before use, following the manufacturer's instructions.
- Rinse the probe with distilled water before and after each measurement to prevent contamination.
- Store the pH probe in a suitable storage solution to prolong its lifespan.
- Avoid measuring solutions that can damage the probe, such as strong solvents or highly concentrated acids/bases.
Example Code for Arduino UNO
// Include the necessary libraries
#include <Wire.h>

// Define the analog input pin connected to the pH meter
const int pHMeterPin = A0;

void setup() {
  // Initialize serial communication at 9600 baud rate
  Serial.begin(9600);
}

void loop() {
  // Read the analog value from the pH meter
  int sensorValue = analogRead(pHMeterPin);
  // Convert the analog value to pH value
  float pHValue = convertToPH(sensorValue);
  // Print the pH value to the Serial Monitor
  Serial.print("pH Value: ");
  Serial.println(pHValue);
  // Wait for a while before taking the next reading
  delay(1000);
}

// Function to convert the analog value to pH value
float convertToPH(int sensorValue) {
  // Convert the analog value to voltage
  float voltage = sensorValue * (5.0 / 1023.0);
  // Map the voltage to the pH scale (adjust the formula based on calibration)
  float pH = (voltage * -5.70) + 21.34; // Example calibration values
  return pH;
}
Troubleshooting and FAQs
Common Issues Users Might Face
- Inaccurate Readings: Ensure the pH meter is calibrated correctly. Check for any residue on the probe and clean it if necessary.
- Drifting Readings: This could be due to a temperature fluctuation. Use the temperature sensor for compensation if available.
- No Readings: Check all connections, especially the power supply and ground. Ensure the probe is not damaged.
Solutions and Tips for Troubleshooting
- Calibration: Perform calibration with standard buffer solutions at pH 4, 7, and 10.
- Cleaning: Use distilled water for cleaning the probe. Avoid touching the sensor with your fingers.
- Storage: When not in use, store the probe in a pH storage solution or keep it moist.
FAQs
- Q: How often should I calibrate my pH meter?
- A: Calibration frequency depends on usage, but it's recommended to calibrate before each critical measurement session.
- Q: Can I measure the pH of non-aqueous solutions?
- A: It depends on the probe's compatibility. Consult the manufacturer's guidelines for non-aqueous solutions.
- Q: What should I do if the pH readings are consistently off?
- A: Double-check the calibration process and ensure the probe is clean. If the issue persists, the probe may need to be replaced.