How to Use 4N35: Examples, Pinouts, and Specs

Introduction
The 4N35 is a versatile optocoupler or optoisolator IC that consists of an infrared emitting diode coupled to a phototransistor. It is designed to provide electrical isolation between its input and output, allowing a signal to be transferred between two isolated circuits without a direct electrical connection. This isolation helps protect sensitive electronic components from voltage spikes and surges, as well as reducing electrical noise in signal processing.
Explore Projects Built with 4N35

Explore Projects Built with 4N35
Common Applications and Use Cases
- Signal isolation in microcontroller circuits
- Interfacing microcontrollers with high voltage systems
- Noise suppression in digital communication lines
- Isolation in power supply circuits
- Switching AC loads using microcontroller outputs
Technical Specifications
Key Technical Details
- Forward Voltage (LED): 1.2V typical at 10mA
- Collector-Emitter Voltage (Detector): 30V maximum
- Current Transfer Ratio (CTR): 100% minimum at IF=10mA, VCE=10V
- Isolation Voltage: 5000V rms minimum
- Input-Output Isolation Resistance: 10^11 ohms
- Operating Temperature Range: -55°C to +100°C
Pin Configuration and Descriptions
| Pin Number | Name | Description |
|---|---|---|
| 1 | Anode (A) | Anode of the infrared LED. Connect to positive voltage. |
| 2 | Cathode (K) | Cathode of the infrared LED. Connect to ground. |
| 3 | NC | No connection. |
| 4 | Emitter (E) | Emitter of the phototransistor. Typically connected to ground. |
| 5 | Collector (C) | Collector of the phototransistor. Connect to the output circuit. |
| 6 | Base (B) | Base of the phototransistor. Optional use for increased sensitivity. |
Usage Instructions
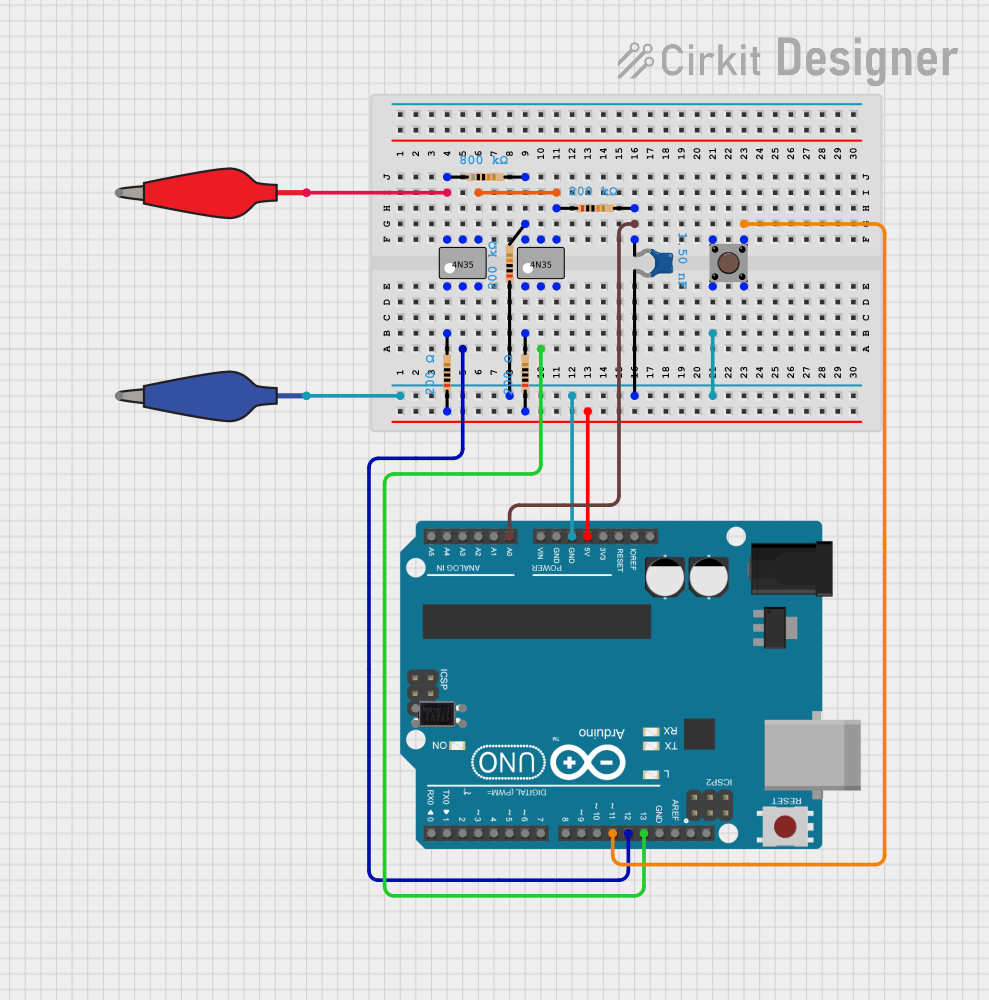
How to Use the 4N35 in a Circuit
Input Side (LED):
- Connect the anode to a digital output pin of a microcontroller through a current-limiting resistor.
- Connect the cathode to the ground.
Output Side (Phototransistor):
- Connect the collector to the positive supply of the isolated circuit through a load resistor.
- Connect the emitter to the ground of the isolated circuit.
Base Connection (Optional):
- The base pin can be left unconnected for normal operation.
- For increased sensitivity, a resistor can be connected between the base and the emitter.
Important Considerations and Best Practices
- Always use a current-limiting resistor on the input side to prevent damage to the LED.
- Ensure that the voltage and current ratings of the phototransistor are not exceeded.
- The base pin is typically not used, but it can be utilized for specific applications where increased sensitivity is required.
- Check the datasheet for detailed specifications and adjust the resistor values accordingly.
Troubleshooting and FAQs
Common Issues Users Might Face
LED Not Lighting Up:
- Check if the current-limiting resistor value is too high.
- Ensure that the input voltage is sufficient to forward bias the LED.
No Output Signal:
- Verify that the load resistor on the output side is correctly sized.
- Check the connections to ensure proper orientation of the IC.
Insufficient Isolation:
- Ensure that the isolation voltage rating is not exceeded.
- Check for any contamination or moisture between the input and output that could reduce isolation resistance.
Solutions and Tips for Troubleshooting
- Double-check the pin configuration to ensure correct connections.
- Measure the input current to the LED to verify it is within the specified range.
- Use an oscilloscope to check for the presence of a signal at the output.
- Inspect the PCB for any solder bridges or shorts that could compromise isolation.
FAQs
Q: Can I drive the 4N35 directly from a microcontroller? A: Yes, you can drive the LED side of the 4N35 directly from a microcontroller pin through a current-limiting resistor.
Q: What is the purpose of the base pin on the 4N35? A: The base pin allows for increased sensitivity and faster switching speeds when used, but it is optional for normal operation.
Q: How do I choose the value of the current-limiting resistor for the LED? A: The value can be calculated using Ohm's law: R = (V_supply - V_forward) / I_forward, where V_supply is the voltage from the microcontroller pin, V_forward is the forward voltage of the LED (typically 1.2V), and I_forward is the desired forward current (usually around 10mA).
Q: Can the 4N35 be used to switch AC loads? A: While the 4N35 itself cannot switch AC loads, it can be used to drive a relay or triac which in turn can control an AC load.
Example Code for Arduino UNO
// Example code for interfacing a 4N35 Optocoupler with an Arduino UNO

const int ledPin = 13; // LED connected to digital pin 13
const int optoPin = 2; // Optocoupler input connected to digital pin 2

void setup() {
  pinMode(ledPin, OUTPUT); // Set the LED pin as output
  pinMode(optoPin, OUTPUT); // Set the optocoupler pin as output
}

void loop() {
  digitalWrite(optoPin, HIGH); // Turn on the optocoupler (LED on)
  digitalWrite(ledPin, HIGH);   // Turn on the LED
  delay(1000);                  // Wait for a second
  digitalWrite(optoPin, LOW);   // Turn off the optocoupler (LED off)
  digitalWrite(ledPin, LOW);    // Turn off the LED
  delay(1000);                  // Wait for a second
}
This example demonstrates how to turn on and off the LED inside the 4N35 optocoupler using an Arduino UNO. The same signal is used to turn on an LED connected to pin 13 to provide a visual indication. Remember to include a current-limiting resistor in series with the optocoupler's LED.