How to Use 313KB Peristaltic Pump: Examples, Pinouts, and Specs

Introduction
The 313KB Peristaltic Pump is a precision fluid movement device commonly used in medical, laboratory, and industrial settings. This pump operates by mechanically compressing a length of flexible tubing, thus propelling the fluid within the tube along in a controlled manner. The design ensures that the fluid only contacts the tubing, not the pump mechanism, which is ideal for sterile applications or when handling aggressive chemicals.
Explore Projects Built with 313KB Peristaltic Pump
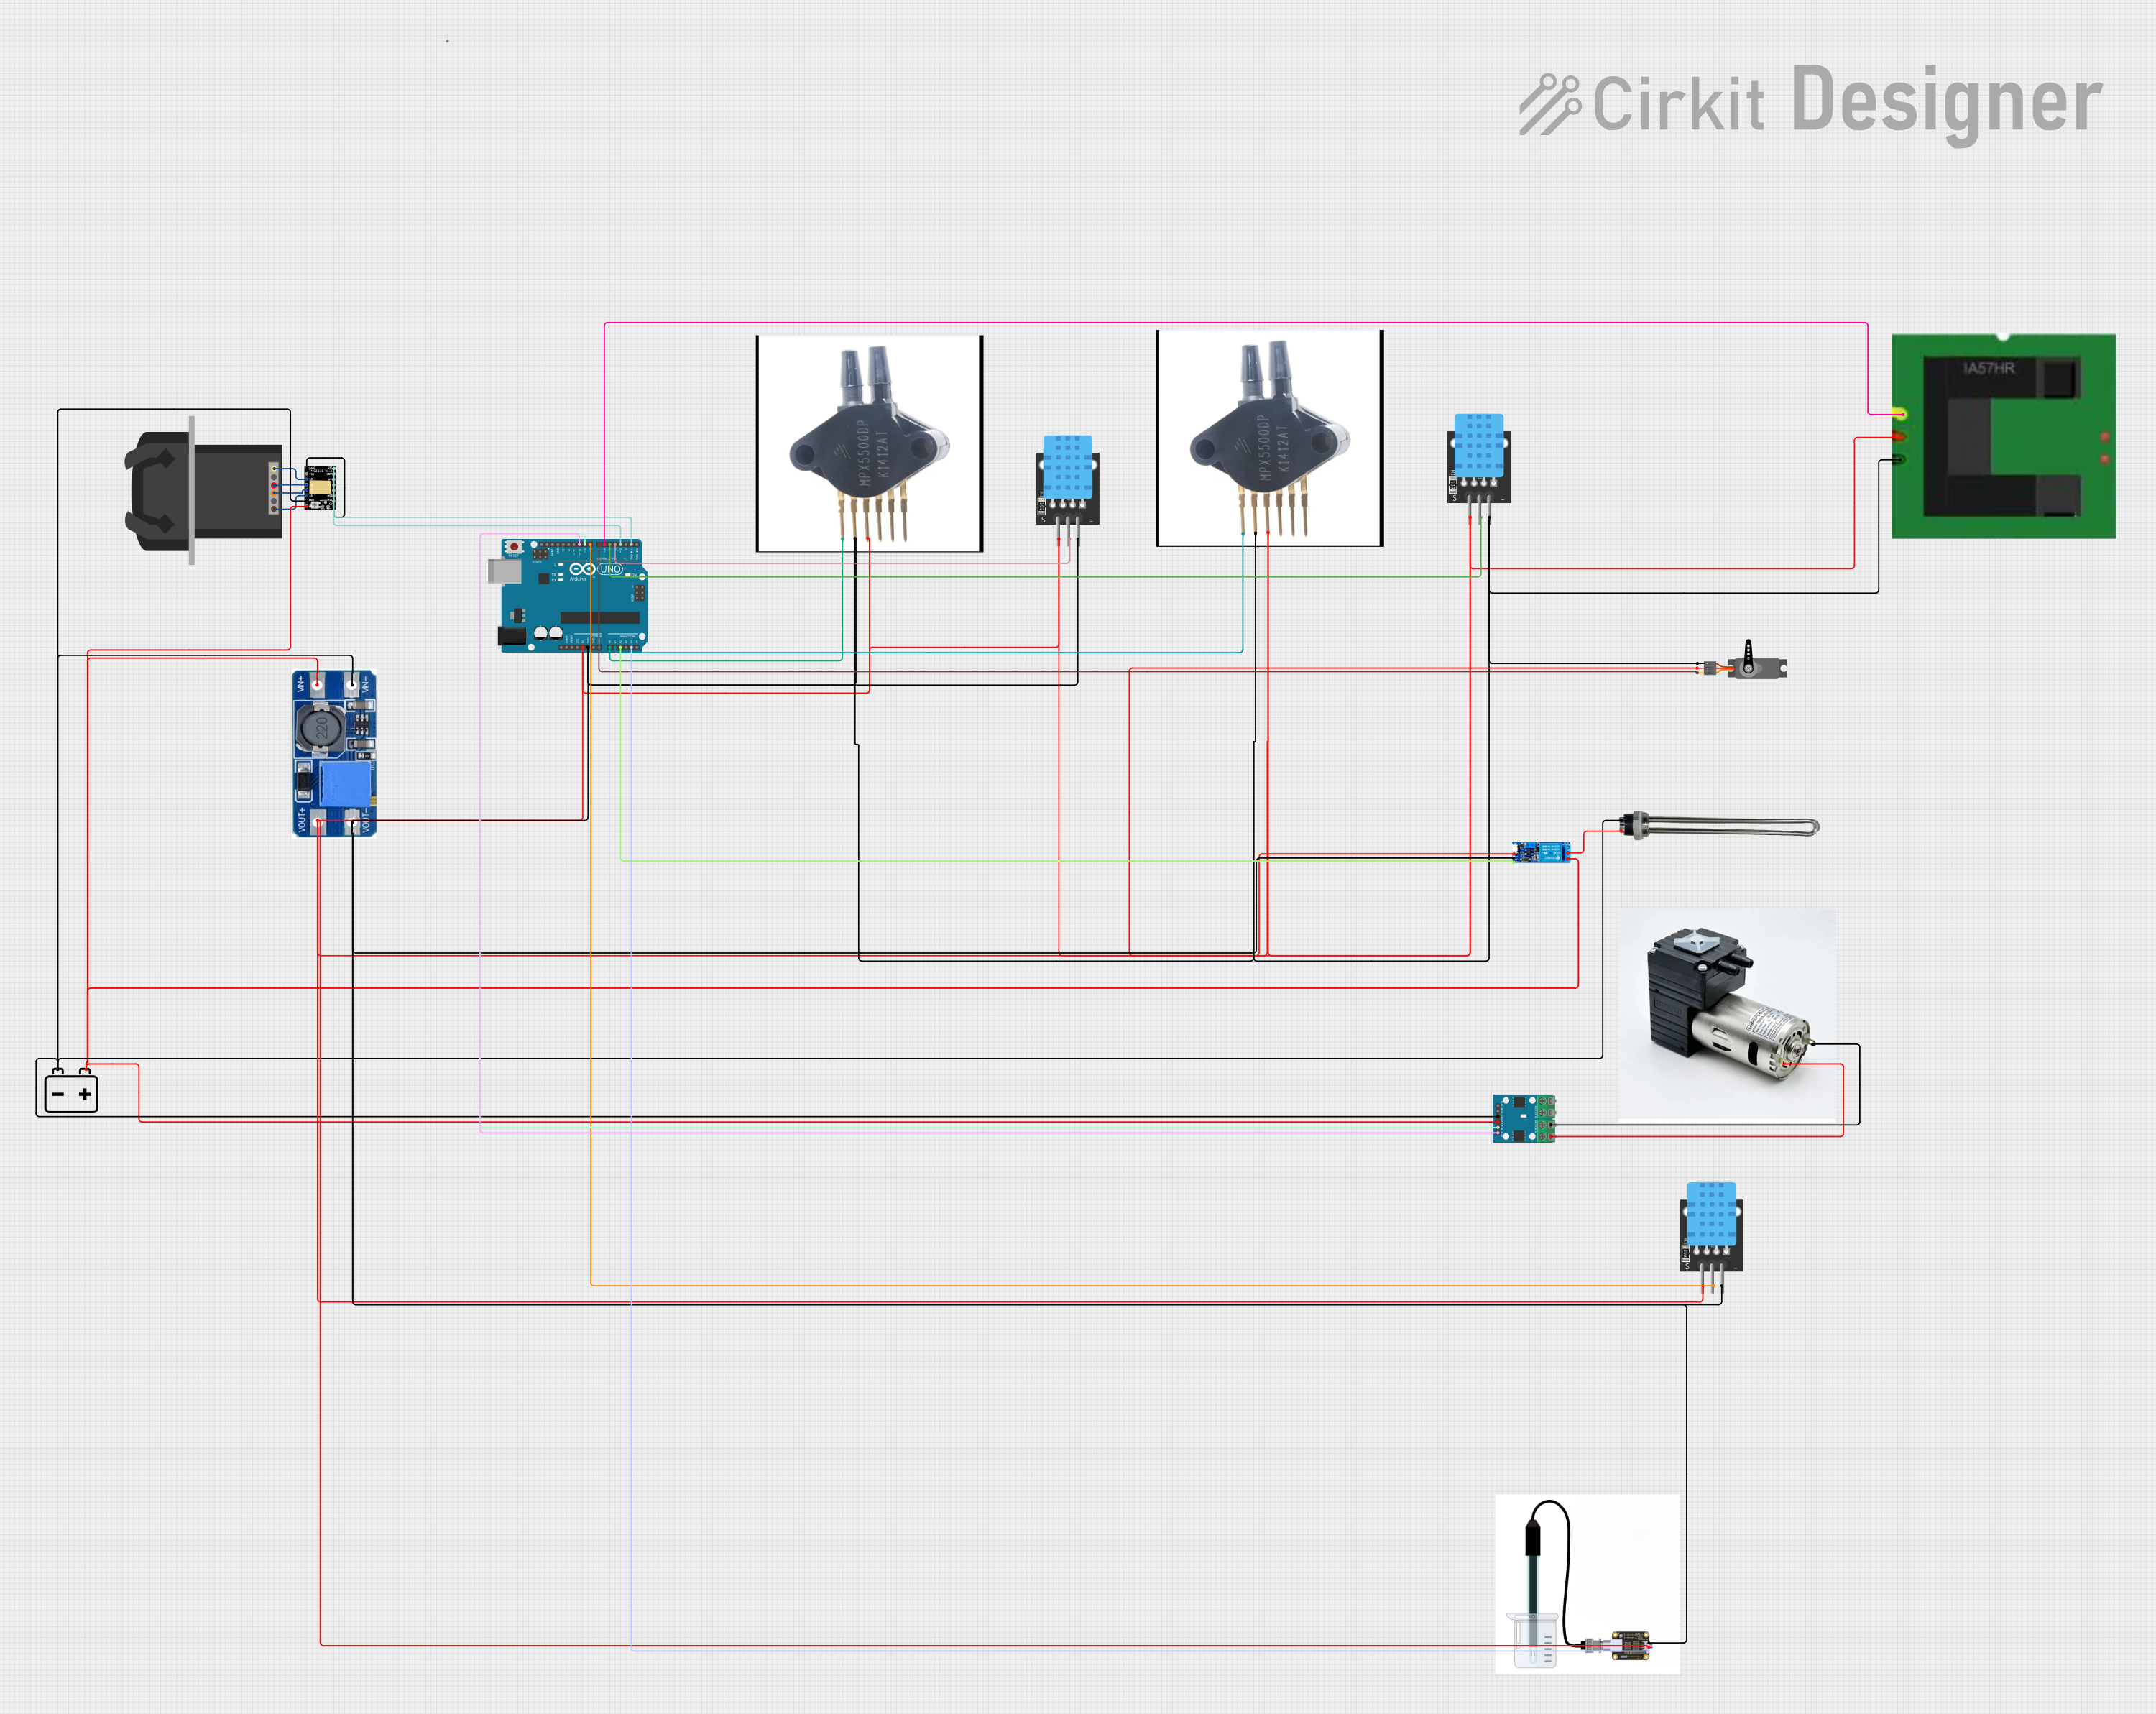
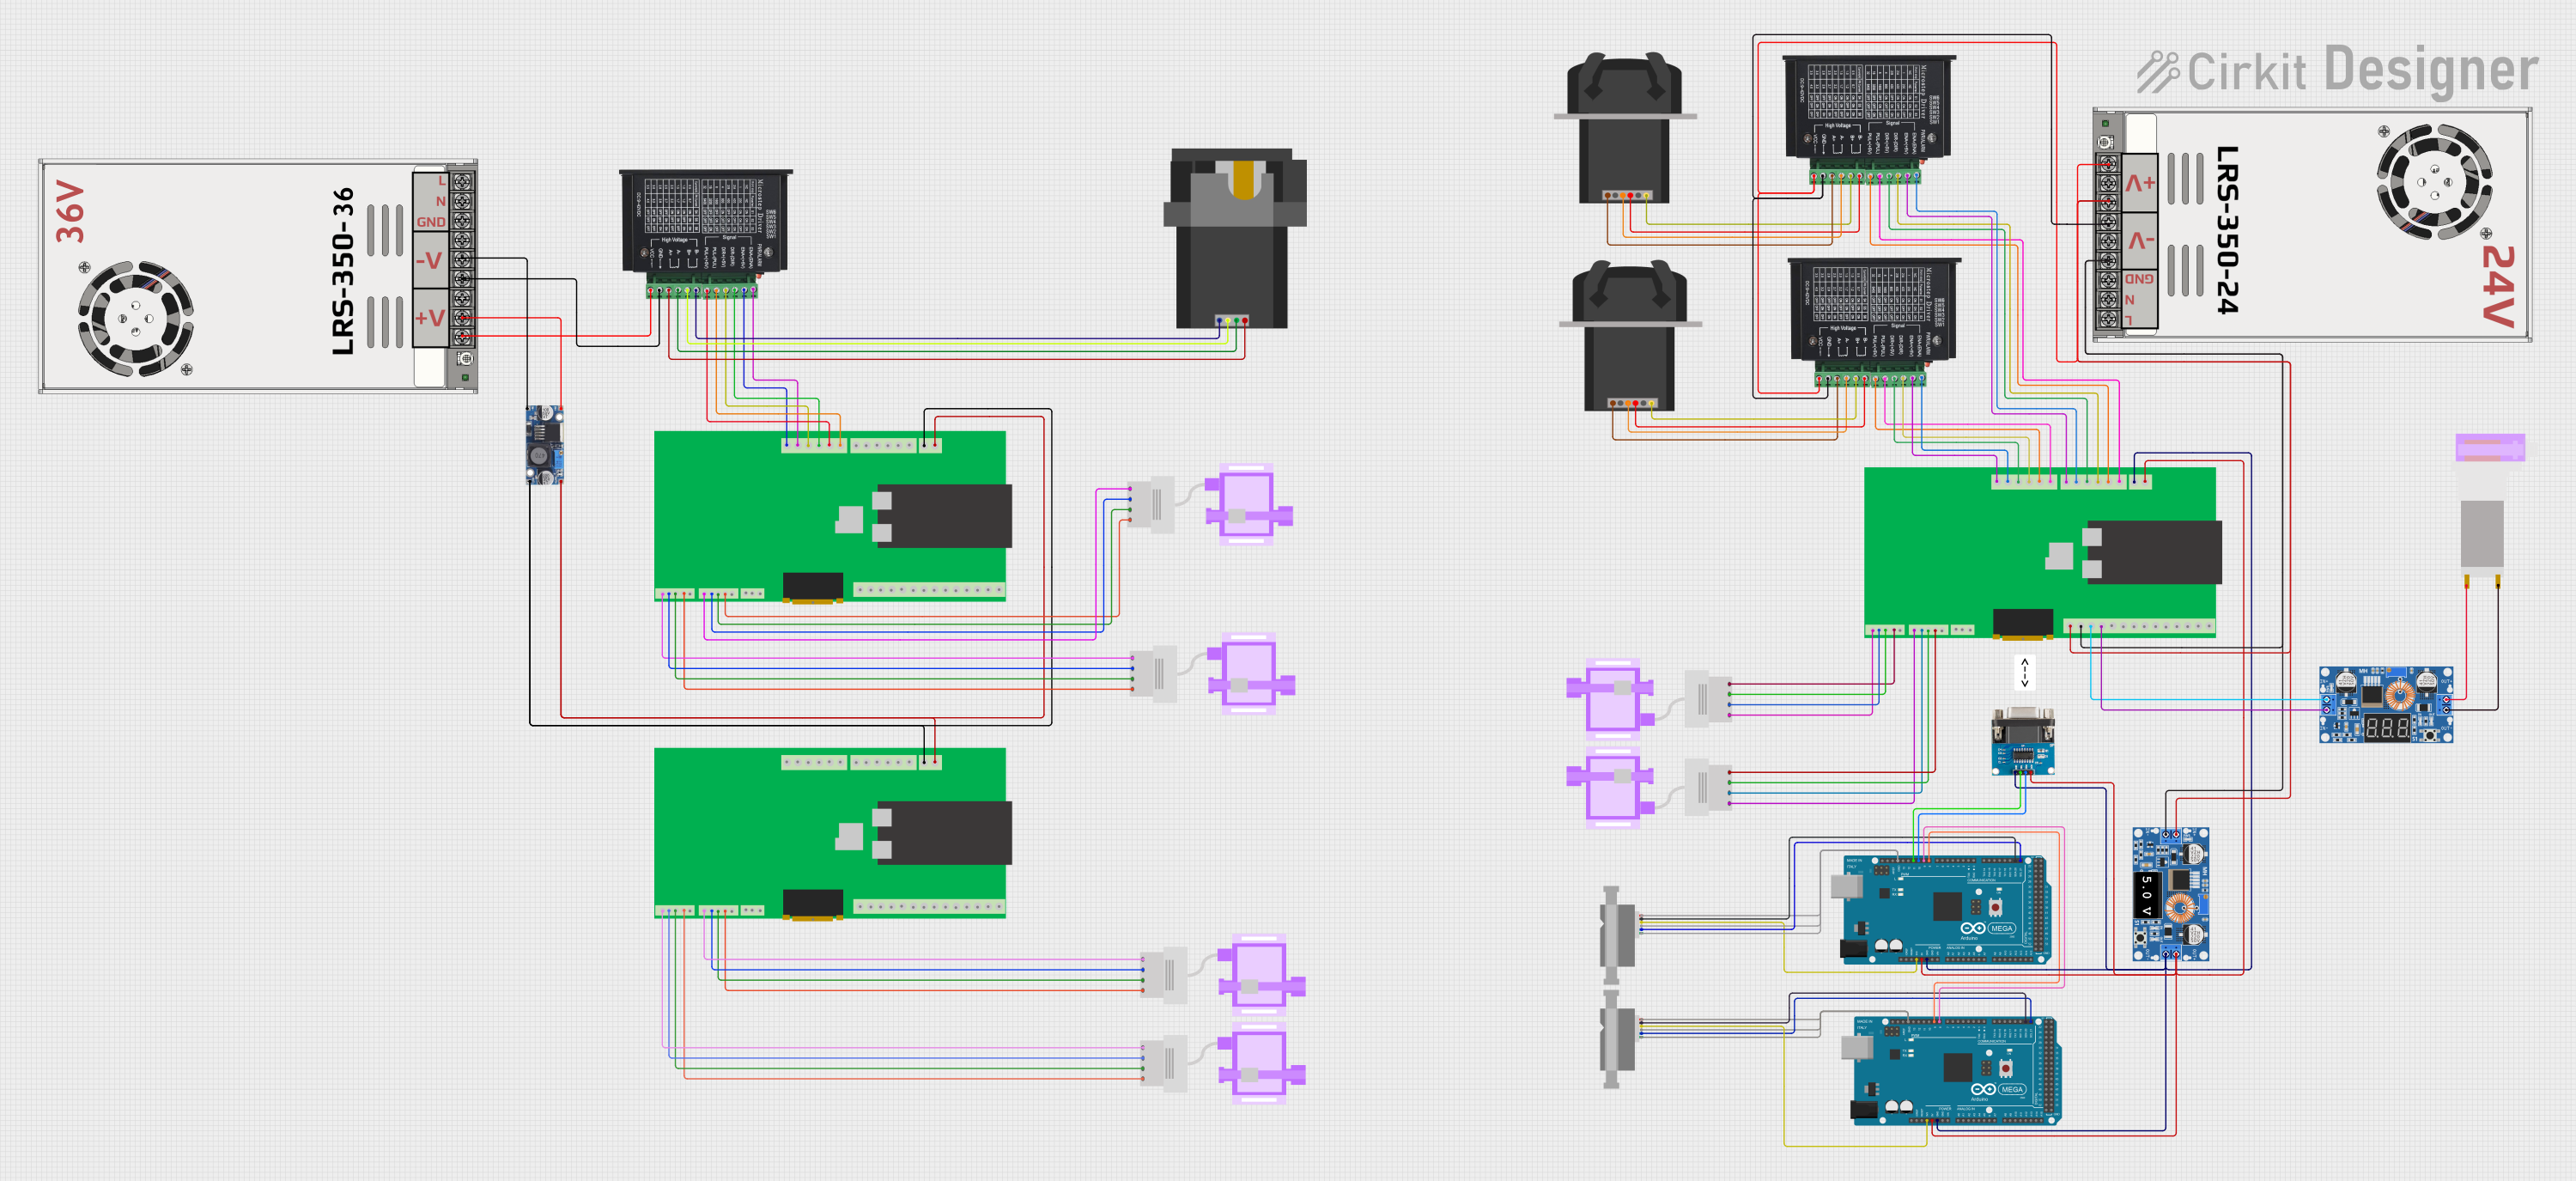
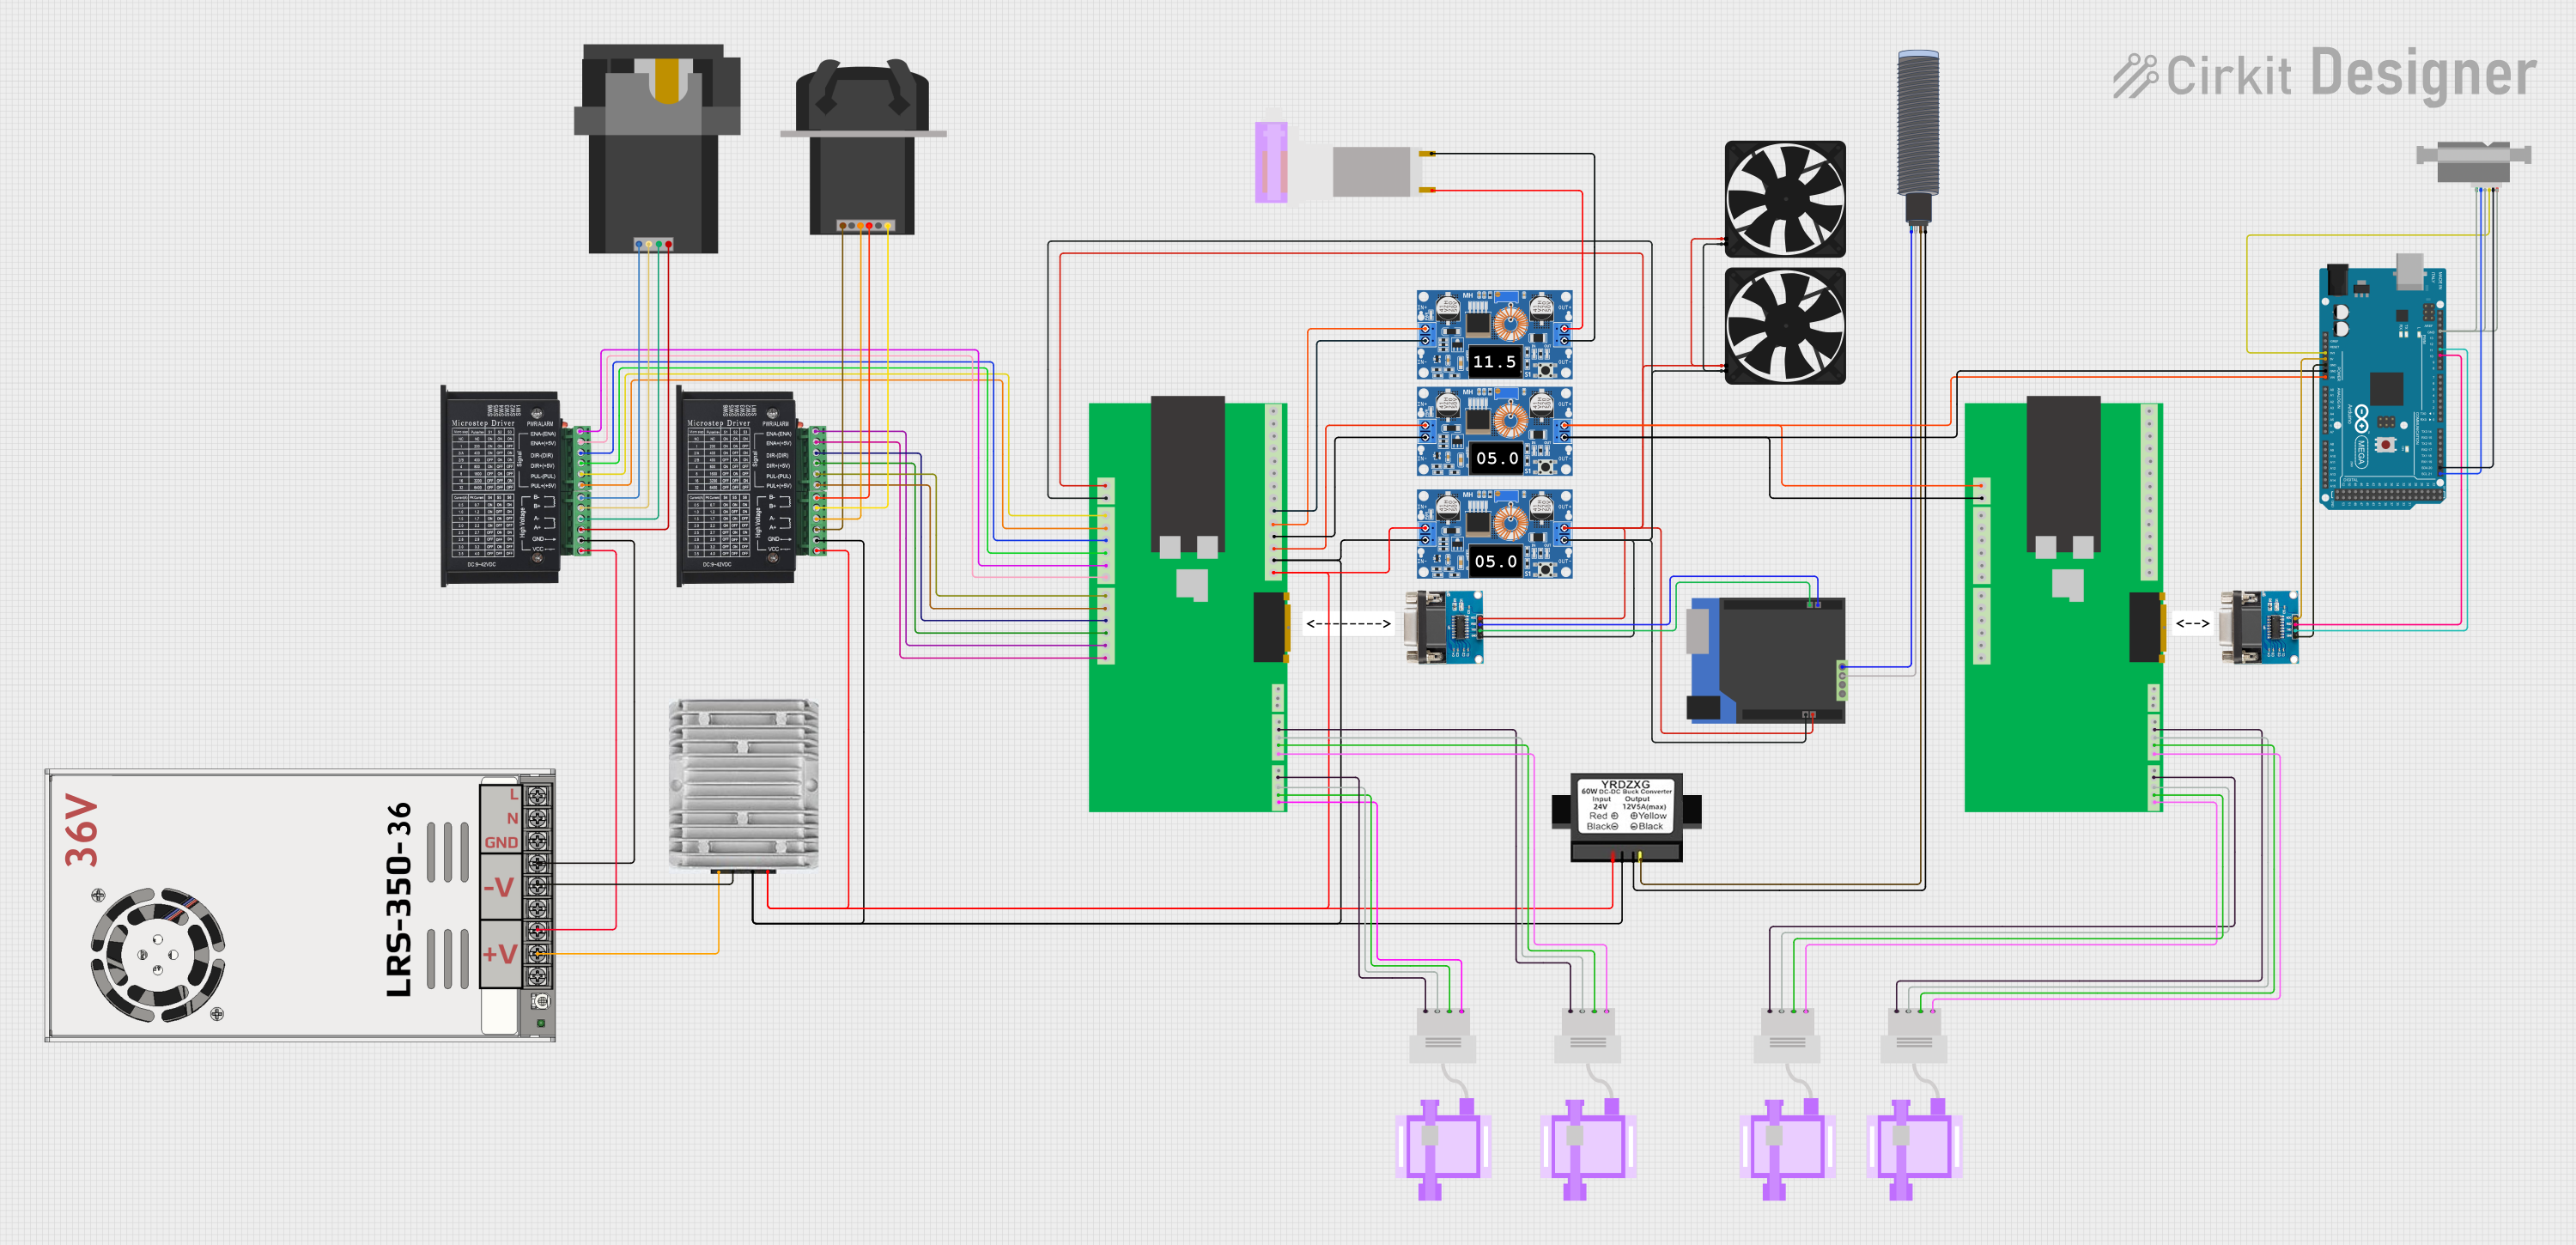
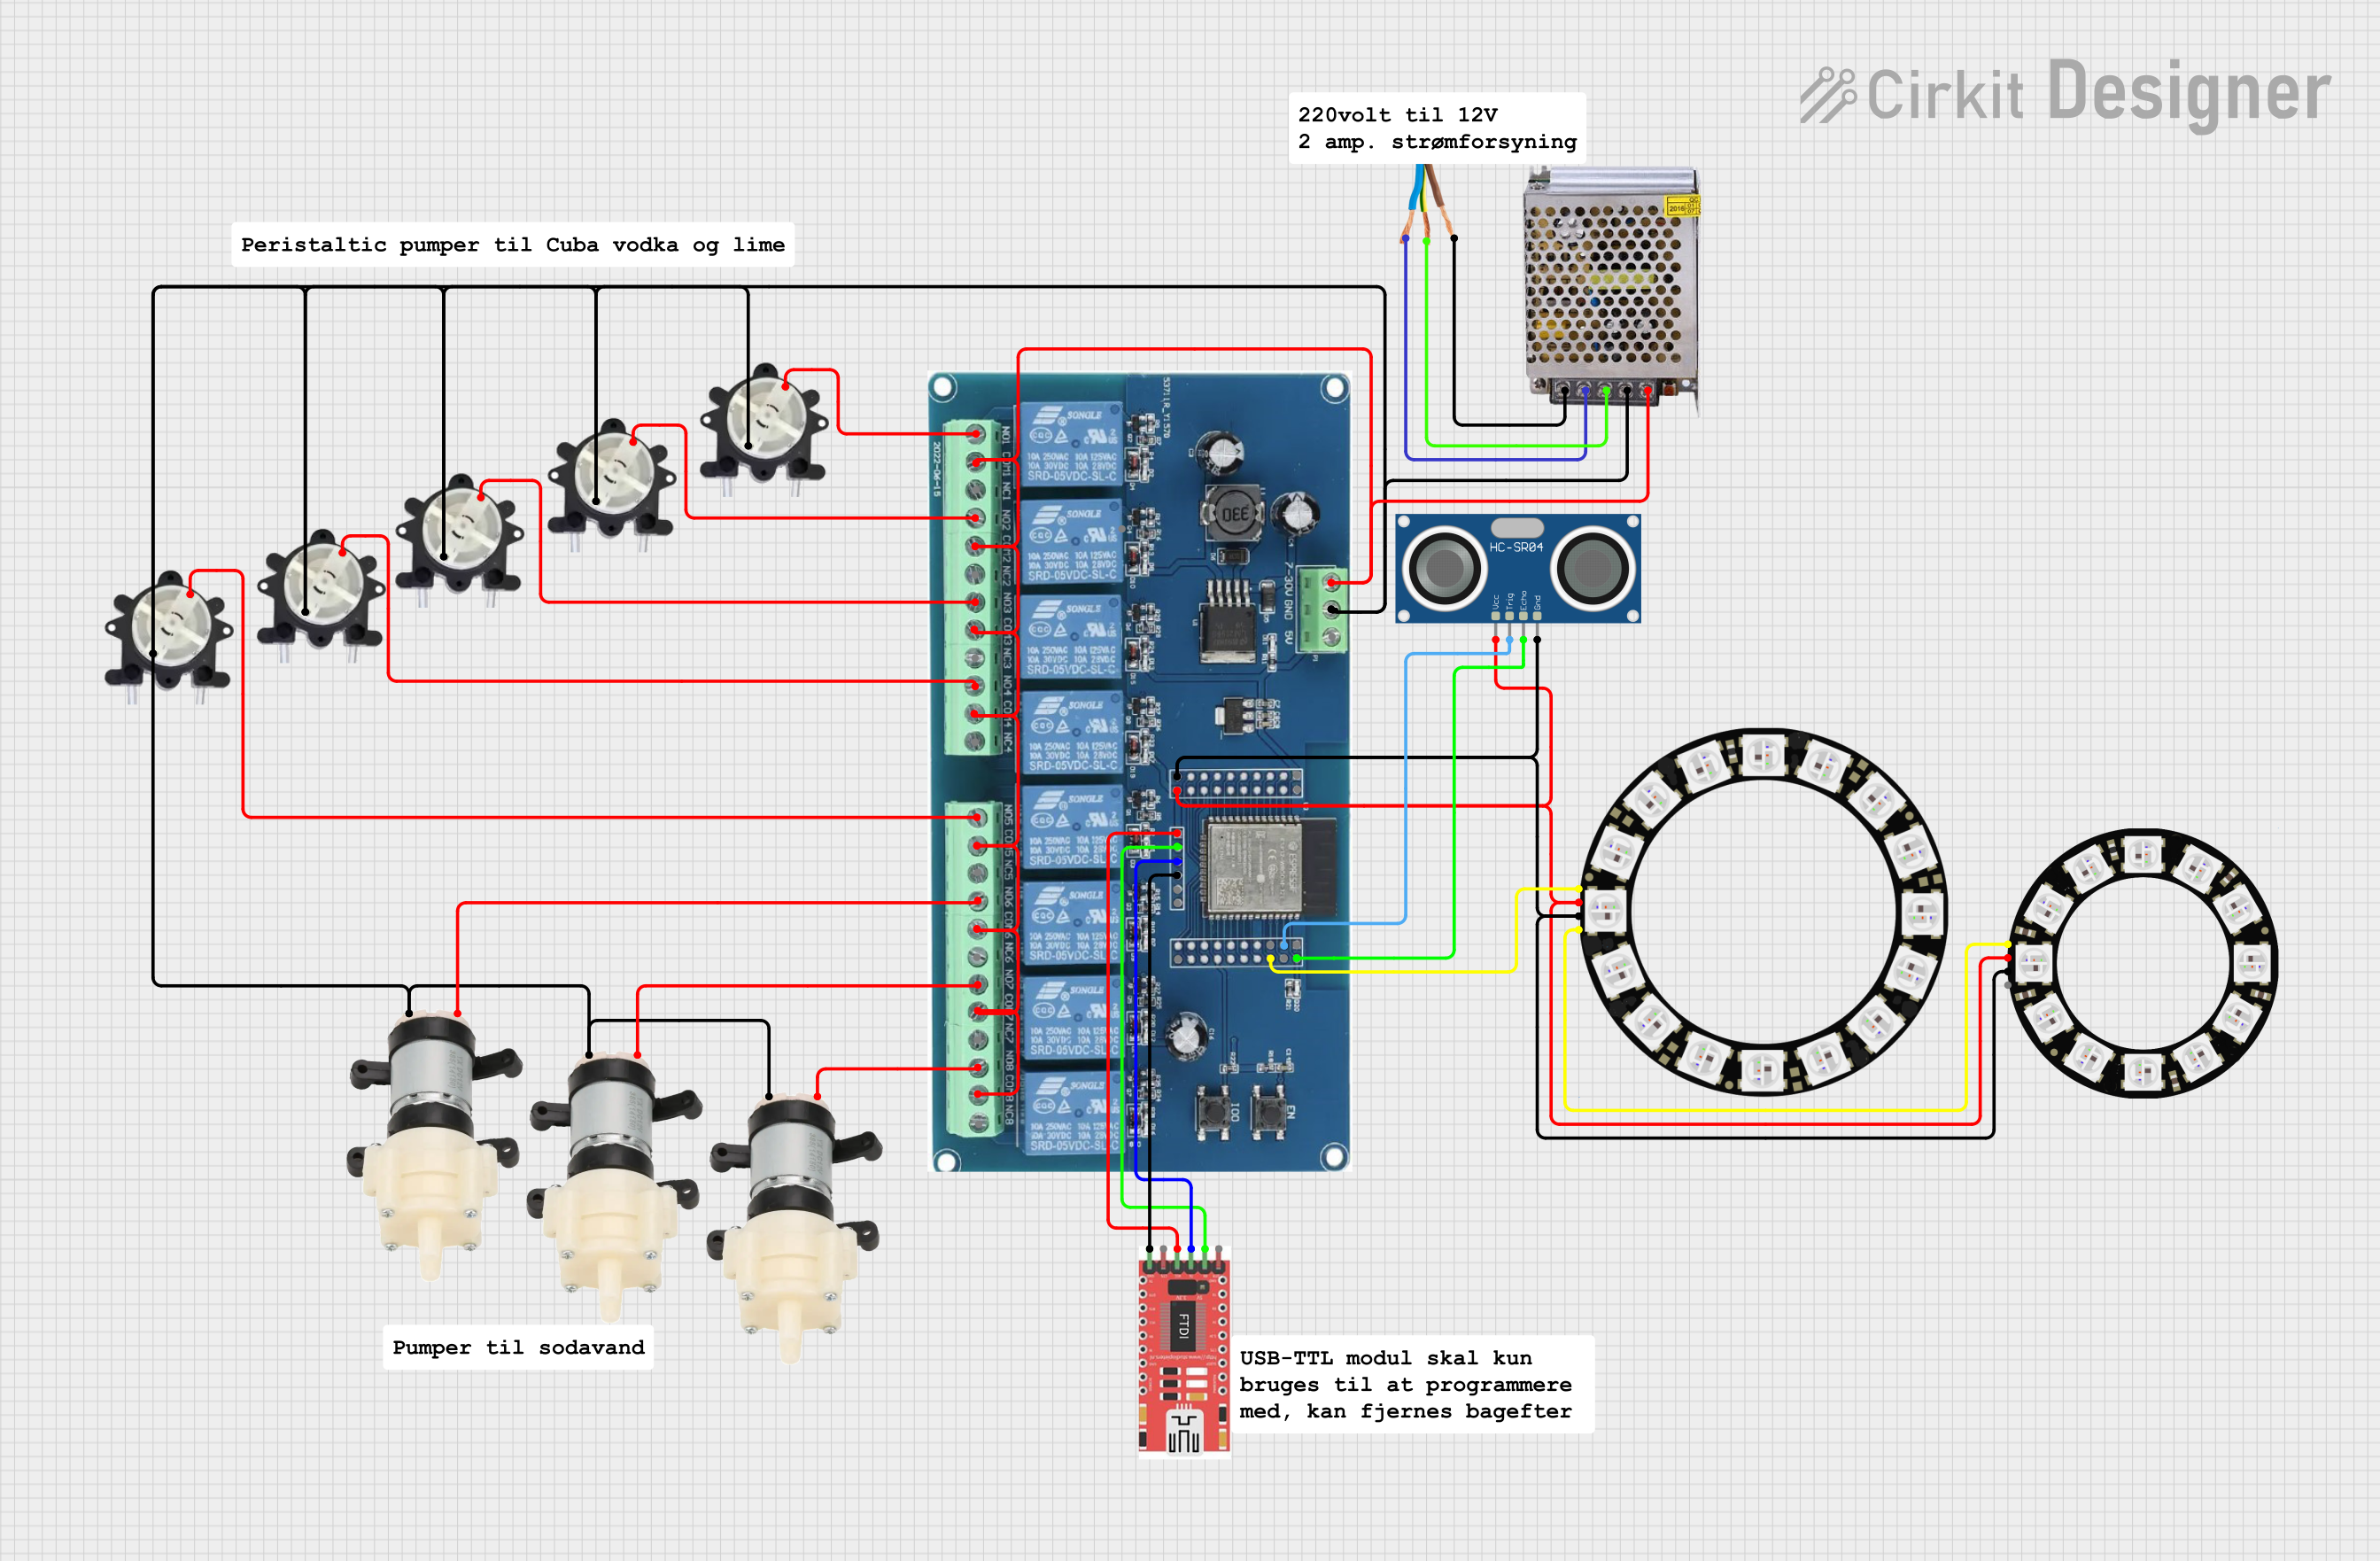
Explore Projects Built with 313KB Peristaltic Pump
Common Applications and Use Cases
- Medical infusion pumps
- Laboratory experiments requiring precise fluid control
- Industrial processes involving corrosive or sensitive liquids
- Hydroponic systems for nutrient delivery
- Aquarium dosing pumps
Technical Specifications
Key Technical Details
- Voltage: 12V DC
- Current: 500 mA
- Power Rating: 6W
- Flow Rate: 0-100 mL/min
- Tubing Internal Diameter: 2.5 mm
- Operating Environment: 0-40°C, <80% RH
Pin Configuration and Descriptions
| Pin Number | Description | Notes |
|---|---|---|
| 1 | Positive Voltage (V+) | Connect to 12V DC power source |
| 2 | Ground (GND) | Connect to system ground |
Usage Instructions
How to Use the Component in a Circuit
- Power Connections: Connect the positive voltage (V+) pin to a 12V DC power supply, and the ground (GND) pin to the common ground in your circuit.
- Tubing Installation: Insert the flexible tubing into the pump ensuring a secure fit to prevent leaks.
- Priming the Pump: Before the first use, prime the pump by running it with water to ensure no air is trapped in the system.
- Control: Use a microcontroller, such as an Arduino UNO, to turn the pump on and off. You can control the flow rate by using pulse-width modulation (PWM) or by controlling the duration the pump is on.
Important Considerations and Best Practices
- Avoid running the pump dry, as this can damage the internal components.
- Ensure the tubing is properly seated and secured to prevent leaks.
- Use a relay or a motor driver to interface the pump with a microcontroller to protect the microcontroller from current spikes.
- Regularly check and replace the tubing as it wears out over time due to the mechanical action of the pump.
Example Arduino UNO Code
// Define the control pin
const int pumpPin = 3; // Connect the pump control wire to pin 3

void setup() {
  pinMode(pumpPin, OUTPUT); // Set the pump control pin as an output
}

void loop() {
  digitalWrite(pumpPin, HIGH); // Turn on the pump
  delay(1000); // Run the pump for 1 second (1000 milliseconds)
  digitalWrite(pumpPin, LOW); // Turn off the pump
  delay(1000); // Wait for 1 second
}
Troubleshooting and FAQs
Common Issues Users Might Face
- Pump does not start: Check power supply connections and ensure the voltage is 12V DC.
- Insufficient flow rate: Verify that the tubing is not kinked or clogged and that it is properly seated in the pump.
- Pump is noisy or vibrating excessively: Ensure the pump is mounted securely and that the tubing is not causing tension.
Solutions and Tips for Troubleshooting
- If the pump does not operate, double-check all electrical connections and ensure the power supply is functioning.
- For flow rate issues, inspect the tubing for blockages or damage and replace if necessary.
- Excessive noise or vibration can often be remedied by re-securing the pump and ensuring the tubing is free to move as the pump operates.
FAQs
Q: How long can the pump run continuously? A: The pump is designed for intermittent use. Continuous operation should be limited to avoid overheating and to prolong the life of the pump.
Q: Can the pump handle viscous fluids? A: Yes, but the flow rate may be reduced depending on the viscosity of the fluid. Ensure the tubing is rated for the specific fluid you are pumping.
Q: Is the pump reversible? A: No, the 313KB Peristaltic Pump is not designed to reverse its direction. Fluid will only flow in one direction.
For further assistance, please contact the manufacturer or your local distributor.