How to Use bme688 unit: Examples, Pinouts, and Specs
Introduction
The BME688 by Unit Electronics is a highly versatile environmental sensor designed to measure temperature, humidity, pressure, and gas concentrations, including volatile organic compounds (VOCs). This compact and powerful sensor is ideal for applications requiring precise environmental monitoring and air quality analysis.
Explore Projects Built with bme688 unit
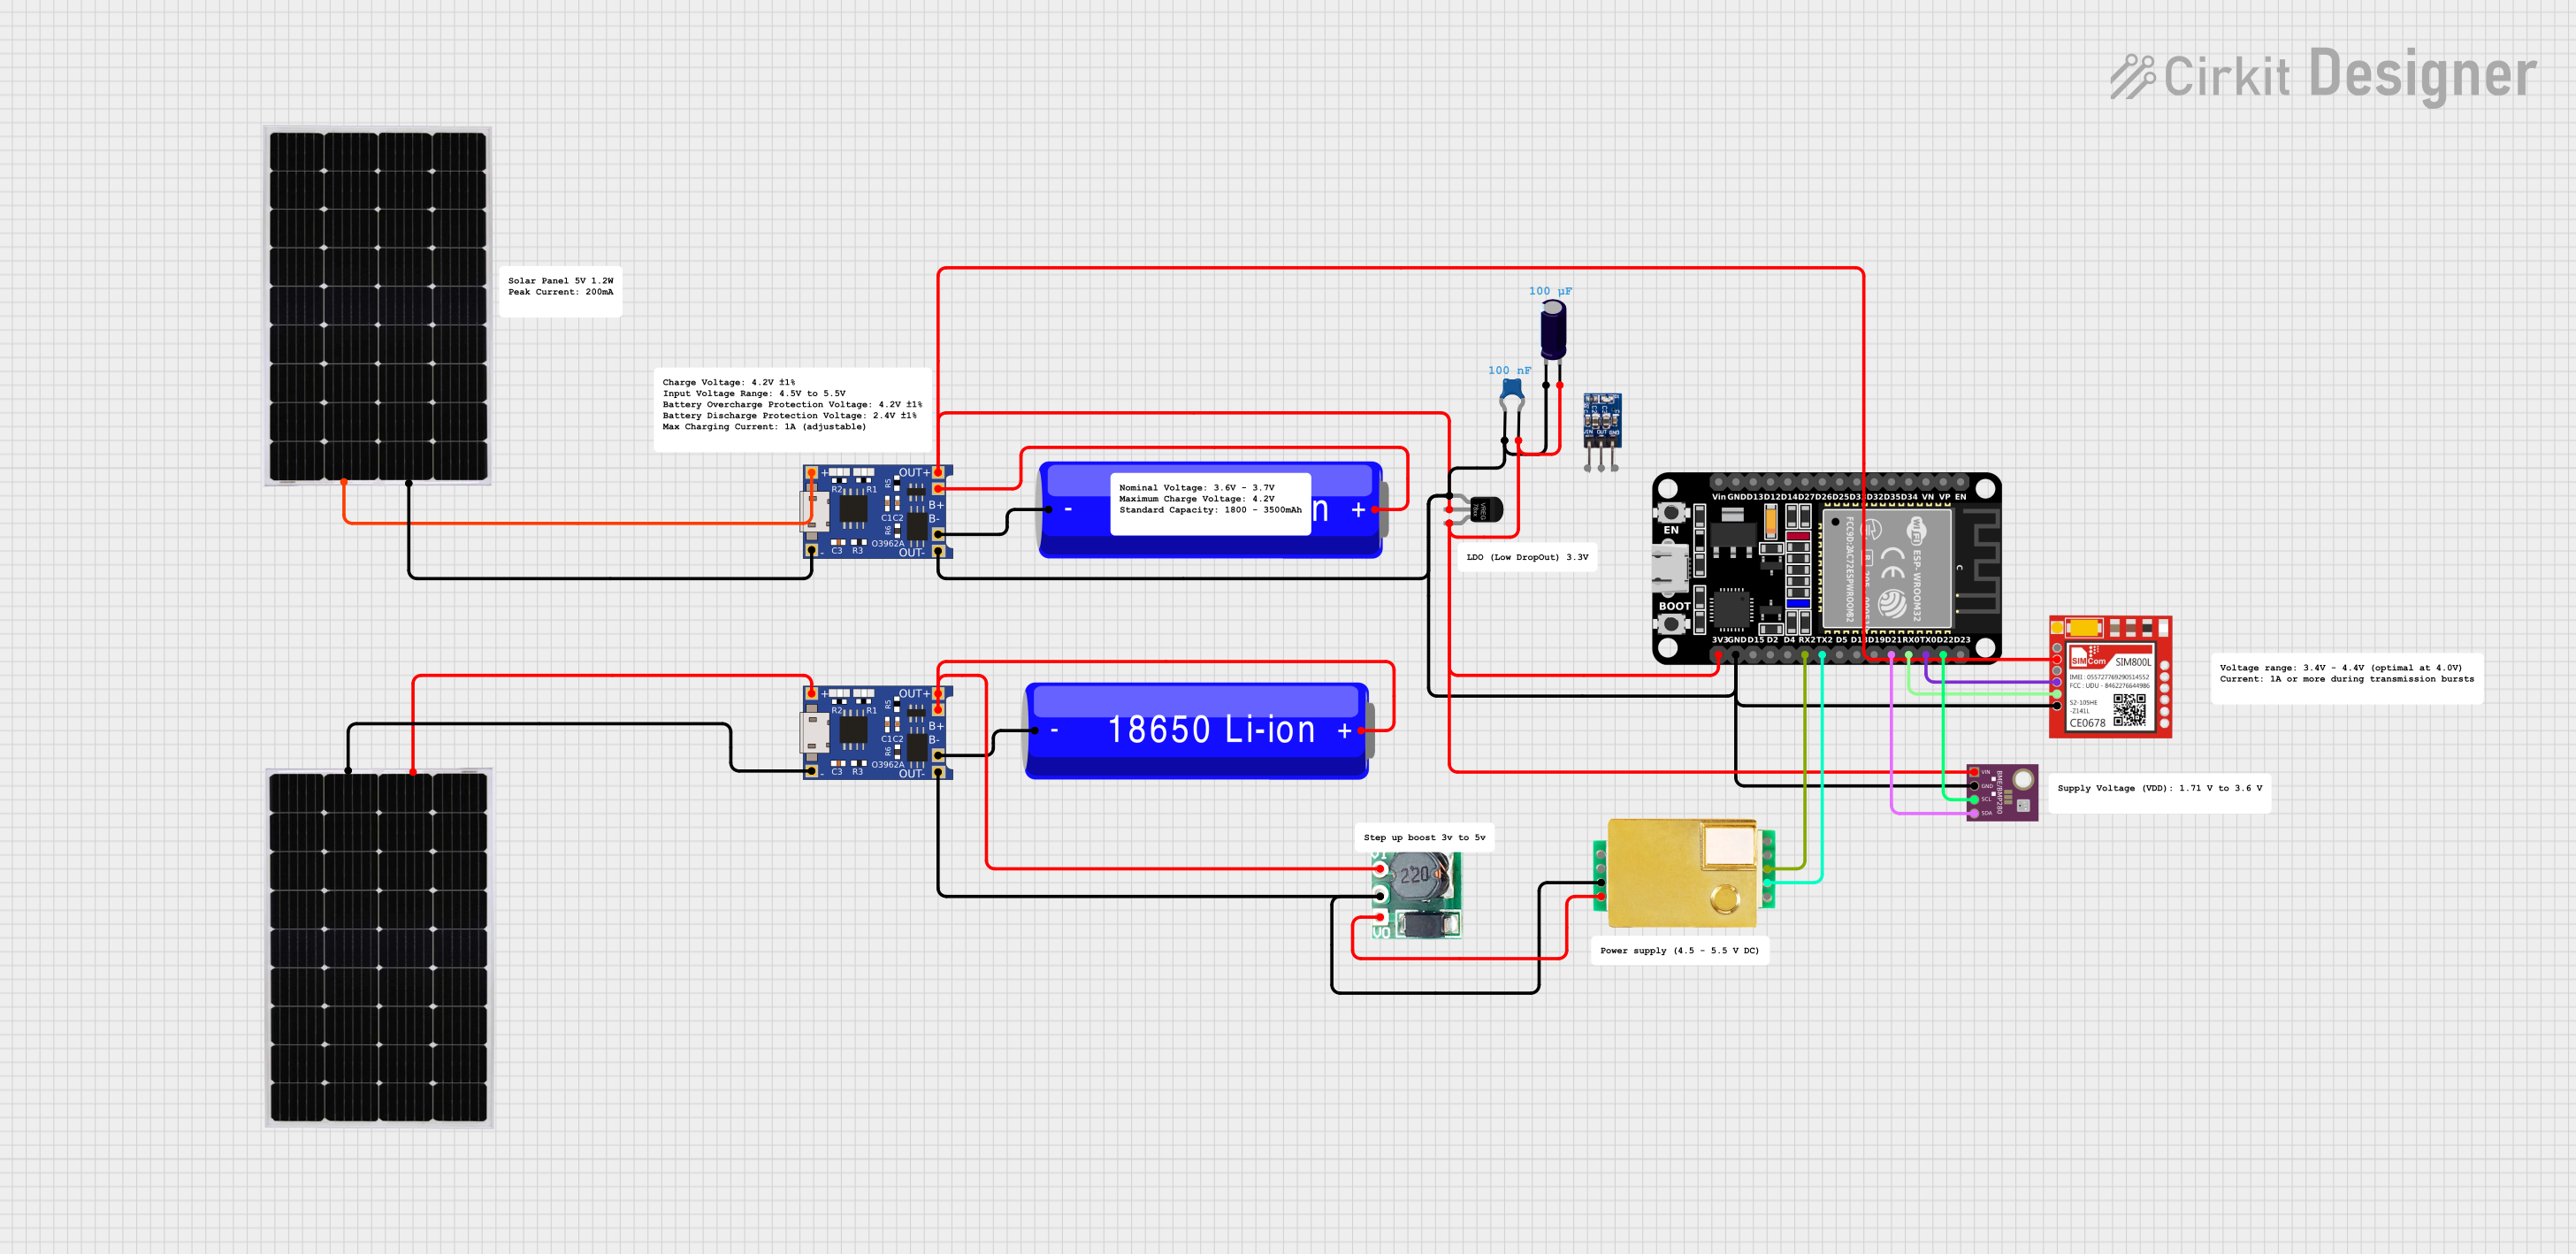
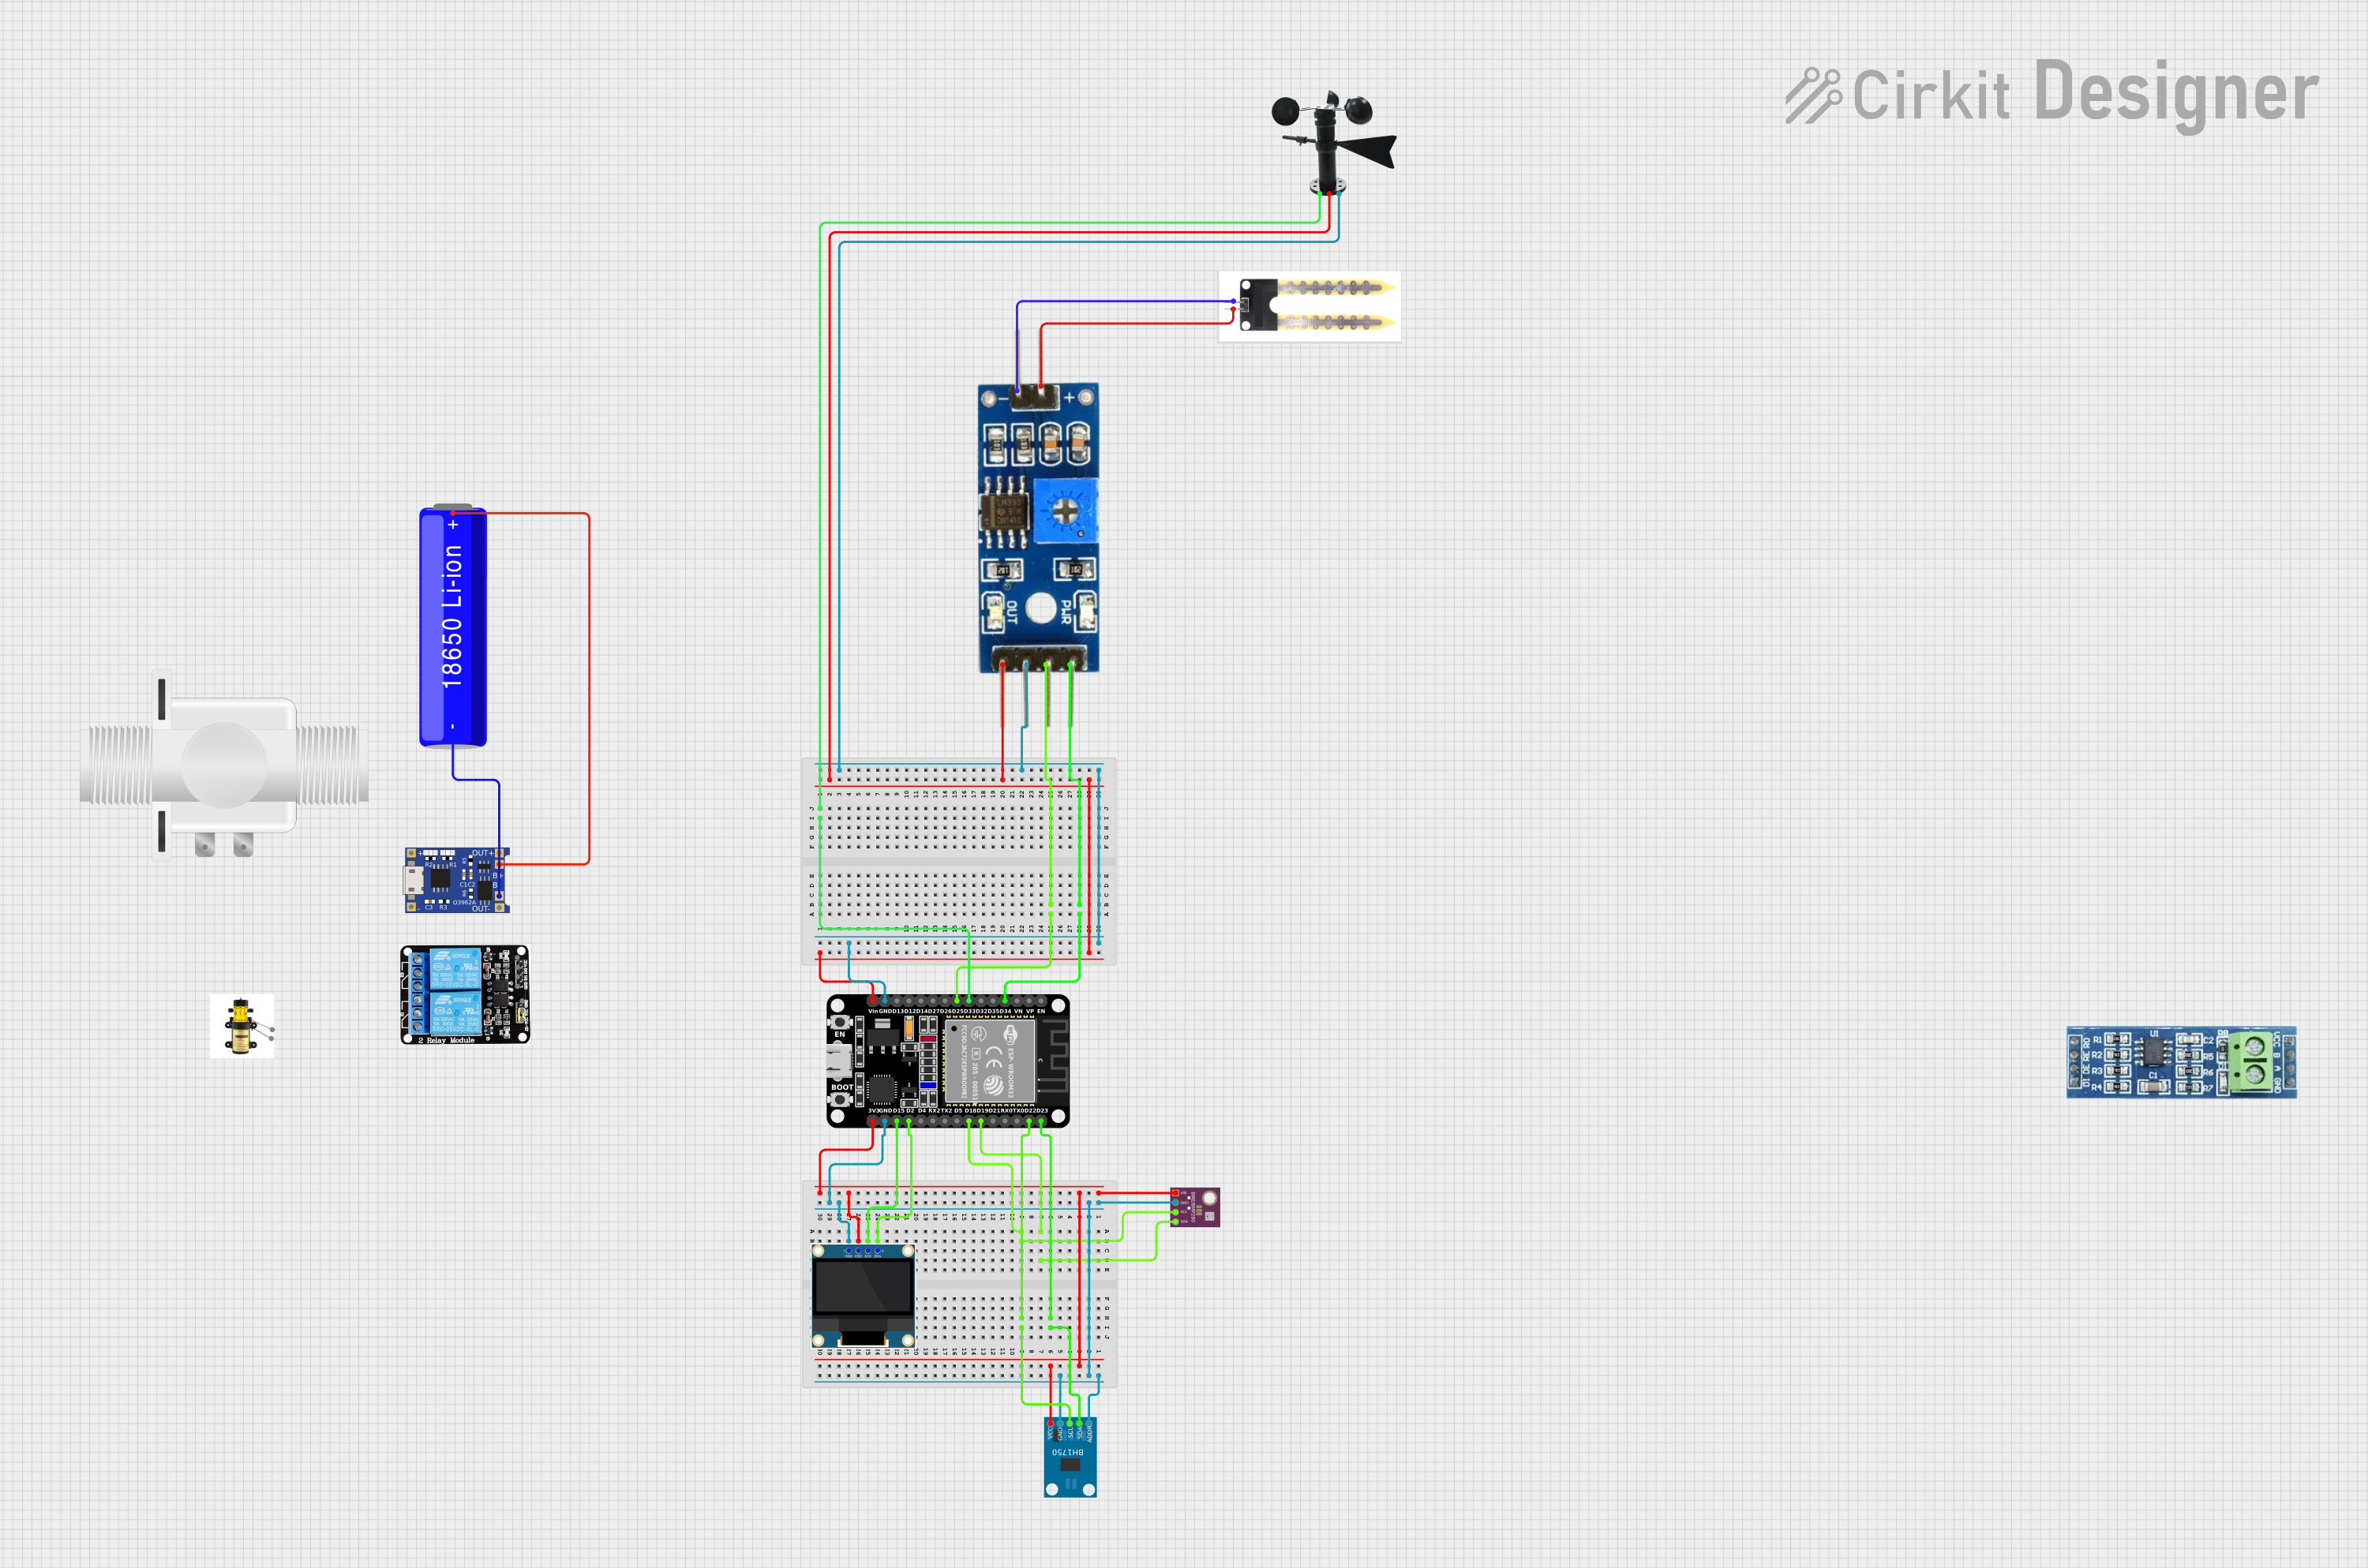
Explore Projects Built with bme688 unit
Common Applications
- Air Quality Monitoring: Detect and analyze VOC levels in indoor and outdoor environments.
- Smart Home Devices: Integrate into smart thermostats, air purifiers, and weather stations.
- IoT Projects: Use in Internet of Things (IoT) systems for environmental sensing.
- Industrial Applications: Monitor environmental conditions in factories, warehouses, and laboratories.
- Wearable Devices: Incorporate into portable devices for personal air quality tracking.
Technical Specifications
The following table outlines the key technical specifications of the BME688 sensor:
| Parameter | Value |
|---|---|
| Manufacturer | Unit Electronics |
| Part ID | BME688 |
| Supply Voltage | 1.71V to 3.6V |
| Operating Current | 2.1 µA (sleep mode), 0.9 mA (typical in operation) |
| Temperature Range | -40°C to +85°C |
| Humidity Range | 0% to 100% RH (non-condensing) |
| Pressure Range | 300 hPa to 1100 hPa |
| Gas Sensing | VOC detection with configurable sensitivity |
| Communication | I²C and SPI interfaces |
| Dimensions | 3.0 mm x 3.0 mm x 0.93 mm |
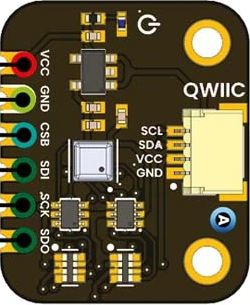
Pin Configuration
The BME688 sensor has a total of 8 pins. The table below describes each pin:
| Pin Number | Pin Name | Description |
|---|---|---|
| 1 | VDD | Power supply input (1.71V to 3.6V) |
| 2 | GND | Ground |
| 3 | SCL | I²C clock line / SPI serial clock |
| 4 | SDA | I²C data line / SPI serial data input |
| 5 | CS | Chip select for SPI (active low) |
| 6 | SDI | SPI serial data input (alternative to SDA) |
| 7 | SDO | SPI serial data output |
| 8 | INT | Interrupt output (optional, configurable) |
Usage Instructions
How to Use the BME688 in a Circuit
- Power Supply: Connect the VDD pin to a regulated power source (1.71V to 3.6V) and the GND pin to ground.
- Communication Interface: Choose between I²C or SPI for communication:
- For I²C, connect the SCL and SDA pins to the corresponding I²C lines on your microcontroller.
- For SPI, connect the CS, SCL, SDI, and SDO pins to the respective SPI lines.
- Pull-Up Resistors: If using I²C, ensure pull-up resistors (typically 4.7 kΩ) are connected to the SCL and SDA lines.
- Interrupt Pin: Optionally, connect the INT pin to a GPIO pin on your microcontroller for event-based notifications.
- Software Configuration: Use a compatible library (e.g., Bosch BME688 library) to initialize and configure the sensor.
Important Considerations
- Power Stability: Ensure a stable power supply to avoid measurement inaccuracies.
- Placement: Place the sensor in an area with good airflow for accurate gas and environmental readings.
- Calibration: Perform gas sensor calibration for optimal VOC detection in your specific environment.
- I²C Address: The default I²C address is
0x76. If multiple sensors are used, configure the address accordingly.
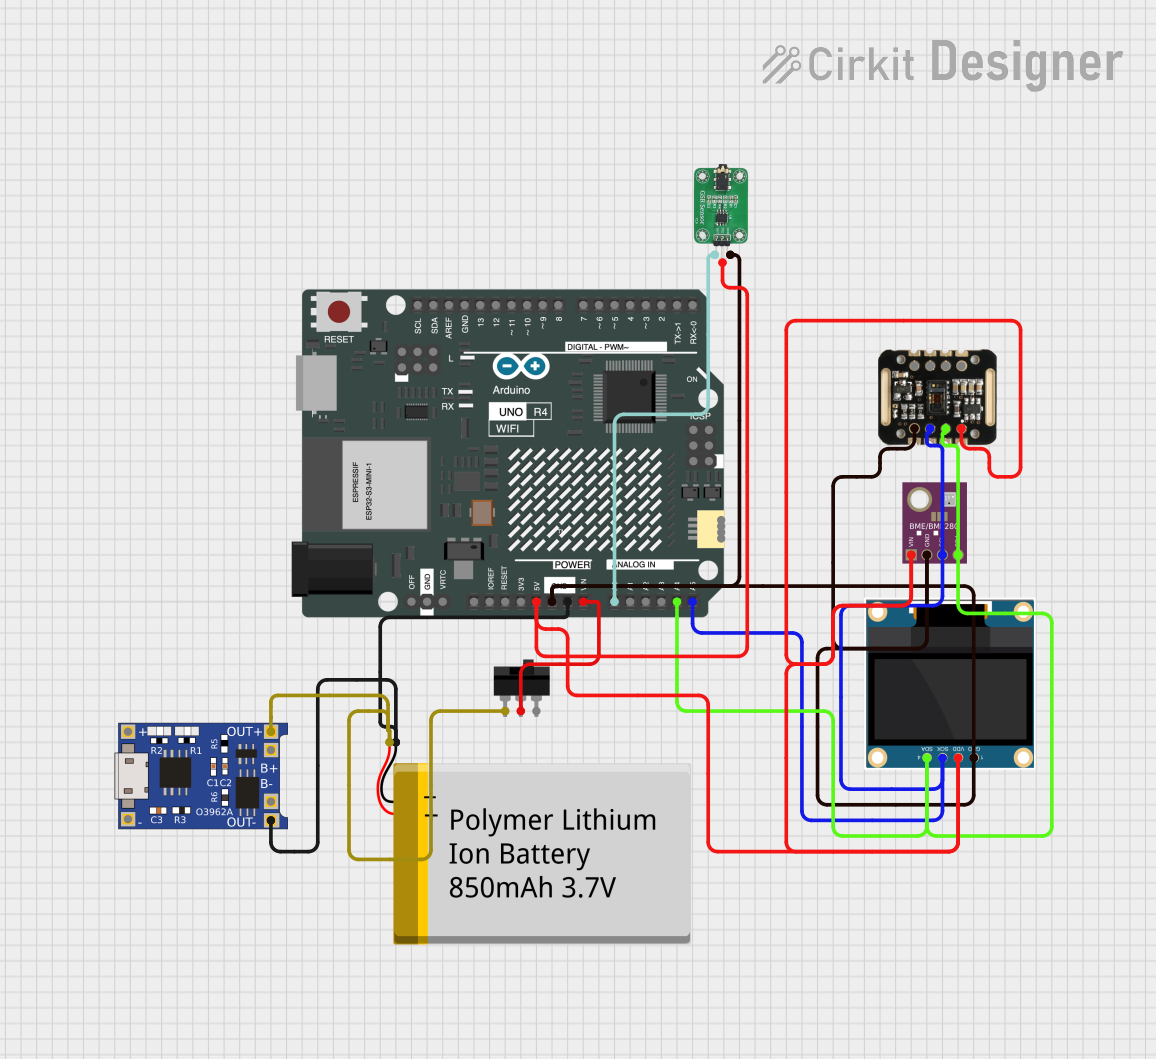
Example Code for Arduino UNO
Below is an example of how to use the BME688 with an Arduino UNO via I²C:
#include <Wire.h>
#include <Adafruit_Sensor.h>
#include <Adafruit_BME680.h>

// Create an instance of the BME680 sensor
Adafruit_BME680 bme;

// Setup function to initialize the sensor
void setup() {
  Serial.begin(9600);
  while (!Serial); // Wait for serial connection

  // Initialize the BME680 sensor
  if (!bme.begin(0x76)) {
    Serial.println("Could not find a valid BME688 sensor, check wiring!");
    while (1);
  }

  // Configure sensor settings
  bme.setTemperatureOversampling(BME680_OS_8X);
  bme.setHumidityOversampling(BME680_OS_2X);
  bme.setPressureOversampling(BME680_OS_4X);
  bme.setIIRFilterSize(BME680_FILTER_SIZE_3);
  bme.setGasHeater(320, 150); // 320°C for 150 ms
}

// Loop function to read and display sensor data
void loop() {
  if (!bme.performReading()) {
    Serial.println("Failed to perform reading!");
    return;
  }

  // Print sensor readings to the Serial Monitor
  Serial.print("Temperature = ");
  Serial.print(bme.temperature);
  Serial.println(" °C");

  Serial.print("Humidity = ");
  Serial.print(bme.humidity);
  Serial.println(" %");

  Serial.print("Pressure = ");
  Serial.print(bme.pressure / 100.0);
  Serial.println(" hPa");

  Serial.print("Gas = ");
  Serial.print(bme.gas_resistance / 1000.0);
  Serial.println(" kOhms");

  delay(2000); // Wait 2 seconds before the next reading
}
Troubleshooting and FAQs
Common Issues
Sensor Not Detected:
- Ensure the wiring is correct and matches the chosen communication protocol (I²C or SPI).
- Verify the I²C address (
0x76by default) or SPI configuration. - Check for loose connections or damaged cables.
Inaccurate Readings:
- Ensure the sensor is placed in an area with good airflow and away from heat sources.
- Verify that the power supply is stable and within the specified range.
- Perform calibration for gas sensing in your specific environment.
Communication Errors:
- For I²C, ensure pull-up resistors are connected to the SCL and SDA lines.
- For SPI, verify the correct configuration of CS, SCL, SDI, and SDO pins.
FAQs
Q: Can the BME688 detect specific gases?
A: The BME688 is optimized for detecting VOCs but does not identify specific gases. It provides a general air quality index based on VOC levels.
Q: What is the typical response time for measurements?
A: The response time varies depending on the parameter being measured. For gas sensing, it typically takes a few seconds to stabilize.
Q: Can I use the BME688 with a 5V microcontroller?
A: Yes, but you must use a level shifter to step down the logic levels to 3.3V, as the BME688 operates at 1.71V to 3.6V.
Q: How do I calibrate the gas sensor?
A: Calibration involves exposing the sensor to known air quality conditions and adjusting the sensitivity settings in software. Refer to the Bosch BME688 datasheet for detailed calibration procedures.