
How to Use LM386 Mono Audio Amplifier Module: Examples, Pinouts, and Specs
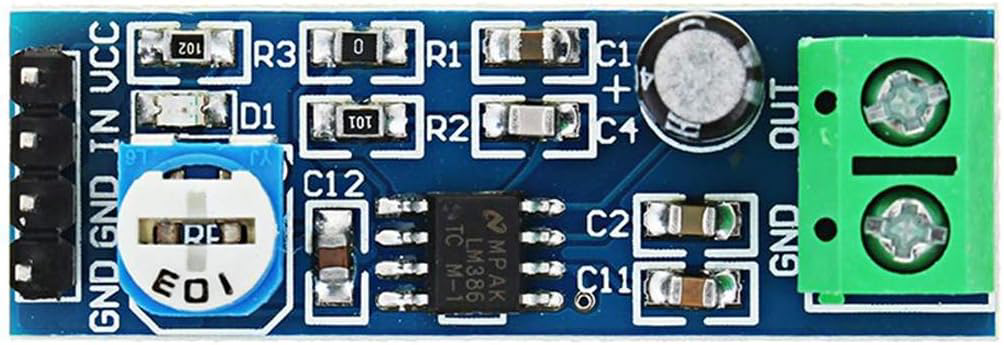
 Design with LM386 Mono Audio Amplifier Module in Cirkit Designer
Introduction
The LM386 Mono Audio Amplifier Module, manufactured by EC Buying (Part ID: B0BKZ8P6NH), is a low-voltage audio amplifier designed for small audio applications. It is capable of driving speakers or headphones with a gain range of 20 to 200, making it ideal for projects requiring compact and efficient audio amplification. This module is widely used in DIY audio systems, intercoms, portable speakers, and other low-power audio devices.
Explore Projects Built with LM386 Mono Audio Amplifier Module
 Open Project in Cirkit Designer
 Open Project in Cirkit Designer
 Open Project in Cirkit Designer
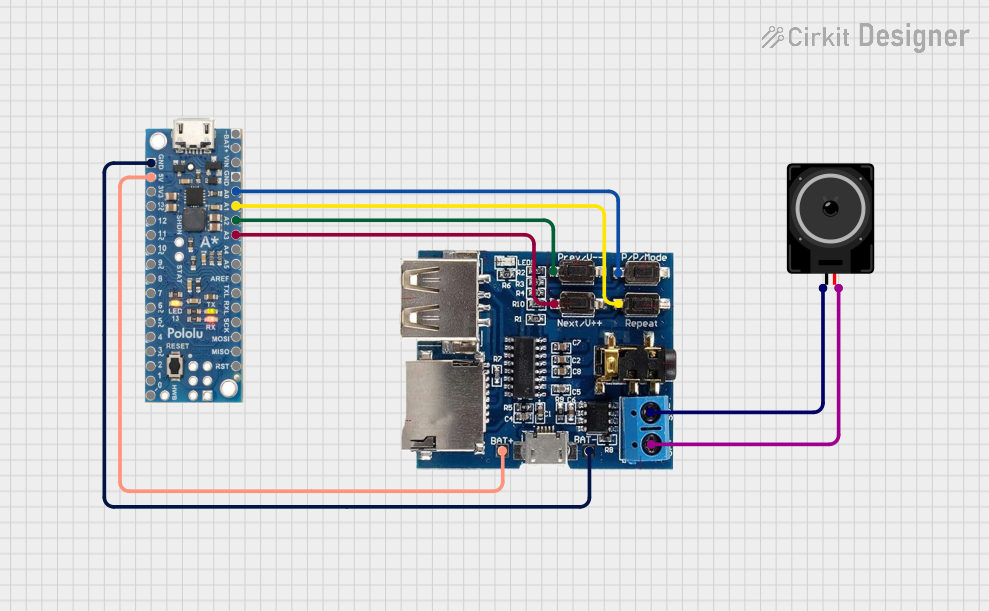
 Open Project in Cirkit Designer
Explore Projects Built with LM386 Mono Audio Amplifier Module

 Open Project in Cirkit Designer
 Open Project in Cirkit Designer
 Open Project in Cirkit Designer
 Open Project in Cirkit Designer
Common Applications and Use Cases
- Portable audio amplifiers
- DIY speaker systems
- Intercom systems
- Audio signal pre-amplification
- Educational electronics projects
Technical Specifications
The LM386 Mono Audio Amplifier Module is designed for simplicity and efficiency. Below are its key technical details:
Key Technical Details
| Parameter | Value |
|---|---|
| Operating Voltage | 4V to 12V DC |
| Output Power | 0.5W to 1W (depending on load) |
| Gain | Adjustable from 20 to 200 |
| Input Impedance | 50 kΩ |
| Output Load Impedance | 4Ω to 32Ω |
| Frequency Response | 300 Hz to 20 kHz |
| Quiescent Current | 4 mA (typical) |
| Dimensions | ~30mm x 20mm x 15mm |
Pin Configuration and Descriptions
The LM386 Mono Audio Amplifier Module typically has the following pinout:
| Pin Number | Pin Name | Description |
|---|---|---|
| 1 | GND | Ground connection for the module |
| 2 | VCC | Power supply input (4V to 12V DC) |
| 3 | IN+ | Non-inverting audio input |
| 4 | IN- | Inverting audio input (commonly connected to GND for single-ended input) |
| 5 | OUT | Amplified audio output for connection to a speaker or headphone |
| 6 | GAIN | Gain adjustment pin (connect external components to adjust gain) |
Usage Instructions
The LM386 Mono Audio Amplifier Module is straightforward to use in audio amplification circuits. Follow the steps below to integrate it into your project:
Basic Circuit Connection
- Power Supply: Connect the
VCCpin to a DC power source (4V to 12V) and theGNDpin to ground. - Audio Input: Connect the audio signal source to the
IN+pin. For single-ended input, connect theIN-pin to ground. - Audio Output: Connect the
OUTpin to a speaker or headphone. Ensure the load impedance is within the range of 4Ω to 32Ω. - Gain Adjustment: To adjust the gain, connect a capacitor and resistor between the
GAINpin and ground. For example:- Gain of 20: Leave the
GAINpin unconnected. - Gain of 200: Connect a 10 µF capacitor between the
GAINpin and ground.
- Gain of 20: Leave the
Example Circuit with Arduino UNO
The LM386 module can be used with an Arduino UNO to amplify audio signals. Below is an example:
Circuit Connections
- Connect the
VCCpin of the LM386 module to the 5V pin of the Arduino. - Connect the
GNDpin of the LM386 module to the GND pin of the Arduino. - Connect the
IN+pin of the LM386 module to an audio signal source (e.g., an audio jack or a signal generated by the Arduino). - Connect the
OUTpin to a small speaker (4Ω to 8Ω recommended).
Example Arduino Code
/*
  Example: Generating a simple audio signal for the LM386 module
  This code generates a square wave on pin 9 of the Arduino, which can be
  used as an audio signal input for the LM386 module.
*/

const int audioPin = 9; // Pin connected to the audio input (IN+) of LM386

void setup() {
  pinMode(audioPin, OUTPUT); // Set the audio pin as an output
}

void loop() {
  // Generate a square wave at 1 kHz frequency
  digitalWrite(audioPin, HIGH); // Set the pin HIGH
  delayMicroseconds(500);       // Wait for 500 microseconds (half period)
  digitalWrite(audioPin, LOW);  // Set the pin LOW
  delayMicroseconds(500);       // Wait for 500 microseconds (half period)
}
Important Considerations and Best Practices
- Power Supply: Use a stable DC power supply to avoid noise in the audio output.
- Heat Dissipation: The LM386 module may heat up during operation. Ensure proper ventilation or use a heatsink if necessary.
- Speaker Impedance: Use a speaker with an impedance of 4Ω to 32Ω to prevent overloading the module.
- Input Signal: Avoid feeding high-amplitude signals directly into the input pins to prevent distortion or damage.
Troubleshooting and FAQs
Common Issues and Solutions
No Sound Output:
- Verify all connections, especially the power supply and ground.
- Check if the input signal is present and within the acceptable range.
- Ensure the speaker or headphone is properly connected and functional.
Distorted Audio:
- Reduce the input signal amplitude to avoid overdriving the amplifier.
- Check the gain setting and ensure it is appropriate for your application.
- Verify that the power supply voltage is stable and within the specified range.
Excessive Noise:
- Use shielded cables for the input signal to minimize interference.
- Ensure the power supply is free from noise or ripple.
- Place decoupling capacitors (e.g., 0.1 µF) near the power supply pins.
Overheating:
- Check the load impedance and ensure it is within the specified range (4Ω to 32Ω).
- Reduce the output power if the module is overheating.
FAQs
Q: Can I use the LM386 module with a 3.3V power supply?
A: No, the LM386 module requires a minimum operating voltage of 4V. Using a 3.3V supply may result in unstable operation or no output.
Q: How do I increase the volume of the output?
A: You can increase the gain by connecting a capacitor (e.g., 10 µF) between the GAIN pin and ground. Additionally, ensure the input signal amplitude is sufficient.
Q: Can I use the LM386 module to drive stereo speakers?
A: No, the LM386 is a mono amplifier. For stereo applications, you will need two LM386 modules, one for each channel.
Q: What is the maximum speaker wattage I can use?
A: The LM386 can output up to 1W of power, so ensure your speaker is rated for at least 1W to avoid damage.
By following this documentation, you can effectively use the LM386 Mono Audio Amplifier Module in your audio projects.