How to Use Talon SRX: Examples, Pinouts, and Specs
Introduction
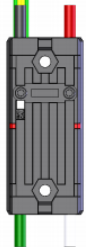
The Talon SRX is an advanced smart motor controller manufactured by CTR Electronics. It is specifically designed for robotics applications, offering precise motor control with features such as advanced control algorithms, built-in sensors, and support for multiple communication protocols. The Talon SRX is widely used in competitive robotics, including FIRST Robotics Competition (FRC), due to its reliability, versatility, and ease of integration.
Explore Projects Built with Talon SRX


Explore Projects Built with Talon SRX
Common Applications and Use Cases
- Competitive robotics (e.g., FRC robots)
- Precision motor control for drive systems, arms, and mechanisms
- Closed-loop control for position, velocity, and current
- Integration with CAN-based control systems
- Robotics projects requiring advanced feedback and diagnostics
Technical Specifications
Key Technical Details
| Parameter | Value |
|---|---|
| Manufacturer | CTR Electronics |
| Part ID | Talon SRX: Advanced Smart Speed Motor Controller for Robotics |
| Input Voltage Range | 6V to 28V DC |
| Continuous Current Rating | 40A |
| Peak Current Rating | 60A (for short durations) |
| Communication Protocols | CAN, PWM |
| Control Modes | Percent Output, Position, Velocity, Current, Motion Profile, Motion Magic |
| Sensor Inputs | Quadrature Encoders, Analog Sensors, Limit Switches |
| Dimensions | 2.25" x 1.75" x 0.75" |
| Weight | 0.2 lbs (90.7 grams) |
Pin Configuration and Descriptions
The Talon SRX features multiple connectors for power, motor output, and communication. Below is a detailed description of its pin configuration:
Power and Motor Output
| Pin/Connector Name | Description |
|---|---|
| VIN+ | Positive input voltage (6V to 28V DC) |
| VIN- | Negative input voltage (ground) |
| M+ | Positive motor output |
| M- | Negative motor output |
CAN Communication
| Pin/Connector Name | Description |
|---|---|
| CANH | CAN High signal for communication |
| CANL | CAN Low signal for communication |
Sensor Inputs
| Pin/Connector Name | Description |
|---|---|
| SRX Data Port | 10-pin port for connecting encoders, limit switches, or analog sensors |
| Limit Switches | Inputs for forward and reverse limit switches |
Usage Instructions
How to Use the Talon SRX in a Circuit
- Power Connection: Connect the VIN+ and VIN- terminals to a DC power source within the range of 6V to 28V. Ensure the power source can supply sufficient current for your motor.
- Motor Connection: Connect the motor leads to the M+ and M- terminals. Verify the polarity to ensure the motor spins in the desired direction.
- Communication Setup:
- For CAN communication, connect the CANH and CANL pins to the CAN bus. Ensure proper termination resistors are in place.
- For PWM control, connect the PWM signal to the appropriate input pin.
- Sensor Integration: Use the SRX Data Port to connect encoders, limit switches, or analog sensors for closed-loop control.
- Programming: Configure the Talon SRX using the provided software libraries (e.g., CTRE Phoenix API) to set control modes, PID parameters, and other settings.
Important Considerations and Best Practices
- Power Supply: Use a regulated power supply capable of handling the motor's peak current requirements.
- Wiring: Ensure all connections are secure and insulated to prevent short circuits.
- Cooling: The Talon SRX has built-in thermal protection, but ensure adequate ventilation to avoid overheating during prolonged use.
- Firmware Updates: Regularly update the Talon SRX firmware using the CTRE Phoenix Tuner to access the latest features and improvements.
- CAN Bus Termination: Properly terminate the CAN bus with 120-ohm resistors at both ends to ensure reliable communication.
Example Code for Arduino UNO (PWM Control)
The Talon SRX can be controlled using PWM signals from an Arduino UNO. Below is an example code snippet:
// Example: Controlling Talon SRX with Arduino UNO using PWM
// Connect the PWM signal from Arduino pin 9 to the Talon SRX PWM input.

const int pwmPin = 9; // PWM output pin on Arduino

void setup() {
  pinMode(pwmPin, OUTPUT); // Set the PWM pin as an output
}

void loop() {
  // Send a PWM signal to control motor speed
  // 0 = Full reverse, 127 = Stop, 255 = Full forward
  analogWrite(pwmPin, 127); // Set motor to stop (neutral position)
  delay(2000); // Wait for 2 seconds

  analogWrite(pwmPin, 200); // Set motor to forward speed
  delay(2000); // Wait for 2 seconds

  analogWrite(pwmPin, 50); // Set motor to reverse speed
  delay(2000); // Wait for 2 seconds
}
Troubleshooting and FAQs
Common Issues and Solutions
Motor Not Spinning:
- Verify power connections and ensure the input voltage is within the specified range.
- Check the motor connections (M+ and M-) for proper wiring.
- Ensure the control signal (PWM or CAN) is being sent correctly.
Overheating:
- Ensure adequate ventilation around the Talon SRX.
- Check for excessive current draw from the motor and reduce the load if necessary.
CAN Communication Failure:
- Verify the CANH and CANL connections and ensure proper termination resistors are in place.
- Check for unique device IDs on the CAN bus to avoid conflicts.
Sensor Not Detected:
- Ensure the sensor is properly connected to the SRX Data Port.
- Verify the sensor configuration in the software.
FAQs
Q: Can the Talon SRX be used with brushed and brushless motors?
A: The Talon SRX is designed for brushed DC motors. For brushless motors, consider using the Talon FX or other compatible controllers.
Q: How do I update the firmware on the Talon SRX?
A: Use the CTRE Phoenix Tuner software to update the firmware. Connect the Talon SRX to your computer via the CAN bus and follow the on-screen instructions.
Q: What is the maximum cable length for CAN communication?
A: The maximum recommended cable length for CAN communication is 40 meters, but this may vary depending on the quality of the cable and termination.
Q: Can I use the Talon SRX with an Arduino for closed-loop control?
A: Closed-loop control is best achieved using the CTRE Phoenix API with a compatible control system (e.g., RoboRIO). However, basic PWM control can be implemented with an Arduino.
This concludes the documentation for the Talon SRX. For further assistance, refer to the official CTR Electronics user manual or support resources.