How to Use ZK-SMC01: Examples, Pinouts, and Specs

Introduction
The ZK-SMC01 is a versatile DC-DC buck converter module designed to step down voltage from a higher input to a lower, stable, and adjustable output. This component is widely used in power supply circuits to provide a consistent voltage level for various electronic devices and projects. Its compact size and adjustable output make it ideal for applications such as battery-powered devices, DIY electronics projects, and embedded systems.
Explore Projects Built with ZK-SMC01

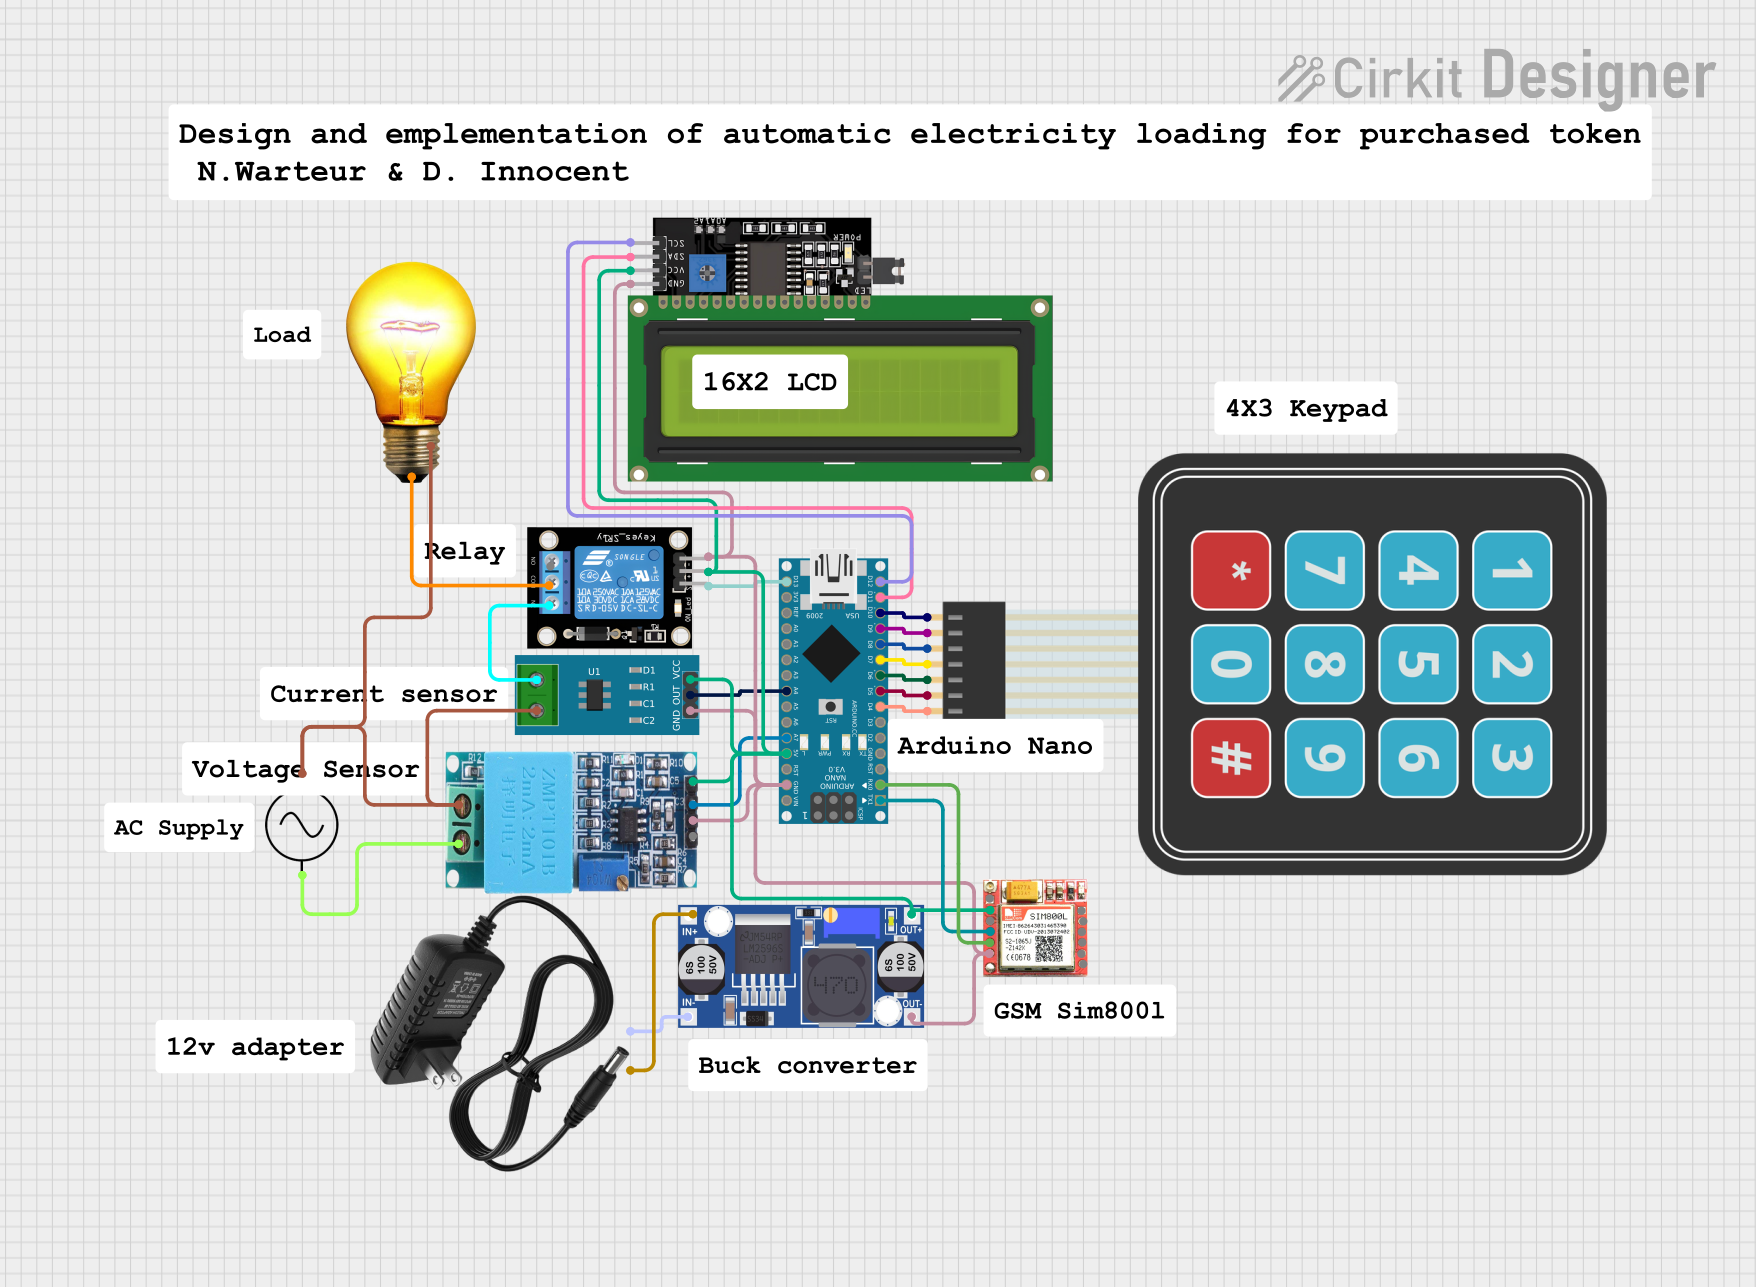
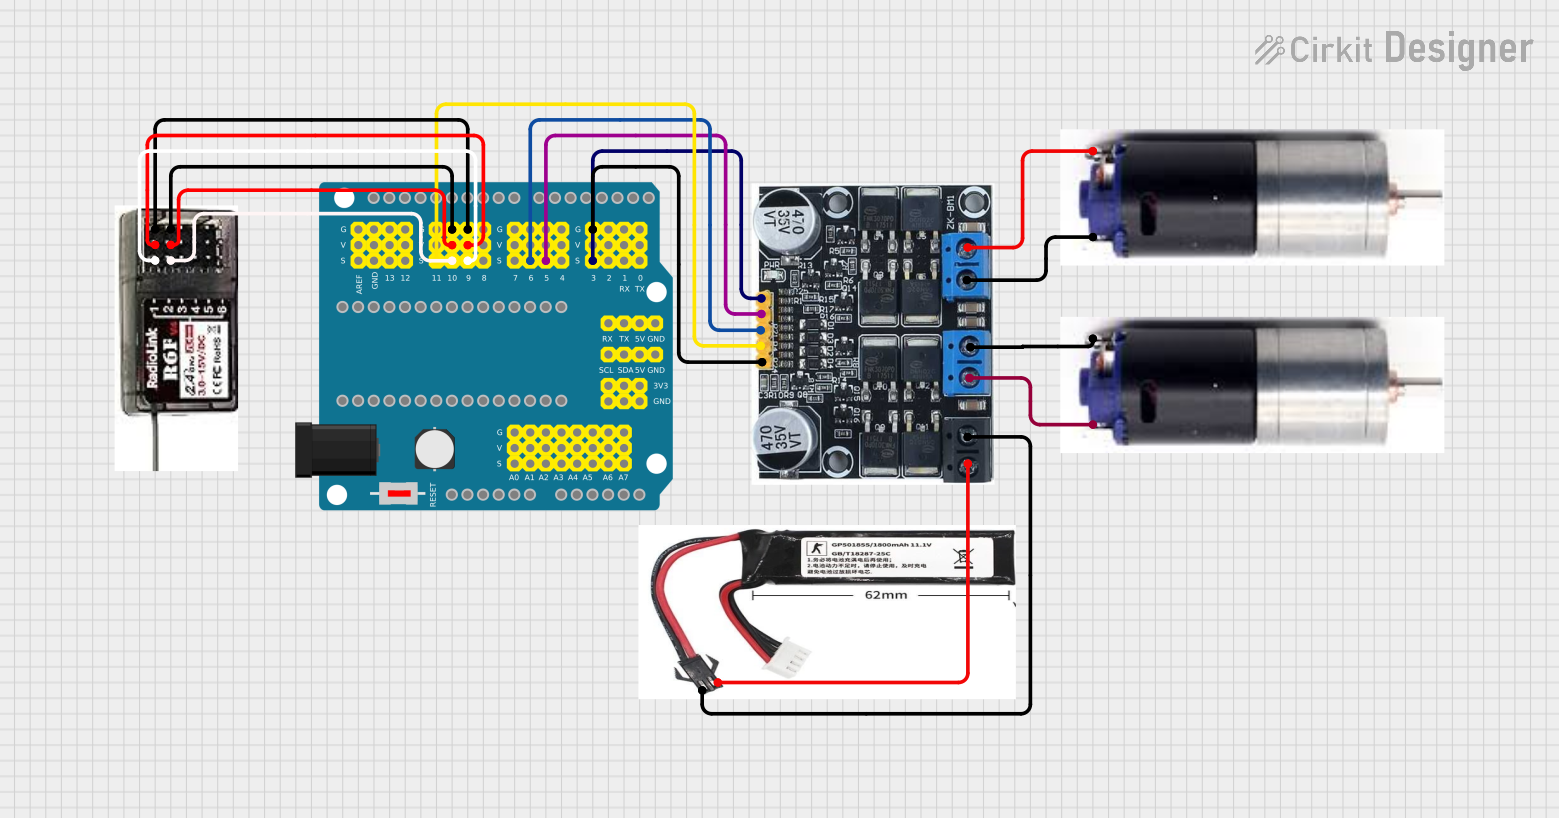

Explore Projects Built with ZK-SMC01
Technical Specifications
Key Technical Details
| Parameter | Value |
|---|---|
| Input Voltage | 4.5V - 28V |
| Output Voltage | 0.8V - 20V (adjustable) |
| Output Current | 3A (max) |
| Output Power | 15W (max) |
| Efficiency | Up to 92% |
| Switching Frequency | 150kHz |
| Operating Temperature | -40°C to +85°C |
| Dimensions | 22mm x 17mm x 4mm |
Pin Configuration and Descriptions
| Pin Number | Pin Name | Description |
|---|---|---|
| 1 | VIN | Input voltage (4.5V - 28V) |
| 2 | GND | Ground |
| 3 | VOUT | Output voltage (0.8V - 20V, adjustable via potentiometer) |
Usage Instructions
How to Use the ZK-SMC01 in a Circuit
Connect the Input Voltage:
- Connect the positive terminal of your power source to the
VINpin. - Connect the negative terminal of your power source to the
GNDpin.
- Connect the positive terminal of your power source to the
Connect the Output Voltage:
- Connect the
VOUTpin to the load that requires a stable, stepped-down voltage. - Ensure the
GNDpin is also connected to the ground of the load.
- Connect the
Adjust the Output Voltage:
- Use the onboard potentiometer to adjust the output voltage to the desired level.
- Turn the potentiometer clockwise to increase the output voltage and counterclockwise to decrease it.
Important Considerations and Best Practices
- Heat Dissipation: Ensure adequate ventilation or heat sinking if the module is operating near its maximum current or power rating.
- Input Voltage: Always ensure the input voltage is within the specified range (4.5V - 28V) to avoid damaging the module.
- Output Voltage Adjustment: Use a multimeter to precisely set the output voltage, especially when powering sensitive electronics.
- Polarity: Double-check the polarity of the connections to prevent damage to the module and connected devices.
Troubleshooting and FAQs
Common Issues and Solutions
No Output Voltage:
- Check Connections: Ensure all connections are secure and correctly oriented.
- Input Voltage: Verify that the input voltage is within the specified range.
- Potentiometer Setting: Adjust the potentiometer to ensure the output voltage is not set too low.
Overheating:
- Current Draw: Ensure the load does not exceed the maximum current rating of 3A.
- Ventilation: Improve ventilation or add a heat sink to dissipate heat more effectively.
Inconsistent Output Voltage:
- Input Stability: Ensure the input voltage is stable and not fluctuating.
- Connections: Check for loose or corroded connections that might cause intermittent contact.
FAQs
Q: Can the ZK-SMC01 be used with an Arduino UNO? A: Yes, the ZK-SMC01 can be used to provide a stable voltage to an Arduino UNO or other microcontroller projects. Below is an example code to read the output voltage using an Arduino UNO.
// Example code to read the output voltage of ZK-SMC01 using Arduino UNO

const int analogPin = A0; // Pin connected to VOUT of ZK-SMC01
float vout = 0.0;         // Variable to store the output voltage
float vin = 0.0;          // Variable to store the input voltage
float R1 = 10000.0;       // Resistor R1 value in ohms
float R2 = 10000.0;       // Resistor R2 value in ohms

void setup() {
  Serial.begin(9600);     // Initialize serial communication
}

void loop() {
  int sensorValue = analogRead(analogPin); // Read the analog input
  vout = (sensorValue * 5.0) / 1024.0;     // Convert the analog value to voltage
  vin = vout / (R2 / (R1 + R2));           // Calculate the input voltage
  Serial.print("Vout: ");
  Serial.print(vout);
  Serial.print(" V, Vin: ");
  Serial.print(vin);
  Serial.println(" V");
  delay(1000);                            // Wait for 1 second before next reading
}
Q: How do I adjust the output voltage accurately? A: Use a multimeter to measure the output voltage while adjusting the potentiometer. This ensures precise control over the output voltage.
Q: What should I do if the module gets too hot? A: Ensure the load does not exceed the maximum current rating and improve ventilation or add a heat sink to help dissipate heat.
By following this documentation, users can effectively integrate the ZK-SMC01 DC-DC buck converter module into their projects, ensuring reliable and stable power supply for various applications.