How to Use DFPlayer MINI: Examples, Pinouts, and Specs
Introduction
The DFPlayer MINI is a compact and versatile MP3 player module that is capable of decoding a variety of audio formats including MP3, WAV, and WMA. It is designed for easy integration into projects requiring audio playback functionality. With its built-in micro SD card slot, users can store audio files on a micro SD card and play them back through a connected speaker. Common applications include voice prompts, background music for interactive installations, and custom sound effects for toys and gadgets.
Explore Projects Built with DFPlayer MINI

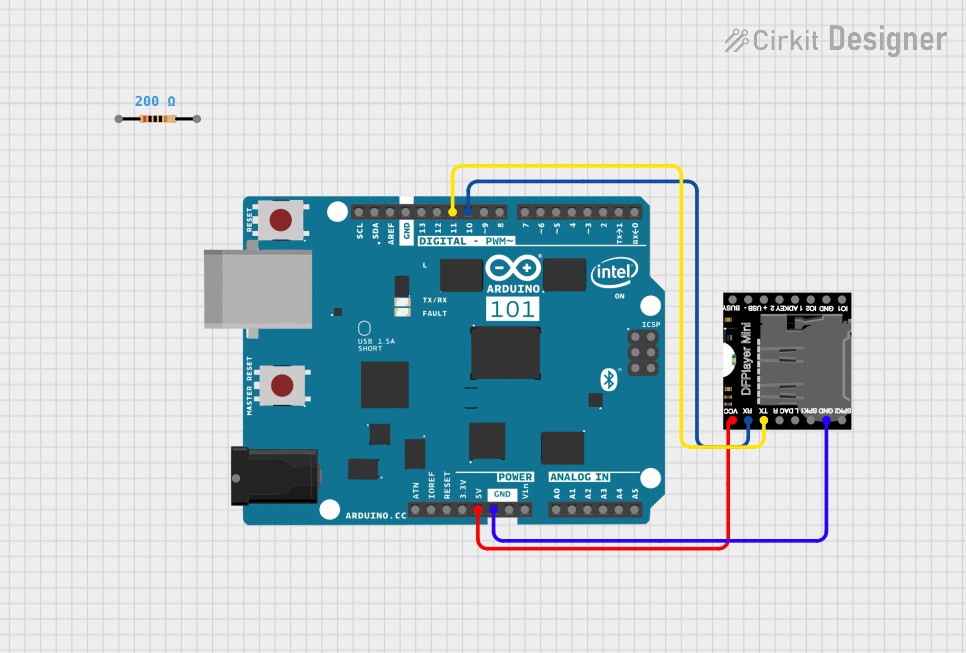
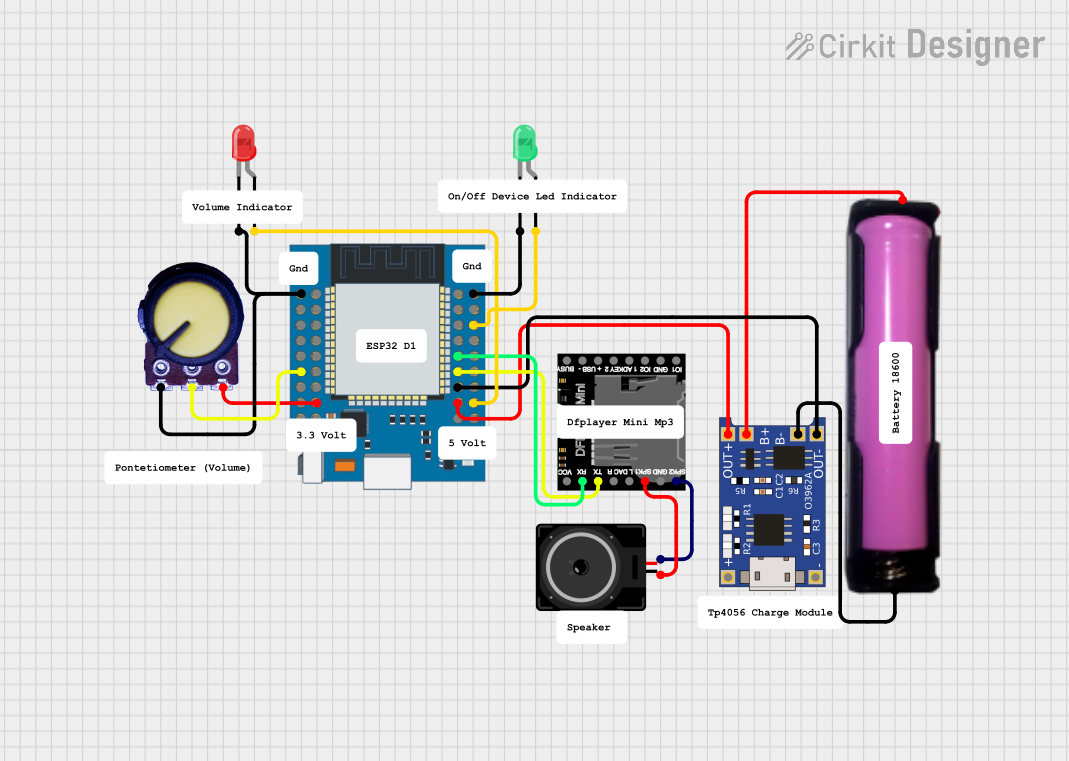
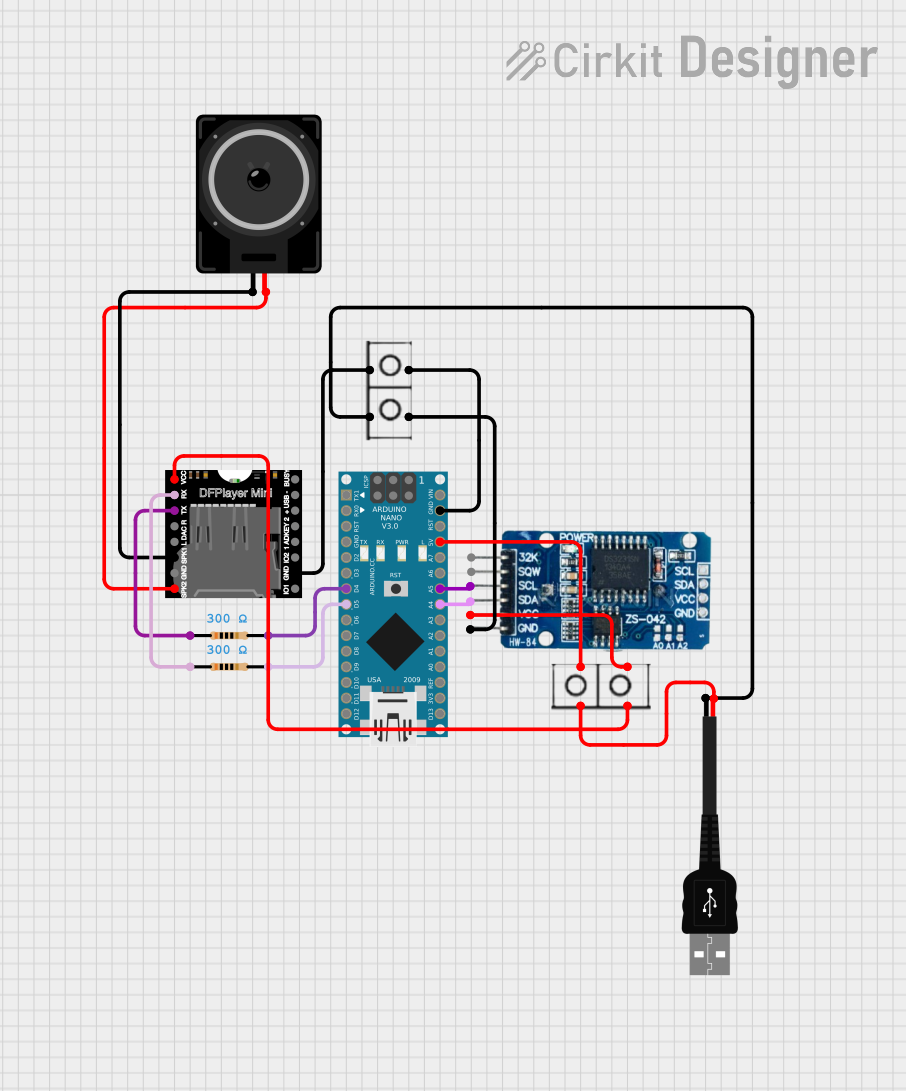
Explore Projects Built with DFPlayer MINI
Technical Specifications
Key Technical Details
- Supported Formats: MP3, WAV, WMA
- Voltage Supply: 3.3V to 5V DC
- Output Power: 3W (max) at 4Ω and 5V
- Signal-to-Noise Ratio (SNR): 85dB
- Dimensions: 20mm x 20mm
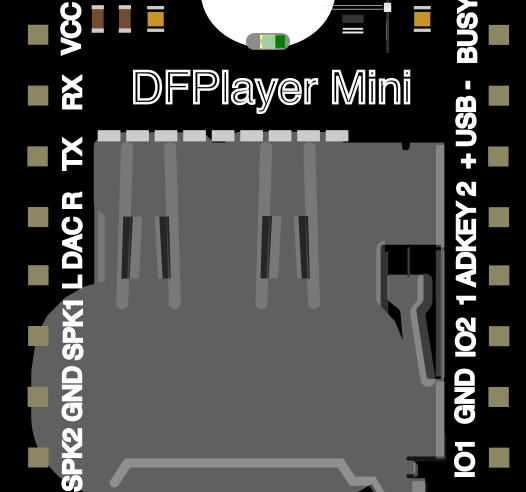
Pin Configuration and Descriptions
| Pin Number | Name | Description |
|---|---|---|
| 1 | VCC | Power supply (3.3V to 5V DC) |
| 2 | GND | Ground connection |
| 3 | SPK1 | Speaker output 1 (connect to speaker -) |
| 4 | SPK2 | Speaker output 2 (connect to speaker +) |
| 5 | RX | Serial receive pin (connect to TX of the controller) |
| 6 | TX | Serial transmit pin (connect to RX of the controller) |
| 7 | ADKEY1 | Analog button input 1 |
| 8 | ADKEY2 | Analog button input 2 |
| 9 | BUSY | Indicates the module is busy playing audio |
| 10 | RESET | Resets the module |
| 11 | DAC_R | Right channel DAC output (for external amplifier) |
| 12 | DAC_L | Left channel DAC output (for external amplifier) |
| 13 | IO1 | General-purpose I/O (configurable) |
| 14 | IO2 | General-purpose I/O (configurable) |
| 15 | SD | Micro SD card slot |
Usage Instructions
Integrating DFPlayer MINI into a Circuit
- Power Supply: Connect the VCC pin to a 3.3V to 5V power supply and the GND pin to the ground.
- Speaker Connection: Connect a speaker between the SPK1 and SPK2 pins.
- Serial Communication: Connect the RX pin to the TX pin of your controller (e.g., Arduino) and the TX pin to the RX pin of your controller.
- Micro SD Card: Insert a micro SD card with audio files into the SD card slot.
Best Practices
- Format the micro SD card to FAT16 or FAT32.
- Name audio files in a numeric sequence (e.g., 0001.mp3, 0002.mp3) for easy access.
- Keep the power supply stable and within the specified voltage range to avoid damage.
- Use a resistor or level shifter if connecting to a 5V logic level microcontroller to protect the 3.3V logic level pins.
Example Code for Arduino UNO
#include <SoftwareSerial.h>
#include <DFRobotDFPlayerMini.h>

// Create a software serial port
SoftwareSerial mySerial(10, 11); // RX, TX

// Create the DFPlayer object
DFRobotDFPlayerMini myDFPlayer;

void setup() {
  mySerial.begin(9600);
  Serial.begin(115200); // Start the hardware serial port for debugging

  if (!myDFPlayer.begin(mySerial)) { // Start the DFPlayer MINI
    Serial.println("Unable to begin:");
    Serial.println("1. Please recheck the connection!");
    Serial.println("2. Please insert the SD card!");
    while (true);
  }

  Serial.println("DFPlayer Mini online.");

  myDFPlayer.volume(10); // Set volume value (0~30).
  myDFPlayer.play(1); // Play the first MP3 file.
}

void loop() {
  // Implement any additional functionality or leave empty if not needed.
}
Troubleshooting and FAQs
Common Issues
- No Audio Output: Ensure the speaker is properly connected and the volume is set above zero.
- Unresponsive Module: Check the power supply and wiring, then try resetting the module.
- Distorted Sound: Verify that the audio files are not corrupted and the speaker specifications match the output power.
Solutions and Tips
- If the module does not start, ensure that the micro SD card is inserted correctly and contains properly formatted audio files.
- For noise issues, use a regulated power supply and keep the power lines as short as possible.
- If using with a 5V microcontroller, ensure that the RX and TX lines are stepped down to 3.3V to avoid damaging the module.
FAQs
Q: Can I control the DFPlayer MINI without a microcontroller? A: Yes, you can use the ADKEY1 and ADKEY2 pins to play/pause and change tracks with buttons.
Q: How many audio files can the DFPlayer MINI handle? A: The module can handle up to 9,999 files on the micro SD card.
Q: Does the DFPlayer MINI support shuffle or repeat modes? A: Yes, the module supports various playback modes which can be set programmatically.
For further assistance, consult the manufacturer's datasheet and the online community forums dedicated to the DFPlayer MINI.