Cirkit Designer Logo
Cirkit Designer
Your all-in-one circuit design IDE
Home / 
Component Documentation

How to Use KY-037 Microphone: Examples, Pinouts, and Specs

Image of KY-037 Microphone
Cirkit Designer LogoDesign with KY-037 Microphone in Cirkit Designer

Introduction

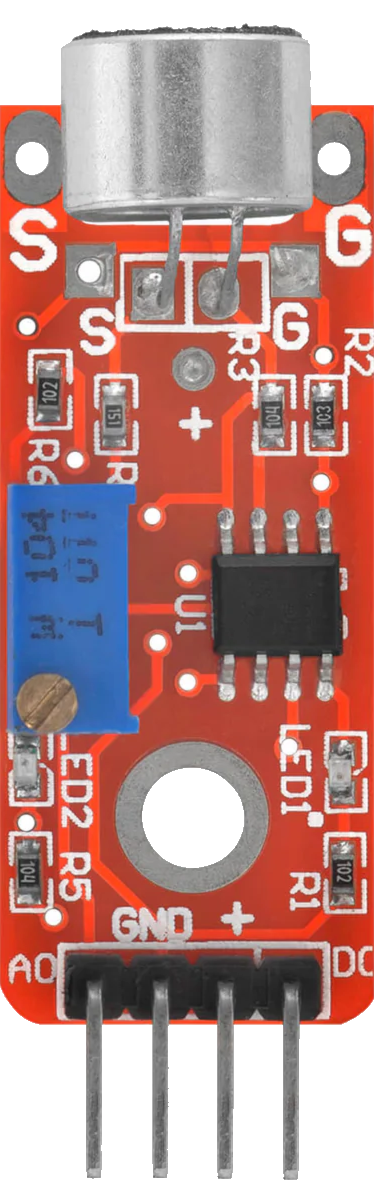
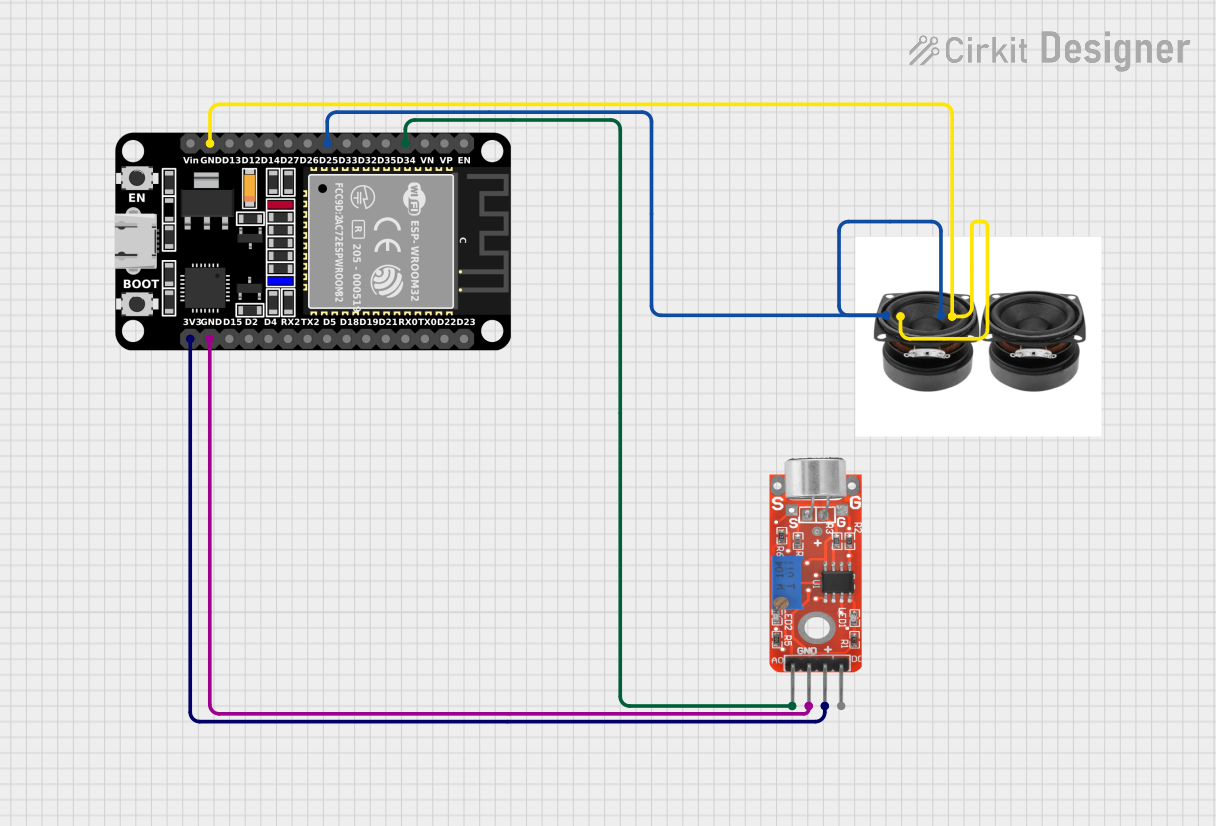
The KY-037 Microphone sensor module is a compact and easy-to-use electronic component that can detect sound levels in the environment and convert them into an analog voltage signal. This module is widely used in various applications such as sound-activated lights, noise level monitoring, and voice command systems. It is also popular in hobbyist projects, particularly those involving Arduino microcontrollers.

Explore Projects Built with KY-037 Microphone

Use Cirkit Designer to design, explore, and prototype these projects online. Some projects support real-time simulation. Click "Open Project" to start designing instantly!
Arduino Nano Sound Level Detector with KY-037 Microphone
Image of pincode detective: A project utilizing KY-037 Microphone in a practical application
This circuit consists of an Arduino Nano microcontroller connected to a KY-037 microphone module. The microphone's analog output is read by the Arduino on pin A0, allowing the Arduino to process audio signals. Power and ground connections are also established between the Arduino and the microphone module.
Cirkit Designer LogoOpen Project in Cirkit Designer
Arduino UNO Voice Assistant with KY-037 Microphone and Speaker
Image of VOICE PY 2: A project utilizing KY-037 Microphone in a practical application
This circuit is a voice assistant project that uses an Arduino UNO to interface with a KY-037 microphone and a speaker. The microphone detects voice commands, which are processed by the Arduino, and the speaker provides audio feedback based on the detected commands.
Cirkit Designer LogoOpen Project in Cirkit Designer
Arduino UNO and KY-037 Microphone Sound Detection System with Speaker Output
Image of VOICE PY: A project utilizing KY-037 Microphone in a practical application
This circuit uses an Arduino UNO to process audio signals from a KY-037 microphone module. The analog output of the microphone is connected to the Arduino's A0 pin, while the digital output is connected to the D2 pin. The Arduino then drives a speaker connected to its D3 pin, allowing for audio playback or sound-based interactions.
Cirkit Designer LogoOpen Project in Cirkit Designer
ESP32-Based Google Assistant Home Automation with Microphone and Speaker
Image of gfhhgw: A project utilizing KY-037 Microphone in a practical application
This circuit features an ESP32 microcontroller interfaced with a KY-037 microphone and a speaker, designed to enable voice-controlled home automation via Google Assistant. The ESP32 reads audio input from the microphone and outputs responses through the speaker, while also supporting Over-the-Air (OTA) updates and Wi-Fi connectivity.
Cirkit Designer LogoOpen Project in Cirkit Designer

Explore Projects Built with KY-037 Microphone

Use Cirkit Designer to design, explore, and prototype these projects online. Some projects support real-time simulation. Click "Open Project" to start designing instantly!
Image of pincode detective: A project utilizing KY-037 Microphone in a practical application
Arduino Nano Sound Level Detector with KY-037 Microphone
This circuit consists of an Arduino Nano microcontroller connected to a KY-037 microphone module. The microphone's analog output is read by the Arduino on pin A0, allowing the Arduino to process audio signals. Power and ground connections are also established between the Arduino and the microphone module.
Cirkit Designer LogoOpen Project in Cirkit Designer
Image of VOICE PY 2: A project utilizing KY-037 Microphone in a practical application
Arduino UNO Voice Assistant with KY-037 Microphone and Speaker
This circuit is a voice assistant project that uses an Arduino UNO to interface with a KY-037 microphone and a speaker. The microphone detects voice commands, which are processed by the Arduino, and the speaker provides audio feedback based on the detected commands.
Cirkit Designer LogoOpen Project in Cirkit Designer
Image of VOICE PY: A project utilizing KY-037 Microphone in a practical application
Arduino UNO and KY-037 Microphone Sound Detection System with Speaker Output
This circuit uses an Arduino UNO to process audio signals from a KY-037 microphone module. The analog output of the microphone is connected to the Arduino's A0 pin, while the digital output is connected to the D2 pin. The Arduino then drives a speaker connected to its D3 pin, allowing for audio playback or sound-based interactions.
Cirkit Designer LogoOpen Project in Cirkit Designer
Image of gfhhgw: A project utilizing KY-037 Microphone in a practical application
ESP32-Based Google Assistant Home Automation with Microphone and Speaker
This circuit features an ESP32 microcontroller interfaced with a KY-037 microphone and a speaker, designed to enable voice-controlled home automation via Google Assistant. The ESP32 reads audio input from the microphone and outputs responses through the speaker, while also supporting Over-the-Air (OTA) updates and Wi-Fi connectivity.
Cirkit Designer LogoOpen Project in Cirkit Designer

Technical Specifications

Key Technical Details

  • Operating Voltage: 3.3V to 5V DC
  • Output Type: Analog and Digital
  • Frequency Response: 50Hz - 20kHz
  • Sensitivity: Adjustable via onboard potentiometer
  • Dimensions: 36mm x 16mm x 15mm (L x W x H)

Pin Configuration and Descriptions

Pin Number Pin Name Description
1 AO Analog output signal
2 DO Digital output signal (threshold-based)
3 GND Ground
4 VCC Power supply (3.3V to 5V DC)

Usage Instructions

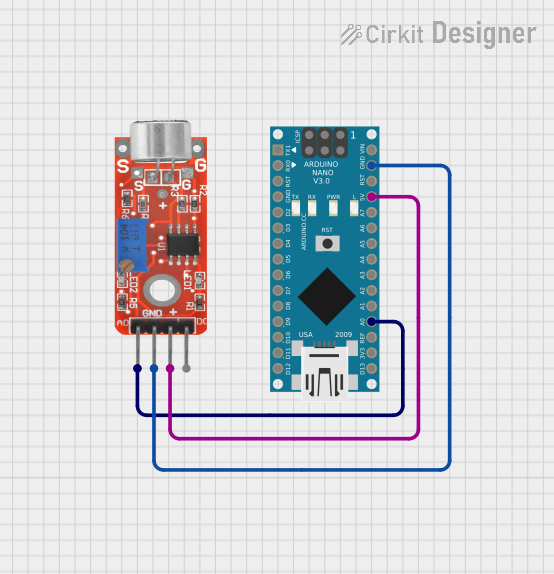
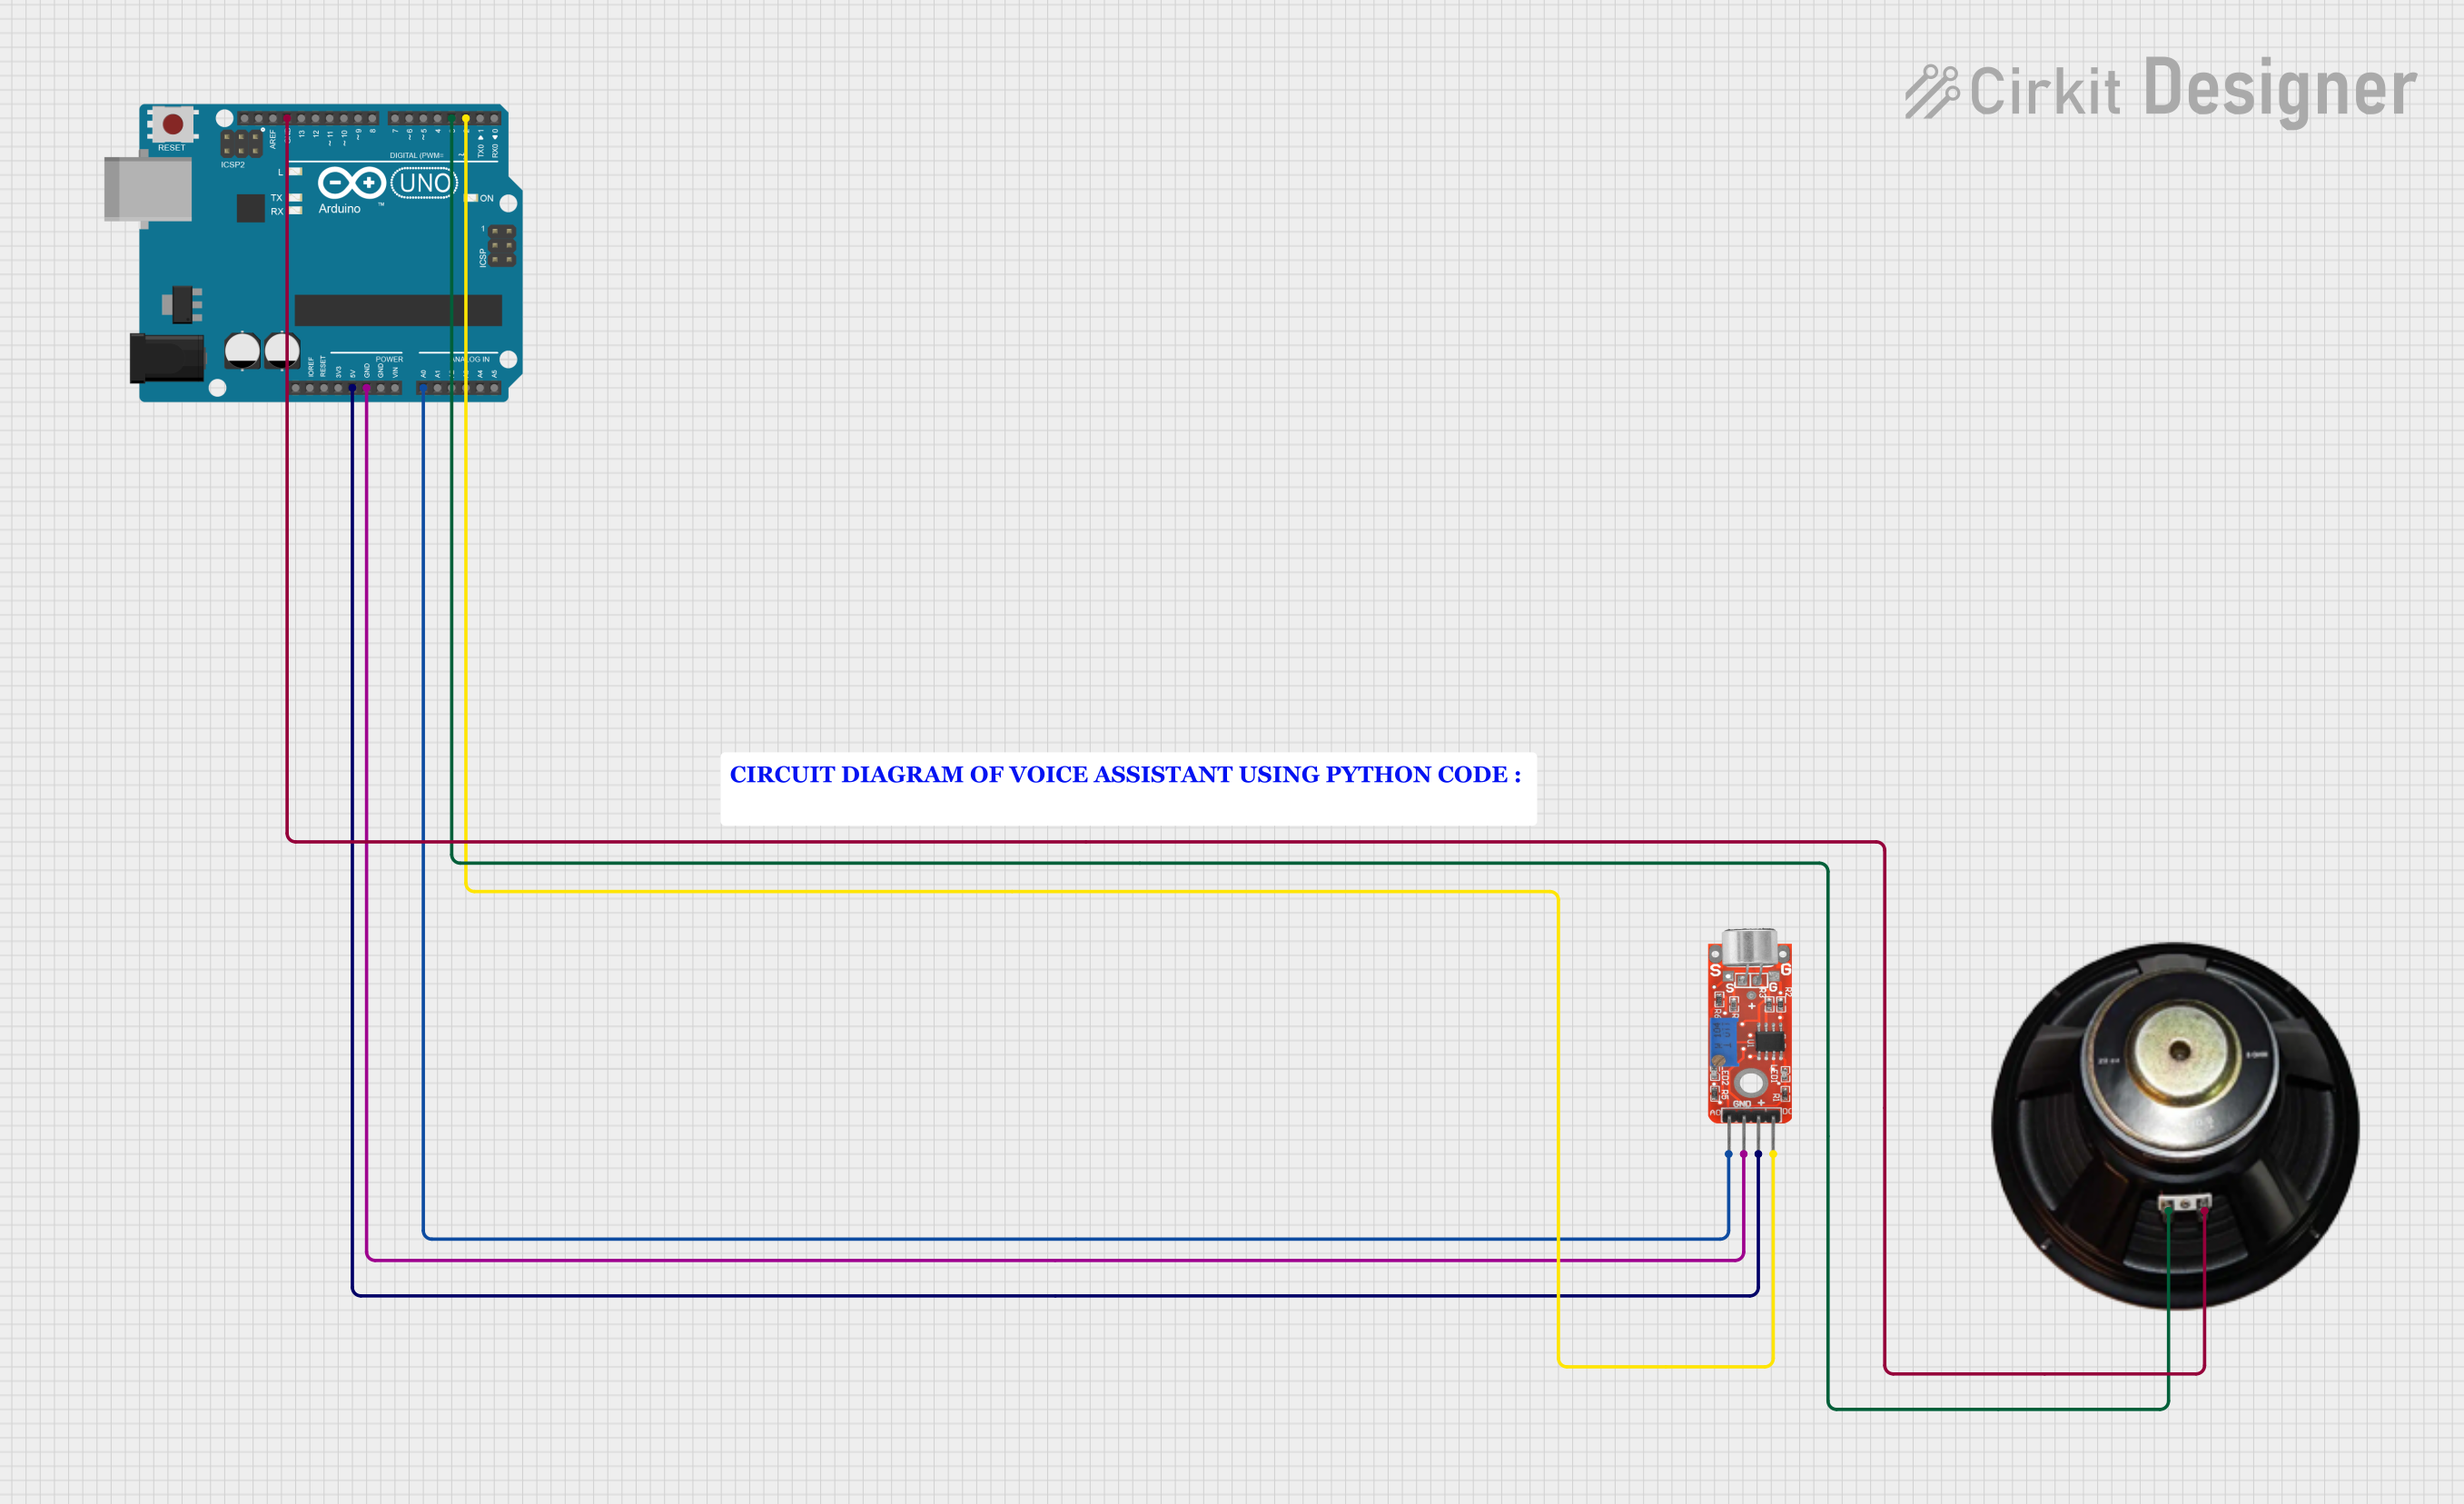
Connecting to a Circuit

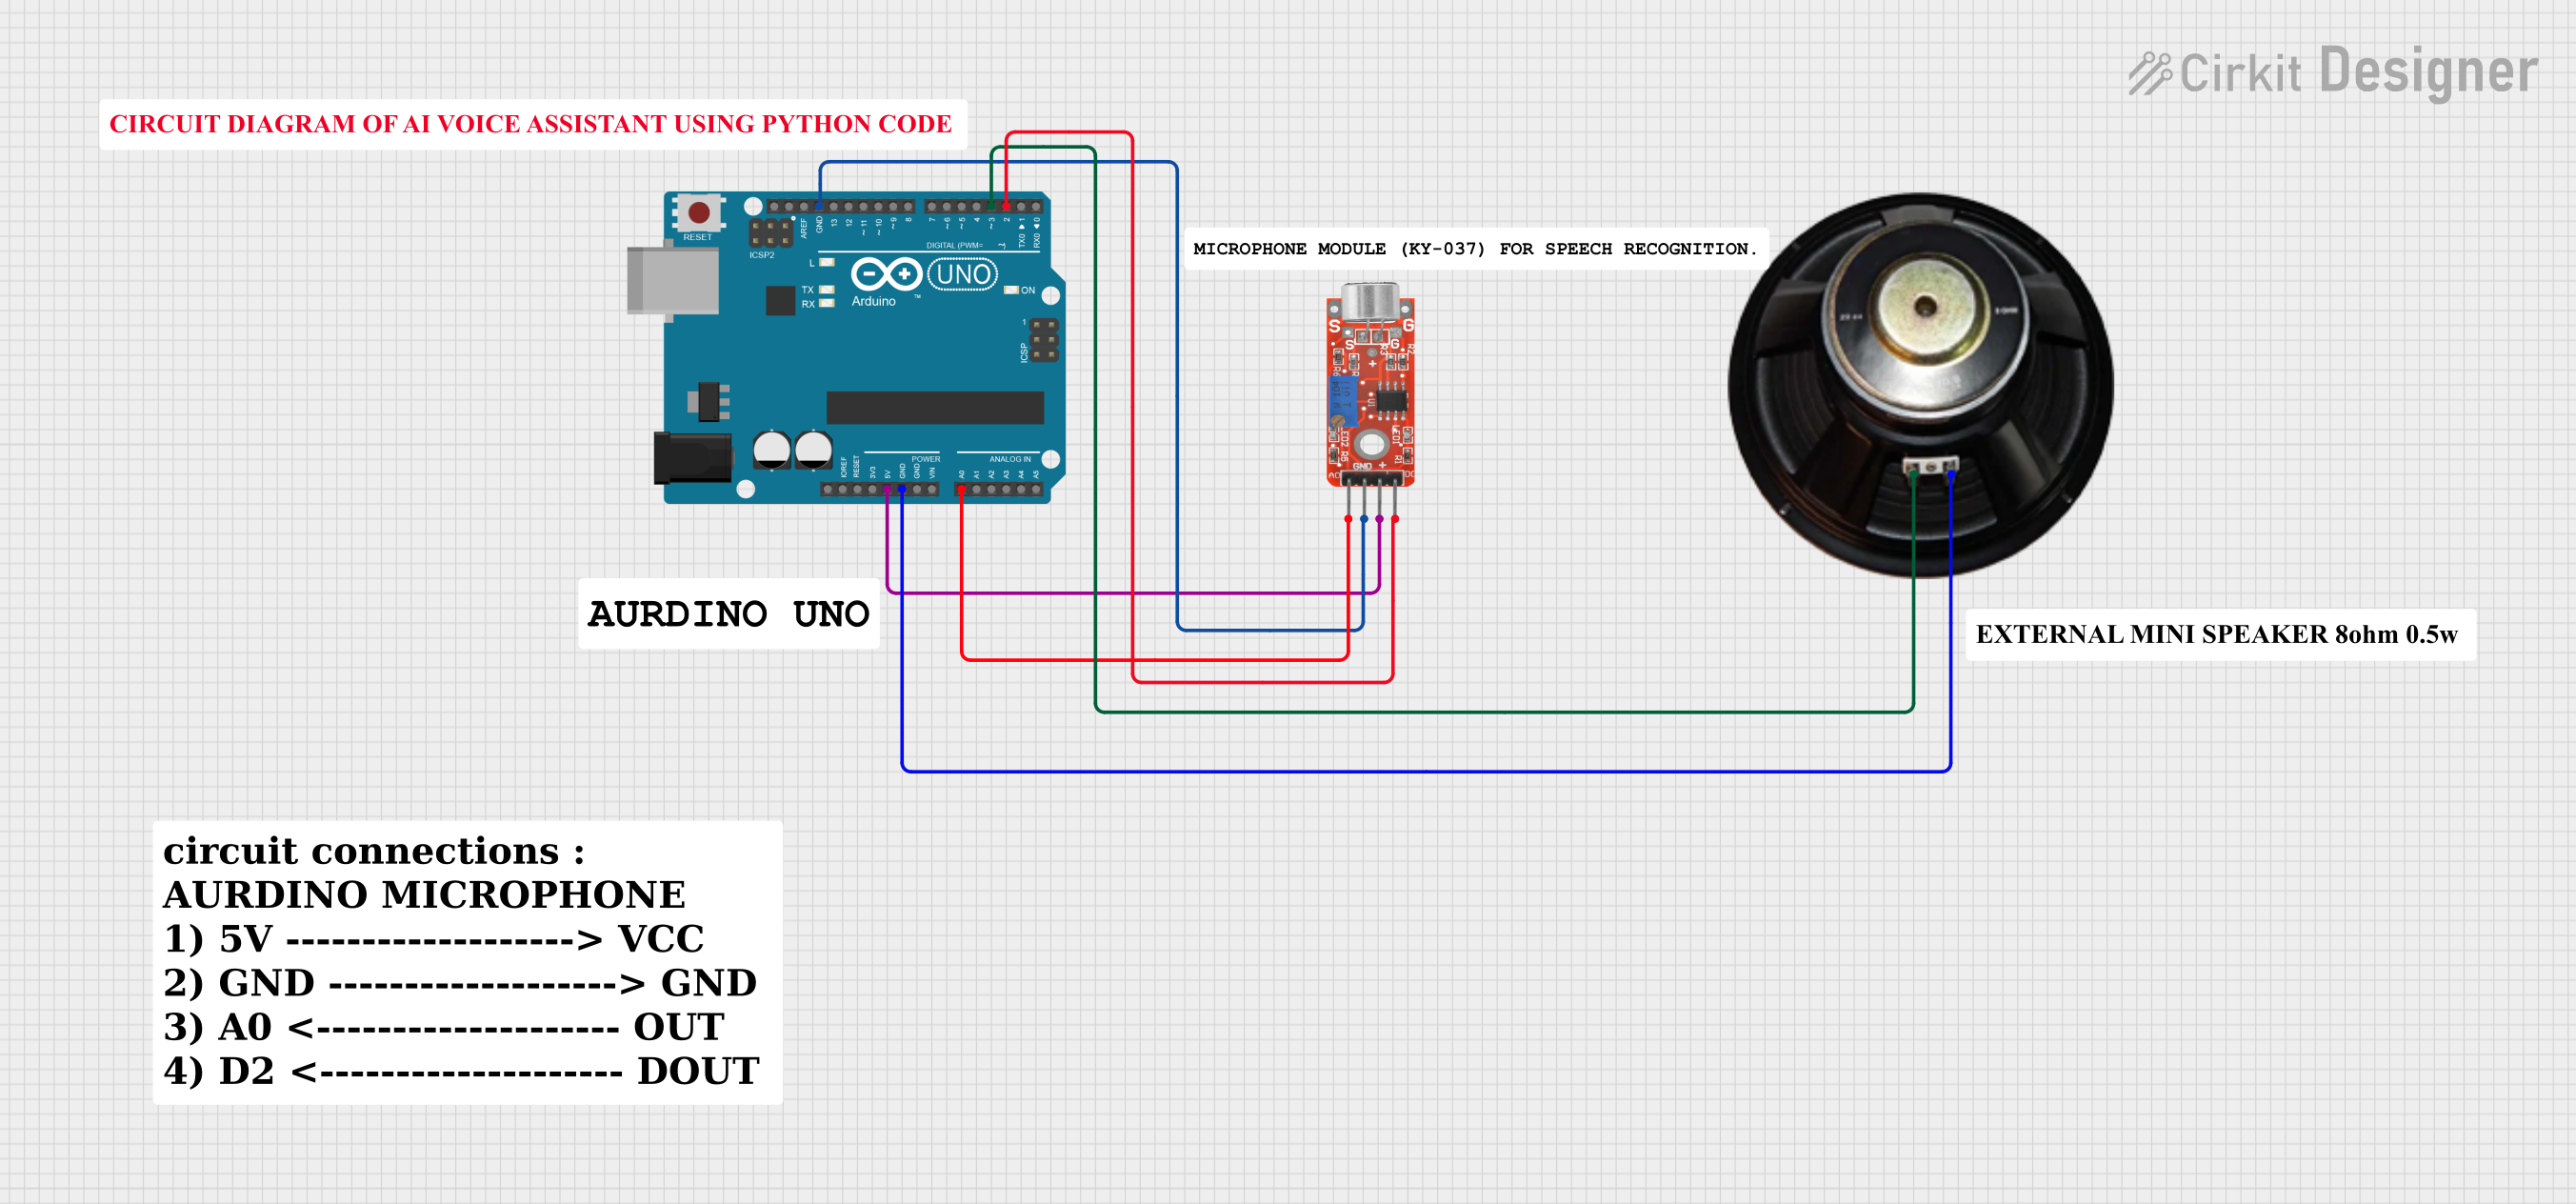
  1. Connect the VCC pin to the 5V or 3.3V output on your Arduino or power supply.
  2. Connect the GND pin to the ground on your Arduino or power supply.
  3. Connect the AO pin to an analog input on your Arduino if you wish to measure the intensity of the sound.
  4. Optionally, connect the DO pin to a digital input on your Arduino if you want to detect when the sound level exceeds a certain threshold.

Important Considerations and Best Practices

  • Use the onboard potentiometer to adjust the sensitivity of the digital output threshold.
  • Keep the module away from noise sources like motors or high-frequency signals to avoid interference.
  • When using the analog output, consider adding a low-pass filter to smooth out the signal if necessary.

Example Arduino Code

// KY-037 Microphone Sensor Example Code

const int analogPin = A0; // Analog input pin for KY-037
const int digitalPin = 2; // Digital input pin for KY-037

void setup() {
  Serial.begin(9600);       // Initialize serial communication at 9600 baud
  pinMode(digitalPin, INPUT); // Set the digital pin as input
}

void loop() {
  int analogValue = analogRead(analogPin); // Read the analog value
  int digitalValue = digitalRead(digitalPin); // Read the digital value

  // Print the results to the Serial Monitor
  Serial.print("Analog Value: ");
  Serial.print(analogValue);
  Serial.print("\tDigital Value: ");
  Serial.println(digitalValue);

  delay(100); // Wait for 100 milliseconds before the next loop
}

Troubleshooting and FAQs

Common Issues

  • No response from the sensor: Ensure that the module is correctly powered and that all connections are secure.
  • Inconsistent readings: Adjust the sensitivity using the onboard potentiometer or check for any interference from other electronic devices.
  • Digital output always high or low: Adjust the threshold potentiometer to a suitable level that corresponds to the ambient noise.

Solutions and Tips for Troubleshooting

  • If the sensor is not responding, double-check the wiring, especially the power connections.
  • For analog output, use the analogRead() function and for digital output, use the digitalRead() function in your Arduino code.
  • To calibrate the sensor, use a known sound source and adjust the potentiometer until the desired response is achieved.

FAQs

Q: Can the KY-037 be used with a 3.3V system? A: Yes, the KY-037 can operate at 3.3V, making it compatible with both 5V and 3.3V microcontrollers.

Q: How can I increase the range of sound detection? A: You can increase the sensitivity by turning the onboard potentiometer clockwise. However, this may also make the sensor more susceptible to noise.

Q: What is the purpose of the digital output? A: The digital output can be used as a simple sound threshold alarm, which triggers when the detected sound exceeds a certain level set by the potentiometer.

Q: Can I use multiple KY-037 sensors with an Arduino? A: Yes, you can connect multiple sensors to an Arduino, but ensure each analog output is connected to a separate analog input pin on the Arduino.

This documentation provides a comprehensive guide to using the KY-037 Microphone sensor module. For further assistance or advanced applications, consult the community forums or technical resources specific to your project needs.